Advertisement
Advertisement

Related Manuals for Mars RG Series


Summary of Contents for Mars RG Series
- Page 1 Owner’s Manual RG/RADS Series Window Type Room Air Conditioner RG-51Q RADS-61R RADS-51Q RADS-81R01 RADS-61Q RADS-101R01 RADS-81Q RADS-121R01 RADS-101Q RADS-151R01 RADS-121Q RADS-183S RADS-151Q RADS-253S RADS-183Q RAD-283S RADS-253Q REG-183R RAD-283Q REG-253R www.marsdelivers.com...
-
Page 2: Table Of Contents
Owner’s Manual - RG/RADS Series Table of Contents Important Safety Instructions ...........03 Installation Instructions..............1 Normal Sounds................2 Air Conditioner Features............2 Care and Cleaning............... Troubleshooting Tips.............. - Page 3 Owner’s Manual - RG/RADS Series IMPORTANT SAFETY INSTRUCTIONS READ THIS MANUAL Inside you will find many helpful hints on how to use and maintain your air conditioner properly. Just a little preventive care on your part can save you a great deal of time and money over the life of your air conditioner.
- Page 4 Owner’s Manual - RG/RADS Series IMPORTANT SAFETY INSTRUCTIONS CAUTION When the air filter is to be Do not put a pet or house plant Ventilate the room well when where it will be exposed to direct used together with a stove, etc. removed, do not touch the metal parts of the unit.
-
Page 5: Important Safety Instructions
Owner’s Manual - RG/RADS Series IMPORTANT SAFETY INSTRUCTIONS NOTE WARNING The power supply cord with this air For Your Safety conditioner contains a current detection device designed to reduce the risk of WARNING event that the power supply cord is damaged, it cannot be repaired- it must conditioner, follow basic precautions, including the following: •... - Page 6 Owner’s Manual - RG/RADS Series IMPORTANT SAFETY INSTRUCTIONS WARNING: ( for using R290/R32 refrigerant only) • Do not use means to accelerate the defrosting process or to clean, other than those reccommended -Do not use means to accelerate the defrosting process or to clean, other than those recommended by the manufacturer.
- Page 7 Owner’s Manual - RG/RADS Series IMPORTANT SAFETY INSTRUCTIONS Explanation of symbols displayed on the unit (R32/R290 Refrigerant only): This symbol shows that service personnel should handle this equipment with reference to This symbol shows that information is available such as the operating manual or WARNINGS (for using R290/R32 refrigerant only) See transport regulations 2.
- Page 8 Owner’s Manual - RG/RADS Series IMPORTANT SAFETY INSTRUCTIONS pipe work that contains or has contained flammable refrigerant shall use any sources of ignition in such a manner that it may lead to the risk of fire or explosion. All possible ignition sources, including cigarette smoking, should be kept sufficiently far away from the site of installation, repairing, removing and disposal, during which flammable refrigerant can possibly be released to the surrounding space.
- Page 9 Owner’s Manual - RG/RADS Series IMPORTANT SAFETY INSTRUCTIONS This shall include damage to cables, excessive number of connections, terminals not made to original specification, damage to seals, incorrect fitting of glands, etc. Ensure that apparatus is mounted securely. Ensure that seals or sealing materials have not degraded such that they no longer serve the purpose of preventing the ingress of flammable atmospheres.
- Page 10 Owner’s Manual - RG/RADS Series IMPORTANT SAFETY INSTRUCTIONS Ensure that the outlet for the vacuum pump is not close to any ignition sources and there is 13. Charging procedures 14. Decomissioning Before carrying out this procedure, it is essential that the technician is completely familiar Mechanical handling equipment is available, if required, for handling refrigerant cylinders;...
- Page 11 Owner’s Manual - RG/RADS Series IMPORTANT SAFETY INSTRUCTIONS the equipment are removed from site promptly and all isolation valves on the equipment are closed off. k) Recovered refrigerant shall not be charged into another refrigeration system unless it has been cleaned and checked. 15.Labelling Equipment shall be labelled stating that it has been de-commissioned and emptied of refrigerant.
-
Page 12: Installation Instructions
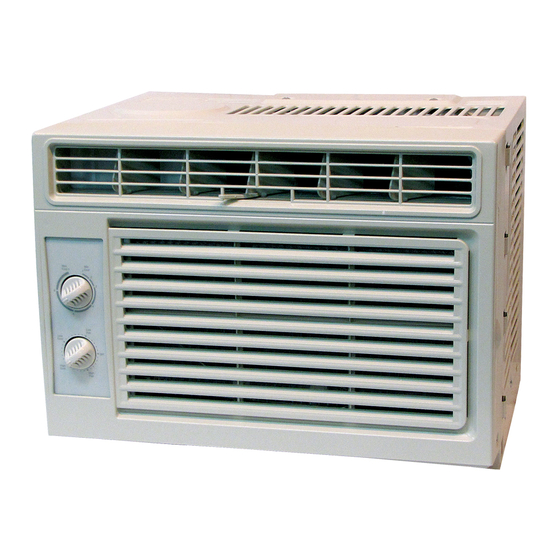
Owner’s Manual - RG/RADS Series Installation Instructions NOTE: The unit you purchased may be look like one of the followings: NOTE: All the illustrations in this manual are for explanation purpose only. The air conditioner... - Page 14 Owner’s Manual - RG/RADS Series C: Align the hole in the top rail with those in the PREPARE THE WINDOW top of the unit as shown in Fig.B Fig.B vertical opening of 13 inches (330mm). Side louvers and the rear of the AC must have clear air condenser, for heat removal.
- Page 15 Owner’s Manual - RG/RADS Series B. Slide the free end " I" section of the panel SECURE THE ACCORDION PANELS directly into the cabinet as shown in Fig. 2. Slide the panel down. Be sure to leave enough space to slip the top and bottom of the frame carefully place the unit into the window into the rails on the cabinet.
- Page 16 Owner’s Manual - RG/RADS Series INSTALL R1 HARDWARE (only INSTALL R1 HARDWARE (only applicable to ≥15000Btu/h Energy applicable to ≥15000Btu/h Energy star models ) star models ) In order to minimize air leaks and ensure optimal In order to minimize air leaks and ensure optimal insulation, it is necessary to install the included insulation, it is necessary to install the included Fig.7A...
- Page 17 Owner’s Manual - RG/RADS Series Step 3. Slide the R1 insulation panel into the side If AC is Blocked by Storm Window curtain, the side with pattern should facing the indoor side.(Fig.13) Add wood as shown in Fig.15, or remove storm window before air conditioner is installed.
- Page 18 Owner’s Manual - RG/RADS Series Preliminary Instructions Installation Instructions (for 15000 to 28500Btu/h) Window Sash Seal Safety Lock and 3 /4 (or1/2 ) Long Hex Head Screw BEFORE YOU BEGIN Top Angle Foam Gasket Read these instructions completely and Washer Head Locking screw carefully.
- Page 20 Owner’s Manual - RG/RADS Series 10. Your unit may come with internal packaging. 10. Your unit may come with internal packaging. Air Conditioner Air Conditioner Plastic Plastic Cabinet Cabinet Frame Frame This packaging must be removed prior to installing This packaging must be removed prior to installing View View the air conditioner back into the cabinet.(see Fig .7).
- Page 21 Owner’s Manual - RG/RADS Series 1 2 Long Screws Left And Locknuts 3 4 (or1 )Long Hex-head Screw Locknut Sill Angle Right Bracket Flat Head Bolt Fig.13 Fig.13B 2 Each Required For Each Support Bracket Install Support Bracket Fig.15B 3. Install support brackets(with sill angle brackets of sill, and tight to bottom of cabinet as shown in attached) to correct hole in bottom of cabinet as Fig.15A.
- Page 22 Owner’s Manual - RG/RADS Series 4. Attach the top angle to window frame: Use a 3. Attach the Lock Frames to the winow sill 3/32" drill bit to drill one hole through the hole using two 3/ 4 " (19mm) screws(Fig.18C) in the middle of top angle into the window frame, (on some models) and drive one 3/ 4 "...
- Page 23 Owner’s Manual - RG/RADS Series Install Chassis into Cabinet and Install Front to Unit 1. Lift air conditioner and carefully slide into cabinet leaving 6 inches protruding. cabinet. 4. Installation of front is the reverse of removal Fig.21 outlined in Section 1. Step 3.
- Page 24 Owner’s Manual - RG/RADS Series WIDTH " X"= inside model width plus twice the WIDTH " X"= inside model width plus twice the B. Thru-The-Wall Installation B. Thru-The-Wall Installation thickness of framing material used. thickness of framing material used. HEIGHT '' Y " = inside model height plus twice the HEIGHT '' Y "...
- Page 25 Owner’s Manual - RG/RADS Series 5. Screw or nail cabinet wooden frame using shims Prepare and Install Cabinet if frame is oversized to eliminate distortion. See 1. Slide chass is from cabinet. Refer back to Fig.8.Remember to maintain proper slope as Step one of Window Mounting.
-
Page 26: Normal Sounds
Owner’s Manual - RG/RADS Series Normal Sounds Normal Sounds Pinging or Switching Pinging or Switching Vibration Vibration Droplets of water hitting condenser during Droplets of water hitting condenser during High Pitched Chatter High Pitched Chatter normal operation may cause “pinging or normal operation may cause “pinging or Unit may vibrate and make noise Unit may vibrate and make noise... -
Page 27: Air Conditioner Features
Owner’s Manual - RG/RADS Series Air Conditioner Features To begin operating the air conditioner, WARNING follow these steps: 1. Set the thermostat to the highest number (coldest or cooler setting). injury to persons, read the IMPORTANT 2. Set the selector control to the highest COOL SAFETY INSTRUCTIONS before operating setting. - Page 28 Owner’s Manual - RG/RADS Series Fresh Air Vent Control (on 15~28.5K models): Fresh Air Vent Control (on 15~28.5K models): Fig. A Fig. A (VENT CLOSED) (VENT CLOSED) Fig. B Fig. B Fig. C Fig. C (VENT OPEN) (VENT OPEN) (VENT & EXHAUST OPEN) (VENT &...
- Page 29 Owner’s Manual - RG/RADS Series ELECTRONIC CONTROL OPERATING INSTRUCTIONS NOTE: and indicator lights describing below are available for the unit you purchased. Please check the control panel of the unit you purchased. The unit can be controlled by the unit control alone or with the remote. TEMP/TIMER Auto Auto...
- Page 30 Owner’s Manual - RG/RADS Series FOLLOW ME FEATURE: SLEEP FEATURE: (on some models) Press Sleep button to initiate the sleep mode. Light flashes or illuminates In this mode the selected temperature will Follow ° increase (cooling) or decrease (heating) by 2 °...
- Page 31 Owner’s Manual - RG/RADS Series • Turning the unit ON or OFF at any time or a To operate on Auto feature: • When you set the air conditioner in AUTO mode, djusting the timer setting to 0.0 will cancel the Auto Start/Stop timed program.
-
Page 32: Care And Cleaning
Owner’s Manual - RG/RADS Series Care and Cleaning CAUTION month to see if cleaning is necessary. Trapped Clean your air conditioner occasionally to accumulation of frost on the cooling coils. keep it looking new. Be sure to unplug • Push the vent handle to the Vent Closed position the unit before cleaning to prevent (where applicable). -
Page 33: Troubleshooting Tips
Owner’s Manual - RG/RADS Series TROUBLESHOOTING TIPS Before calling for service, review this list. It may save your time and expense. This list includes common occurrences that are not the result of defective workman-ship or materials in this appliance. Problem Solution Air conditioner does not start... - Page 34 Owner’s Manual - RG/RADS Series Problem Solution Water dripping Improper installation. Tilt air conditioner slightly to the outside to allow water drainage. INSIDE when unit Refer to installation instructions - check with installer. is cooling. Water dripping Unit removing large quantity of moisture from humid room. This is normal during OUTSIDE when excessively humid days.
- Page 35 Owner’s Manual - RG/RADS Series LIMITED EXPRESS WARRANTY Congratulations on purchasing your new HVAC equipment. It’s REMEDY PROVIDED BY THE LIMITED EXPRESS WARRANTY been designed for long life and reliable service, and is backed The sole remedy under the Limited Warranty is replacement of the by one of the strongest warranties in the industry.
- Page 36 9/2021...
Need help?
Do you have a question about the RG Series and is the answer not in the manual?
Questions and answers