Advertisement
Quick Links
Owner's Manual - REG81-R01, REG123-R01
WINDOW TYPE ROOM AIR CONDITIONER
Owner's Manual
Conditioner with Electric Heat
IMPORTANT NOTE:
Before using your air conditioner, please read
this manual carefully and keep it for future reference.
OWNER'S MANUAL
Window Type Room Air
REG-81R01 REG-123R01
517.787.2100 • www.marsdelivers.com
Model
1
OPP/MSII/COMPII Series
EN
Advertisement

Subscribe to Our Youtube Channel
Related Manuals for Mars Comfort-Aire Century REG-81R01


Summary of Contents for Mars Comfort-Aire Century REG-81R01
- Page 1 Owner’s Manual - REG81-R01, REG123-R01 WINDOW TYPE ROOM AIR CONDITIONER Owner’s Manual OWNER’S MANUAL Window Type Room Air Conditioner with Electric Heat Model REG-81R01 REG-123R01 IMPORTANT NOTE: OPP/MSII/COMPII Series Before using your air conditioner, please read this manual carefully and keep it for future reference. 517.787.2100 •...
-
Page 2: Table Of Contents
Owner’s Manual - REG81-R01, REG123-R01 CONTENTS Safety precautions Installation instructions What is in the box Before you get started Install your product. Operation instructions Get to know your AC. Get to know the features. Cleaning & Maintenance Troubleshooting... -
Page 3: Safety Precautions
Owner’s Manual - REG81-R01, REG123-R01 Safety Precautions Inside you will find many helpful hints on how to use and maintain To prevent injury to the user or other people and property your air conditioner properly. Just a little preventive care on your damage, the following instructions must be followed. - Page 4 Owner’s Manual - REG81-R01, REG123-R01 WARNING Plug in power plug properly. Otherwise, it may cause electric shock Unplug the unit if strange sounds, smell, or smoke or fire due to excess heat generation. Do not operate or stop the unit comes from it.
- Page 5 Owner’s Manual - REG81-R01, REG123-R01 CAUTION unless they have been given super vision or instruction Hold the plug by the head of the power plug when taking concerning use of the appliance by a person responsible for it out. It may cause electric shock and damage. Turn o the their safety.
- Page 6 Owner’s Manual - REG81-R01, REG123-R01 Operation of Current Device The power supply cord contains a current device that senses damage to the power cord. To test your power supply cord do the following: Plug in the Air Conditioner. The power supply cord will have TWO buttons on the plug head. Press the TEST button, you will notice a click as the RESET button pops out.
- Page 7 Owner’s Manual - REG81-R01, REG123-R01 WARNING Electrical Information For Your Safety The complete electical rating of your new room air conditioner Do not store or use gasoline or other flammable vapors and is stated on the serial plate. Refer to the rating when checking liquids in the vicinity of this or any other appliance.
-
Page 8: What Is In The Box
Owner’s Manual - REG81-R01, REG123-R01 What is in the Box. Package content 5/8in Screws and Top Rail 3/8in Screws Safety Lock(3 Types) LE F T R I G H T Foam insert(E-Star model only) Frame Assembly(Left) Window Type Room Window Sash Seal Window Sash Seal Frame Assembly(Right) Air Conditioner unit... -
Page 9: Before You Get Started
Owner’s Manual - REG81-R01, REG123-R01 Before you get started. Preparations before installation NOTE The installation must be carried out n u a Installing your AC should take about in strict accordance with the instructions 60 minutes. Save Carton and these Installation in this manual. -
Page 10: Install Your Product
Owner’s Manual - REG81-R01, REG123-R01 Installation overview. Installation Completion Display Safety Lock and 5/8in Screws Top Rail and 3/8in Screws Frame Assembly(Left) Safety Lock and 5/8in Screw Frame Assembly(Right) Air Conditioner unit Window Sash Seal Foam Remote controller LE F T R... - Page 11 Owner’s Manual - REG81-R01, REG123-R01 Step Install your AC unit. LE F T R I G H T What you need.
- Page 12 Owner’s Manual - REG81-R01, REG123-R01 Install you AC. R I G H T R I G H T Install the top rail Pull the panels Install the NOTE: Top rail and Sliding Panels at each side are on the AC. out around.
- Page 13 Owner’s Manual - REG81-R01, REG123-R01 Install you AC. LE F T LE F T R I G H T R I G H T Fasten the panels to the AC. The AC unit is done. Stretch the wind screen outward and insert the upper Before you rush to the A.
- Page 14 Owner’s Manual - REG81-R01, REG123-R01 Step Insulate your window. What you need.
- Page 15 Owner’s Manual - REG81-R01, REG123-R01 Insulate your window. Cut the seal foam to the Insert the foam to the gaps. width of your window, and stick it of the underside. You should cut the foam to be the width of your window In order to improve the operation of the equipment and from the left to the right side.
- Page 16 Owner’s Manual - REG81-R01, REG123-R01 Step Lift the AC into the window. LE F T R I G H T What you need.
- Page 17 Owner’s Manual - REG81-R01, REG123-R01 Lift the AC into the window. Wooden Windows Vinyl-Clad Windows Angle:3-4° LE F T R I G H T Inside Outside Inside Outside Together with your helper, Properly position the bottom bar lift the assembled AC into BEHIND the inside window sill.
- Page 18 Owner’s Manual - REG81-R01, REG123-R01 Lift the AC into the window. SASH Board Storm window thickness 1-1/2"min frame or other as required, (38 mm) obstruction. for proper pitch to rear, along entire LE F T R I G H T sill.
- Page 19 Owner’s Manual - REG81-R01, REG123-R01 Step Secure the AC. LE F T R I G H T What you need.
- Page 20 Owner’s Manual - REG81-R01, REG123-R01 Secure the AC. 1/8 " (3mm) pilot holes before Drive 1/ 2" (12.7 mm) locking driving screws. Drive 1/ 2" (12.7mm) screws through the frame lock locking screws through frame holes LE F T R I G H T and into the sill(Only wooden into window sash(Only wooden windows).
- Page 21 Owner’s Manual - REG81-R01, REG123-R01 The final details LE F T R I G H T Cut the non-adhesive Use the nonadhesive foam insulation foam to fit the to fill the gaps in your window. width of your window. Make sure you are cutting the foam with the Stu it between the gap of the upper and lower sashes of non-adhesive sides.
- Page 22 Owner’s Manual - REG81-R01, REG123-R01 One more thing Additional Notes If AC is Blocked by Storm Window. Normal Sounds High Pitched Chatter Add wood as shown in Caution illustration on page 16, or remove storm window before air conditioner is installed. If Storm Window High e ciency compressors may have a high pitched chatter during the Frame must remain, be sure the drain holes or slots are not caulked cooling cycle.
-
Page 23: Get To Know Your Ac
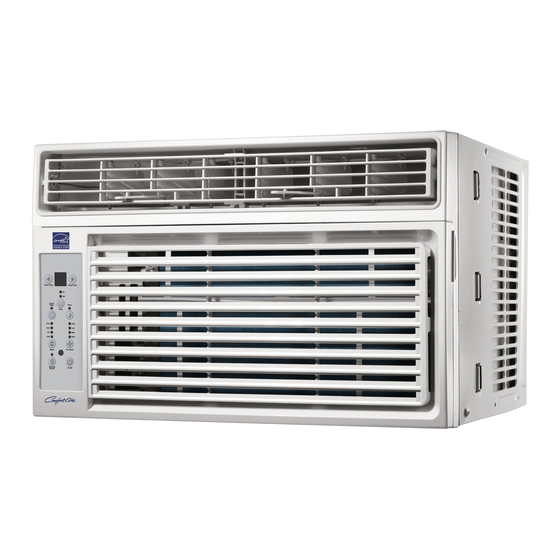
Owner’s Manual - REG81-R01, REG123-R01 Get to know your AC. AC unit overview NOTE The following two types of product appearance for reference only, The machine you purchase may be a little di erent. Levers Levers Air Direction Air Direction Display Status display (Electronic... - Page 24 Owner’s Manual - REG81-R01, REG123-R01 Adjust your air conditioning direction. Air conditioning louvers CAUTION Do not stick your fingers in the air outlet, it may cause an injury. Bidirectional adjustment (left or right) - For 05K/06K The louver will allow you to direct the air flow Left or Right throughout the room as needed.
-
Page 25: Get To Know The Features
Owner’s Manual - REG81-R01, REG123-R01 Get to know the features. Air conditioner features WARNING To reduce the risk of fire, electric shock, or injury to persons, read the IMPORTANT SAFETY INSTRUCTIONS before operating this appliance. Please always wait 3 minutes when turning unit o then on again, and when changing from cool to fan and back to cool. This prevents compressor from overheating &... - Page 26 Owner’s Manual - REG81-R01, REG123-R01 Electronic control operating instructions To activate the Follow Me feature, point the NOTE: For some models, the fan speed can 5. TO ADJUST FAN SPEEDS: remote control towards the unit and press the not be adjusted under HEAT mode. Press Fan button to select the Fan Speed in four To operate on Auto feature: Follow Me button.
- Page 27 Owner’s Manual - REG81-R01, REG123-R01 Electronic control operating instructions Error codes: 10. TIMER: AUTO START/STOP FEATURE: AS - Room temperature sensor error • Press Timer button, the TIMER ON or TIMER OFF indicator light ES -Evaporator temperature sensor error illuminates. It indicates the Auto Start or Auto Stop program is HS -Electric heating sensor error;...
-
Page 28: Cleaning & Maintenance
Owner’s Manual - REG81-R01, REG123-R01 Cleaning & maintenance How to clean & change your filter. Check the air filter once a month Cabinet Cleaning to see if cleaning is necessary. The air filter should be checked at least once a •... -
Page 29: Troubleshooting
Owner’s Manual - REG81-R01, REG123-R01 TROUBLESHOOTING Problem Solving Before calling for service, review this list. It may save your time and expense. This list includes common occurrences that are not the result of defective workman-ship or materials in this appliance. Problem Solution Wall plug disconnected. - Page 30 Owner’s Manual - REG81-R01, REG123-R01 Problem Solving Problem Solution Dirty air filter- air restricted. Clean air filter. Refer to Care and Cleaning section. Temperature is set too High, set temperature to a Lower setting. Air conditioner cooling, but room Air directional louvers positioned improperly. Position louvers for better air distribution. is too warm- NO ice forming on Front of units is blocked by drapes, blinds, furniture, etc.
- Page 31 Page Intentionally Left Blank...
- Page 32 Owner’s Manual - REG81-R01, REG123-R01 4/2023...
Need help?
Do you have a question about the Comfort-Aire Century REG-81R01 and is the answer not in the manual?
Questions and answers