Table of Contents
Advertisement
Quick Links
User Manual / Installation Guide
Model No. P150VG / P150VR / P150VP
Warning!
It will cause malfunction if the monitor is operating with unspecified power supply adaptor
or incorrect power voltage. Do not expose this unit in the rain or moisture environment to reduce the
risk of fire or electric shock.
PRECAUTIONS
Do not use the monitor near water.
Do not place the monitor on an unstable cart, stand, or table. If the monitor falls, it can injure a
person and cause serious damage to the appliance. Use only a cart or stand recommended by the
manufacturer or sold with the monitor. If you mount the monitor on a wall or shelf, use a mounting
kit approved by the manufacturer and follows the kit instructions.
The monitor should be operated with type of power adaptor indicated on the label.
Normally it is packed with monitor, or using an adaptor approved by the manufacturer.
Unplug the unit during a lightning storm or when it will not be used for long periods of time. This will
protect the monitor from being damaged due to power surges.
Never spill liquids on the monitor.
Do not attempt to service the monitor yourself; opening or removing covers can damage to the
monitor or panel. Please refer all servicing to qualified service personnel.
For Wall mount adaptor, wall socket shall be installed near the equipment and shall be easily
accessible.
1
Advertisement
Table of Contents

Related Manuals for Phistek P150VG


Summary of Contents for Phistek P150VG
- Page 1 User Manual / Installation Guide Model No. P150VG / P150VR / P150VP Warning! It will cause malfunction if the monitor is operating with unspecified power supply adaptor or incorrect power voltage. Do not expose this unit in the rain or moisture environment to reduce the risk of fire or electric shock.
-
Page 2: Table Of Contents
Index: Introduction --------------------------------------------------------------------------------------------------- 3 Features--------------------------------------------------------------------------------------------------------- 3 Unpack the monitor------------------------------------------------------------------------------------------ 3 Check Accessories-------------------------------------------------------------------------------------------- 3 Installation----------------------------------------------------------------------------------------------------- 4 Power Supply & Signal connection ---------------------------------------------------------------------- 4 Function Touch Key Control ------------------------------------------------------------------------------ 4 OSD Lock/ Unlock -------------------------------------------------------------------------------------------- 5 Structure of OSD settings----------------------------------------------------------------------------------- 5 III. For your safety------------------------------------------------------------------------------------------------ 6 Support timing chart ---------------------------------------------------------------------------------------- 6 5 Wires Resistive Touch Panel ---------------------------------------------------------------------------- 7 Projected Capacitive Touch Panel ----------------------------------------------------------------------- 14... -
Page 3: Introduction
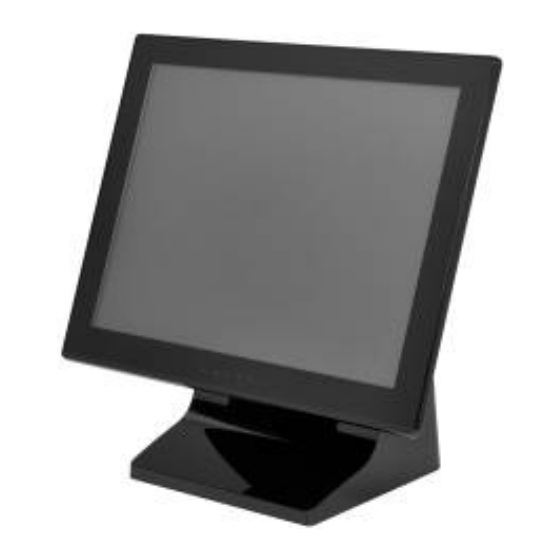
- Rimless front bezel design, spill & dust proof. - Cable management down routing through the mounting stand. - Light weight. - Mitsubishi PMMA cover lens for P150VG. - 5 Wires Resistive Touch Panel Control Function for P150VR. - Projected Capacitive Touch panel for P150VP. -
Page 4: Installation
Installation: Power Supply & Signal connection: Power supply: Use attached Wall-mount Power adaptor to get 12Vdc power. VGA signal: Use attached 1.8meter 15pin D-sub VGA cable to connect System PC. Touch Control: Use attached USB cable to connect system PC. Touch Control VGA input DC12V input... -
Page 5: Osd Lock/ Unlock
a. Press Menu key to activate OSD Menu. b. This key also means “OK”. Menu - Press “Up” or “Down” key to move the indicator to the desired item, then (MENU) press Menu key to select and read to adjust. - After adjustment, press this key to return to previous Menu. -
Page 6: For Your Safety
Adjust OSD Menu horizontal position, press “UP” key to shift H. Position − Menu right, “DOWN” key to shift Menu left. Adjust OSD Menu vertical position, press “UP” key to shift V. Position − Menu upward, “DOWN” key to shift Menu downward. Sets the time duration in seconds that the OSD is visible after OSD Time −... -
Page 7: Wires Resistive Touch Panel
5 Wires Resistive Touch Panel (For Resistive Touch Model only): Resistive Touch panel: Type : 5 Wires Resistive Touch Touch Control Type : USB Transmission : 80% Touch Driver installation: Please go to the EETI website to get Touch Driver https://www.eeti.com/drivers.html 1.0 Download driver and run the installation. - Page 8 2.0 Select the setup type, don’t tick the box if PS2 interface is not required, Click “Next> 3.0 RS232 interface driver installed is default, please click Next>...
- Page 9 4.0 You can select to do Touch screen calibration after system boot up or not. Default setting is” None” 5.0 Select to use Multi-Monitor system, then press Next>...
- Page 10 6.0 Choose destination location, default folder location shown as below. Press Next> 7.0 Figure shown below, please press Next> to complete installation.
- Page 11 Calibration 1.0 Execute “eGalaxTouch” 2.0 Click “Tools” tab and click “4 Points Calibration”...
- Page 12 3.0 Four Calibration points will appear on screen sequentially, please to press the center of circle on screen in 15 seconds one by one. 4.0 After finish 4 points calibration the diagram will appear as follow.
- Page 13 5.0 Click “Tools” tab and click “Linearization”. 6.0 Nine Calibration points will appear on screen sequentially, please to press the center of circle on screen one by one.
-
Page 14: Projected Capacitive Touch Panel
7.0 After finish all linearization calibration the diagram will appear as follow. Projected Capacitive Touch Panel (For Projected Capacitive Touch Model only): Projected Capacitive Touch panel: Type : Projected Capacitive Touch Control Type : USB Transmission : 85% Touch Control Driver : eGalax Touch driver (Mouse emulation driver) or supported by driver embedded in OS after windows 7 Touch Driver installation:... -
Page 15: Mechanical Dimension
VII. Mechanical dimension... -
Page 16: Emc Warning Statement
VIII. EMC Warning: FCC Class A Warning This equipment has been tested and found to comply with the limits for a Class A digital device, pursuant to Part 15 of the FCC Rules. These limits are designed to provide reasonable protection against harmful interference when the equipment is operated in a commercial environment. -
Page 17: Product General Specification
Product General Specification: Model P150VG P150VR P150VP LCD Panel Size 15" Resolution 1024 x 768 Aspect Ratio Contrast Ratio (Typ.) 800:1 Brightness (Typ., cd/m² ) 300~350 MTBF (Min., hrs) 50,000 Front Cover 10-points 5-wires resistive Type PMMA projected touch Surface Hardness...
Need help?
Do you have a question about the P150VG and is the answer not in the manual?
Questions and answers