
Related Manuals for Telstar Bio II Advance Plus


Summary of Contents for Telstar Bio II Advance Plus
- Page 1 SERVICE MANUAL Microbiological Safety Cabinet Bio II Advance Plus In order to carry out the service tasks properly, it is required to check the User’s Manual together with this manual. SM-BioIIAdvancePlus-EN-1812 1 / 40...
- Page 2 SM-BioIIAdvancePlus-EN-1812 2 / 40...
-
Page 3: Table Of Contents
INDEX COMPONENTS DESCRIPTION ________________________________________ 4 ELEMENTS LOCATION ______________________________________________ 6 REPLACEMENT OF ELECTRICAL ELEMENTS ______________________________ 7 2.1. Fuse of the power socket _______________________________________ 7 2.2. CPU card ____________________________________________________ 8 2.2.1. Test and replacement of the CPU fuses ________________________ 9 2.3. Control panel (Display) _________________________________________ 10 2.4. -
Page 4: Components Description
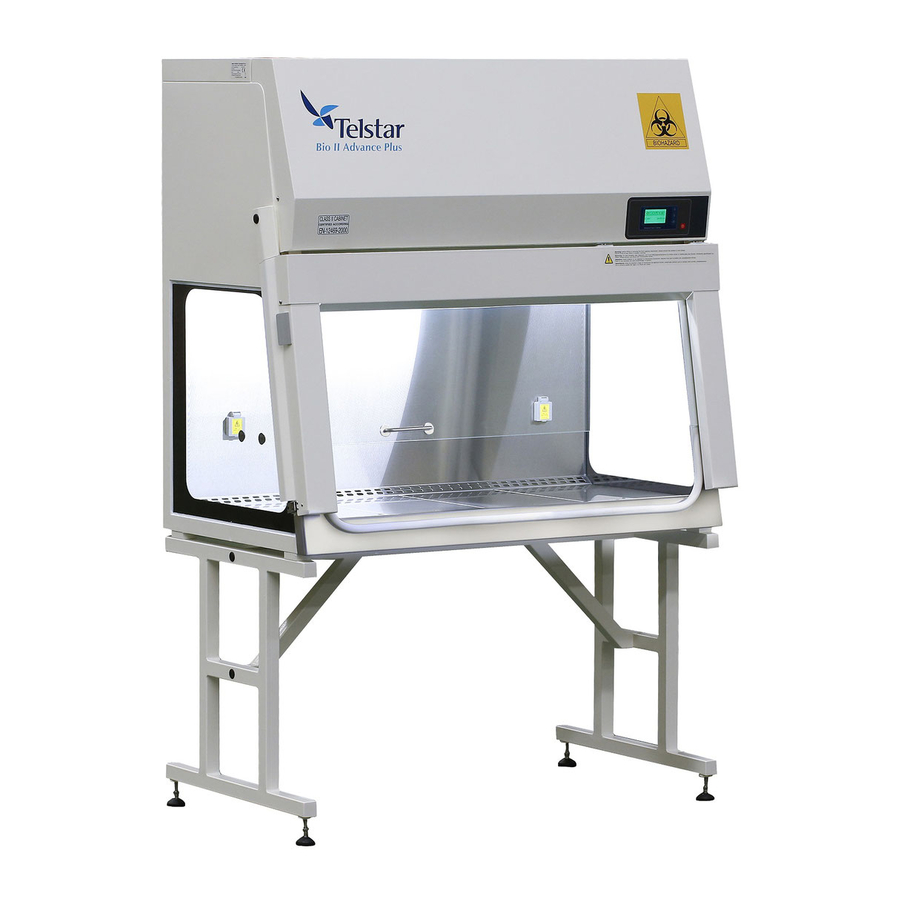
0. COMPONENTS DESCRIPTION Advance 4 1. Centrifugal Blower 2. Exhaust flexible tube 3. Laminar flow chamber or plenum 4. Laminar flow HEPA filter 5. Exhaust HEPA filter 6. Working area 7. Outside air inlet and protection barrier 8. Exhaust outlet SM-BioIIAdvancePlus-EN-1812 4 / 40... - Page 5 Advance 6 1. Centrifugal Blower 2. Exhaust flexible tube 3. Laminar flow chamber or plenum 4. Laminar flow HEPA filter 5. Exhaust HEPA filter 6. Working area 7. Outside air inlet and protection barrier 8. Exhaust outlet SM-BioIIAdvancePlus-EN-1812 5 / 40...
-
Page 6: Elements Location
1. ELEMENTS LOCATION Exhaust outlet. Checking valve for D.O.P. control (Differential pressure). Power supply. Gas and vacuum connections (OPTIONAL). Display and control panel. CPU card. Checking valve fans pressure. SM-BioIIAdvancePlus-EN-1812 6 / 40... -
Page 7: Replacement Of Electrical Elements
2. REPLACEMENT OF ELECTRICAL ELEMENTS WARNING Before any service task ensure to perform a proper decontamination of the cabinet when applicable as shown in user manual Annexes 5.3 and 5.4. After finishing any service task, it must be ensured that the cabinet is working properly, according the checklist shown in chapter 4. -
Page 8: Cpu Card
2.2. CPU CARD For the replacement of the CPU card, these steps should be followed: a) Unplug the cord plug of the cabinet. b) Remove the two M5 screws that hold the frontal cover and lift it up, fixing it with the two rods provided for that objective. -
Page 9: Test And Replacement Of The Cpu Fuses
2.2.1. TEST AND REPLACEMENT OF THE CPU FUSES The CPU card includes 5 fused for the lighting, sockets of the chamber and the fans. In order to replace the fuses it is required to turn 180º the cover of the specific fuse holder, take the fuse out and replace it by a new one that fulfills the following features: F1 –... -
Page 10: Control Panel (Display)
2.3. CONTROL PANEL (DISPLAY) For the replacement of the Control panel (display), these steps should be followed: a) Unplug the cord plug of the cabinet. b) Remove the two M5 screws that hold the frontal cover and lift it up, fixing it with the two rods provided for that objective (Fig.1) c) Disconnect the connector of the display card (Fig.2) d) Unscrew the six M3 screws and its washers (Fig.3) -
Page 11: Power Source
2.4. POWER SOURCE For the replacement of the power source, these steps should be followed: a) Unplug the cord plug of the cabinet. b) Remove the two M5 screws that hold the frontal cover and lift it up, fixing it with the two rods provided for that objective. -
Page 12: Replacement Of The Led Lights
2.5. REPLACEMENT OF THE LED LIGHTS For the replacement of the led lights, these steps should be followed: a) Unplug the cord plug of the cabinet. b) Take out the two M5 screws of the frontal cover of the lighting fitting (Fig.1). c) Lift the led lighting fitting and pull carefully the led light downwards in order it is unclipped (Fig.2). -
Page 13: Replacement Of The Uv Light
2.6. REPLACEMENT OF THE UV LIGHT For the replacement of the UV light, these steps should be followed: a) Unplug the cord plug of the cabinet. b) Detach the frontal-glass from the cabinet (by pulling from the lateral handles of the metal support (Fig.1), and move the glass to the limit upper position. -
Page 14: Replacement Of The Micro-Switches
2.7. REPLACEMENT OF THE MICRO-SWITCHES For the replacement of the micro-switches and/or the glass working position actuator, these steps should be followed: a) Unplug the cord plug of the cabinet. b) Remove the two M5 screws that hold the frontal cover and lift it up, fixing it with the two rods provided for that objective (Fig.1) c) For the replacement of one of the micros, take out the connectors and the two M3 nuts of each micro (Fig.2) - Page 15 For replacing the glass closed position micro-switches, these steps should be followed: a) Unplug the cord plug of the cabinet. b) Detach the frontal mechanism from the cabinet. That way it will be possible to access the micro-switches (Fig.1) that are located at the right side of the cabinet. c) Take out the two M3 nuts of the micro to be replaced (Fig.2) d) Loose the opposite end of the cabling, that is screwed to the inferior part of the right contact between the frontal cover and the frontal mechanism.
- Page 16 For replacing the contacts between the frontal cover and the frontal mechanism, these steps should be followed: a) Unplug the cord plug of the cabinet. Upper part of the contacts: b) Remove the two M5 screws that hold the frontal cover and lift it up, fixing it with the two rods provided for that objective (Fig.1) c) The contacts are screwed to the frontal cover with two nuts, that should be unscrewed, as well as the terminals of the cabling that get to the contacts (Fig.2)
-
Page 17: Replacement Of The Speed Probe
2.8. REPLACEMENT OF THE SPEED PROBE WARNING Before replacing the speed probe, ensure that the fans are fully stopped. For the replacement of the speed probe, these steps should be followed: a) Unplug the cord plug of the cabinet. b) Remove the two M5 screws that hold the frontal cover and lift it up, fixing it with the two rods provided for that objective (Fig.1) c) Remove all screws M5 that hold the frontal cover of the plenum (Fig.2) and remove it. - Page 18 Fig. 5 Fig. 6 Fig. 7 Fig. 8 Fig. 9 SM-BioIIAdvancePlus-EN-1812 18 / 40...
-
Page 19: Replacement Of Mechanical Elements
3. REPLACEMENT OF MECHANICAL ELEMENTS WARNING Before any service task ensure to perform a proper decontamination of the cabinet when applicable as shown in user manual Annexes 5.3 and 5.4. After finishing any service task, it must be ensured that the cabinet is working properly, according the checklist shown in chapter 4. -
Page 20: Replacement Of The Extraction Filter
3.1. REPLACEMENT OF THE EXTRACTION FILTER WARNING Before proceeding to replace the filters, ensure that the fans are fully stopped. For the replacement of the extraction filter, these steps should be followed: a) Remove the two M5 screws that hold the frontal cover and lift it up, fixing it with the two rods provided for that objective (Fig.1) b) Remove all M5 screws that hold the frontal cover of the plenum (Fig.2) and remove it. -
Page 21: Replacement Of The Impulsion Filter
3.2. REPLACEMENT OF THE IMPULSION FILTER WARNING Before proceeding to replace the filters, ensure that the fans are fully stopped. For the replacement of the impulsion filter, these steps should be followed: a) Remove the two M5 screws that hold the frontal cover and lift it up, fixing it with the two rods provided for that objective (Fig.1). -
Page 22: Replacement Of The Frontal Glass
3.3. REPLACEMENT OF THE FRONTAL GLASS WARNING The frontal glass must be moved into the upper limit position before removing the nuts. For the replacement of the frontal glass, these steps should be followed: a) Detach the frontal mechanism from the cabinet. Then, it can be accessed (Fig.1) b) Pull the glass up to the upper limit position. - Page 23 Fig. 5 Fig. 6 SM-BioIIAdvancePlus-EN-1812 23 / 40...
-
Page 24: Replacement Of The Gas Springs Of The Glass
3.4. REPLACEMENT OF THE GAS SPRINGS OF THE GLASS WARNING The gas springs are assembled with pre-tension. Its assembly and disassembly must be made carefully. Incorrect handling can result in damage to the cabinet and the technician. For the replacement of the gas springs that compensate the glass weight, these steps should be followed: a) Remove the glass, as indicated in last chapter. -
Page 25: Functional Test
4. FUNCTIONAL TEST Depending on the repair task been made, following actions must be followed in order to check the proper function of the cabinet: Repair task zone Action To be checked Switch on the cabinet to Check that the cabinet is switched on and the mains supply and press it Works properly. -
Page 26: Operation And Control Of The Cabinet
OPERATION AND CONTROL OF THE CABINET 5.1. START UP OF THE CABINET To proceed to connect the cabinet: Connect the main supply to the cabinet by means of the power cord plug supplied by the manufacturer Check that the aspiration and extraction air flow are free (Chapter 0, pos. 8). Carry out the appropriate installation tests (User Manual Chapter 3.6). -
Page 27: Alarms
5.2. ALARMS Display of the alarms: in the moment that a cabinet detects any mal-function the acoustic and visual alarms are activated. In the display will appear the information showing the corresponding messages and alarms. • Alarms shown on the display: ALARM SHOWN ON THE DISPLAY Excessive laminar down flow... -
Page 28: User Screens To Be Used In Maintenance Operations
5.3. USER SCREENS TO BE USED IN MAINTENANCE OPERATIONS In the control display is the general switch (Annex A3 pos. 1 of user manual). A. On/Off Button (Annex 3 pos. 1): • Pressing when the cabinet is turned off: It goes to the Password Request screen. When entering the correct password (Chapter 4.5 point 1), it goes to the Main Operation screen. - Page 29 2. Configuration Menu screen. It shows the direct access icons to the configuration functions allowed to the user. Go to Contrast screen. Go to Maintenance screen. Go to Language screen. Go to PIN Configuration screen. Go to Date & Hour screen. Go to Sensors Information screen.
-
Page 30: Control Functions With Technical Service Password
5.4. CONTROL FUNCTIONS WITH TECHNICAL SERVICE PASSWORD The access to the Technical Service menu can be done by means of the Password Request screen (User Manual Chapter 4.5 point 1) by introducing as password the key corresponding to the random number indicated in the screen. The random numbers listing and their corresponding passwords is as follows: 2421 5832... - Page 31 Once introduced the correct password, following screens can be shown: 1. Main Menu screen. Following actions can be carried out: Activate/Deactivate fans. Activate/Deactivate lights. Activate/Deactivate sockets. Activate/Deactivate gas solenoid valve. Activate/Deactivate/Adjust ECO mode. Go to Window Menu. Go to previous/next Menu. 1.1 Adjust ECO Mode screen.
- Page 32 2. Adjustments Menu screen. Following actions can be carried out: Go to Model and size screen. Go to Calibration screen. Go to Set Points Menu screen. Go to Counters Reset screen. Go to Date & Hour screen. Go to Test Menu screen. Go to previous/next Menu.
- Page 33 2.3 Set Points Menu screen. Go to Set Points adjustment screen. Go to Set Point Test screen Back to Adjustments Menu. 2.3.1. Set Points Adjustment screen. Set Point Inflow Speed Following actions can be carried out: Confirm the value of the selected field. Reset the numeric fields.
- Page 34 2.4 Counters Reset screen. Following actions can be carried out: Introduce the date after filter changing. Reset the fan hours counter. Reset UV lamp hours counter. Back to Adjustments Menu. 2.5 Date & Hour screen. Confirm the selected value and selects next field (format dd/mm/yy hh:mm).
- Page 35 3. Accessories Menu screen. Following actions can be carried out: Go to External Fan & Sensors Menu screen. Go to Communications screen. Activate/Deactivate Alarm Relay (only test) Go to Particles Counter screen. Activate/Deactivate Extrac.Valve (only test) Go to Engineering Access screen. Pin 2009: software update by using SD card.
- Page 36 Sensor: (Temperature/Humidity/Pressure/No) selects the sensor type. Increase the selected value. Decrease the selected value. Confirm and save the selected value. Confirm the value. Cancel. Exit. After activation, it will appear in the Sensor Menu user screen. 3.2 Communications screen. Confirm the value. Cancel.
-
Page 37: Calibration Of The Cabinet
5.5. CALIBRATION OF THE CABINET The purpose of this technical instruction is to regulate and check that the impulsion speed flow and inflow are suitable to achieve product and user protection. To determine the speed average as well as the uniformity range in the laminar flow zone and velocity through the front aperture of the microbiological safety cabinet. - Page 38 9. Place the anemometer at 270mm high of the shelves, over each point (take all readings with the anemometer in the same direction and without covering any hole). 10. Take all the reading velocity needed and enter the average velocity. 11.
-
Page 39: Recommended Installation Test
6. RECOMMENDED INSTALLATION TEST 6.1. DOWNFLOW FILTERS INTEGRITY TEST See Annex A9.1 of the User’s Manual. 6.2. EXHAUST FILTERS INTEGRITY TEST See Annex A9.2 of the User’s Manual. 6.3. DOWNFLOW AIR VELOCITY TEST See Annex A9.3 of the User’s Manual. 6.4. -
Page 40: Cleaning
9. CLEANING 9.1. SUPERFICIAL CLEANING See Annex A5.1 of the User’s Manual. 9.2. FRONT GLASS DISINFECTION AND CLEANING See Annex A5.2 of the User’s Manual. 9.3. FORMOL DISINFECTION See Annex A5.3 of the User’s Manual. 9.4. DISINFECTION WITH VAPORIZED HYDROGEN PEROXIDE See Annex A5.4 of the User’s Manual.
Need help?
Do you have a question about the Bio II Advance Plus and is the answer not in the manual?
Questions and answers