Table of Contents
Advertisement
Quick Links
SERVICE MANUAL
For your convenience, all service parts, identified in this manual are available through Eiki's normal distribution channels.
In addition to service part number, the generic descriptions have been given, where possible, to allow your service
technicians to substitute equivalent components which might be available from other sources.
All orders for service parts will be honored. However, in instances where generic components are considered to be
available from several common sources, as would be the case with an industry standard fuse, resistor, or semicon-
ductor, it may be more economical and expeditious to purchase the part locally.
PRODUCT CODE
1 122 142 01
(MM8B)
All manuals and user guides at all-guides.com
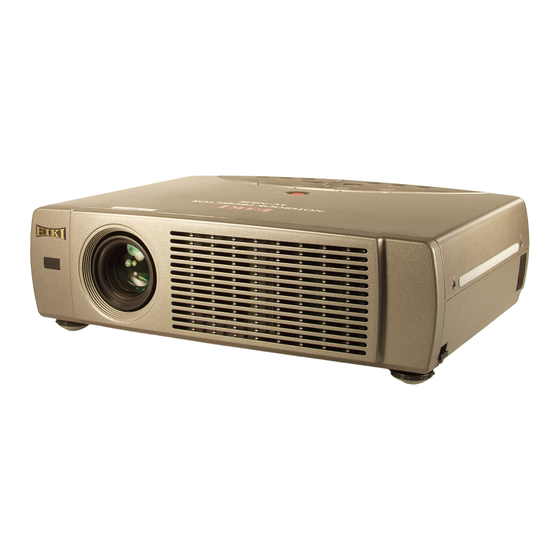
Multimedia Projector
FOREWORD
Model No. LC-NB3E
(U.S.A., Canada)
ORIGINAL VERSION
Chassis No. MM8-NB3E00
Give complete "Chassis No." for parts
order or serviceing, it is shown on the
rating sheet on the cabinet on the pro-
jector.
REFERENCE NO.
SM
5110335
Advertisement
Table of Contents

Related Manuals for Eiki LC-NB3E


Summary of Contents for Eiki LC-NB3E
- Page 1 FOREWORD For your convenience, all service parts, identified in this manual are available through Eiki’s normal distribution channels. In addition to service part number, the generic descriptions have been given, where possible, to allow your service technicians to substitute equivalent components which might be available from other sources.
-
Page 2: Table Of Contents
All manuals and user guides at all-guides.com Contents Safety instructions ________________________________________________3 Specifications __________________________________________________ 4 Note on Servicing ______________________________________________ 5 Adjustments after parts replacement ________________________________ 5 Circuit protections ______________________________________________ 6-7 Fuse ____________________________________________________ 6 Thermal switch ____________________________________________ 6 Interlock switch ____________________________________________ 6 Warning temperature and power failure protection ________________ 7 Mechanical disassemblies ______________________________________ 8-13 Optical parts disassemblies ____________________________________ 14-17... -
Page 3: Safety Instructions
All manuals and user guides at all-guides.com Safety Instructions SAFETY PRECAUTIONS WARNING: The chassis of this projector is isolated (COLD) from AC line by using the converter transformer. Primary side of the converter and lamp power supply unit circuit is connected to the AC line and it is hot, which hot circuit is iden- tified with the line ( ) in the schematic diagram. -
Page 4: Specifications
All manuals and user guides at all-guides.com Specifications Projector Type Multi-media Projector Dimensions (W x H x D) 13.11” x 3.52” x 9.25” (333mm x 89.5mm x 235mm) Net Weight 8.6 lbs (3.9 kg) LCD Panel System 0.9” TFT Active Matrix type, 3 panels Panel Resolution 800 x 600 dots Number of Pixels... -
Page 5: Note On Servicing
All manuals and user guides at all-guides.com Adjustments after Parts Replacement : Adjustment necessary : Check necessary Disassembly / Replaced Parts LCD/ Polarized glass Condenser Condenser Relay P. F. Power Main Prism Lens Lens-Out Lens-Out Board Board Board Ass’y Condenser lens adjustment Condenser lens-out adjustment Relay lens-out adjustment Contrast Adjustment... -
Page 6: Circuit Protections
All manuals and user guides at all-guides.com Circuit Protections This projector is equipped with the following circuit protections to operate in safety. If the abnormality occurs inside the projector, it will automatically turn off by operating one of the following protection circuits. Fuse Line Filter Board The fuse is located inside of the projector. -
Page 7: Warning Temperature And Power Failure Protection
All manuals and user guides at all-guides.com Circuit Protections Warning temperature and power failure protection The TEMP WARNING indicator flashes red and the projector will automatically turn off when the internal tempera- ture of the projector exceeds the normal temperature or when stopping cooling fans or when the internal power supply lines are failed. -
Page 8: Mechanical Disassemblies
All manuals and user guides at all-guides.com Mechanical Disassemblies Mechanical disassemble should be made following procedures in numerical order. Following steps show the basic procedures, therefore unnecessary step may be ignored. Caution: The parts and screws should be placed exactly the same position as the original otherwise it may cause loss of performance and product safety. - Page 9 All manuals and user guides at all-guides.com Mechanical Disassemblies AV, AV Sub Board and Speaker removal Remove 1 screw to release a grounding wire. Pull the Rear Panel ass’y upward. Remove 4 screws and take AV Board off. Remove 4 screws and take AV Sub Board off.
- Page 10 All manuals and user guides at all-guides.com Mechanical Disassemblies Lamp Ballast Unit removal Remove 1 screw and disconnect the Lamp Socket. Remove 2 screws to take the Lamp Ballast ass’y upward off. Remove 4 screws to take the Lamp Ballast Board off. Lamp ballast board Fig.5 Filter Board removal...
- Page 11 All manuals and user guides at all-guides.com Mechanical Disassemblies Power Box Cover and Fans(FN901, FN906) removal Remove 4 screws to take the Fan(FN901) off. Remove 4 screws to take the Fan(FN905) off. Remove 3 screws to take the Power Box Cover upward off. FN906 Power box cover FN901...
- Page 12 All manuals and user guides at all-guides.com Mechanical Disassemblies Optical Unit removal Step from previous procedure. Remove 6 screws to take the Optical Unit upward upward off. To mount optical unit, mount optical unit first then mount the Lamp assembly and Lamp Cover.
- Page 13 All manuals and user guides at all-guides.com Mechanical Disassemblies Fan (FN905) removal Remove 1 screw and take a Washer, Spring and Interlock Switch lever. Interlock switch lever Pull the Fan and duct ass’y upward, then remove the 2 screws to take the Fan (FN906) off. FN905 Fig.10 Temp Board and Fans (FN902, FN903, FN904) removal...
-
Page 14: Optical Parts Disassemblies
All manuals and user guides at all-guides.com Optical Parts Disassemblies Before taking this procedure, remove Cabinet Top and Main Board following to the “Mechanical Disassemblies”. Disassembly requires a 2.0mm hex wrench and a screwdriver. Projection Lens removal Remove the Front Panel following to “Front Panel Removal” on “Mechanical Disassemblies”. - Page 15 All manuals and user guides at all-guides.com Optical Pats Disassemblies Condenser lens disassembly Remove 2 screws and pull the Condenser Lens ass’y upward. Remove 4 screws to take the Lens off from the holder. Condenser Lens Holder * Lens should be placed as the flat Fig.3- surface side comes to the holder side.
- Page 16 All manuals and user guides at all-guides.com Optical Parts Disassemblies Relay Lens-Out disassembly Remove 2 screws and pull the Relay Lens-Out ass’y upward. Remove 2 screws to take the Lens off from the holder. Note: There is no mounting direction of the lens. Holder Relay Lens-Out Fig.5-...
- Page 17 All manuals and user guides at all-guides.com Optical Parts Disassemblies Polarized Glass-Out removal Remove 4 screws and take the LCD/Prism ass’y off upward from the optical unit. Remove each screw and take the glass off upward. LCD Panel/Prism Ass’y Note: Do not replace the LCD panel separately otherwise it can not obtain proper picture.
- Page 18 All manuals and user guides at all-guides.com Optical Parts Disassemblies Locations and Directions Key No. Description When mounting or assembling the optical parts in the optical unit, the Mirror (W) parts must be mounted in the specified location and direction as Integrator lens (OUT) shown in figure below.
-
Page 19: Lcd Panel/Prism Ass'y Replacement
All manuals and user guides at all-guides.com LCD Panel/Prism Ass’y Replacement IMPORTANT NOTICE on LCD Panel/Prism Ass'y Replacement LCD panels used for this model can not be replaced separately. Do not disassemble the LCD Panel/Prism Ass’y. These LCD panels are installed with precision at the factory. When replacing the LCD panel, should be replaced whole of the LCD panels and prism ass’y at once. -
Page 20: Lamp Replacement
All manuals and user guides at all-guides.com Lamp Replacement WARNING: ORDER REPLACEMENT LAMP - For continued safety, replace with a lamp assembly of the same type. Type No. Service Parts No. - Allow the projector to cool for at least 45 minutes before you open the POA-LMP35 610 293 2751 lamp cover. -
Page 21: Optical Adjustments
All manuals and user guides at all-guides.com Optical Adjustments Before taking optical adjustments below, remove the Cabinet Top and Main Board following to the “Mechanical Disassemblies” Adjustments require a 2.0mm hex wrench and a slot screwdriver. When you adjust Condenser lens, Condenser lens-out or Relay lens adjustment, you need to disconnect some connectors and FPC cables of LCD panels on the main board. -
Page 22: Condenser Lens Adjustment
All manuals and user guides at all-guides.com Optical Adjustments Condenser Lens adjustment Turn the projector on by a state of without FPC cables. Project only green light on the screen. Adjust the adjustment base of condenser lens assy to make color uniformity in green. -
Page 23: Condenser Lens-Out Adjustment
All manuals and user guides at all-guides.com Optical Adjustments Condenser Lens-Out adjustment Turn the projector on by a state of without FPC cables. Project green and blue lights on the screen. Adjust the adjustment base of condenser lens-out assy to make color uniformity in cyan. -
Page 24: Relay Lens-Out Adjustment
All manuals and user guides at all-guides.com Optical Adjustments Relay lens-Out adjustment Turn the projector on by a state of without FPC cables. Project all of lights on the screen. Adjust the adjustment base of relay lens assy to make color unifor- mity in white. -
Page 25: Electric Adjustments
All manuals and user guides at all-guides.com Electrical Adjustments Service Adjustment Menu Operation To enter the service mode To enter the “Service Mode”, press and hold the MENU and IMAGE button on the projector at the same time for more than 3 seconds. The service menu appears on the screen as follows. To adjust service data Select the adjustment group no. -
Page 26: Circuit Adjustments
All manuals and user guides at all-guides.com Electrical Adjustments Circuit Adjustments CAUTION: The each circuit has been made by the fine adjustment at factory. Do not attempt to adjust the follow- ing adjustments except requiring the readjustments in servicing otherwise it may cause loss of per- formance and product safety. - Page 27 All manuals and user guides at all-guides.com Electrical Adjustments NRS adjustment Black Level adjustment 1. Receive the 16-step grey scale computer signal. 1. Receive the 16-step grey scale computer signal. 2. Set to COMPUTER mode. 2. Set to COMPUTER mode. 3.
- Page 28 All manuals and user guides at all-guides.com Electrical Adjustments PC Offset adjustment PC Gain adjustment 1. Receive the 16-step gray scale computer signal. 1. Receive the 16-step gray scale computer signal. 2. Set to COMPUTER mode. 2. Set to COMPUTER mode. 3.
- Page 29 All manuals and user guides at all-guides.com Electrical Adjustments AV Gain adjustment Gamma Shift adjustment 1. Receive the 16-step gray scale video signal. [PC-GAMMA OFF ADJUSTMENT] 2. Set to VIDEO mode. 1. Receive the 16-step gray scale computer signal. 3. Enter the service mode. 2.
-
Page 30: Service Adjustment Data Table
All manuals and user guides at all-guides.com Electrical Adjustments Service Adjustment Data Table These initial values are the reference data written from the CPU ROM to memory IC when replaced new memory IC. The adjust- ment items indicated with “ ” are required to readjust following to the “Electrical adjustments”. - Page 31 All manuals and user guides at all-guides.com Electrical Adjustments Adjustment Item Initial Value Range Description Cinema LTI_LEVEL 0 ~ 3 Set this value at Cinema Mode Group: 2 L3E07050 (Digital Gamma, Color Shading & Timing Controller) DVI,AV R_SUB_BRT 0 ~ 1023 G_SUB_BRT 0 ~ 1023 B_SUB_BRT...
- Page 32 All manuals and user guides at all-guides.com Electrical Adjustments Adjustment Item Initial Value Range Description REF_R 0 ~ 255 Red white-black level adjustment REF_G 0 ~ 255 Green white-black level adjustment REF_B 0 ~ 255 Blue white-black level adjustment NRS_B 0 ~ 255 NRS_A 0 ~ 255...
- Page 33 All manuals and user guides at all-guides.com Electrical Adjustments Adjustment Item Initial Value Range Description AV Cinema Green 0 ~ 63 AV Cinema Blue 0 ~ 63 AV Cinema Sharpness 0 ~ 31 AV Cinema Gamma 0 ~ 15 Group: 500 ADC ADC R-OFFSET 0 ~ 255 ADC G-OFFSET...
-
Page 34: Test Points And Locations
All manuals and user guides at all-guides.com Electrical Adjustments Test Points and Locations MAIN BOARD TP52R TP52G TP52B TP11SC TP11SY TP62V TP62H TP11CV TP11PB TP201G TP25G1 TP201B TP11PR TP25G2 TP201R TP3551 IC4101 K25G TP205 IC301 TP25B2 TP25R1 TP25B1 TP25R2 TPDVS TPDCLK TP12V2 TPDHS... -
Page 35: Troubleshooting
All manuals and user guides at all-guides.com Troubleshooting No Power The possible causes of No Power are listed below. Please - Abnormality on lamp ballast drive signal (BALLAST_AC). check following and refer to power supply and protection cir- BALLAST_AC signal is output from pin 39 of IC801 and cuits diagram in the figure opposite. - Page 36 All manuals and user guides at all-guides.com Troubleshooting Power supply drive and protection diagrams and locations SW902 IC2881 IC4881 F601 SW904 LAMP Ass'y LAMP BALLAST UNIT P.F BOARD F601 SW904 SW902 IC4881 Fuse Interlock sw. AC IN Thermal sw. TEMP. SENS. K48E TSW611 IC611...
-
Page 37: No Picture
All manuals and user guides at all-guides.com Troubleshooting No Picture The possible causes of No Picture are listed below. Please 3. No picture from both of Video and Computer check following and refer to video signal processing dia- sources. grams in the figure opposite. Check RGB signals at test points TP52R, TP52G and TP52B. - Page 38 All manuals and user guides at all-guides.com Troubleshooting Video Signal processing diagrams -38-...
-
Page 39: No Sound
All manuals and user guides at all-guides.com Troubleshooting No Sound 1. No audio signals at AV input circuit. Check MUTE signal at pin 7 of IC1831, pins 7 and 13 of IC1881, and peripheral circuit. Check audio signals at pins14 and 15 of IC5011 on AV Mute On : High Board. -
Page 40: Control Port Functions
All manuals and user guides at all-guides.com Control Port Functions System Control & I/O Port Table (IC801) Pin No. Name Function Name Function Action PE5/D5 POWER_SW Power_SW H: On PE6/D6 SYS SW Peripheral IC power supply SW L: on PE7/D7 LAMP_SW Lamp LED H: On... - Page 41 All manuals and user guides at all-guides.com Control Port Functions Pin No. Name Function Name Function Action Operation mode control 2 Fixed H PF7/¢ ¢ ¢ output PF6/AS AS output PF5/RD Read signal Control for SRAM PF4/HWR Write signal (upper 8 bit) Control for SRAM PF3/LWR/ADTRG/IRQ3 IRO_CS...
- Page 42 All manuals and user guides at all-guides.com Control Port Functions IIC Bus I/O Expander (IC1851) Port Functions Pin No. Name Function Action Reset Open IIC SCL Active “L ” IIC SDA Active “L ” CARD_IN L: CARD H: No CARD VIEWER_ON L: VIEWER Unit exist SCDT1...
- Page 43 All manuals and user guides at all-guides.com Control Port Functions IIC Bus DA Converter (IC2161) Port Functions Pin No. Name Function Action Reset Fixed “H” IIC SCL Active “L ” IIC SDA Active “L ” RCLP R Signal clamp reference voltage GCLP G Signal clamp reference voltage BCLP...
-
Page 44: Waveforms
All manuals and user guides at all-guides.com Waveforms VIDEO-IN Y-IN <IC1101-5> C-IN <IC1101-7> Y-OUT <IC1101-21> CB-OUT <IC1101-22> CR-OUT <IC1101-23> H-SYNC OUT <IC1101-9> V-SYNC OUT <IC1101-4> R-OUT <IC4101-35> G-OUT <IC4101-37> B-OUT <IC1101-7> R-DRIVE <TP52R/TP201R> G-DRIVE <TP52G/TP201G> B-DRIVE <TP52B/TP201G> -44-... - Page 45 All manuals and user guides at all-guides.com Waveforms H-SYNC OUT <IC4101-29> V-SYNC OUT <IC4101-28> H-SYNC IN <TP205> H-SYNC DRIVE <TP62H> V-SYNC DRIVE <TP62V> DHS <TPDHS> DVS <TPDVS> NRS <TP3551/TP3581> R-S&H OUT <TP25R1/TP25R2> G-S&H OUT <TP25G1/TP25G2> B-S&H OUT <TP25B1/TP25B2> BALLAST SW <TP28L> -45-...
-
Page 46: Cleaning
All manuals and user guides at all-guides.com Cleaning After long periods of use, dust and other particles will accumulate on the LCD panel, prism, mirror, polarized glass, lens, etc., causing the picture to darken or color to blur. If this occurs, clean the inside of optical unit. Remove dust and other particles using air spray. -
Page 47: Ic Block Diagrams
All manuals and user guides at all-guides.com IC Block Diagrams AD8183ARU <Selector, IC5241> BA6287F <Motor Drive IC5501, IC5551> -47-... - Page 48 All manuals and user guides at all-guides.com IC Block Diagrams BA7078AF <Selector, IC6241> CXA2101AQ <RGB Matrix, IC4101> -48-...
- Page 49 All manuals and user guides at all-guides.com IC Block Diagrams CXD2064Q <Digital Comb Filter, IC2101> L3E01031 <Level Shift, IC3531, IC3561> -49-...
- Page 50 All manuals and user guides at all-guides.com IC Block Diagrams L3E06070 <D/A-Sample & Hold, > IC501, IC531, IC561 L3E07050 <Color, Gamma Correction & Timing Controller, IC401> -50-...
- Page 51 All manuals and user guides at all-guides.com IC Block Diagrams ML60851 <USB I/F, IC9801> M62393 <D/A, IC2571> -51-...
- Page 52 All manuals and user guides at all-guides.com IC Block Diagrams TB1274AF <Video Decoder, IC1101> TA1318N <AFC Detector, IC6171> -52-...
- Page 53 All manuals and user guides at all-guides.com IC Block Diagrams FA7612CA <PWC Controller, IC65A, IC671, IC681> STR-Z2156 <Switching Controller, IC631> -53-...
- Page 54 All manuals and user guides at all-guides.com -54-...
-
Page 55: Service Parts Lists
All manuals and user guides at all-guides.com MM8-NB3E00 Electrical Parts List Product safety should be considered when a component replacement is made in any area of a projector. Components indicated by a mark in this parts list and the circuit diagram show components whose value have special significance to product safety. - Page 56 All manuals and user guides at all-guides.com MM8-NB3E00 Electrical Parts List Note: Parts order must contain Chassis No., Part No., and Descriptions. OUT OF CIRCUIT BOARD Thermal Switch Interlock switch (SW902) (SW904) Lamp Ballast Unit F601 Fuse FN906 Cooling Fan Line Filter Board AV Sub Board...
- Page 57 All manuals and user guides at all-guides.com MM8-NB3E00 Electrical Parts List Key No. Part No. Description Key No. Part No. Description DIODE ASSEMBLIED BOARDS D6801 407 179 0501 ZENER DIODE UDZ6.2B-TE-17 D6802 407 179 0501 ZENER DIODE UDZ6.2B-TE-17 610 292 5609 ASSY,PWB,KEY SW MS6A 1AA0B10C34000 D6803 407 179 0501 ZENER DIODE UDZ6.2B-TE-17...
- Page 58 All manuals and user guides at all-guides.com MM8-NB3E00 Electrical Parts List Key No. Part No. Description Key No. Part No. Description R618 401 259 9002 MT-GLAZE 150K FA 1/2W Q68A 405 139 7706 TR IMZ1A-T108 R619 401 259 9002 MT-GLAZE 150K FA 1/2W Q681 405 047 9007 TR 2SB1204-S-TL...
- Page 59 All manuals and user guides at all-guides.com MM8-NB3E00 Electrical Parts List Key No. Part No. Description Key No. Part No. Description R5505 401 105 5301 MT-GLAZE 4.7K JA 1/16W R677 401 105 4304 MT-GLAZE 330K JA 1/16W R5506 401 105 5301 MT-GLAZE 4.7K JA 1/16W R678 401 105 2201 MT-GLAZE...
- Page 60 All manuals and user guides at all-guides.com MM8-NB3E00 Electrical Parts List Key No. Part No. Description Key No. Part No. Description D69B 407 004 0706 DIODE DCB015-TB 405 014 4608 TR 2SC2412K T146 S D69C 407 004 0706 DIODE DCB015-TB 405 015 8704 TR 2SC2812-L6-TB 405 015 8902 TR 2SC2812-L7-TB MISCELLANEOUS...
- Page 61 All manuals and user guides at all-guides.com MM8-NB3E00 Electrical Parts List Key No. Part No. Description Key No. Part No. Description IC3011 409 461 7403 IC LT1399CS R1024 401 105 0405 MT-GLAZE 100 JA 1/16W IC3041 409 464 1408 IC TC74ACT14FT R1025 401 105 0603 MT-GLAZE 10K JA 1/16W...
- Page 62 All manuals and user guides at all-guides.com MM8-NB3E00 Electrical Parts List Key No. Part No. Description Key No. Part No. Description R5011 401 105 0702 MT-GLAZE 100K JA 1/16W L2005 645 044 8836 FILTER,EMI 100MHZ R5012 401 105 0702 MT-GLAZE 100K JA 1/16W L2006 645 044 8836 FILTER,EMI 100MHZ...
- Page 63 All manuals and user guides at all-guides.com MM8-NB3E00 Electrical Parts List Key No. Part No. Description Key No. Part No. Description D2057 407 187 8209 ZENER DIODE UDZ12B-TE-17 IC6171 409 523 5002 IC TA1318AF D2058 407 187 8209 ZENER DIODE UDZ12B-TE-17 CAPACITOR D2059 407 187 8209 ZENER DIODE UDZ12B-TE-17...
- Page 64 All manuals and user guides at all-guides.com MM8-NB3E00 Electrical Parts List Key No. Part No. Description Key No. Part No. Description MISCELLANEOUS 405 163 1602 TR 2SC2812N-L6-TB0 405 163 1701 TR 2SC2812N-L7-TB0 X6171 645 046 9213 OSC,CERAMIC 503.0KHZ Q132 405 014 4509 TR 2SC2412K T146 R 405 014 4608 TR 2SC2412K T146 S 405 015 8704 TR 2SC2812-L6-TB MAIN BOARD...
- Page 65 All manuals and user guides at all-guides.com MM8-NB3E00 Electrical Parts List Key No. Part No. Description Key No. Part No. Description 405 163 1602 TR 2SC2812N-L6-TB0 405 015 8704 TR 2SC2812-L6-TB 405 163 1701 TR 2SC2812N-L7-TB0 405 015 8902 TR 2SC2812-L7-TB Q3111 405 014 4509 TR 2SC2412K T146 R 405 163 1602 TR 2SC2812N-L6-TB0...
- Page 66 All manuals and user guides at all-guides.com MM8-NB3E00 Electrical Parts List Key No. Part No. Description Key No. Part No. Description IC5241 409 470 2604 IC AD8183ARU C1133 403 113 3805 CERAMIC 1000P K IC5251 409 357 6602 IC LT1260CS C1161 403 155 4204 CERAMIC 15P J...
- Page 67 All manuals and user guides at all-guides.com MM8-NB3E00 Electrical Parts List Key No. Part No. Description Key No. Part No. Description C2103 403 304 1801 ELECT 100U M 6.3V 403 335 0309 ELECT 10U M 403 373 7704 ELECT 100U M 6.3V C3103 403 164 0204 CERAMIC 0.1U Z...
- Page 68 All manuals and user guides at all-guides.com MM8-NB3E00 Electrical Parts List Key No. Part No. Description Key No. Part No. Description C406 403 164 0204 CERAMIC 0.1U Z C5201 403 304 2105 ELECT 47U M 6.3V C407 403 164 0204 CERAMIC 0.1U Z C5202 403 164 0204 CERAMIC...
- Page 69 All manuals and user guides at all-guides.com MM8-NB3E00 Electrical Parts List Key No. Part No. Description Key No. Part No. Description C568 403 164 0204 CERAMIC 0.1U Z C6634 403 164 0204 CERAMIC 0.1U Z C569 403 164 0204 CERAMIC 0.1U Z C6642 403 164 0204 CERAMIC...
- Page 70 All manuals and user guides at all-guides.com MM8-NB3E00 Electrical Parts List Key No. Part No. Description Key No. Part No. Description 645 027 1519 R-NETWORK 0X4 1/16W R1104 401 105 4106 MT-GLAZE 3.3K JA 1/16W RB1446 645 037 0656 R-NETWORK 0X4 0.063W R1105 401 105 0405 MT-GLAZE 100 JA 1/16W...
- Page 71 All manuals and user guides at all-guides.com MM8-NB3E00 Electrical Parts List Key No. Part No. Description Key No. Part No. Description R152 401 105 8104 MT-GLAZE 56K JA 1/16W R2106 401 105 0306 MT-GLAZE 10 JA 1/16W R153 401 105 3406 MT-GLAZE 27K JA 1/16W R2107 401 105 3901 MT-GLAZE...
- Page 72 All manuals and user guides at all-guides.com MM8-NB3E00 Electrical Parts List Key No. Part No. Description Key No. Part No. Description R2549 401 105 7909 MT-GLAZE 0.000 ZA 1/16W R3111 401 105 0504 MT-GLAZE 1K JA 1/16W R2550 401 105 7909 MT-GLAZE 0.000 ZA 1/16W R3112 401 105 0504 MT-GLAZE...
- Page 73 All manuals and user guides at all-guides.com MM8-NB3E00 Electrical Parts List Key No. Part No. Description Key No. Part No. Description R3544 401 105 0306 MT-GLAZE 10 JA 1/16W R4106 401 105 8104 MT-GLAZE 56K JA 1/16W R3545 401 105 0306 MT-GLAZE 10 JA 1/16W R4107 401 105 8104 MT-GLAZE...
- Page 74 All manuals and user guides at all-guides.com MM8-NB3E00 Electrical Parts List Key No. Part No. Description Key No. Part No. Description R457 401 105 3901 MT-GLAZE 33 JA 1/16W R5288 401 105 5103 MT-GLAZE 47 JA 1/16W R458 401 105 3901 MT-GLAZE 33 JA 1/16W R5291 401 105 1402 MT-GLAZE...
- Page 75 All manuals and user guides at all-guides.com MM8-NB3E00 Electrical Parts List Key No. Part No. Description Key No. Part No. Description R884 401 105 7909 MT-GLAZE 0.000 ZA 1/16W R6616 645 030 1056 PROTECTOR,IC 3.8A 72V R886 401 105 7909 MT-GLAZE 0.000 ZA 1/16W R6619 401 105 7909 MT-GLAZE...
- Page 76 All manuals and user guides at all-guides.com MM8-NB3E00 Electrical Parts List Key No. Part No. Description Key No. Part No. Description RESISTOR D2842 407 187 8209 ZENER DIODE UDZ12B-TE-17 D2843 407 187 8209 ZENER DIODE UDZ12B-TE-17 R4881 401 105 0306 MT-GLAZE 10 JA 1/16W D2844 407 187 8209 ZENER DIODE UDZ12B-TE-17...
- Page 77 All manuals and user guides at all-guides.com MM8-NB3E00 Electrical Parts List Key No. Part No. Description Key No. Part No. Description -77-...
-
Page 78: Mechanical Parts List
All manuals and user guides at all-guides.com MM8-NB3E00 Mechanical Parts List Note: Parts order must contain Chassis No., Part No., and Descriptions. CABINET PARTS -78-... - Page 79 Key No. Part No. Description Key No. Part No. Description CABINET PARTS OPTICAL PARTS 610 281 4323 BADGE EIKI-MA6B 645 046 8483 ASSY,PRISM(PBS) 610 292 6972 BUTTON CONTROL-MS6B 645 049 7896 PRISM(PBS) 610 292 6996 BUTTON ZOOM-MS6B 645 047 0226...
-
Page 80: Optical Parts List
All manuals and user guides at all-guides.com MM8-NB3E00 Optical Parts List -80-... - Page 81 All manuals and user guides at all-guides.com MM8-NB3E00 Optical Parts List 67 (Red) 68 (Green) 69 (Blue) -81-...
- Page 82 All manuals and user guides at all-guides.com MM8-NB3E00 Optical Parts List 53-a (Red) 53-b (Green) 53-c (Blue) -82-...
- Page 83 All manuals and user guides at all-guides.com MM8-NB3E00 Optical Parts List 52-a -83-...
- Page 84 All manuals and user guides at all-guides.com MM8-NB3E00 Optical Parts List -84-...
- Page 85 All manuals and user guides at all-guides.com MM8-NB3E00 -85-...
- Page 86 All manuals and user guides at all-guides.com MM8-NB3E00 -86-...
- Page 87 All manuals and user guides at all-guides.com MM8-NB3E00 -87-...
- Page 88 All manuals and user guides at all-guides.com A-key to better communications U.S.A. Canada EIKI International, Inc. EIKI CANADA - Eiki International, Inc. 30251 Esperanza P.O. Box 156, 310 First St. - Unit 2, Rancho Santa Margarita Midland, ON, L4R 4K8, Canada...
Need help?
Do you have a question about the LC-NB3E and is the answer not in the manual?
Questions and answers