Philips MCD299/98 User Manual
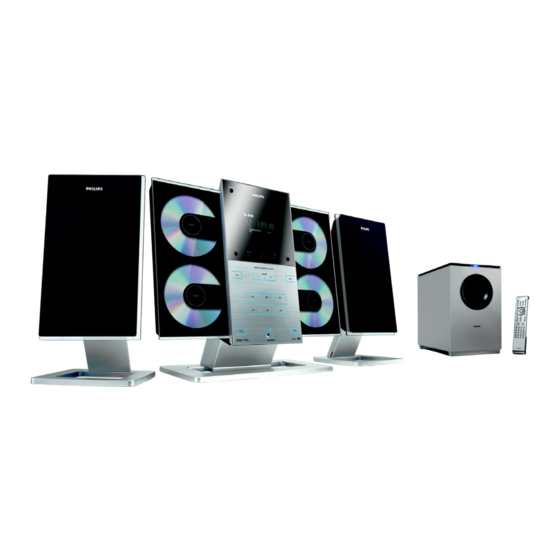
Philips dvd micro theater mcd299 dvd playback 4-disc charger
Hide thumbs
Also See for MCD299/98:
- Quick start manual (4 pages) ,
- Quick start manual (4 pages) ,
- Service manual (41 pages)

Related Manuals for Philips MCD299/98


Summary of Contents for Philips MCD299/98
- Page 1 MCD299 DVD Micro Theatre Register your product and get support at www.philips.com/welcome pg001-pg020_MCD299-98-Eng-A 2007.9.27, 13:04...
- Page 2 pg001-pg020_MCD299-98-Eng-A 2007.9.27, 13:04...
- Page 3 & pg001-pg020_MCD299-98-Eng-A ≤ ¡ ™ ∞ § £ ≥ 2007.9.27, 13:04...
- Page 4 Manufactured under license from Dolby Laboratories. “Dolby” and the double-D symbol are trademarks of Dolby Laboratories. Windows Media and the Windows logo are trademarks, or registered trademarks of Microsoft Corporation in the United States and/or other countries. Plays Windows Media pg001-pg020_MCD299-98-Eng-A MANUFACTURED UNDER LICENSE FROM DIGITAL THEATER SYSTEMS, INC.
- Page 5 Index English ------------------------------------------------ 6 -------------------------------------------------------- 45 CAUTION Use of controls or adjustments or performance of procedures other than herein may result in hazardous radiation exposure or other unsafe operation. pg001-pg020_MCD299-98-Eng-A 2007.9.27, 13:04...
-
Page 6: Table Of Contents
Contents General Information Features ... 8 Discs for playback ... 8 Supplied accessories ... 9 Environmental information ... 9 Care and safety information ... 9 Installation Step 1: Connecting speakers ... 11 Step 2: Antennas Connection ... 11 Step 3: Connecting TV ... 12 Using A/V OUT jack Using Y Pb Pr OUT jack Step 4: Placing the set and speakers ... - Page 7 System Menu Options Basic operations ... 28 General Setup Page ... 28 OSD Lang Screen Saver Audio Setup Page ... 28~29 Night Mode Digital Output Dolby Digital Setup Video Setup Page ... 29 TV Display Progress TV Type Preference Page ... 29~31 Audio Subtitle Disc Menu...
-
Page 8: General Information
General Information Congratulations on your purchase and welcome to Philips! To fully benefit from the support that Philips offers, register your product at www.philips.com/ welcome. Features Your DVD Micro Theatre with 2.1 channel full digital amplifier creates the same dynamic sound... -
Page 9: Supplied Accessories
Supplied accessories – A/V cord (R/W/Y) – Component video cables (red/blue/green) – FM wire antenna – MW loop antenna – 15-pin D-Sub cable – Stands for the main set and speakers – Wall mounting kit – Remote Control – This instruction booklet and a quick start guide Environmental information All unnecessary packaging has been omitted. -
Page 10: Installation
Installation Subwoofer AC power cord A/V cord AC CORD Speaker (right) IMPORTANT! – The type plate is located at the rear of the system. – The voltage selector located at the rear of this system is preset at 220V-240V from the factory. For countries that operate at 110V-127V, please adjust to 110V-127V before you switch on the system. -
Page 11: Step 1: Connecting Speakers
Step 1: Connecting speakers AC CORD SPEAKERS 6 Ω Y/Pb/Pr OUT A/V OUT CONNECT TO SUB WOOFER Place the main set with the front side facing down on a flat and firm surface. Connect the two front speaker cables to the SPEAKERS (6 Ω) terminals: right speaker to "R"... -
Page 12: Step 3: Connecting Tv
Installation Step 3: Connecting TV IMPORTANT! – You only need to make one video connection from the following options, depending on the capabilities of your TV. – Connect the DVD system directly to the TV. Using AV OUT jack AUDIO S-VIDEO AUDIO TV IN... -
Page 13: Step 4: Placing The Set And Speakers
Step 4: Placing the set and speakers With the supplied detachable stands and wall mounting kit, you can either place the main set and speakers on desktop or mount them onto wall. Desktop installation is taken for example here. For how to mount the system onto wall, please refer to Appendix and the attached Wall Mounting Instructions. -
Page 14: Using The Vcr For Recording Dvds
Installation Using the VCR for recording DVDs VIDEO IN AUDIO IN SPEAKERS 6 Ω Y/Pb/Pr OUT A/V OUT CONNECT TO SUB WOOFER Connect the end of the supplied AV cord with only one connector to the A/V OUT jack of the DVD system. -
Page 15: Controls
Controls on the system STANDBY-ON y – switches the system on or to standby mode. Display screen – shows the status of the system. LEFT ç – opens/closes the left disc door. RIGHT ç – opens/closes the right disc door. iR SENSOR –... - Page 16 Controls 9 OK – to exit or confirm the selection. í/ë – Disc: skips to the previous/next chapter/title/ track. – Tuner: selects a preset radio station. – for clock/timer, to set the minute. – In DISC/USB mode, to stop playback or clear a program.
-
Page 17: Step 1: Inserting Batteries Into The Remote Control
IMPORTANT! – Make sure to complete the preparation procedures before operating the system. Step 1: Inserting batteries into the Remote Control Open the battery compartment. Insert two AAA batteries following the indications (+/-) inside the compar tment. Close the cover. Using the Remote Control to operate the Player Aim the Remote Control... -
Page 18: Step 3: Setting Video Preference
Preparations Step 3: Setting video preference IMPORTANT! – Make sure you have completed all the necessary connections. (See "Connections-Connecting TV".) – – Video Setup Page – – TV Display PROGRESS TV Type Multi NTSC Turn on the TV set and set it to the correct Video-In channel. -
Page 19: Setting Up Progressive Scan Feature
Note: The format you select must be available on the disc. If it is not, the setting for TV Display will not affect the picture during playback. To exit the menu Press SYSTEM MENU again. Setting up Progressive Scan feature (for Progressive Scan TV only) The progressive scan display twice the number of frames per seconds than interlaced scanning... - Page 20 Preparations – – Preference Page – – Audio English Subtitle Spanish Disc Menu Portuguese Parental Thai Password Chinese Default Others Audio (DVD only) Switches the display language of the sound track. Select the language from the displayed list. Subtitle (DVD only) Switches the display language of the subtitle.
-
Page 21: Basic Functions
Plug and Play (for tuner installlation) Plug and Play allows you to store all available radio stations automatically. First time setup/power up When you turn on the main supply, "AUTO INSTALL - PRESS PLAY" is displayed. PressÉÅ on the system to start installation. ➜... -
Page 22: Volume Control
Basic Functions Volume control Press VOLUME -/+ (VOL +/- on the remote) to increase or decrease the volume level. ➜ ”VOL XX” is displayed on the display panel. “XX” denotes the volume level. To switch off the volume temporarily ● Press MUTE on the remote. -
Page 23: Disc Operations
Video In channel. (See "Setting up the TV".) Press STANDBY-ON 2. ➜ You should see the blue Philips DVD background screen on the TV. Press LEFT ç or RIGHT ç on the front panel (L ç or R çon the remote control) to open the left or right disc door respectively. -
Page 24: Selecting A Track/Chapter/Title
Disc Operations Selecting a track/chapter/title (DVD/ VCD/CD/MP3/WMA) Press í/ë during playback to go to the previous or next chapter/title/track. To go directly to any chapter/ title/track, enter the chapter/ title/track number using the Numeric Keypad (0-9). Resuming playback from the last stopped point (DVD/VCD/CD/MP3 /WMA) ●... -
Page 25: Forward/Reverse Searching
Forward/Reverse Searching (DVD/VCD/ Press 22/33 during playback to select the required speed: X2, X4, X8, X16 or X32 (backward or forward). ➜ Sound will be muted. To return to normal speed, press 2;. Time search & search by chapter/track number (DVD/VCD/CD/MP3/WMA) Press GOTO until the time or chapter/track edit box appears. -
Page 26: Playing Mp3/Wma Disc
Press à to move to the album column on the left of the TV screen, then use 5/4 to select an album and press OK to open it. 00:00 00:00 PHILIPS 001/005 \MP3\Sample\102A\ 102A-G 102A-L 102A-F Press á... -
Page 27: Special Jpeg Features
Special JPEG features Zoom picture (JPEG) ● During playback, press ZOOM repeatedly to display the picture with different scales (100%, 125%, 150%, 200%, 75%, 50% and OFF). ● Use à/á/5/4 to view the zoomed picture. Slide show playback modes (JPEG) ●... -
Page 28: System Menu Options
System Menu Options Basic operations Press SYSTEM MENU to enter the Setup Menu. Press à/á to select a page to be set. Press 5/4 to highlight an option. Enter its submenu by pressing 3 or OK. Move the cursor by pressing 5/4 to highlight the selected item. -
Page 29: Dolby Digital Setup
Dolby Digital Setup The options included in the Dolby Digital Setup page is: “Dynamic”. – – Audio Setup Page – – NIGHT MODE DIGITAL Output Dolby Digital Setup Dynamic Optimises the dynamic sound output. High volume outputs are softened, enabling you to watch your favourite movie without disturbing others. -
Page 30: Subtitle
System Menu Options Subtitle See "Preparations-Step 4: Setting language preference" for details. Disc Menu See "Preparations-Step 4: Setting language preference" for details. Parental Some DVDs may have a parental level assigned to the complete disc or to certain scenes on the disc. -
Page 31: Audio
To change password Move to "Password" and press á or OK to enter its submenu. Press OK to enter the menu below. Use the Numeric Keypad (0-9) to enter your four-digit code. ➜ The password supplied by default is 1234. Enter your new four-digit password using Numeric Keypad (0-9). -
Page 32: Radio Reception
Radio Reception Tuning to radio stations Press SOURCE on the front panel of the system repeatedly or TUNER on the remote to select TUNER. ➜ TUNER is displayed briefly. Press SOURCE on the front panel of the system or TUNER on the remote once or more to select your waveband (FM/MW). -
Page 33: Manual Programming
Manual programming Tune to your desired station (see “Tuning to radio stations”). Press PROGRAM to activate programming. Press í / ë on the remote to allocate a number from 1 to 40 to this station. Press PROGRAM again to confirm the setting. ➜... -
Page 34: External Sources
External Sources Using a non-USB device Connect the system's AUX IN (R/L) jacks to the AUDIO OUT jacks on the other audio/ visual device (such as a VCR, Laser Disc player or cassette desk) (cable not supplied). Press AUX to select external equipment. ➜... - Page 35 How to organize your MP3/WMA files on the USB mass storage device This Hi-Fi system will browse the MP3/WMA files in the folders/sub-folders/titles order. Example: Root Title 001 Title 002 Title 003 Album 01 Title 001 Title 002 Title 003 Album 02 Title 001 Title 002...
-
Page 36: Timer
Timer Timer setting The system can switch on to DISC, USB or TUNER mode automatically at a preset time, serving as an alarm to wake you up. IMPORTANT! – Before setting the timer, ensure that the clock has been set correctly. See “Preparations - Step 2: Setting the clock”... -
Page 37: Sleep Timer Setting
Sleep timer setting The sleep timer enables the system to switch to standby mode automatically at a preset time. Press TIMER/SLEEP on the remote control repeatedly to select a preset time. ➜ The selections are as follows (time in minutes): 15 ™... -
Page 38: Specifications
... 4 Hz - 22 kHz (48kHz) ... 4 Hz - 44 kHz (96kHz) Digital Output ..SPDIF (Sony Philips digital interface) Coaxial Number of programmable tracks ... 20 Signal-to-noise ratio ... ≥ 60 dBA Channel separation ... ≥ 40 dB (1 kHz) Total harmonic distortion ... -
Page 39: Troubleshooting
Do not open the system as there is a risk of electric shock. If a fault occurs, first check the points listed below before taking the system for repair. If you are unable to remedy a problem by following these hints, consult your dealer or Philips for help. - Page 40 Troubleshooting Problem The DVD player does not start playback. The DVD player does not respond when buttons are pressed. The language for the sound or subtitle cannot be changed when playing a DVD. No image is output when a function is selected.
-
Page 41: Troubleshooting
Problem Left and right sound outputs are reversed. The remote control does not function. The timer is not working The Clock/Timer setting is erased Some files on the USB device are not displayed. pg021-pg044_MCD299-98-Eng-B Troubleshooting Solution ✔ Check the speaker connections and location. ✔... -
Page 42: Glossary
Glossary Analog: Sound that has not been turned into numbers. Analog sound varies, while digital sound has specific numerical values. These jacks send audio through two channels, the left and right. Aspect ratio: The ratio of vertical and horizontal sizes of a displayed image. The horizontal vs. -
Page 43: Appendix
How to mount your system onto wall IMPORTANT! – The wall mounting instructions are for use by the qualified wall mounting person only! – Ask a qualified person to help you with the wall mounting, which includes drilling holes on the wall and mounting the set onto wall. - Page 44 Appendix Mounting your speakers onto wall The supplied speaker brackets enable you to mount your speakers onto wall too. Position the brackets on the wall where you want to hang the speakers one by one. Drill 2 holes slightly undersized for each bracket to ensure a firm fit.
- Page 45 Meet Philips at the Internet http://www.philips.com MCD299 CLASS 1 LASER PRODUCT Printed in China PDCC-JS-JW-0740 PageBack_MCD299_98 2007.9.27, 13:03...
Need help?
Do you have a question about the MCD299/98 and is the answer not in the manual?
Questions and answers