Table of Contents
Advertisement
Quick Links
Advertisement
Table of Contents

Related Manuals for Pulsar Trionyx T3


Summary of Contents for Pulsar Trionyx T3
- Page 1 Trionyx Manual...
-
Page 2: Table Of Contents
Content Specifications Description Package Contents Components and Controls Features Button Operation Using the Battery Pack Battery Charging Battery Installation Precautions Recommendations for Use External Power Supply Powering on and Image Settings Operating Modes Observation Modes IR Filter Microbolometer Calibration Discrete Digital Zoom Status Bar Quick Menu Functions Main Menu Functions... - Page 3 Video Recording and Photography Wi-Fi Function IR Illuminator SumLight™ Function Stadiametric Rangefinder Display-Off Function Stream Vision 2 Firmware Update USB Connection Technical Inspection Technical Maintenance Troubleshooting Legal Compliances and Disclaimers...
-
Page 4: Specifications
Specifications Model 77451 Microbolometer Type uncooled Resolution, pixels 384x288 Pixel size, microns Frame refresh rate, Hz Digital Sensor Type/Resolution, pixels CMOS/1280x720 Optical Specifications Magnification, x - Thermal imaging channel 2.5-10 - Digital channel 3.5-14 - Fusion mode 3.5-14 Lens, mm ... - Page 5 Detection distance (Object of "deer" type), m/y 1000/1093.6 - Thermal imaging channel 450/492.1 - Digital channel Diopter adjustment, D ±5 Display Type/Resolution, pixels AMOLED/1024x768 Operating Features Power Supply, V Battery type / Capacity / Rated Li-Ion Battery Pack TPS7 / 6400 Output Voltage mAh / 3.7 V 5 V, 9 V (USB Type-C Power...
- Page 6 Type / Wavelength, nm LED/850 * Actual operating time will depend to what extent the Wi-Fi and built-in video recorder is used. ** The reception range may vary depending on various factors: obstacles, other Wi-Fi networks.
- Page 7 Model 77452 Microbolometer Type uncooled Resolution, pixels 384x288 Pixel size, microns Frame refresh rate, Hz Digital Sensor Type/Resolution, pixels CMOS/1280x720 Optical Specifications Magnification, x - Thermal imaging channel 2.5-10 - Digital channel 3.5-14 - Fusion mode 3.5-14 Lens, mm ...
- Page 8 Display Type/Resolution, pixels AMOLED/1024x768 Operating Features Power Supply, V Battery type / Capacity / Rated Li-Ion Battery Pack TPS7 / 6400 Output Voltage mAh / 3.7 V 5 V, 9 V (USB Type-C Power External Power Supply Delivery) Battery Pack operating time (at t = 22 °C), h Degree of protection IP code...
- Page 9 ** The reception range may vary depending on various factors: obstacles, other Wi-Fi networks.
-
Page 11: Description
Description Trionyx Multispectral Fusion Binoculars combine the advantages of thermal imaging and digital night vision devices. Trionyx can be used both at night and during the day in adverse weather conditions (fog, smog, rain). Trionyx binoculars are designed for different types of use, such as night hunting, observation, terrain orientation, rescue operations, etc. ... -
Page 12: Package Contents
Package Contents Multispectral Fusion Binoculars Carrying Case TPS7 Battery Pack Battery Pack Charger Power Adapter USB Type-C Cable Quick Start Guide Neck strap Lens-Cleaning Cloth Warranty Card IR filter... -
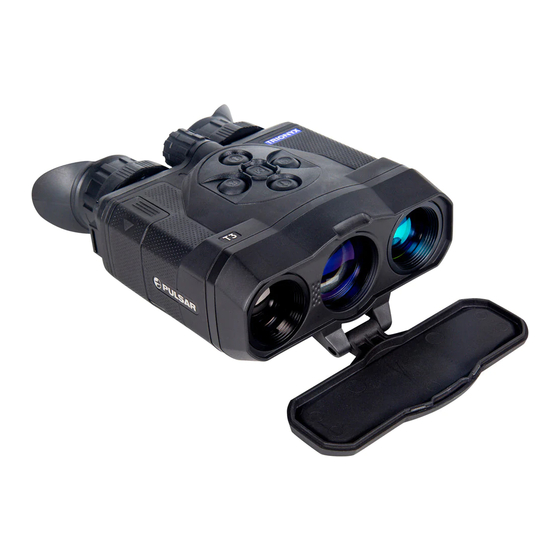
Page 13: Components And Controls
Components and Controls... - Page 14 1. Power ON/OFF/Calibration button 2. Navigation button UP/MODE 3. Button MENU 4. Recording button REC 5. Navigation button DOWN/ZOOM 6. Interpupillary distance adjustment rings 7. Diopter adjustment rings 8. Digital channel lens focus knob 9. Battery Pack 10. Battery Pack latch 11.
- Page 15 12. Radiator cooling system 13. Lens cover 14. Thermal imaging channel lens 15. Digital channel lens 16. IR illuminator 17. USB Type-C port 18. USB Type-C cable...
-
Page 16: Features
Features Microbolometer with a resolution of 384x288 pixels Microbolometer pixel size is 17 microns Digital sensor with a resolution of 1280x720 pixels Functional and ergonomic design Comfortable for long observation Variable interpupillary distance 1024x768 AMOLED display resolution High refresh rate 50 Hz Three operating modes: thermal imaging, digital, Fusion. - Page 17 Built-in photo and video recorder Integration with iOS and Android devices Wi-Fi remote control and viewing using a smartphone Storing photos and videos in Cloud when using the Stream Vision 2 App Battery Pack Quick Change Li-Ion Battery Pack TPS 7 Charging from USB Power Bank USB Power Delivery quick charge...
-
Page 18: Button Operation
Button Operation Operation Button Power device on short press Power device off long press for 3 secs long press for less than 3 Turn display off secs Turn display on short press Calibrate the microbolometer (for Thermal Imaging and short press Fusion modes) Switching modes of operation ... - Page 19 Stop video recording long press Switch to video / photo long press Capture Photo short press Main Menu Button Enter main menu long press Navigation upwards/rightwards short press Navigation short press downwards/leftwards Enter menu items short press Confirm selection short press Exit submenu without long press confirming selection...
-
Page 20: Battery Charging
Battery Charging Trionyx binoculars come with a TPS 7 rechargeable lithium-ion battery. TPS 7 batteries support USB Power Delivery fast charging technology when using a standard charging set of your Trionyx device (charger, USB Type-C cable, power adapter). Charge the battery before first use. ... - Page 21 Option 1 1. Insert the battery (9) along the guide to the stop into the TPS 7 charger slot (20) (see. Fig.). 2. Connect the plug of the USB Type-C cable (18) to the USB Type-C connector of the power adapter(22). Plug the power adapter (22) into a socket 100-240 V (110 V for US) (23).
- Page 22 4. LED indication(19) will display battery charge level (see Table). LED indication (19) in Battery charge status battery charging mode Battery level is from 0% to 25% Battery level is from 26% to Battery level is from 51% to Battery level is from 81% to The battery is fully charged.
- Page 23 * Standby mode – an operating mode in which the battery is inserted into the charger, but the power adapter is not connected. In this mode, the indication is on for 10 seconds. Attention! When using a power adapter that does not support USB Power Delivery fast charging technology, the flicker frequency of LED indicators is reduced by 3 times and charge time increases.
- Page 24 Option 2 1. Install the battery (9) into the device (see the Battery Installation section) 2. Connect the USB cable(18) to the USB Type-C connector (17) of the device. 3. Connect the other end of the USB cable (18) to the power adapter (22).
- Page 25 4. Plug the power adapter (22) into a 100-240 V socket (23).
-
Page 26: Battery Installation
Battery Installation 1. Lift the lever (10). 2. Insert the rechargeable battery(9) along the guide into the battery compartment. 3. Lock the battery (9) by lowering the lever(10). -
Page 27: Precautions
Precautions Always use the TPS 7 charger supplied with the device (or purchased separately) to charge TPS 7 batteries. Using an unsuitable charger can cause irreparable damage to the battery and fire. Do not charge the battery immediately after bringing it from cold to warm. -
Page 28: Recommendations For Use
Recommendations for Use The batteries should be partially charged (50 to 80 %) for long-term storage. The battery is to be charged at an ambient temperature of 0 °C to +35 °C or the lifespan of the battery will decrease significantly. When using the battery at sub-zero ambient temperatures, the battery capacity decreases. -
Page 29: External Power Supply
External Power Supply Show device diagram ... - Page 30 External power can be supplied from an external source, such as a Power Bank (5 V, 9 V).
- Page 31 1. Connect the external power source to the USB Type-C connector (17) on the device. 2. The device will switch to draw power from the external source while the TPS 7 battery will be gradually recharged. 3. A battery icon will appear on the display showing the percentage charge level.
-
Page 32: Powering On And Image Settings
Powering on and Image Settings Show device diagram ... - Page 33 1. Open the lens cover (13). 2. Press the ON/OFF (1) button briefly to turn on the device. 3. Set the pupillary distance by squeezing the eyepieces together or pulling farther apart while holding the adjustment rings (6). 4. Get a sharp image of the symbols on the displays by rotating the optical adjustment ring of the eyepieces (7).
- Page 34 6. For Thermal Imaging mode: Select the operation mode (Forest/Rocks/Identification/User) with a long press of the MODE (2) button. User mode allows you to setup and save custom brightness and contrast settings, as well as select one of the three modes as the base. Select the appropriate color palette with a long press of the DOWN (5) button or in the main menu (see the Color Modes...
- Page 35 operation: this is normal and allows an increase in the sensitivity of the device. When the device warms up significantly, the warning message “Your device needs to cool down before you can use it” will appear on the display, photo/video recording and WiFi will automatically turn off. The device needs to cool down to continue using these functions.
-
Page 36: Operating Modes
Operating Modes Show device diagram ... - Page 37 The device has three operating modes: Thermal Imaging, Digital and Fusion. To switch between operating modes, briefly press the MODE (2) button. Thermal Imaging Mode Thermal imaging mode is designed to detect the observed object. By converting thermal radiation into an image visible to the human eye, the device can detect many important details hidden from human vision.
- Page 38 external light sources – a thermal imaging microbolometer is sensitive to the objects' intrinsic radiation. As a result, the thermal imaging mode works equally well during the day and night as well as in utter darkness. Digital Mode Digital mode allows you to identify an object of observation, and visualize terrain and vegetation in detail.
-
Page 39: Observation Modes
Observation Modes Show device diagram ... - Page 40 Available in thermal imaging mode The device has four observation modes of the thermal imager: Forest (mode for object observation in low thermal contrast conditions), Rocks (mode for object observation in high thermal contrast conditions), Identification (high imagery resolution), User (personalized brightness and contrast settings). Select the observation mode with a long press of the UP/MODE (2) button.
- Page 41 Forest Mode. This is the best mode when searching and observing within field conditions, against the background of leaves, bushes and grass. The mode is highly informative about an object being observed as well as landscape details. Rocks Mode.This is the best mode for observing objects after a sunny day or within urban conditions.
-
Page 42: Ir Filter
IR Filter To increase the contrast and reduce the excessive brightness of the daytime image, insert an IR filter (24) (included in the delivery package) into the digital channel lens (25) of Trionyx binoculars. ... -
Page 43: Microbolometer Calibration
Microbolometer Calibration Show device diagram ... - Page 44 Available in thermal imaging and Fusion modes The calibration evens out the microbolometer’s temperature background and eliminates the imperfections of the thermal image (such as vertical stripes, phantom images, etc.) that appear during binoculars operation. There are three calibration modes: manual (M), semi-automatic (SA) and automatic (А).
- Page 45 Press briefly the ON/OFF (1) button. Open the lens cover (13). Mode SA (semi-automatic) Press briefly the ON/OFF (1) button to calibrate. You do not need to close the lens cover (the microbolometer is closed with the internal shutter automatically). Mode А (automatic) The device calibrates by itself according to the firmware algorithm.
-
Page 46: Discrete Digital Zoom
Discrete Digital Zoom Show device diagram ... - Page 47 The device allows you to quickly increase the basic magnification by 2 or 4 times. To operate the discrete digital zoom, press successively theZOOM (5) button. The digital zoom will not be saved after the device is re-started.
-
Page 48: Status Bar
Status Bar The status bar is at the bottom of the image and displays data on the device status, including: 1. Operating mode: - Thermal Imaging - Digital - Fusion 2. Color palette (shown only if the "Black Hot" palette is selected) 3. - Page 49 6. Wi-Fi connection 7. Time 8. Power Indication: - charge level if the device is powered by a battery - charge level if the device is charging and powered by a battery - no battery, the device is connected to an external power supply 9.
-
Page 50: Quick Menu Functions
Quick Menu Functions Show device diagram ... - Page 51 The quick menu is used to access basic device settings such as brightness and display contrast, smooth digital zoom, stadiametric rangefinder. Enter the menu by briefly pressing the MENU (3). A short press of the МENU (3) button enables you to toggle between functions, as described below.
- Page 52 Brightness – press the UP (2)/DOWN (5) buttons to change display brightness from 0 to 20. Contrast – press the UP (2)/DOWN (5) buttons to change image contrast from 0 to 20. Base Mode – allows you to select one of the three observation modes (Forest, Rocks, Identification) as the base for the User mode ( available in thermal imaging mode).
-
Page 53: Enter The Main Menu
Enter the Main Menu Show device diagram ... - Page 54 1. Enter the main menu with a long press of the MENU (3) button. 2. Press the UP (2)/DOWN (5) buttons to move through the menu items. 3. Press the MENU (3) button briefly to select the menu item. 4. Press and hold the MENU (3) button to exit the menu or wait for 10 seconds to exit automatically.
- Page 55 Tab 2...
-
Page 56: Image Detail Boost
Image Detail Boost https://www.youtube.com/embed/GNezJKveMRc Show device diagram ... - Page 57 Available in thermal imaging mode TheImage Detail Boost function enhances image detail. The results of the function depend on the selected mode and the observation conditions: the higher the object contrast the more noticeable the effect. This option is disabled by default, but it can be enabled from the main menu. Turn on/off Image Detail Boost:...
- Page 58 1. Press and hold down the МENU (3) button to enter the main menu. 2. Select the Image Detail Boost menu option with the UP (2)/DOWN (5) buttons. 3. Turn Image Detail Boost on/off with a short press of the МENU (3) button.
-
Page 59: Color Modes
Color Modes Show device diagram ... - Page 61 Available in thermal imaging mode Basic color mode is White Hot. To select another palette: 1. Press and hold down the МENU (3) button to enter the main menu. 2. Select the Color Modes icon with the UP (2)/DOWN (5) buttons. 3.
- Page 62 high temperature) Red Hot Red Monochrome Rainbow Ultramarine Violet Sepia Notes: To quickly change color modes press and hold the DOWN (5) button. In Fusion mode, there is only one Fusion palette that does not change.
-
Page 63: Calibration Mode
Calibration Mode Show device diagram ... - Page 64 Available in thermal imaging and Fusion modes There are three calibration modes: manual (M), semi-automatic (SA) and automatic (А). 1. Press and hold down the MENU (3) button to enter the main menu. 2. Select the Calibration Mode option with the UP (2)/DOWN (5) buttons.
-
Page 65: Icon Brightness
Icon Brightness Show device diagram ... - Page 66 Icon brightness 1. Press and hold the МENU (3) button to enter the main menu. 2. Use the UP (2)/DOWN (5) buttons to select the Icon Brightnessicon 3. Press the МENU (3) button briefly to enter the submenu. 4. Use the UP (2)/DOWN (5) buttons to select the desired brightness level from 0 to 10.
-
Page 67: General Settings
General Settings Show device diagram ... - Page 68 This menu section allows you to change the interface language, set the date, time, units of measure, return the device to factory default settings and perform memory card formatting. 1. Press and hold the MENU (3) button to enter the main menu. 2.
- Page 69 Language selection 1. Press the MENU (3) button briefly to enter the Language menu item. 2. Use the UP (2)/DOWN (5) buttons to select one of the available interface languages: English, German, Spanish, French, Russian, Italian, Portuguese, Dutch, Danish, Norwegian, Swedish, Polish, Czech, Hungarian.
- Page 70 Units of Measure Rangefinder units of measure 1. Press the MENU (3) button briefly to enter the Units of Measure menu item. 2. Press the UP (2)/DOWN (5) buttons to select either Meters or Yards as the unit of measure. 3. Press the MENU (3) button briefly to confirm your selection. 4.
- Page 71 Attention!When restoring the factory defaults the date, time and user pixel map are saved. Format This function enables you to format the Flash memory card. All files will be deleted. Formatting should be carried out in case of a memory card error. Before formatting, make sure you transfer all footage to other media.
-
Page 72: Wi-Fi Activation
Wi-Fi Activation Show device diagram ... - Page 73 Turning Wi-Fi on/off 1. Press and hold the MENU (3) button to enter the main menu. 2. Use the UP (2)/DOWN (5) buttons to select the Wi-Fi Activation icon. 3. Press the MENU (3) button briefly to turn Wi-Fi on / off.
-
Page 74: Wi-Fi Settings
Wi-Fi Settings Show device diagram ... - Page 75 This menu option allows you to set up your device for operation in a Wi-Fi network. 1. Press and hold down the МENU (3) button to enter the main menu. Image not found or type unknown 2. Select the Wi-Fi Settings menu option with the UP (2)/DOWN (5) buttons.
- Page 76 from an external device. The password is used to connect an external device (i.e. smartphone) to your thermal imager. 1. Press briefly the МENU (3) button to enter the Password Setup submenu. 2. The default password (12345678) will appear on the screen. 3.
-
Page 77: Device Information
Device Information Show device diagram ... - Page 78 This option allows the user to view the following information about the device: Full name SKU number Serial number Firmware version Hardware version Service information To display information, do the following: 1. Press and hold down theМENU (3) button to enter the main menu. 2.
- Page 79 buttons. 3. Press briefly the МENU (3) button to confirm.
- Page 80 Video Recording and Photography Show device diagram ...
- Page 81 Trionyx binoculars feature video recording and photography of the image being ranged to the internal memory card. Before using photo and video functions, please read the subsections Date, and Time in the General Settings section. The built-in recorder operates in two modes - Video and Photo. Video mode.
- Page 82 4. Upon start of video recording icon disappears, and icon REC and recording timer in the format MM:SS (minutes : seconds) appear instead: 5. Pause and resume recording video with a short press of the REC (4) button. 6. Press and hold the REC (4) button to stop and save the video. 7.
- Page 83 Download links are shown below: VLC Video Player http://www.videolan.org/vlc/download-macosx.html ELMEDIA Video Player https://apps.apple.com/us/app/elmedia-multiformat- video/id937759555?mt=12...
- Page 84 Wi-Fi Function The device has a function enabling wireless communication with external devices (smartphone or tablet) via Wi-Fi. Turn on the wireless module in the WI-Fi Activation menu option. Wi-Fi operation is shown in the status bar as follows: Connection status Status bar indication Wi-Fi is off Wi-Fi activated by the user,...
- Page 85 IR Illuminator Show device diagram ...
- Page 86 Available in digital and Fusion modes The device is equipped with a IR Illuminator which provides significant increase in observation range in lowlight conditions and in the darkness. 1. To activate the IR illuminator, press and hold the UP (2) button. IR Image not found or type unknown power level upon start is minimal 2.
- Page 87 Image not found or type unknown Image not found or type unknown > ) successively. 4. To turn the IR illuminator off, switch the power level with successive long presses of the UP (2) button until the icon in the status bar changes to...
- Page 88 SumLight™ Function Show device diagram ...
- Page 89 Available in digital and Fusion modes The SumLight™ function substantially increases the sensitivity of the digital channel sensor in the event of a reduction in the light level, thus enabling observation in conditions of low light without using the IR illuminator. 1.
- Page 90 “blurred”. Such effects are not defects. Luminous white dots (pixels) may be visible on the image. The number of dots may increase when the SumLight™ function is enabled. This is due to the peculiarities of this function and is also not a defect.
- Page 91 Stadiametric Rangefinder Show device diagram ...
- Page 92 Trionyx binoculars are equipped with a stadiametric rangefinder which allows the user to determine the approximate distance to an object of a known size with reasonable accuracy.
- Page 93 1. Select the Stadiametric Rangefinder function with short presses of the МENU (3) button until the icon is selected. 2. The following will be displayed: lines to determine the distance, icons of three objects and digits of the determined distance to three objects. 3.
- Page 94 Display-Off Function Show device diagram ...
- Page 95 The Display-Off function deactivates transmission of image to the displays by minimizing their brightness. This prevents accidental disclosure. The device keeps running. 1. When the device is on, hold down theON/OFF (1) button. The displays go out, the message "Display off" appears.
- Page 96 2. To activate the displays, press briefly the ON/OFF (1) button. 3. When you press and hold the ON/OFF(1) button, the displays shows the message "Display off" with a countdown. Pressing & holding the button down for the duration of the countdown will power the device off completely.
- Page 97 Stream Vision 2 Trionyx binoculars support Stream Vision and Stream Vision 2 mobile apps that allow you to stream real-time image from your device to your smartphone or tablet via Wi-Fi. We recommend using the latest version – Stream Vision 2. ...
- Page 98 You can find further guidelines on Stream Vision here. Download from Google Play Download from App Store Find answers to frequently asked questions about using Stream Vision here. Stream Vision 2 Manual Android https://e.issuu.com/embed.html?d=stream_vision_2_quick_guide_for_android_en&hideIss https://e.issuu.com/embed.html?d=stream_vision_2_quick_guide_for_ios_en&hideIssuuLo...
- Page 99 Pulsar device is connected to phone, please turn on mobile data transfer (GPRS/3G/4G) to download update; if your Pulsar device is not connected to your phone but is already listed in “Settings” > “My devices” section, you may use Wi-Fi to download update.
- Page 100 Pulsar device is connected to phone, please turn on mobile data transfer (GPRS/3G/4G) to download update; if your Pulsar device is not connected to your phone but it's already in the “My Devices” section, you may use Wi-Fi to download update.
- Page 101 USB Connection Show device diagram ...
- Page 103 1. Connect one end of the USB Type-C (18) to the USB Type-C (17) port of your device and the other end to the USB port of your PC / laptop. 2. Turn the device on with a short press of the ON/OFF(1) button (a device that has been turned off cannot be detected by your computer).
- Page 104 Memory Card (external memory) In this mode the device is detected by the computer as a flash card. This mode is designed for work with the files saved in the device's memory. The device's functions are not available in this mode; the device turns off automatically.
- Page 105 Technical Inspection It is recommended to carry out a technical inspection before each use of the device. Check the following: The device appearance (there should be no cracks on the body). Condition of objective lenses, oculars and IR illuminator (there should be no cracks, grease spots, dirt or other deposits).
- Page 106 Technical Maintenance Maintenance should be carried out no less frequently than twice a year, and should consist of the following measures: Wipe external plastic and metal surfaces with a cotton cloth to remove dust and dirt. To avoid damage to the paint coating, do not use chemically active substances, solvents, etc.
- Page 107 Troubleshooting The device does not turn on Possible cause Battery Pack is discharged. Solution Charge the Battery Pack. The device does not operate from an external power source Possible cause The USB cable is damaged. Solution Replace the USB cable. ...
- Page 108 Possible cause Calibration is required. Solution Perform the calibration according to Microbolometer Calibration section. Poor quality image. There is noise or ghost images of previous scenes or objects Possible cause Manual calibration has been performed with the lens cover open. Solution Check the Calibration Mode, close the lens cover and...
- Page 109 Possible cause These problems may occur during observation in adverse weather conditions (snow, rain, fog, etc.). Smartphone or tablet PC cannot be connected to the device Possible cause Device password has been changed. Solution Delete the network and connect again using the password saved in the device.
- Page 110 obstacles between the device and the smartphone or tablet (e.g., concrete walls). Solution Relocate smartphone or tablet into the Wi-Fi signal line of sight. More information on solving problems with connection by following the links: Stream Vision FAQ, Stream Vision 2 FAQ.
- Page 111 Possible cause In positive temperature conditions the observation objects (environment, background) are heated in different ways due to different thermal conductivity. As a result, a high temperature contrast is achieved and therefore the image quality formed with binoculars is higher. At low operating temperatures, objects under observation (background) normally cool down to roughly identical temperatures, which leads to reduced temperature contrast and to image quality (precision)
- Page 112 Legal Compliances and Disclaimers Attention!A license is required for Trionyx Multispectral Fusion Binoculars when exporting outside your country. Electromagnetic compatibility.This product complies with the requirements of European standard EN 55032: 2015, Class A. Caution:Operating this product in a residential area may cause radio interference.
Need help?
Do you have a question about the Trionyx T3 and is the answer not in the manual?
Questions and answers
How do I set the screen color, I want white hot?
To set the screen color to White Hot on the Pulsar Trionyx T3, access the main menu, navigate to the Color Modes section, and select White Hot.
This answer is automatically generated