
Related Manuals for KEKAI KT3000


Summary of Contents for KEKAI KT3000
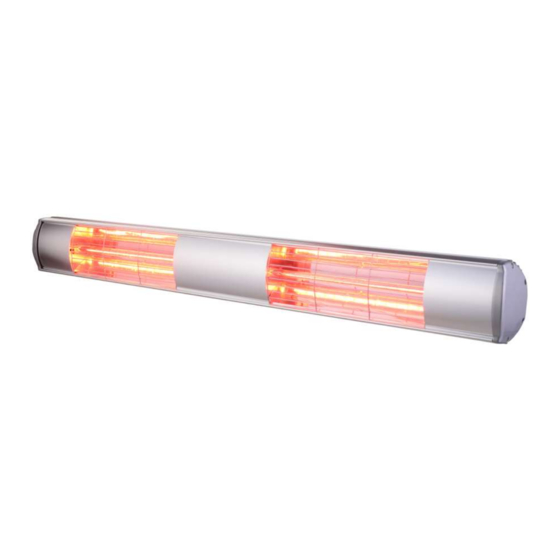
- Page 1 ESTUFA INFRARROJOS HALOGENO GOLDEN TUBE 3000W 103,5 CM - IP65 REF: KT3000 Manual de instrucciones Instruction manual...
- Page 2 MANUAL DE INSTRUCCIONES ESPAÑOL Gracias por comprar su nuevo calentador infrarrojo. Estas instrucciones de funcionamiento le ayudarán a usarlo de forma adecuada y segura. Le recomendamos que pase algún tiempo leyendo este manual de instrucciones para que entienda completamente todas las características operativas que ofrece.
- Page 3 Advertencias de seguridad Siga todas las precauciones de seguridad que se indican a continuación para mayor seguridad y para reducir el riesgo de lesiones o descargas eléctricas. Lea atentamente este Manual de instrucciones para maximizar el rendimiento de este aparato y conservarlo para futuras referencias. Asegúrese siempre de que el voltaje de la fuente de alimentación coincida con la etiqueta de clasificación de este aparato.
- Page 4 No intente reparar ni ajustar ninguna función eléctrica o mecánica en esta unidad. La unidad no contiene ninguna pieza de servicio al usuario. Sólo un electricista calificado debe realizar mantenimiento o reparaciones. Intentar reparar la unidad usted mismo anulará su garantía. Si el cable de red está...
- Page 5 Para desconectar el calentador, apague los controles y, a continuación, retire el enchufe del enchufe. No desenchufe tirando del cable de alimentación. Desenchufe siempre la unidad y asegúrese de que la unidad esté completamente fría antes de moverse, limpiarla o almacenarla. Este calentador está...
-
Page 6: Instalación
1. Instalación Antes de la instalación, los siguientes asuntos necesitan su atención. 1. Los productos deben ser puestos suavemente. 2. No se recomienda la instalación en entornos ácidos y alcalilinos. 3. El producto debe estar terroso. 4. Los productos están obligados a comprobar la marca del producto en la tensión y la tensión local si se cumplen. - Page 7 II. Introduzca los seis anclajes de pared de plástico en los tres orificios. III. Fije el soporte con tres tornillos y asegúrese de que los puntos de instalación están fijados de forma segura. IV. Antes de fijar el calefactor, compruebe el interruptor basculante del lado...
-
Page 8: Mantenimiento
derecho y luego fije el soporte al calefactor con dos tornillos M6*14 y tuercas de mariposa 4.Instrucciones de funcionamiento El interruptor basculante del lado derecho controla el encendido/apagado. 5.Mantenimiento y limpieza Mantenimiento ¡Atención! Se requiere un mantenimiento riguroso y regular del calefactor de infrarrojos para lograr un funcionamiento prolongado y eficiente del producto. - Page 9 2- El número de comprobaciones puede incrementarse en función de la cantidad de polvo en el ambiente. 3- Compruebe visualmente la deformación del reflector, el cable y el marco mientras limpia el aparato. En caso de detectar cualquier deformación, consulte a un técnico cualificado. 4- Compruebe visualmente el cable de alimentación y el enchufe mientras limpia el aparato.
- Page 10 El símbolo del producto o de las instrucciones significa que su equipo eléctrico y electrónico debe ser eliminado al final de su vida útil por separado de los residuos domésticos. Existen sistemas de recogida separados para el reciclaje en la UE. Para obtener más información, póngase en contacto con la autoridad local o su distribuidor donde compró...
- Page 11 INSTRUCTION MANUAL ENGLISH Thank you for purchasing your new Wall Mounted Infrared Heater. These operating instructions will help you use it properly and safely. We recommend that you spend some time reading this instruction manual in order that you fully understand all the operational features it offers. Read all the safety instructions carefully before use and keep this instruction manual for future reference.
- Page 12 Safety Warnings Please follow all the safety precautions listed below for safety and to reduce the risk of injury or electrical shock. Read this Instruction Manual carefully to maximize this appliance’s performance and keep for future reference. Always ensure that your power supply voltage matches this appliance’s rating label.
- Page 13 repair the unit yourself will void your warranty. If the mains cable is damaged it must be replaced by the manufacturer, its service agent, or similarly qualified persons in order to avoid a hazard. Do not handle the element with bare hands. If it is inadvertently touched, remove finger marks with a soft cloth and methylated spirits or alcohol, otherwise the marks will burn into the element causing premature heater failure.
- Page 14 This heater is intended for domestic use only and should not be used commercially for contract purposes. Any alternative use, not recommended by the manufacturer, may result in fire, electric shock, or injury to persons. The use of attachments on the heater is not recommended. Warning: This heater does not equipped with a device to control the room temperature.
-
Page 15: Installation
1. Installation Before the installation, the following matters need your attention. 1. Products should be put down gently. 2. Installation in acidic and alkaline environments is not recommended. 3. The product must be earthed. 4. The products are required to check the product brand mark on the voltage and the local voltage whether conform. - Page 16 II. Insert the six plastic wall anchors into the six holes. III. Fixed the bracket using six ST4*35 screws and make sure the installation points are fixed securely.
-
Page 17: Maintenance
IV. Before fixing the heater, make sure the rocker power switch on the right side and then fixed the bracket to the heater using four M6*14 screws and butterfly nuts. 4. Operating Instructions The rocker power switch on the right side controls power on/off. 5.Maintenance and Cleaning Maintenance Attention! Careful and regular maintenance of Infrared Heater is required to... -
Page 18: Specifications
1- Check the cleanliness of the Reflector and IR-Filament at least once a month. If necessary, apply cleaning and maintenance instructions. 2- The number of checks may be increased considering the amount of dust in the environment. 3- Check the deformation of the Reflector, Wire and Frame visually while cleaning the appliance. - Page 19 The symbol on the product or in the instructions means that your electrical and electronic equipment should be disposed at the end of its life separately from your household waste. There are separate collection systems for recycling in the EU. For more information, please contact the local authority or your retailer where you purchased the product.
- Page 20 Oficina KOVYX OUTDOOR S.L Servicio Post-Venta Tel: (+34) 911 34 50 46 Tel: (+34) 918 09 62 29 C/ de las Moreras 1 - Naves 7-10 Email: info@kovyx.com Email: spv@kovyx.com Pol. Ind. Camporrosso Sur Av. de Andalucía, 208, 28350 - Madrid 28341 Valdemoro, Madrid www.kovyx.com...
Need help?
Do you have a question about the KT3000 and is the answer not in the manual?
Questions and answers