
Related Manuals for KEKAI KTP2090


Summary of Contents for KEKAI KTP2090
- Page 1 Calefactor Pared Cerámico PTC Split Dual Ultraslim 2000W c/ mando - 59 x 14 x 22 cm REF: KTP2090 8445401003786 Manual de instrucciones Instruction manual...
- Page 2 CALEFACTOR DE CERÁMICA MANUAL DE INSTRUCCIONES Modelo: KTP2090 LEA Y GUARDE LAS INSTRUCCIONES LEA ATENTAMENTE LOS CONSEJOS DE SEGURIDAD ANTES DE UTILIZAR EL APARATO Advertencia: riesgo de incendio, descarga eléctrica, lesiones físicas y daños materiales. Antes de utilizar este aparato, siga en todo momento los consejos de seguridad durante el montaje, uso y mantenimiento.
-
Page 3: Instalación
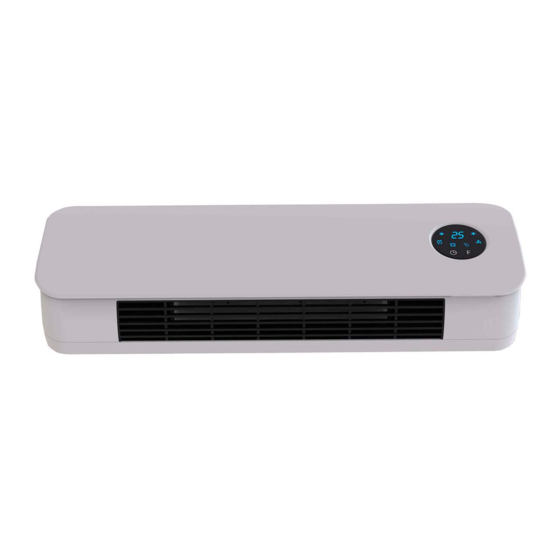
estén bajo supervisión continua. Los niños de entre tres y ocho años solo deben encender y apagar el aparato siempre que se haya colocado o instalado en la posición de funcionamiento normal prevista y hayan recibido supervisión o instrucciones sobre el uso del aparato de forma segura y comprendan los peligros existentes. - Page 4 tubo de plástico inflado, fije el gancho al tubo con un tornillo. Asegúrese de que el gancho esté firme y cuelgue el calefactor. El pasador debajo del gancho debe introducirse en la parte inferior del calefactor. Panel de control: Pantalla led Botón de control Ventana receptora del mando a distancia Mando a distancia:...
- Page 5 1. Enchúfelo y enciéndalo con el interruptor rojo 0/I; el producto entra en modo de espera y la pantalla muestra « »: 2. Pulse el botón « » una vez para entrar en el modo de ventilador y la pantalla mostrará «--» (foto A).
- Page 6 puede establecer la hora de activación programada en 1-12 horas. Después de completar el ajuste, la pantalla muestra la hora de activación programada y se enciende la luz « ». En la pantalla, se resta automáticamente 1 hora por cada hora que pasa. Cuando llega la hora de encendido programada, el producto se enciende automáticamente.
- Page 7 4. Defina la HORA/DÍA actuales (se puede configurar tanto en modo de espera como en estado de funcionamiento): Pulse el botón « » una vez; la pantalla muestra «12» de forma predeterminada. Pulse el botón « » para configurar la hora actual. Vuelva a pulsar el botón « »...
- Page 8 Nota: Para configurar la temperatura, usará el modo de funcionamiento inteligente: 1) Ajuste de temperatura - temperatura ambiente >2 ℃, con potencia alta. 2) 0 ℃<Ajuste de la temperatura – temperatura ambiente=<2 ℃, funcionamiento a potencia baja. 3) Ajuste de la temperatura - temperatura ambiente = 0 ℃; el ventilador de enfriamiento funcionará...
- Page 9 4) Pulse « »; la pantalla muestra «P1~P6» (para cada día, se puede configurar un máximo de seis periodos de tiempo). Ajuste P1: vea el ejemplo C a continuación. 5) Pulse « », la pantalla muestra «00» por defecto. Pulse « »...
-
Page 10: Especificaciones
Definición de la detección de ventana abierta (SOLO con el mando a distancia): 1) Pulse « » para que el producto entre en estado de funcionamiento. Se activará la calefacción hasta que se estabilice. 2) Pulse el botón « » con el mando a distancia; se enciende la luz « / ℃»;... -
Page 11: Mando A Distancia
Clase II MANDO A DISTANCIA El mando a distancia requiere una pila de litio CR2025 de 3 V ¡. Importante: siga las instrucciones de uso y las reglas de reciclaje que se encuentran en el paquete de la pila. 1- Abra el compartimento de la pila deslizando la tapa hacia abajo. 2- Introduzca la pila en el compartimento, observando la polaridad en el diagrama (vea la siguiente ilustración). - Page 12 Requisito informativo para los aparatos de calefacción local eléctricos Identificador(es) del modelo: KTP2090 Artículo Símbolo Valor Unidad Artículo Unidad Tipo de entrada de calor, solo para calefactores eléctricos de almacenamiento local (seleccione uno) Potencia calorífica Potencia calorífica nominal Control manual de carga de calor,...
-
Page 13: Ceramic Heater
CERAMIC HEATER INSTRUCTION MANUAL Model: KTP2090 READ AND SAVE THIS INSTRUCTION PLEASE READ THE SAFETY ADVICE CAREFULLY BEFORE USING THE APPLIANCE Warning: risk of fire, electric shock, physical injuries and material damage. Before using this appliance,always follow the safety advice during assembly, use and maintenance. -
Page 14: Installation
supervised. Children aged from 3 years and less than 8 years shall only switch on/off the appliance provided that it has been placed or installed in its intended normal operating position and they have been given supervision or instruction concerning use of the appliance in a safe way and understand the hazards involved. - Page 15 inflated plastic pipe, fixed pothook on the pipe with screw. Make sure pothook fastness and hang the heater. The clip under the pothook should be inserted rabbet of the heater bottom. Control panel: LED display Control button Receiver window of remote control Remote control:...
- Page 16 1. Plug in and switch on by pressing the red switch 0/I, enter into standby mode and display shows“ ”: 2. Press” “ button for one time, enter into fan mode and the display show “--”(photo A) . Press second time , the product works in low heating and display shows like photo B Press third time, changes to high heating and display shows like photo C , then Press fourth time , enter into in standby mode and display shows“--”,like photo A.
- Page 17 5. Appointment “ON”: In standby mode, press timer button, you can set the appointment turn-on time in 1-12 hours. After complete setting, the display shows the appointment turn-on time and also the light ” “ is on. The display automatically decreases 1 hour for each hour passed.
- Page 18 4. Set current TIME/DAY (can set both under standby mode & working status): Press ” ”button for one time, the display shows ”12“ as default,press“ “ to set current hour; press “ “ again, the display shows minute “ 30“, press” “...
- Page 19 When setting temperature, it will use SMART working way: 1)Setting temperature – ambient temperature>2℃, working with high power; 2)0℃<Setting temperature – ambient temperature=<2℃, working with low power; 3)Setting temperature – ambient temperature=0℃, the cool fan will work for 30seconds to below out the heating left inside, then enter into standby mode.
- Page 20 5).Press” “,the display shows 00”as default. Press” “ continuously to set the turn-on time. Such as set the turn-on time 7:00am P1:See below :D (Memo: the setting time 0-24 for choice) 6).Press” “,the display shows the previous step turn-on time by default. Press ”...
-
Page 21: Specifications
display”23”by default.Press” “to set target temperature. During open-window detection mode, once the ambient temperature drops 5-10℃ within 10 minutes, then the product will stop working within 30 minutes and enter into stand by mode. Then press “ ”to turn on the product. Press ”... -
Page 22: Cleaning And Maintenance
CLEANING AND MAINTENANCE 1. If you don’t use the heater for a long time, please wipe the surface and put it into the box. Lay the carton on the ventilated and dry place. Humidity and force press was prohibited. 2. Wait for the machine being cool and pull out the plug, then clean it. Wipe it clean with wet washcloth or cleaner. - Page 23 Information requirment for the electric local space heaters Model identifier(s): KTP2090 Item Symbol Value Unit Item Unit Type of heat input, for electric storage local space heaters only (select one) Heat output Nominal heat output manual heat charge control, Pnom...
- Page 24 Oficina KOVYX OUTDOOR S.L Servicio Post-Venta Tel: (+34) 911 34 50 46 Tel: (+34) 918 09 62 29 C/ de las Moreras 1 - Naves 7-10 Email: info@kovyx.com Email: spv@kovyx.com Pol. Ind. Camporrosso Sur Av. de Andalucía, 208, 28350 - Madrid 28341 Valdemoro, Madrid www.kovyx.com...
Need help?
Do you have a question about the KTP2090 and is the answer not in the manual?
Questions and answers