Table of Contents
Advertisement
Quick Links
Advertisement
Table of Contents

Related Manuals for Velocity NoteMagix M10


Summary of Contents for Velocity NoteMagix M10
- Page 1 NoteMagix ™ User’s Guide...
- Page 2 M10. Changes may be made periodically to the information in this publication. Velocity Micro makes no representation or warranties, either expressed or implied, with respect to the contents hereof and specially disclaims the implied warranties of merchantability or fitness for a particular purpose.
-
Page 3: Table Of Contents
CONTENTS CHAPTER 1 GETTING TO KNOW THE M10 .......7 CHAPTER 3 USING YOUR M10 ..........25 1.1 FRONT VIEW .................. 8 3.1 AC ADAPTER ................25 1.2 LEFT VIEW ..................9 3.2 LITHIUM ION ( LI-ION) BATTERY PACK ......25 1.3 RIGHT VIEW ................. - Page 4 NoteMagix M10 User’s Guide Congratulations on the purchase of your Velocity Micro NoteMagix M10. Since 1992, we have made it our mission to create the very fi nest ultra performance notebooks and desktop PCs on the planet. Your M10 has been designed and assembled by master craftsmen obsessed with perfection to create a notebook unlike any other you’ve ever owned.
- Page 5 With proper care and maintenance, your NoteMagix M10 will provide years of operation. DO NOT place the M10 on uneven or unstable work surfaces. Contact Velocity Micro if the casing becomes damaged. DO NOT expose or use the M10 near liquids, rain, or moisture. Avoid using the LAN connection during an electrical storm.
- Page 6 Taking care of your battery pack Using only Velocity Micro Li-Ion batteries. Always turn the power off before removing or replacing batteries. DO NOT tamper with batteries in any way. Keep away from children. Dispose of used batteries according to local regulations.
-
Page 7: Chapter 1 Getting To Know The M10
Your NoteMagix M10 is a slim, sleek, ultra-portable, fully Windows® compatible computer, ready to meet your needs, right out of the box. From personal productivity to entertainment and professional applications, the NoteMagix M10 has been specially designed to be the perfect ultra mobile system both at home and on the road. -
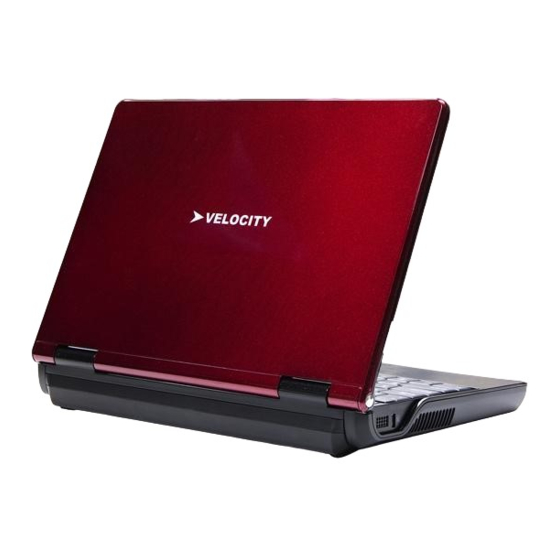
Page 8: Front View
NoteMagix M10 User’s Guide 1.1 Front View Icon Item Description Web Camera Built-in 1.3 Mega pixel camera lets you to snap a photo or create a video chat or video conference with just click. Display Panel Color LCD panel with back lighting for crystal clear text and graphics. -
Page 9: Left View
Array Microphone Built-in array microphone is an omni-directional audio input device., allowing for the stereo recep- tion and transmission of voice and/or other audio data to any program capable of accepting such input. Touch Pad Touch Pad device is a mouse-like cursor control with two buttons and touch sensitive movement pad. -
Page 10: Right View
NoteMagix M10 User’s Guide 1.3 Right View 1.4 Back View Icon Item Description Icon Item Description USB port Connect peripheral equipment MIC jack To connect an external MIC for with a universal USB 2.0 interface. inputting audio. LAN RJ45 jack Connects your M10 to the inter- Earphone To connect external headphones. -
Page 11: Bottom View
1.5 Bottom View Icon Item Description Battery supplies power to the M10 when the AC power is disconnected. Battery latch Locks the battery into place. Air in Inputs cool air into the M10 for fl awless operation. HDD Cover To uninstall or change a hard drive Memory Cover To uninstall or change Memory. -
Page 12: Status Indicators
NoteMagix M10 User’s Guide 1.6 Status Indicators Icon Item Description Power indicator Illuminates when the computer is powered on. HDD Activity indicator The Hard Disk Drive (HDD) Activity indicator tells you whether your internal hard drive is being accessed and, if so, how fast. -
Page 13: Chapter 2 Learning The Basics
Chapter 2 Learning the Basics This Chapter will go over the basics of operating your Velocity Micro M10 and teach you how to get the maximum use and enjoyment from your new netbook. Did you know…Velocity Micro also makes the VMdrive, a sleek and stylish DVD drive that’s the perfect accessory for your new M10. -
Page 14: Connect Ac Adapter
2. Connect the power cable to AC adapter. 3. Connect the power cable to a live electrical outlet. Warning: The AC adapter is specially made for the Velocity Micro M10. Do not use with other electronics and do not use other AC adapters with the M10. -
Page 15: Turn On/Turn Off The M10
2.3 Turning on/off the M10 Turning on your M10 Press the power button for about one second to turn on the M10. Turn off the M10 To shut down the system, access the Windows menu: Click “Start”, then “Turn off” select “Turn off” Notice: To manually shut down, hold down the power key for four seconds. -
Page 16: Connection To The Internet
NoteMagix M10 User’s Guide 2.4 Connecting to the Internet Using the LAN Port The M10 comes with an internal 10Base-T/100Base-TX LAN and 1000Mbps module that connects your notebook to other notebook/networks, access the Internet, and supports data transfer rates of 10Mbps up to 100Mbps. The built-in LAN module provides a standard RJ-45 connector. -
Page 17: Using The Touchpad
2.5 Using Touch pad The built-in touch pad is a PS/2-compatible pointing device that senses movement on its surface. The cursor responds as you move your fi nger on the surface of the touchpad. The central location on the palm rest provides optimum comfort and support. -
Page 18: Using The Keyboard
NoteMagix M10 User’s Guide 2.6 Using the Keyboard Your M10 is equipped with an 87-key keyboard that provides all of the functionality of a full-sized 101 or 102-key keyboard. Aside from the standard typewriter-layout of the keys, there are a number of extra features including function controls and hot-keys on the built-in keyboard. - Page 19 Key features and operations are described below: Function Keys The function keys F1 through F12 are application-driven. These keys work together with the Fn key to activate special functions. Some keys (printed in blue on keypad) are preprogrammed with dual functions. Control keys Ctrl, Alt, Fn, and Shift are controls used in conjunction with other keys to change their functions.
- Page 20 NoteMagix M10 User’s Guide Basic Keyboard Functions Keypad Function Description <Enter> key. Execute a command. Within many text editing application programs, the <Enter> key inserts a hard carriage return. <Esc> key. Press this key to cancel or escape from a command or function.
- Page 21 Keypad Function Description <Shift> key. Press this key in combination with alphabet letters to produce uppercase letters in typing. Use this key in combination with those two-character keys (found on the second row of the keyboard) to produce the upper marked keys. Also used in most applica- tion program in combination with other keys to execute a certain command.
- Page 22 NoteMagix M10 User’s Guide Cursor Control Keys Keypad Function Description Up arrow key. Moves the cursor up one line at a time. Down arrow key. Moves the cursor down one line at a time. Left arrow key. Moves the cursor to the left one space at a time.
- Page 23 <Fn>+<PgDn> key. Moves the cursor down one screen at a time. <End> key. Moves the cursor to the end of a screen or line. Windows Hot Keys Keypad Function Description <Start> key. Pulls up the Windows Start menu. <Right Click> key. Performs a mouse right-click function. Welcome to the New PC Experience...
- Page 24 NoteMagix M10 User’s Guide Fn Combination Keys (Hot Keys) Use the Fn key combined with other keys to activate, close or set special functions. These combinations are also called Hot Keys. To use the Hot Keys, press and hold down <Fn> together with the keys listed below.
-
Page 25: Chapter 3 Using Your M10
3.1 AC adapter The AC adapter provides external power to your NoteMagix M10 and charges the internal battery pack at the same time. The AC adapter also has an auto-switching design that can connect to any 100VAC ~ 240VAC power outlet. - Page 26 NoteMagix M10 User’s Guide Remove the battery pack from the unit if the M10 will be stored for more than 2 weeks. Warning: Do not expose battery packs to temperatures below 32ºF or above 122ºF. Charging the battery To charge the battery, slide the battery pack into the battery bay and plug the AC adapter into the M10 and an electrical outlet.
- Page 27 Checking the battery level Using the Windows battery meter: The Windows battery meter indicates the present battery level. Simply rest your cursor on the battery meter (or AC plug) icon on the taskbar to see the present charge level of your battery. Optimizing battery life This section helps you get the most out of battery operation.
-
Page 28: Configuring Your Screen Display
NoteMagix M10 User’s Guide 3.3 Configuring Your Screen Display The VGA display function of your NoteMagix M10 contains RAM-based Digital-to-Analog Converter (RAMDAC) that transforms the digital data from the graphics and video subsystems to analog data for the CRT monitor. This controller offers a large set of extended functions and higher resolutions especially useful when you are connecting an external high-resolution and high-frequency CRT or LCD. -
Page 29: Power Saving Features
RAM (Random Access Memory). This allows your NoteMagix M10 to wake up quickly, but a low level of power is required to maintain this suspended state. How quickly your system powers down into Standby mode is determined in the Power Options of the Control Panel. While the NoteMagix M10 is in Standby mode, the LED power indicator fl... -
Page 30: Using Flash Memory Cards
3.5 Using Flash Memory Cards Flash Memory Card Flash Memory is a memory storage media used by most digital cameras. The 4 in 1 card slot in the NoteMagix M10 supports SD, MS (Memory Stick), MMC, and MS_Pro cards. Only one card can be inserted into the 4 in 1 card slot at a time. - Page 31 Inserting a Flash Memory Card To insert a fl ash memory card, position the card in the middle of the slot with copper connections pointed downward. Press gently until you feel the card lock into place. A dialogue window should pop up to indicate the fl ash card has been properly inserted.
- Page 32 NoteMagix M10 User’s Guide www.velocitymicro.com/support...
-
Page 33: Chapter 4 Using Multimedia
4.2 Audio Sound System Features Your NoteMagix M10 has a built-in 16-bit stereo sound controller that allows you to record, store, and playback voice, music and other sound effects with built-in mixer controls. An integrated full-duplex microphone and twin mini- speakers are also built-in into your NoteMagix M10 to allow you to record and playback sound anytime and anywhere. -
Page 34: Playing Audio And Sound
NoteMagix M10 User’s Guide On the front side of your NoteMagix M10, you will fi nd the audio ports that include the following: External 1/8-inch microphone jack that connects the external microphone. Earphone or headphone jack. Sound volume adjustment via K/B hot-key 4.3 Playing Audio and Sound... -
Page 35: Playing Video And Mpeg Files
4.4 Playing Video and MPEG Files Your NoteMagix M10 is capable of running video fi les as well as MPEG (Motion Picture Expert Group) fi les on CD, DVD, or CD-RW (with optional USB optical drive). By using a software MPEG program, you can watch real full- motion video on your NoteMagix M10. - Page 36 NoteMagix M10 User’s Guide www.velocitymicro.com/support...
-
Page 37: Chapter 5 Connecting Peripherals
USB (Universal Serial Bus) is a hardware interface that enables you to connect multiple peripheral devices to your NoteMagix M10. USB’s hot swap capability allows items to be plugged and unplugged without restarting the system. Depending on your operational requirements, you may need to disable other ports in order to release system resource for the USB port. -
Page 38: Using An External Monitor
NoteMagix M10 User’s Guide 5.2 Using an External Monitor Your M10 has a 15-pin Monitor port for supporting any external CRT or LCD color monitor. You will need a display signal cable with a 15-pin connector (usually provided with the monitor). -
Page 39: Using The External Audio System
5.3 Using the External Audio System At the front side of your NoteMagix M10, you will fi nd the built-in audio ports. You can connect microphone jacks, earphones, or external speakers. To connect to an audio jack: 1. Locate the audio port (Microphone, Headphone) that you want to use. - Page 40 NoteMagix M10 User’s Guide www.velocitymicro.com/support...
-
Page 41: Chapter 6 Troubleshooting
Chapter 6 Troubleshooting This chapter contains advice and solutions to a few basic issues you might encounter with the M10. If you cannot fi nd the solution to your problem here, please contact Velocity Micro customer care at VelocityMicro.com/support. AC Adapter... - Page 42 Hard disc drive (HDD) Problem Solution HDD won’t boot Operating system may be corrupted by incorrect operation or virus. Try to clean the virus using antivirus software. You may be experiencing an error in Windows XP. Contact Velocity Micro customer care. www.velocitymicro.com/support...
- Page 43 HDD performs very slowly Use the hard drive defragger to clean up fragmented fi les on the hard drive Problem Solution The screen is blank Press hot key Fn + F5 to change the display mode. Make sure the system isn’t in Hibernation or Standby modes. Audio Problem Solution...
- Page 44 NoteMagix M10 User’s Guide Stand by / Hibernation Problem Solution Can’t enter into Standby / Check to see if Windows Media Player is running. If so, close and try again. Hibernation IEEE 1394 Problem Solution Equipment connected doesn’t Be sure equipment is firmly connected to the M10.
Need help?
Do you have a question about the NoteMagix M10 and is the answer not in the manual?
Questions and answers