
Related Manuals for DOREGRILL Ginox 4 E


Summary of Contents for DOREGRILL Ginox 4 E
- Page 1 INSTRUCTION MANUAL PROFESSIONAL ROTISSERIE Ginox 4 E Ginox 6 E Ginox 8 E USER GUIDE ROTISSERIE OVEN GINOX ELEC...
- Page 2 DOREGRILL is always at the cutting edge in our field. We pour all our skills and experience into our ovens to ensure that we meet your expectations by striving to combine comfort and safety.
-
Page 3: Table Of Contents
TABLE OF CONTENTS INFORMATION FOR THE USER GENERAL POINTS ..............................5 ..................................5 ABELLING ............................6 HE IMPORTANCE OF THE MANUAL ..............................6 ENERAL PRECAUTIONS ..................................6 UARANTEE TRANSPORT AND HANDLING ..........................7 ..............................7 RANSPORT AND DELIVERY ..............................7 NPACKING AND HANDLING TECHNICAL DESCRIPTION............................ - Page 4 10.4 4 – C ............................22 ICTURE ONTROL PANEL 10.5 5 – D ......................22 ICTURE RIVE OF THE SPITS AND SAUCE DISH 10.6 7 – R ........................24 ICTURE OOF AND AMBIENT LIGHTING 10.7 8 - E 4 ........................25 ICTURE LECTRICAL DIAGRAM INOX...
-
Page 5: Information For The User
INFORMATION FOR THE USER GENERAL POINTS Labelling This equipment complies with the USA guidelines that apply to it. As a result, the ETL logo is marked on the rating plate and a declaration of conformity is attached to this manual. -Manufacturer name -Machine serial number -Labelling... -
Page 6: The Importance Of The Manual
Its installation, adjustment and maintenance must be carried out by a qualified technician. In the event of a change in Voltage, contact the company DOREGRILL for all the information necessary for the transformation and only have it carried out by a qualified technician. -
Page 7: Transport And Handling
TRANSPORT AND HANDLING Transport and delivery Our rotisserie oven is tested, checked and carefully packaged to ensure their arrival at destination in the best conditions. They are delivered on pallet, strapped and filmed. The device is protected by cardboard packaging, bubble wrap, polystyrene and foam angles to withstand normal conditions of transport. -
Page 8: Parts List
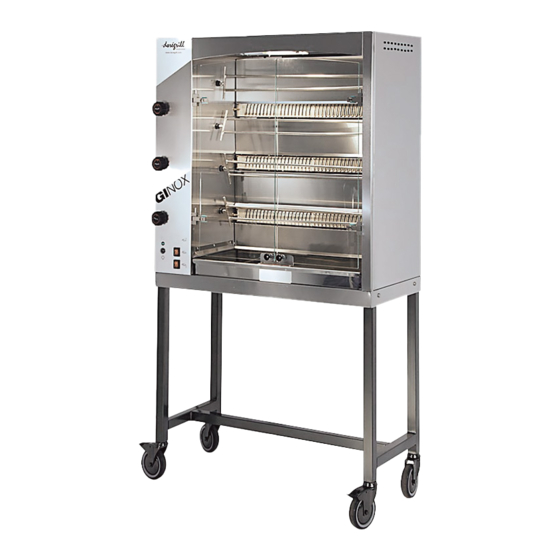
Parts list The various components of the rotisserie are shown in Fig. 2 below. USER GUIDE ROTISSERIE OVEN GINOX ELEC... -
Page 9: Control Panel
Control panel Operation indicator 3 Superior resistances ON / OFF Switch Rotation of motors 2 middle resistors 3 lower resistances Dimensions of the rotisserie See Chapter 7 “Installer – Technical characteristics” Technical data See Chapter 7 “Installer – Technical characteristics” Employment destination Our rotisseries are intended for cooking meat and poultry prepared in the hot and catering departments of professionals in the food sector. -
Page 10: Installation
If the rotisserie is used in a room, it must be installed under an exhaust hood corresponding to the minimum characteristics indicated below (take the standard dimensions immediately above) The DOREGRILL Company can provide you, on request, and as an option, the hood suitable for your needs... - Page 11 Wall hood: 100 mm 300 mm 300 mm 880 mm 1625 mm 300 mm 300 mm 300 mm 300 mm 1080 mm 1625 mm Corner hood 300 mm 100 mm 300 mm 100 mm 880 mm 1425 mm USER GUIDE ROTISSERIE OVEN GINOX ELEC...
-
Page 12: Use
Controls Ignition on the resistors Each switch controls a group of resistors. Ignition of spit gear motors The motors are controlled two by two by illuminated switches. The spit of a stage turns in one direction, and the stages near it turn in the opposite direction, in order to allow the cooking of large poultry without the risk of blocking the rotation mechanism. -
Page 13: Implementation
Implementation The implementation of gas rotisseries imposes certain precautions so that their use is done in complete safety. IMPORTANT It is strictly forbidden to place the dish or any other object on top of the rotisserie, or to obstruct the exhaust chimney and the ventilation areas by any means. -
Page 14: Maintenance
This is a delicate operation due to the fragility of the elements. Rotisserie design allows for instant mounting of doors by removing hinge pins. Le produit DECAGRILL distribué par la Sté DOREGRILL est préconisé pour le nettoyage des rôtissoires USER GUIDE... -
Page 15: Tempered Glass Windows - Main Cause Of Breakage
TEMPERED GLASS WINDOWS – MAIN CAUSE OF BREAKAGE Thermal shock There cannot be a difference greater than 80°C between two specific points on the window. When this is the case, the breaking point is reached and the window can then explode instantly. Ex: cleaning a hot window with a cold sponge. -
Page 16: Technical Characteristics
INFORMATIONS FOR THE PRODUCT INSTALLER TECHNICAL CHARACTERISTICS GINOX 4 Elec GINOX 6 Elec GINOX 8 Elec DIMENSIONS Overall width 1025 mm 1025 mm 1025 mm Overall depth 600 mm 600 mm 600 mm Rotisserie height 1040 mm 1400 mm 1745 mm Trolley height 850 mm 490 mm... -
Page 17: Maintenance / Customer Service
MAINTENANCE MAINTENANCE / CUSTOMER SERVICE Any interventions on your device must be performed by a qualified professional. Problem localisation This section is intended to list the main failures that any user may encounter, to identify the possible causes and to provide the means to remedy them without outside intervention. DEFECTS FOUND POSSIBLE CAUSES REMEDIES TO BRING... -
Page 18: Specific Repairs
Specific repairs 9.2.1 Changing a bulb This operation can be performed by the user. ATTENTION Before changing a hot lamp, wait a few minutes for it to cool down in order to avoid burning yourself. With a number 7 Allen key, unscrew the screws and remove the stainless-steel frame. Unscrew the unit, remove the defective bulb and replace it with an identical, 300W max bulb. -
Page 19: Illustrated Composition Table
ILLUSTRATED COMPOSITION TABLE 10 ILLUSTRATED COMPOSITION TABLE 10.1 Picture 1 – The trolley GInox GInox GInox Number Designation Trolley frame (height 490 mm) Trolley frame (height 850 mm) Steerable wheel with brake Ø 100 with plate Steerable wheel with brake Ø 125 Steerable wheel Ø... -
Page 20: Picture 2 - Back Opening
10.2 Picture 2 – Back opening Open the back of the rotisserie oven to clean it 10.3 Picture 3 – Doors GInox GInox GInox Number Designation Straight glazed doors (height 796 mm) Straight glazed doors (height 1156 mm) Straight glazed doors (height 1516 mm) Hinge lower part Hinge pin Hinge middle part... - Page 21 Picture 3 – DOORS USER GUIDE ROTISSERIE OVEN GINOX ELEC...
- Page 22 10.4 Picture 4 – Control panel GInox GInox GInox Number Designation Motor red switch Spit red switch An indicator Switch 0.1 10.5 Picture 5 – Drive of the spits and sauce dish GInox GInox GInox Number Designation Fat catcher dish Flat lock Glass stopper Flat stopper...
- Page 23 Picture 5 – DRIVE OF THE SPITS AND SAUCE DISH USER GUIDE ROTISSERIE OVEN GINOX ELEC...
- Page 24 10.6 Picture 7 – Roof and ambient lighting GInox GInox Ginox Number Designation Rounded top band Ceiling A top Roof (Optional Accessory) 300W quartz lamp Aluminum reflector Stainless steel fan washer Ø4 mm Quartz backing M4 stainless steel nut Porcelain dominoes Stainless steel screw M4-25 Lighting glass holder Neoceram quartz lamp protection glass...
- Page 25 10.7 Picture 8 - Electrical diagram Ginox 4 220V 3 phase +T 380V 3 phase +N+T USER GUIDE ROTISSERIE OVEN GINOX ELEC...
- Page 26 10.8 Picture 9 - Electrical diagram Ginox 6 380V 3 phase +N+T USER GUIDE ROTISSERIE OVEN GINOX ELEC...
- Page 27 220V 3 phase +N+T USER GUIDE ROTISSERIE OVEN GINOX ELEC...
- Page 28 10.9 Picture 10 - Electrical diagram Ginox 8 380V 3 phase +N+T USER GUIDE ROTISSERIE OVEN GINOX ELEC...
- Page 29 220V 3 phase +N+T USER GUIDE ROTISSERIE OVEN GINOX ELEC...
Need help?
Do you have a question about the Ginox 4 E and is the answer not in the manual?
Questions and answers