Table of Contents
Advertisement
Quick Links
Important Warning
•
It is critical that all Prorack racks and accessories be properly and securely attached to your vehicle. Improper
attachment could result in an automobile accident, and could cause serious bodily injury or death to you or to others.
•
You are responsible for securing the racks and accessories to your car, checking the attachments prior to use, and
periodically inspecting the products for adjustment, wear, and damage. Therefore, you must read and understand all
of the instructions and cautions supplied with your Prorack product prior to installation or use.
•
If you do not understand all of the instructions and cautions, or if you have no mechanical experience and are not
thoroughly familiar with the installation procedures, you should have the product installed by a professional installer
such as a boat carrier specialist.
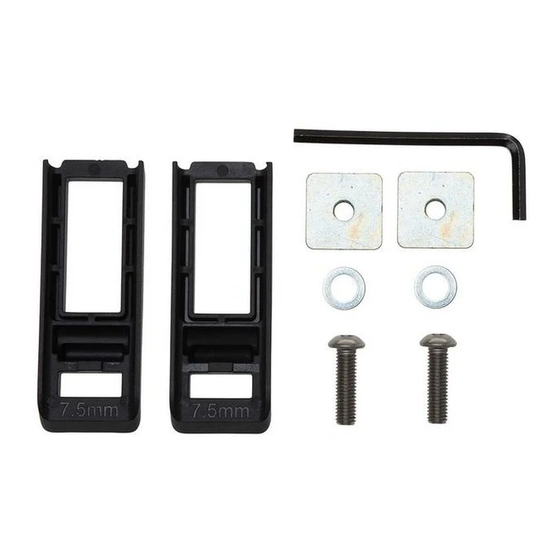
Kit Contents
Item
Component
1
M8 Washer
2
M8 x 30 Button Head Capscrew
3
M8 28 x 28 x 5 Square Nut
4
Trades Height Packer P3
5
Allen Key
1
Remove Hex Key from right hadn
cover. Use the Hex Key to remove
the endcap screw.
0413200 TP1 - Rev2
Heavy Duty Height Packers - 2 Pack
Qty
2
2
2
2
1
Installation for Heavy Duty Crossbars
2
Remove the endcap by pulling on the endcap pin and
pushing on the top of the endcap. Use a side to side
motion to assist.
Repeat on other crossbar.
Page 1 of 4
Advertisement
Table of Contents

Related Manuals for Prorack TP1


Summary of Contents for Prorack TP1
- Page 1 Important Warning • It is critical that all Prorack racks and accessories be properly and securely attached to your vehicle. Improper attachment could result in an automobile accident, and could cause serious bodily injury or death to you or to others.
- Page 2 Use the Allen Key to fully undo the adjusting completely off the crossbar. screw. Remove adjusting screw and store in a safe Use the Allen Key to lift the toggle assemble. place. Repeat for both leg assemblies. Page 2 of 4 0413200 TP1 - Rev2...
- Page 3 Assemble the nut onto the capscrew. Place leg assemble back onto the crossbar. Ensure the nut goes into the bottom slot of Do Not Fully Tighten. the crossbar. Repeat on other crossbar. Page 3 of 4 0413200 TP1 - Rev2...
- Page 4 Prorack Freephone 17 Hinkler Court, Brendale AU: 1800 143 548 www.prorack.com.au QLD 4500, Australia NZ: 0800 4776 722 www.prorack.co.nz ALL CONTENT SUBJECT TO YAKIMA AUSTRALIA PTY LTD COPYRIGHT © 2015 Page 4 of 4 0413200 TP1 - Rev2...
Need help?
Do you have a question about the TP1 and is the answer not in the manual?
Questions and answers