Advertisement
Quick Links
Advertisement

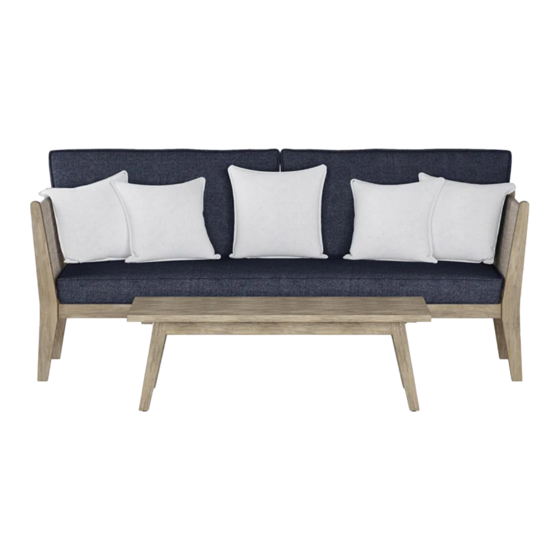
Summary of Contents for SIMPLIHOME Cayman AXCPTCON4-CAY
- Page 1 Cayman / Luna / Sahara 4 Piece Outdoor Conversation Set Model # AXCPTCON4-CAY...
- Page 2 Great quality is a right. Thank you for shopping with Simpli Home, America's top brand for high-value furniture. It's time to register your product warranty. It's quick and easy. And you'll be happy you did. ü Activate your 1-year warranty ü...
- Page 3 Review your product and collect rewards! Thank you for your purchase! We hope you enjoy it. We’d love your feedback. Please share a review and get instant rewards! simpli-home.com/product-review Share photos and get your cash back! Send us images or share them on social and qualify for instant rewards.
- Page 4 For Fastest Customer Service: Open your phone’s camera. Point your phone’s camera at the QR code to scan. Click on the pop up. You’ll be taken to our customer service page. Fill the form with your order information and issue. Submit form.
-
Page 5: Safety Information
IMPORTANT : Please read this manual carefully before beginning assembly of this product. Keep this manual for future reference. Safety Information Identify all the parts and hardware. Do not discard of the packaging until you have checked that you have all of the parts and hardware required. Hardware package may have spare parts. -
Page 6: Care And Maintenance
Care & Maintenance This furniture is designed for outdoor use. Coffee Table / Dining Table Wash frame parts with mild soap and water, rinse thoroughly and dry frame completely. Do not use bleach, acid or other solvents on the frame parts. Use placemats or coasters to prevent leaving marks from hot plates or cold glasses. - Page 7 Cayman / Luna / Sahara Outdoor Coffee Table Model # AXCPTCT-CAY...
- Page 8 Pre-Assembly Information Model # AXCPTCT-CAY Part Description TABLE TOP QTY 1 QTY 4 Hardware Description WASHER LOCK WASHER Ø16 / Ø8 X 1 mm Ø15 / Ø8 X 2 mm QTY 8 QTY 8 WRENCH WR13 Ø13 / Ø8 X 6 mm QTY 8 QTY 1...
- Page 9 Components - Key Diagram Model # AXCPTCT-CAY...
- Page 10 Assembly Model # AXCPTCT-CAY Step 1 1. Attach Legs B to Table Top A using eight Washers 1 , eight Lock Washers 2 and eight Nut 3 through guide holes. 2. Use Wrench 4 to tighten Nuts. Do not over-tighten.
- Page 11 Cayman / Luna / Sahara Outdoor Conversation Chair Model # AXCPTCCH-CAR...
- Page 12 Pre-Assembly Information Model # AXCPTCCH-CAR Part Description LEFT SIDE RIGHT SIDE BACK QTY 1 QTY 1 QTY 1 SEAT BACK CUSHION SEAT CUSHION QTY 1 QTY 1 QTY 1 DÉCOR PILLOW QTY 2 Hardware Description ALLEN KEY BOLT LOCK WASHER WASHER Ø8 X 60 mm Ø15 / Ø8 X 2 mm...
- Page 13 Components - Key Diagram Model # AXCPTCCH-CAR...
- Page 14 Assembly Model # AXCPTCCH-CAR Step 1 1. Attach Left Side AL to Seat C using Washers 3 , Lock Washers 2 and Nut 4 through guide holes. 2. Use Wrench 6 to tighten Nuts. Do not over-tighten.
- Page 15 Assembly Model # AXCPTCCH-CAR Step 2 1. Align Wood Dowels with guide holes on Left Side AL and attach Back B to Left Side AL . 2. Use Allen Key Bolts 1 Washers 3 , Lock Washers 2 to attach Left Side AL through guide holes.
- Page 16 Assembly Model # AXCPTCCH-CAR Step 3 1. Repeat Step 2 and 3 for Right Side AR .
- Page 17 Cayman / Luna / Sahara Outdoor Sofa Model # AXCPTSOF-CAY...
- Page 18 Pre-Assembly Information Model # AXCPTSOF-CAY Part Description LEFT SIDE RIGHT SIDE BACK QTY 1 QTY 1 QTY 1 SEAT BOTTOM LEG BACK CUSHION QTY 1 QTY 1 QTY 2 SEAT CUSHION DÉCOR PILLOW QTY 1 QTY 5 Hardware Description ALLEN KEY BOLT ALLEN KEY BOLT LOCK WASHER WASHER...
- Page 19 Components - Key Diagram Model # AXCPTSOF-CAY...
- Page 20 Assembly Model # AXCPTSOF-CAY Step 1 1. Attach Bottom Leg D to Seat C . 2. Attach Left Side AL to Seat C using Washers 4 , Lock Washers 3 and Nut 5 through guide holes. 3. Use Wrench 7 to tighten Nuts. Do not over-tighten.
- Page 21 Assembly Model # AXCPTSOF-CAY Step 2 1. Align Wood Dowels with guide holes on Left Side AL and attach Back B to Left Side AL . 2. Use Allen Key Bolts 1 , 2 , Washers 4 , Lock Washers 3 to attach Left Side AL through guide holes.
- Page 22 Assembly Model # AXCPTSOF-CAY Step 3 1. Repeat Step 2 and 3 for Right Side AR .
- Page 23 Assembly Model # AXCPTSOF-CAY Step 4 Note: Leveler on bottom of leg can be adjusted if floor is uneven.


Need help?
Do you have a question about the Cayman AXCPTCON4-CAY and is the answer not in the manual?
Questions and answers