
Related Manuals for TP-Link TL-WA3001


Summary of Contents for TP-Link TL-WA3001
- Page 1 User Guide AX3000 Gigabit Wi-Fi 6 Access Point TL-WA3001 © 2022 TP-Link 1910013155 REV1.0.0...
-
Page 2: Table Of Contents
Manage the User TP-Link IDs ..........16 3. 3. 1. Add TP-Link ID to Manage the Access Point ......17 3. - Page 3 Chapter 5. Portal (for Access Point/Multi-SSID Mode) ....32 Chapter 6. Access Control ......... 35 Chapter 7.
-
Page 4: About This Guide
The Quick Installation Guide can be found where you find this guide or inside the product package. Specifications can be found on the product page at https://www.tp-link.com. TP-Link Community is provided for you to discuss our products and share knowledge at https://community.tp-link.com. Our Technical Support contact information can be found at the... - Page 5 *Maximum wireless signal rates are the physical rates derived from IEEE Standard 802.11 specifications. Actual wireless data throughput and wireless coverage are not guaranteed and will vary as a result of 1) environmental factors, including building materials, physical objects, and obstacles, 2) network conditions, including local interference, volume and density of traffic, product location, network complexity, and network overhead, and 3) client limitations, including rated performance, location, connection, quality, and client condition.
-
Page 6: Chapter 1. Get To Know About Your Access Point
Chapter Get to Know About Your Access Point This chapter introduces what the access point can do and shows its appearance. It contains the following sections: • Product Overview • Panel Layout... -
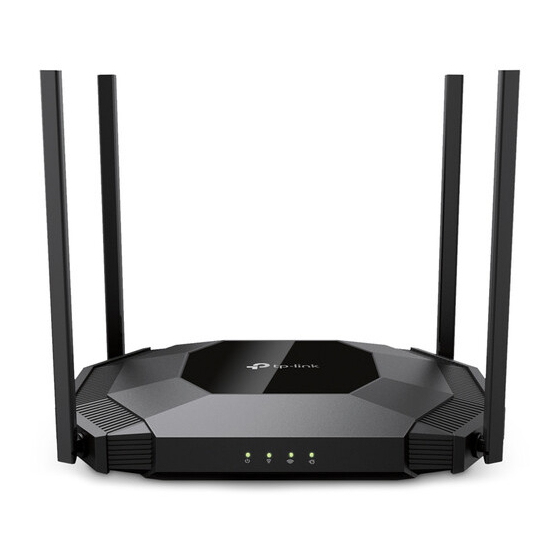
Page 7: Product Overview
1. 1. Product Overview The TP-Link access point, with multiple operation modes, is designed to establish or expand a scalable high-speed wireless network or to connect your Ethernet enabled device to a wireless network, such as the game console, digital media adapter, printer, or network attached storage device. -
Page 8: Back Panel
Chapter 1 Get to Know About Your Access Point LED Explanation Name Status Indication Power is on. Blinking The system is starting up or updating firmware. Do not once every disconnect or power off your access point. second (Power) Blinking WPS connection is in progress. - Page 9 Chapter 1 Get to Know About Your Access Point The following parts (view from left to right) are located on the back panel. Ports or Buttons Description For connecting the access point to a power socket via the provided POWER Port power adapter.
-
Page 10: Chapter 2. Set Up Internet Connection
Chapter Set Up Internet Connection This chapter introduces how to quickly set up the access point. It contains the following sections: • Position Your Access Point • Set Up Your Access Point... -
Page 11: Position Your Access Point
Chapter 2 Set Up Internet Connection 2. 1. Position Your Access Point • The product should not be located in a place where it will be exposed to moisture or excessive heat. • Place the access point in a location where it can be connected to various devices as well as to a power source. -
Page 12: Set Up Your Access Point
Chapter 2 Set Up Internet Connection 2. 2. Set Up Your Access Point There are four operation modes supported by this access point: Access Point, Range Extender, Client, and Multi-SSID. Please determine which operation mode you need and complete the corresponding setup. 2. -
Page 13: Range Extender Mode
Chapter 2 Set Up Internet Connection 5. Follow the step-by-step instructions to complete the configuration. 6. Now, reconnect your wireless devices to the new Wi-Fi network and enjoy the internet! 2. 2. 2. Range Extender Mode In this mode, the access point extends the range of an existing Wi-Fi network. This mode is suitable when you are in a Wi-Fi dead-zone or a place with weak wireless signal, and you want to have a larger effective range of the wireless signal throughout your home or office. -
Page 14: Client Mode
Chapter 2 Set Up Internet Connection 5. Click Change Mode and switch to the Range Extender mode. 6. Wait until the access point reboots, then log in again. 7. Follow the step-by-step instructions to complete the configuration. 8. Relocate the access point about halfway between your host router and the Wi-Fi dead zone. -
Page 15: Multi-Ssid Mode
Chapter 2 Set Up Internet Connection Internet Main Network Access Point Other Wired Device Existing Router 1. Connect the access point according to Step A to B in the diagram. 2. Turn on the power, and wait for about 2 minutes until the Power and Wi-Fi LEDs are lit and stable. - Page 16 Chapter 2 Set Up Internet Connection VLAN 1 SSID 1 for VLAN 1 Internet VLAN 2 SSID 2 for VLAN 2 SSID 3 for VLAN 3 Existing Router Access Point SSID 4 for VLAN 4 VLAN 3 VLAN 4 1. Connect the access point according to Step A to D in the diagram. 2.
-
Page 17: Chapter 3. Tp-Link Cloud Service (For Access Point Mode)
TP-Link Cloud service provides a better way to manage your cloud devices. Log in to your access point with a TP-Link ID, and you can easily monitor and manage your home network when you are out and about via the Tether app. To ensure that your access point stays new and gets better over time, the TP-Link Cloud will notify you when an important firmware upgrade is available. -
Page 18: Register A Tp-Link Id
Manage the User TP-Link IDs. • Once you have registered a TP-Link ID on the web management page, you can only register another TP-Link ID via the Tether APP. Please refer to Manage the Access Point via the TP-Link Tether App to install the app. -
Page 19: Manage The User Tp-Link Ids
2. Enter the current password, then a new password twice. And click SAVE. 3. 3. Manage the User TP-Link IDs The TP-Link ID used to log in to the access point for the first time will be automatically bound as the Admin... -
Page 20: Add Tp-Link Id To Manage The Access Point
3. Click , enter another TP-Link ID as needed and click SAVE. Note: If you need another TP-Link ID, please register a new one via the Tether app. Refer to Manage the Access Point via the TP-Link Tether App to install the app and register a new TP-Link ID. -
Page 21: Manage The Access Point Via The Tp-Link Tether App
Note: If you need to remotely access your access point from your smart devices, you need to: • Log in with your TP-Link ID. If you don’t have one, refer to Register a TP-Link • Make sure your smartphone or tablet can access the internet with cellular data or a Wi-Fi network. -
Page 22: Chapter 4. Wireless Settings
Chapter Wireless Settings This chapter guides you on how to configure the wireless settings. It contains the following sections: • Specify Wireless Settings • Use WPS for Wireless Connection (for Access Point/Multi-SSID Mode) • Check Advanced Wireless Settings (for Access Point/Multi-SSID Mode) •... -
Page 23: Specify Wireless Settings
Chapter 4 Wireless Settings 4. 1. Specify Wireless Settings The access point’s wireless network names (SSIDs), password, and security option are preset in the factory. The preset SSIDs and password can be found on the label of the access point. Wireless settings differ with operation mode. - Page 24 Chapter 4 Wireless Settings • To enable or disable OFDMA: OFDMA enables multiple users to transmit data simultaneously, and thus greatly improves speed and efficiency. Noted that only when your clients also support OFDMA, can you fully enjoy the benefits. It is disabled by default. 1.
-
Page 25: Range Extender Mode
Chapter 4 Wireless Settings 1. Go to Wireless > Wireless Settings. 2. Select Hide SSID, then your SSID won’t display when wireless devices scan for wireless networks and you will need to manually enter the SSID to join the network. •... - Page 26 Chapter 4 Wireless Settings 4. In the Extended Network section, customize the extended networks as you need. You can: • Enable or disable a wireless network. • Change the extended SSIDs or copy main network SSIDs. Note: Extended passwords are the same as the main network passwords and cannot be changed. •...
-
Page 27: Client Mode
Chapter 4 Wireless Settings 5. Click SAVE. 4. 1. 3. Client Mode When the device works in Client mode, you can connect to another network. 1. Visit http://tplinkap.net, and log in with the password you set for the access point. 2. -
Page 28: Multi-Ssid Mode
Chapter 4 Wireless Settings 7. Click SAVE. 4. 1. 4. Multi-SSID Mode When the device works in Multi-SSID mode, you can customize and isolate multiple wireless networks. 1. Visit http://tplinkap.net, and log in with the password you set for the access point. 2. - Page 29 Chapter 4 Wireless Settings TWT (Target Wake Time) allows 802.11ax access points and clients to negotiate their periods to transmit and receive data packets. Clients only wake up at TWT sessions and remain in sleep mode for the rest of the time, which significantly extend their battery life.
- Page 30 Chapter 4 Wireless Settings 3. Click SAVE. • To change the transmit power: 1. Go to Wireless > Wireless Settings. 2. Click 2.4GHz GHz. 3. Select an option from the Transmit Power drop-down list. • To change channel settings: 1. Go to Wireless >...
-
Page 31: Use Wps For Wireless Connection (For Access Point/Multi-Ssid Mode)
Chapter 4 Wireless Settings 4. 2. Use WPS for Wireless Connection (for Access Point/Multi-SSID Mode) Wi-Fi Protected Setup (WPS) provides an easier approach to set up a security-protected Wi-Fi connection. 1. Visit http://tplinkap.net, and log in with the password you set for the access point. 2. -
Page 32: Check Advanced Wireless Settings (For Access Point/Multi-Ssid Mode)
• Connect via the WPS button on the access point 1 ) Press the WPS button on the back panel of the access point. 2 ) Within 2 minutes, enable WPS on your client. The client will connect to the access point. WLAN TP-Link MyHome David HomeNetwork TP-Link_Home... -
Page 33: Monitor Wireless Statistics (For Access Point/Multi-Ssid Mode)
Chapter 4 Wireless Settings • WMM – This function can guarantee the packets with high-priority messages being transmitted preferentially. • AP Isolation – This function isolates all connected wireless stations so that wireless stations cannot access each other through WLAN. •... -
Page 34: Monitor The Traffic Throughput (For Access Point/Multi-Ssid Mode)
Chapter 4 Wireless Settings 2. Go to Wireless > Wireless Statistics. 3. View the data statistics of wireless clients. 4. 5. Monitor the Traffic Throughput (for Access Point/Multi-SSID Mode) The throughput chart displays the current data traffic of the network. 1. -
Page 35: Chapter 5. Portal (For Access Point/Multi-Ssid Mode)
Chapter Portal (for Access Point/Multi-SSID Mode) - Page 36 Chapter 5 Portal (for Access Point/Multi-SSID Mode) Imagine that you run a small shop and provide Wi-Fi access for your customers. You want to seize every opportunity to promote your shop, which makes portal authentication an excellent choice. Customers will be directed to a web page for access verification, on which your personalized promotion is displayed.
- Page 37 Chapter 5 Portal (for Access Point/Multi-SSID Mode) 9. Click SAVE.
-
Page 38: Chapter 6. Access Control
Chapter Access Control... - Page 39 Chapter 6 Access Control Access Control is used to block or allow specific client devices to access your network (via wired or wireless) based on a list of blocked devices (Blacklist) or allowed devices (Whitelist). 1. Visit http://tplinkap.net, and log in with the password you set for the access point. 2.
- Page 40 Chapter 6 Access Control 2 ) Click to add other devices you want to allow. 3 ) Click Select From Device List, choose devices, then click ADD. Alternatively, click Manually, enter the device name and MAC address, then click ADD.
- Page 41 Chapter 6 Access Control Done! Now you can block or allow specific client devices to access your network using the Blacklist or Whitelist.
-
Page 42: Chapter 7. Customize Network Settings
Chapter Customize Network Settings This chapter introduces how to customize your network settings. It contains the following sections: • Change the LAN Settings • Specify DHCP Server Settings... -
Page 43: Change The Lan Settings
Chapter 7 Customize Network Settings 7. 1. Change the LAN Settings The access point is preset with Dynamic IP, which allows it to dynamically obtain an IP address and gateway from the main router/AP. It is recommended that you keep the default LAN settings to avoid IP conflict with the main router/AP or other devices on your local network. - Page 44 Chapter 7 Customize Network Settings • To specify the IP address range that the access point assigns: 1. Turn on DHCP Server. 2. Enter the starting and ending IP addresses of the IP Address Pool. 3. Leave other parameters as the default settings. 4.
-
Page 45: Chapter 8. Manage Your Access Point
Chapter Manage Your Access Point This chapter will show you how to configure and manage your access point. It contains the following sections: • Set the System Time and Language • Control LEDs • Configure the SNMP Agent • Configure the Ping Watchdog •... -
Page 46: Set The System Time And Language
Chapter 8 Manage Your Access Point 8. 1. Set the System Time and Language System time is the time displayed while the access point is running. The system time you configure here will be used for other time-based functions like Reboot Schedule. You can choose the way to obtain the system time as needed. - Page 47 Chapter 8 Manage Your Access Point 4 ) (Optional) In the NTP Server II field, enter the IP address or domain name of the second NTP Server. 5 ) Click SAVE. • To get the system time from the managing device: 1 ) In the Set Time field, select...
-
Page 48: Control Leds
Chapter 8 Manage Your Access Point 2 ) Select the correct Start date and time when daylight saving time starts at your local time zone. 3 ) Select the correct date and time when daylight saving time ends at your local time zone. -
Page 49: Configure The Snmp Agent
Chapter 8 Manage Your Access Point 2 ) Specify the LED Off Time as needed, and the LEDs will be off during the period. 4. Click SAVE. 8. 3. Configure the SNMP Agent SNMP (Simple Network Management Protocol) is a popular network monitoring and management protocol. -
Page 50: Configure The Ping Watchdog
Chapter 8 Manage Your Access Point 4. Configure the SNMP agent according to your actual network requirement. • SysContact – Enter the contact email address of the node to be managed. • SysName – Set a user-defined name for the node to be managed. •... -
Page 51: Update The Firmware
We will inform you through the web management page if there’s any new firmware available for your access point. Also, the latest firmware will be released at the TP-Link official website www.tp-link.com, and you can download it from the... -
Page 52: Online Update
Chapter 8 Manage Your Access Point 4. Specify the Update Time and save the settings. When a new version is available, the access point will update the firmware automatically at the specified time. 8. 5. 2. Online Update 1. Visit http://tplinkap.net, and log in with the password you set for the access point. 2. -
Page 53: Local Update
Manage Your Access Point 8. 5. 3. Local Update 1. Download the latest firmware file for the access point from www.tp-link.com. 2. Visit http://tplinkap.net, and log in with the password you set for the access point. 3. Go to System >... -
Page 54: Reboot The Access Point
Note: • During the resetting process, do not turn off the access point. • After reset, you can still use the current login password or the TP-Link ID to log in to the web management page. • To reset the access point to its factory settings:... -
Page 55: Change The Login Password
Chapter 8 Manage Your Access Point 2. Go to System > Reboot. • To reboot the access point immediately: Click REBOOT. • To schedule the access point to reboot periodically: 1 ) Enable Reboot Schedule. 2 ) Set the Reboot Time Repeat time. -
Page 56: Password Recovery
Chapter 8 Manage Your Access Point 8. 9. Password Recovery This feature allows you to recover the login password you set for you access point in case you forget it. 1. Visit http://tplinkap.net, and log in with the password you set for the access point. 2. - Page 57 Chapter 8 Manage Your Access Point • Access the access point via HTTPS and HTTP: Tick the Enable box of Local Management via HTTPS to access the access point via HTTPS and HTTP, or keep it disabled to access the access point only via HTTP. •...
-
Page 58: 8. 11. Test The Network Connectivity
Chapter 8 Manage Your Access Point 3. Click VIEW CONNECTED DEVICES and select the device to manage the access point from the devices list, or enter the MAC address of the device manually. 4. Specify a Description for this entry. 5. -
Page 59: 8. 12. System Log
Chapter 8 Manage Your Access Point • To test the connectivity via Traceroute: 1 ) Choose Traceroute as the diagnostic tool. 2 ) Enter the IP Address Domain Name of the tested host. 3 ) Keep the default Traceroute Max TTL. - Page 60 Chapter 8 Manage Your Access Point 3. Choose the type and level of the system logs as needed. 4. In the Save Log section, click SAVE TO LOCAL to save the system logs to a local disk. • To send the system log to a mailbox at a fixed time: For example, I want to check my access point’s working status at a fixed time every day, however, it’s too troublesome to log in to the web management page every time I want...
- Page 61 Chapter 8 Manage Your Access Point Email From: Enter the email address used for sending the system log. 2 ) Select Require Password. Tips: Generally, Require Password should be selected if the login of the mailbox requires username and password. Username: Enter the user name to log in to the sender’s email address.
-
Page 62: Faq
Q1. How do I restore the access point to its factory default settings? With the access point powered on, use a pin to press and hold the RESET button until the Power LED blinks, then release the button. Note: Resetting the access point will clear all previous configurations, and the access point will reset to the default Access Point mode. - Page 63 Q6. What should I do to maximize my signal strength in Range Extender mode? When choosing an ideal location to optimize wireless signal in Range Extender mode, please refer to the following recommendations. • Halfway is the best way. Generally, the ideal location for an access point is about halfway between your wireless router and your wireless clients and make sure that the location you choose is within the range of the host router.
- Page 64 FCC compliance information statement Product Name: AX3000 Gigabit Wi-Fi 6 Access Point Model Number: TL-WA3001 Component Name Model I.T.E. Power Supply T480050-2B1 Responsible party: TP-Link USA Corporation Address: 10 Mauchly, Irvine, CA 92618 Website: http://www.tp-link.com/us/ Tel: +1 626 333 0234 Fax: +1 909 527 6804 E-mail: sales.usa@tp-link.com...
- Page 65 FCC compliance information statement Product Name: I.T.E. Power Supply Model Number: T480050-2B1 Responsible party: TP-Link USA Corporation Address: 10 Mauchly, Irvine, CA 92618 Website: http://www.tp-link.com/us/ Tel: +1 626 333 0234 Fax: +1 909 527 6804 E-mail: sales.usa@tp-link.com...
- Page 66 Any changes or modifications not expressly approved by the party responsible for compliance could void the user’s authority to operate the equipment. We, TP-Link USA Corporation, has determined that the equipment shown as above has been shown to comply with the applicable technical standards, FCC part 15. There is no unauthorized change is made in the equipment and the equipment is properly maintained and operated.
- Page 67 5250 MHz -5350 MHz (23dBm) 5470 MHz -5725 MHz (30dBm) EU Declaration of Conformity TP-Link hereby declares that the device is in compliance with the essential requirements and other relevant provisions of directives 2014/53/EU, 2009/125/EC, 2011/65/EU and (EU)2015/863. The original EU Declaration of Conformity may be found at https://www.tp-link.com/en/support/ce/...
- Page 68 The original UK Declaration of Conformity may be found at https://www.tp-link.com/support/ukca National Restrictions Attention: This device may only be used indoors in Great Britain. Canadian Compliance Statement This device contains licence-exempt transmitter(s)/receiver(s) that comply with Innovation, Science and Economic Development Canada’s licence-exempt RSS(s).
- Page 69 Radiation Exposure Statement: This equipment complies with IC radiation exposure limits set forth for an uncontrolled environment. This equipment should be installed and operated with minimum distance 20cm between the radiator & your body. Déclaration d’exposition aux radiations: Cet équipement est conforme aux limites d’exposition aux rayonnements IC établies pour un environnement non contrôlé.
- Page 70 限用物質含有情況標示聲明書 設備名稱:AX3000 Gigabit Wi-Fi 6 Access Point 型號(型式):TL-WA3001 Equipment name Type designation (Type) 限用物質及其化學符號 Restricted substances and its chemical symbols 單元 六價鉻 多溴聯苯 多溴二苯醚 鉛 汞 鎘 Unit Hexavalent Polybrominated Polybrominated Lead Mercury Cadmium chromium biphenyls diphenyl ethers (Pb) (Hg)
- Page 71 • Operating Temperature: 0℃ ~ 40℃ (32℉ ~ 104℉) • This product uses radios and other components that emit electromagnetic fields. Electromagnetic fields and magnets may interfere with pacemakers and other implanted medical devices. Always keep the product and its power adapter more than 15 cm (6 inches) away from any pacemakers or other implanted medical devices.