Table of Contents
Advertisement
Quick Links
FR :
Un manuel dans votre langue est disponible sur Internet:
IT:
Il manuale nella sua lingua può essere trovato su Internet:
ES:
Puede encontrar un manual en su idioma en Internet:
PT:
Um manual em seu idioma pode ser encontrado na Internet:
PL:
Instrukcję w swoim języku możesz znaleźć na stronie:
SWE:
En handbok på ditt språk finns på Internet:
NL:
Een handleiding in uw taal vindt u op internet:
www.easypix.info/ download-manuals/download/goxtreme-vision-duo
USER MANUAL
(Translation of the original)
https://bit.ly/3qzHHEQ
Advertisement
Table of Contents

Subscribe to Our Youtube Channel
Related Manuals for goxtreme Vision DUO


Summary of Contents for goxtreme Vision DUO
- Page 1 Puede encontrar un manual en su idioma en Internet: Um manual em seu idioma pode ser encontrado na Internet: Instrukcję w swoim języku możesz znaleźć na stronie: SWE: En handbok på ditt språk finns på Internet: Een handleiding in uw taal vindt u op internet: https://bit.ly/3qzHHEQ www.easypix.info/ download-manuals/download/goxtreme-vision-duo...
-
Page 2: Table Of Contents
Table of contents General Information ..................3 Explanation of Symbols .................. 3 Product Description ..................4 Intended Use ....................4 Restrictions ..................... 4 Safety Instructions ..................5 Operating Environment .................. 6 Camera Description ..................7 First Use ......................8 Step 1: Insert and charge the battery ............. 8 Step 2: Turn on/off the camera ............... - Page 3 Disclaimer Easypix makes no representations or warranties with respect to this manual and, to the extent permitted by law, expressly limits its liability for breach of any warranty that may arise from replacement of this manual by another. Furthermore, Easypix reserves the right to revise this publication at any time without obligation to notify any person of the revision.
-
Page 4: General Information
General Information Please read this manual and its safety instructions before using this product. Follow all instructions. This will prevent hazards that could result in property damage and/or serious injury. The product may only be used by persons who have fully read and understood the contents of this user manual. -
Page 5: Product Description
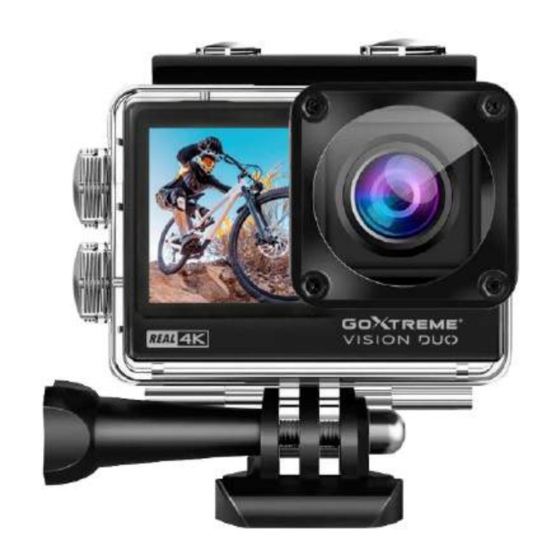
Product Description GoXtreme Vision DUO is a 4K action camera with a dual displays: A 2"/5cm screen on the back of the camera and an additional 1.3"/3.3cm screen in the front. The rear display features a touch screen that allows you to easily... -
Page 6: Safety Instructions
WARNING The product is not waterproof. It should only be immersed under water when securely enclosed in the supplied housing. • Before using the product in water, make sure that all covers and latches on the camera and underwater housing are securely closed and sealed. -
Page 7: Operating Environment
strong magnetic fields or radio waves to prevent them from damaging the product or affecting the sound and picture quality. • In the unlikely event of overheating, smoke or unpleasant odours coming from the unit, disconnect it immediately from the charging cable and remove the battery to avoid fire. -
Page 8: Camera Description
Camera Description 1. Front display (1.3”) 10. - Change display 2. Camera lens (Long press) 3. Rear display - Wi-Fi activation (2” Touchscreen) (Short press) 4. Operating indicator 11. Speaker 5. Charging indicator 12. - Mode 6. USB connection - Power button 7. -
Page 9: First Use
First Use NOTE! To ensure optimum performance from your camera, please follow the steps below when using the camera for the first time: Step 1: Insert and charge the battery Before using the product for the first time, make sure that it is fully charged. • Open the battery compartment cover, insert the battery and charge it for a minimum of 4 hours. -
Page 10: Step 2: Turn On/Off The Camera
Step 2: Turn on/off the camera • Press and hold the Power button for about 3 seconds to turn on the camera. • To turn off the camera, press and hold the Power button again for about 3 seconds. Step 3: Touch screen The camera's back screen is a touch screen - so you can operate the camera conveniently by using finger swipes and taps. -
Page 11: Step 4: Switching Between Front And Rear Screens
Step 4: Switching between front and rear screens To switch the currently active screen, press and hold the down button (10) for 2 seconds. The 1.3“ front display allows you to set up the perfect angle for your selfie videos and photos. Please note: The front screen is not a touch screen. Step 5: Setting the language By default, the camera is set to English. -
Page 12: Step 6: Insert And Format The Microsd Card
2. In the camera settings menu, scroll your finger to navigate down to the "Language" sub-menu. 3. Tap ‚Language‘ to view the various language options. 4. Scroll down through the options and tap to select and activate your preferred language. 5. - Page 13 • Ensure a U3 speed memory card is always used when recording 4K video. Using a lower speed card may cause data transfer speed problems due to the large file size that a 4K video produces. • Maximum micro SD card size is 128GB (FAT32 formatted) •...
-
Page 14: Step 7: Set Date And Time
Step 7: Set date and time 1. Click on the "Settings" icon on the screen and select "Settings" again. 2. In the settings menu, you can navigate to the sub-menu "Date&Time" by scrolling with your finger. 3. Set the time or date by tapping each of the on screen options and their corresponding up and down arrows. -
Page 15: Step 9: Changing The Video/Photo Settings
Step 9: Changing the video/photo settings Video settings are available when in video mode. Photo settings are available when in photo mode. 1. When the camera is switched on, it is in video mode by default. Press the Mode button or swipe the screen to switch to Photo mode. -
Page 16: Video Setup
Video Setup Video settings General settings Back Video Resolution 4K 60fps / 4K30fps /2.7K 30fps/ 1080P 60fps / 1080P 30fps / 720P120fps / 720P 60fps Please note: • When capturing video at high resolution or high frame rates such as 4K 30fps, it is normal for the camera to become hot and consume more power. - Page 17 fast motion including cycling, motorcycling, and hand-held uses. Please note: • EIS is not available when using the 720P 120fps video resolution. • If you activate the EIS function, Loop Video, Time Lapse Video, Slow Motion and Auto Low Light will be automatically disabled. Voice Record On/Off Wind Noise Reduction When activated, the Wind Noise Reduction function can help reduce...
-
Page 18: Photo Setup
Photo Setup Photo settings General settings Back Photo Resolution 20M / 16M / 14M / 10M / 8M / 5M / 2M Image Quality High / Medium / Low Auto / 100 / 200 / 400 / 800 / 1600 / 3200 Default setting is Auto. -
Page 19: General Setup
Date Stamp If you turn on Date Stamp, the camera adds stamp to the photos you take. General Setup To change operating settings of the camera, enter the General settings menu. General settings Sounds Shutter / Boot-up / Beep / Volume Angle Narrow / Medium / Wide Diving Mode... - Page 20 Distortion Calibration On / Off Driving Mode If you activate car mode and power the camera with a car charger, the camera will turn on and start recording automatically when you turn on the car ignition. The camera will turn off and stop recording when the cars ignition is turned off.
- Page 21 Power Frequency 50Hz/60Hz White Balance Auto / Daylight / Shade / Tungsten Light / Fluorescent AWB (Auto White Balance) lets you adjust the color temperature of videos and photos to ensure they are optimised for cool or warm lighting conditions. Note: Diving mode provides color correction while capturing footage in blue water or clear freshwater at depths of 1.5 to 10m.
-
Page 22: More Video And Photo Functions
More Video and Photo Functions In addition to normal video and photo recording, the camera features other special functions for photo and video. To view the functions available swipe your finger upwards from the bottom of the screen. Tap on one of the options presented to activate the function. - Page 23 Loop Video 1min / 3min / 5min When the loop video function is activated and when the micro SD card is full, new files will automatically record over and replace the oldest files on the card in sequence. Note: The default FAT32 formatting of the Micro SD card means the camera stops recording when the size of each file reaches 4GB.
- Page 24 Fast Motion 2x / 4x / 6x / 10x /15x This feature produces a video that appears to move faster than normal on the screen. This is accomplished by filming the action at less than normal speed and then playing it back it at normal speed. Wi-Fi Turn on the Wi-Fi function.
- Page 25 MORE PHOTO FUNCTIONS The time-lapse photo, burst photo, self-timer NOTE! and long exposure functions cannot be selected at the same time. If you select one of them, the other three are automatically switched off. Burst Photo 3 photos / 7 photos / 15 photos / 30 photos Continuous shooting can take up to 30 photos with a single shutter press, making it ideal for fast-moving events.
- Page 26 Time Lapse Photo 3Sec / 5Sec / 10Sec / 30Sec / 1min Time Lapse Photo captures a series of photos at specified time intervals. Use this mode to capture photos of any activity, then choose the best ones later. Delay Timer (Self-Timer) 2sec / 5sec / 10sec A Delay Timer gives a delay between pressing the shutter release and the shutter's firing to take the photo.
-
Page 27: Playback Mode
Playback Mode The Power button also functions as the Mode key. Press this button to switch between the different modes of operation: Video > Photo > Playback > Video Setup > Photo Setup To enter playback mode, tap the playback icon and confirm your selection using the OK button. -
Page 28: Remote Control
PLAYING BACK ON COMPUTER To playback your video or view photos on a computer, you must first transfer these files to a computer. Transferring files also frees up space on your micro SD card for new content. Remote Control Using the supplied remote control: You can start a video recording or take a photo using the remote control. -
Page 29: Connection To " Ismart Dv2" App
Connection to " iSmart DV2" App 1. Before using the WiFi feature, please go to the App Store or GooglePlay and install the iSmart DV2 app on your smartphone or tablet PC. ANDROID 2. Press the DOWN button to activate the built in WiFi (WLAN) function of the camera. - Page 30 NOTE! • Ensure that you have downloaded the correct app. • Please note that wireless transmission of files via the app is not possible for videos with a resolution of more than 1080p. Files with a resolution greater than 1080p can only be transferred using a computer or card reader.
-
Page 31: Technical Specifications
Technical Specifications 4K (60*/30 fps) 2.7K (30 fps) Video resolution 1080p (60/30 fps) 720p (120/60 fps) Photo resolution 20M*/16M*/14M*/10M/8M/5M/2M 1.3”/3.3cm front display Display 2.0”/5cm back display (Touch Screen) Sensor 12MP Waterproof housing Waterproof up to 30m Microphone/Loudspeaker Integrated Wide angle 170° Slow motion 1080p 60fps / 720p 120fps, 60fps 1Sec / 3Secs / 5Secs / 10Secs /30Secs... -
Page 32: Box Contents
WiFi frequency 2.4 GHZ File formats MOV, JPG Interface HDMI, USB 2.0 Micro Battery Exchangeable 1050mAh Li-Ion battery Remote Control Range up to 10M Dimensions of the 60 x 44 x 32 mm product - Support of MicroSD cards up to max. 128GB External memory - Requirement: U3 class10 cards or higher... - Page 33 Disposal Devices marked with this symbol must not NOTE! be disposed of with household waste! You are legally obliged to dispose of old appliances as well as batteries and accumulators separately from household waste. Information on collection points that accept used devices/batteries free of charge is available from your local authority or town council.
- Page 34 WARNING Warning regarding the battery: • Do not store in temperatures above 60°C. • Avoid exposing your camera to very cold or very hot temperatures. Low or high temperature conditions may temporarily shorten the battery life or cause the camera to temporarily stop working properly. Avoid dramatic changes in temperature or humidity when using the camera, as condensation may form on or within the camera.
- Page 35 Declaration of conformity We hereby declare that the marking has been affixed to this product in accordance with the essential requirements and relevant provisions of the European directives. The complete declaration of conformity can be downloaded here: www.easypix.info/download/pdf/doc_goxtreme_vision_duo.pdf...
Need help?
Do you have a question about the Vision DUO and is the answer not in the manual?
Questions and answers