Advertisement
Quick Links
Warning
1. Always take the appropriate steps to protect your camera from falls, shock or impact.
2. Ensure a suitable distance is kept from any objects with strong magnetic interference such as
electrical machinery in order to avoid strong radio waves that may be damaging to the product and
affect the sound or image quality.
3. Never expose the product directly to high temperatures and prolonged strong sunlight.
4. We recommend using high quality, class 6 or above Micro SD Card for the best results.
5. To avoid potential data error, avoid placing your Micro SD card near strong magnetic objects.
6. In the unlikely event of overheating, unwanted smoke or unpleasant smell from the device, unplug it
immediately from the power outlet to prevent hazardous fire.
7. Keep the device out of reach of children while charging.
8. The device should be stored in a dry and dust free location at normal room temperature and out of
direct sunlight.
9. The product should only be charged via laptop or computer USB port.
10. Before using your camera in the water please verify that all lids and locks are tightly closed and sealed
on the camera and the underwater case.
11. After use, clean the housing of salt and chlorine water and then let it dry.
12. The camera should not be exposed to large temperature and humidity differences to avoid
condensation inside the housing or behind the lens.
13. After underwater use, the case must be kept open to avoid condensation or rust.
14. Recording times are depending on resolution.
15. Battery life time - depending on settings and outdoor temperature - up to 90 min.
under optimal conditions.
16. After reaching a max. video recording time of max. 25 minutes the camera will automatically stop.
It can only be restarted manually.
User's manual
1
Advertisement

Related Manuals for goxtreme Vision 4K


Summary of Contents for goxtreme Vision 4K
- Page 1 User’s manual Warning 1. Always take the appropriate steps to protect your camera from falls, shock or impact. 2. Ensure a suitable distance is kept from any objects with strong magnetic interference such as electrical machinery in order to avoid strong radio waves that may be damaging to the product and affect the sound or image quality. 3. Never expose the product directly to high temperatures and prolonged strong sunlight. 4. We recommend using high quality, class 6 or above Micro SD Card for the best results. 5. To avoid potential data error, avoid placing your Micro SD card near strong magnetic objects. 6. In the unlikely event of overheating, unwanted smoke or unpleasant smell from the device, unplug it immediately from the power outlet to prevent hazardous fire. 7. Keep the device out of reach of children while charging. 8. The device should be stored in a dry and dust free location at normal room temperature and out of direct sunlight. 9. The product should only be charged via laptop or computer USB port. 10. Before using your camera in the water please verify that all lids and locks are tightly closed and sealed on the camera and the underwater case. 11. After use, clean the housing of salt and chlorine water and then let it dry. 12. The camera should not be exposed to large temperature and humidity differences to avoid condensation inside the housing or behind the lens. 13. After underwater use, the case must be kept open to avoid condensation or rust. 14. Recording times are depending on resolution. 15. Battery life time - depending on settings and outdoor temperature - up to 90 min. under optimal conditions. 16. After reaching a max. video recording time of max. 25 minutes the camera will automatically stop. It can only be restarted manually.
-
Page 2: Product Features
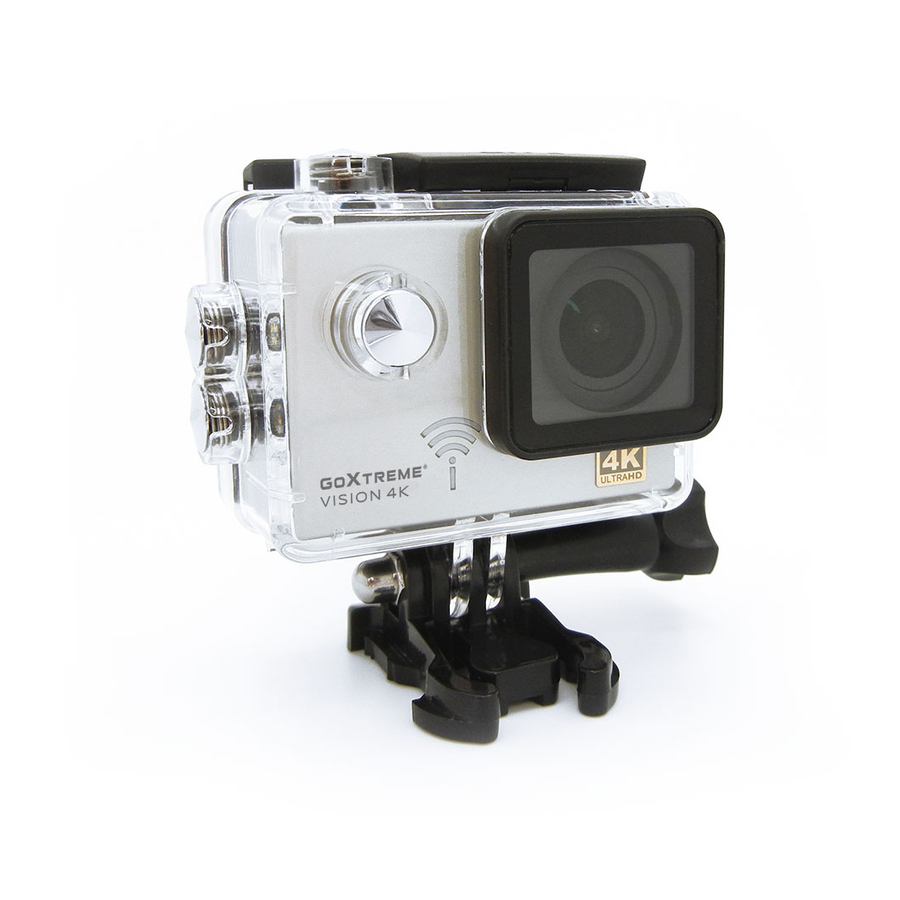
Introduction The GoXtreme Vision 4K is a compact and portable action video and still image camera with class leading features including video recording in stunning ultra high definition at up to 24 frames per second and still image capture at up to 16MP. The 170º viewing angle, built in LCD screen and WiFi connectivity allow you to capture, view and share every detail ensuring nothing is left to chance. With a wide selection of accessories and mounts including the 30M waterproof case available out of the box, the GoXtreme Vision 4K is ready for your next adventure. Product features Includes waterproof case, allowing you to record HD video at up to 30M depth. HD screen display for convenient video and image playback Detachable battery facilitates easy replacement and more power on the go Record videos while charging HD 16 Megapixel (by interpolation), 170ºwide angle lens HDMI Output Web Camera function Supports SD card memory expandable up to 64GB (Maximum) Supports multiple video recording formats: 4K/2.5K/1080P/720P/ WVGA Supports multiple photo shooting modes: Single shot & Snapper Video encryption enabled Camera Micro SD HDMI Switch/Mode Lens... - Page 3 Indicator UP/WiFi Speaker Down Charging Screen Indicator Operation Indicator Waterproof case Down Lens Switch/Mode...
- Page 4 How to mount the included accessories:...
-
Page 5: Mode Switching
1. Installing a Micro SD Card Note: Please choose a branded Micro SD card, and then format it with the computer before use. We suggest a high quality SD card for the perfect result. Maximum card capacity is 64GB (Class 6 or above) 2. Installing and removing the batteries A. Slightly press and swipe the battery cap to open it B. Correctly install the battery into the camera as indicated by +/- sign and make sure it is inserted in the correct direction, matching the arrows marked on the battery before you fit it. C. Battery Gauge: Please refer to diagram D. Removing the Battery: Open the cap and pull out the battery 3. Charging A. You can recharge the camera by connecting it directly to the computer. B. It can be also charged with a car charger (Max output 1.0mAh) C. The camera can record video while charging D. The camera can also be charged with the power switched off. 4. Switching the camera on and off A. Press and hold the power switch for 3 to 5 seconds to turn it on/off B. You can also switch it on/ off trough the LCD screen display menu. 5. Mode Switching Switch between video recording/Photo shooting/Playback by pressing the power button as mode function. Recording mode, while is photo shooting mode. Symbols are displayed on the top of the screen. Refers to the function of video playback, and the last option displayed is system settings. - Page 6 6. Video recording & setting configuration C. 1 6.1. Video recording Switch to recording mode and you will see the icon in the upper left corner of the screen. Press OK to start the recording and the icon in the upper left corner will start to flash. Press “OK” again if you want to stop recording and the icon will disappear. 6.2. Photo shooting & settings Switch the camera on and press “Mode” to select “Photo shooting Mode”, you will see the icon in the upper left corner of the screen display and the camera is in photo shooting mode. Press “OK” to take photos. Shooting Pattern options include: Single shot / Self-timer (2s/5s/10s) and Continuous Shooting 6.3. Data storage & playback You can use the USB cable to transfer your files to the computer or you can remove the micro SD card with the card reader. Always ensure the camera is powered off before inserting or removing the micro SD card. 7. WiFi connection To connect the camera to your Android or iOS smart device please take the following steps: Using the GooglePlay or iOS App Store, install the “CANANY” or “Finalcam“ app on your smartphone or tablet. After powering the camera on, press the WiFi key on the camera - the WiFi icon displays on the screen. Ensure the WiFi function is active on your smart device, go to settings and search for the cameras WiFi account. Connect the smart device and camera using password “12345678” which will display on screen. This action is only required on initial set up or following a system reset. When the WiFi is connected, “WiFi Connection Ready” displays on the screen, The app allows you to view and download your images and video to your smartphone or tablet. The apps on screen icons allow you to perform various app functions or set function parameters of the camera. Please note: Using the app on your smart device it is possible to select and switch between the following video resolution settings: Full HD 1080p, HD 720p, WVGA and VGA. Due to certain WiFi restrictions it is not possible to select or transfer files of 2.5k or 4k Ultra HD resolution.
- Page 7 Android "OKCAM" v1.0.4 Android 4.0.3 or later "FinalCam" v3.0.8.0123 Android 3.0 or later iOS "OKCAM" v1.0.4 iOS 7.0 or later "FinalCam" v1.0.3 iOS 6.1 or later 8. Menu terms Video Resolution (4K 24fps, 2K 30fps, 1080P 60fps, 1080P 30fps, 720P 120fps, 720P 60fps, 720P 30pfps, WVGA P 30, VGA P 240, VGA P 30, QVGA P 30) Selects your video resolution and frame rate setting. Time Lapse Record (Off, 1 Seconds, 2 Seconds, 5 Seconds, 10 Seconds, 30 Seconds, 1 Minute) Selects the interval at which a photo is taken to produce a time lapse video. HDR (Off, On) Turns on High Dynamic Range to record higher contrast images. Record Audio (Off, On) Option to record video with or without sound.
- Page 8 Slow Motion (Off, 720P 120fps, VGA P240) Selects the resolution at which slow motion video will be recorded. Date Stamp (Off, On) Select 'On' to add a date and time display to your recordings. Motion Detection (Off, On) When activated, the camera records automatically while sensing motion. After a period of 10 seconds while it doesn't senses any movement it stops. Image Size (16M 4608x3456, 14M 4320x3240, 12M 4032x3024, 10M 3648x2736, 8M 3264x2448, 5M 2592x1944, 3M 2048x1536, VGA 640x480) Selects the still image resolution. Sequence (Off, 3 Sequence, 5 Sequence, 10 Sequence) When activated the camera takes a rapid burst of 3, 5 or 10 images. Capture Mode (Single, 2S Timer, 5S Timer, 10S Timer, 20S Timer) When activated the camera automatically takes a photo every 2, 5, 10 or 20 seconds. Quality (Fine, Normal, Economy) Selects the quality of the stored images. Default setting is 'Normal'. Sharpness (Strong, Normal, Soft) Adjusts the sharpness of captured images. Default setting is 'Normal'. Anti Shaking (Off, On) Reduces the effect on the final recording that may be caused by a shaking hand or unsecured mount. Exposure (+2.0, +5/3, +4/3, +1.0, +2/3, +1/3, +0.0, -1/3, -2/3, -1.0, -4/3, -5/3, -2.0) Selects you chosen exposure levels. White Balance (Auto, Daylight, Cloudy, Tungsten, Fluorescent) Selects your preferred White Balance setting from a number of pre-set options. Color (Color, Black & White, Sepia) Selects colour options for captured images. ISO (Auto, 100, 200, 400) Selects ISO settings. Default setting is 'Auto'.
- Page 9 Delete Deletes the selected photo / video or all files. Protect Files marked as protected can not be deleted in error. Date/Time (and how to set) When connected to a smartphone the time and date synchronise automatically. However the Date/Time menu option allows you to manually set the time and date if required. Press the up / down buttons on the side of the camera to increase or decrease the selected field . Pressing the OK button allows you to progress to the next setting. After you have made all settings, press the on / off (Mode ) button on the front of the camera to confirm the settings and exit. Auto Power Off (5 Minutes, 10 Minutes) In order to prolong battery life the camera can be set to power off automatically after 5 or 10 minutes. Beep Sound (Off, On) Turn beep On or Off. Language Selects the language displayed for all menu items. Frequency (50 Hz, 60 Hz) Select to match the frequency of the electricty network in your country. An incorrect setting may cause a flickering effect in videos in artifical light. TV-Mode (NTSC, PAL) Select to match your TV playback standard (For example PAL for Europe and NTSC for US). TV-Out (Off, On) Using a HDMI cable (sold separately) to connect your camera and TV, select 'On' to display a live image from the camera on your TV. Screensaver (Off, 30 Seconds, 1 Minute, 3 Minutes, 5 Minutes) To help prolong battery life the camera screen can be set to turn off after a preset period of time. WiFi (Off, On) Turns the cameras WiFi network on or off. WiFi must be activated for use with a smartphone or tablet.
- Page 10 WiFi SSID (and how to set) Allows you to rename your cameras network name . Switch to this menu by pressing the Mode button until the field " Del " displays and delete the default name by repeatedly pressing the OK button . Enter a new name by pressing the Up / Down buttons to select the letter or number , and press enter to confirm your selection . After you have entered the required name change press OK to confirm and save your changes. WiFi Password (And how to set) Allows you to change the factory preset WiFi password (12345678) using the actions described above for changing the SSID. Format (Internal Memory, SD Card) WARNING: Formatting your memory card will erase all files stored on the card. Default Setting (Cancel, OK) Resets your camera and all settings to default factory settings. Version Displays the camera system settings. 9. Technical data Display (LCD) 2.0” LTPS Lens 170°A+ HD wide-angle lens Video resolution 4K (3840x2160) @24fps 2.5K (2560x1440) @30fps 1080p (1920x1080) @60fps/30fps 720p (1280x720) @120fps/60fps/30fps WVGA (800x480) @30fps VGA (640x480) @240fps/30fps QVGA (320x240) @30fps Video format MP4 Compressed video format H.264 Sensor 12MP Sony IMX078 sensor Photo resolution 16M (4608x3456) by interpolation, 14M (4320x3240) by interpolation, 12M (4032x3024), 10M (3648x2736), 8M (3264x2448), 5M (2592x1944), 3M (2048x1536), VGA (640x480)
-
Page 11: Declaration Of Conformity
Micro SD up to 64GB Class 6 or above Shooting mode Single Shot / Self-timer (2s / 5s / 10s / Continuous Shooting Frequency of optical source 50Hz / 60Hz USB USB2.0 Power source interface 5V 2A Battery 1,050mAh Power dissipation 400mA@4.2V Recording time 1080p/ About 70 minutes Charging time About 3hours Operating system (OS) WindowsXP/Vista/Win7/Win8/Win10/Win8 /Win10/Mac OS Dimensions 59 x 41 x 29 mm NOTE: The original specification may vary from time to time due to product upgrading and updating. Please use Micro SD cards up to 64GB, minimum Class6 (not included). Recording times are depending on resolution. Battery life time - depending on settings and outdoor temperature - up to 90 min. under optimal conditions. Before using your camera in the water please verify that all lids and locks are tightly closed and sealed on the camera and the underwater case. After use, clean the housing of salt and chlorine water and then let it dry. The camera should not be exposed to large temperature and humidity differences to avoid condensation inside the housing or behind the lens. After underwater use, the case must be kept open to avoid condensation or rust. DECLARATION OF CONFORMITY Easypix hereby declares that the product GoXtreme Vision 4K is in conformity to all the essential requirements of Directive 1999/5/EC. The declaration of conformity can be downloaded here: http://www.easypix.info/download/pdf/doc_goxtreme_vision4k.pdf For technical help please visit our support area on www.easypix.eu. Only EU...
Need help?
Do you have a question about the Vision 4K and is the answer not in the manual?
Questions and answers