Table of Contents
Advertisement
Quick Links
OPERATING & PACKING INSTRUCTIONS
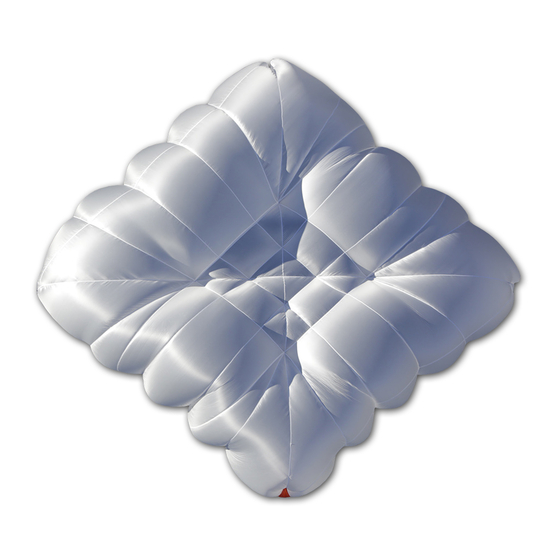
Reserve parachute DIAMONDcross
Models
DIAMONDcross 100 / 125 / 160 / 220 Basic
DIAMONDcross 100 / 125 / 160 / 220 ST
DIAMONDcross 160 ST Tandem
DIAMONDcross 125 / 160 / 220 HG
Certification standards EN 12491 and LTF NFL II 91/09
Version 07/2022 | Valid from year of manufacture 2017
Advertisement
Table of Contents

Related Manuals for CHARLY DIAMONDcross 100 Basic


Summary of Contents for CHARLY DIAMONDcross 100 Basic
- Page 1 OPERATING & PACKING INSTRUCTIONS Reserve parachute DIAMONDcross Models DIAMONDcross 100 / 125 / 160 / 220 Basic DIAMONDcross 100 / 125 / 160 / 220 ST DIAMONDcross 160 ST Tandem DIAMONDcross 125 / 160 / 220 HG Certification standards EN 12491 and LTF NFL II 91/09 Version 07/2022 | Valid from year of manufacture 2017...
- Page 3 It has been written to inform you comprehensively about the correct use and must be read before installation! If you have any questions related to the use of this rescue system, please contact CHARLY directly. If you need professional packing or repair service, please contact your certified dealer or CHARLY.
-
Page 4: Table Of Contents
INTENDED USE & GENERAL SAFETY INSTRUCTIONS PERMISSIBLE OPERATING TIME INNER CONTAINER & INSTALLATION OF THE RESERVE IN THE HARNESS Constructional features of CHARLY inner containers Connecting the reserve to the harness Connecting the inner container to the release handle Repacking into third-party inner containers Compatibility test of reserve, harness &... -
Page 5: Structural Setup
STRUCTURAL SETUP Flight direction indicator (red marking) Stabilo Stabilo Rear vent Main & center lines Lower center lines Control lines Main riser Control riser Control handle Suspension points The figure shows the structural setup of the steerable DIAMONDcross ST. The steerable Basic and HG versions are not equipped with control risers. -
Page 6: Technical Data
The Rotor (CHARLY art.no. HFa160) has been tested and approved for a breaking load of up to 50 kN. The DIAMONDcross HG can be purchased directly ex works with the Rotor looped in, but it is also possible to loop it in at a later date between the reserve lines and the main riser as shown in the picture below. - Page 7 DC160 DC220 Surface 41,0 m 59,2 m Load max. / min. 160 / 80 kg 220 / 100 kg Sink rate 4,8 m/s @ 160 kg 4,6 m/s @ 220 kg 3,5 m/s @ 110 kg 3,6 m/s @ 160 kg Max.
-
Page 8: Intended Use & General Safety Instructions
SAT-like rotations. Inside the CHARLY pocket container, the canopy is protected from dirt in the best possible way, and unintentional release of the line bundles is reliably excluded. Operating & packing instructions | DIAMONDcross... - Page 9 - even if the latter has a significantly smaller volume. Thanks to its centered, triangular pull tab, the CHARLY flat container will slide out of the harness even if the deployment handle is intuitively pulled upward instead of outward.
-
Page 10: Connecting The Reserve To The Harness
(e.g. CHARLY art.no. Be31) or with “soft links” (usually made of Dyneema material) at the attachment points provided for this purpose. From there, they are led to the reserve container via the dedicated channel which is otherwise used for the V-line. - Page 11 Avoiding twists when installing the inner container in the harness Twists are often unavoidable when deploying the reserve. However, the described installation method helps avoid them as much as possible. Position the harness and container as shown on the left. Then turn the container over so that the closure points to the ground.
-
Page 12: Connecting The Inner Container To The Release Handle
Release handles with possibility of looping in the original inner container If there is a possibility of looping in the deployment handle, it is recommended to attach the CHARLY inner container to it. It is then very important to check the length between the handle and the inner container. -
Page 13: Repacking Into Third-Party Inner Containers
CHARLY permits this, provided that it is a standard cloverleaf inner container and its volume is not less than that of the CHARLY rescue system (see technical data). If the design of the third-party inner container differs significantly from the usual cloverleaf containers, the handle-inner container combination must be sent to CHARLY for approval. - Page 14 Gently pull the line bundles from the Open the line compartment closure loops Tie the central line bundle together with a Gently pull the central line bundle from its packing cord closure loop Open the inner container flaps Carefully remove the cap from the inner container Operating &...
- Page 15 Packing into the cloverleaf inner container Carefully insert the cap into the cloverleaf Guide the closure loop through the central container and remove the 3 packing cords eyelet, and secure it with the line bundle Inser the looped line bundles Close the container and make sure that all packing cords have been removed Reserve packed inside the cloverleaf inner...
-
Page 16: Compatibility Test Of Reserve, Harness & Pilot
Particular attention must be paid to the following: • That the packing volume indicated on the CHARLY reserve’s approval label is consistent with the allowed volume indicated in the operating instructions of the harness/ container. -
Page 17: Information For Winch Towing
The paraglider is quickly unloaded and dives down. This prevents the danger of a scissor position between the rescue system and the paraglider, facilitates the recovery of the main glider and even allows the unhooking of one riser with CHARLY Pinlock or even conventional carabiners. - Page 18 This also applies to all non-steerable systems, which is why it is generally advisable to use separation carabiners (e.g. CHARLY Paralock) instead of conventional carabiners. Resolving twists If the paraglider is disconnected, even multiple twists can be resolved quickly and easily with the right technique.
-
Page 19: General Advice For The Use Of A Steerable Reserve
approach and landing are done completely unbraked. GENERAL ADVICE FOR THE USE OF A STEERABLE RESERVE 1. In an air emergency situation, pull the release handle firmly so that the release pins are pulled out of the release pin loops. Throw the inner container holding the reserve, which is attached to the release handle, powerfully into clear air. -
Page 20: Maintenance
8. Heading for the landing area: In the remaining time, head for the nearest possible area where a safe, injury-free landing appears possible. Do not attempt to fly over power lines or other obstacles in low altitude if your position is in front of the obstacle! 9. -
Page 21: Care & Cleaning
If damage is found during the inspection of the reserve parachute, it must be sent to CHARLY or an authorized service center for repair. This also applies to damage whose effects on the airworthiness cannot be clearly determined. The manufacturer must be... -
Page 22: Disposal
Such damage must be checked and, if necessary, repaired by the manufacturer or an authorized service center. We recommend to always inspect the rescue system for signs of wear and, if necessary, have any damage repaired by CHARLY or an authorized service center before the next use. Disposal CHARLY rescue systems are mainly made of fibers such as polyamide, polyurethane and polyethylene, which do not require special disposal. -
Page 23: Optional Riser Cover
For connecting the risers from the tandem spread-bar to the pilot harness, we recommend the use of a riser protection cover (CHARLY Art.No. HFa195RST). To install the riser cover, guide it all the way from the reserve riser loop to under the cover of the pilot’s harness shoulder attachment points. - Page 24 Operating & packing instructions | DIAMONDcross...
-
Page 25: Packing Instructions
All packing rubbers must be replaced with new ones for each packing operation. Original packing rubbers can be obtained from CHARLY (CHARLY Art.Nr. HFa1991). We strongly recommend to let the reserve be packed by a trained professional. -
Page 26: Packing Procedure
Packing procedure Preparation Connect the rescue parachute to the harness as described on page 9 and place the harness on the ground with the back part facing upwards. Sorting the lines Separate the lines of the risers (ST When you reach the center line fork, drop versions) or the riser (Basic &... - Page 27 Check that all center lines go between the two fork lines (5 lines on DIAMONDcross 100 & 125, 8 lines on DIAMONDcross 160, 9 on DIAMONDcross 220). CAUTION: If the center lines are outside, the canopy is twisted in on itself (inside out, line overthrow!).
- Page 28 Presorted canopy after line and twist control. Place the right half of the canopy over the left half as shown in the picture, so that the red marking is visible and facing the packer. For packing, bundle the lines with packing cord.
- Page 29 Due to its asymmetrical lines, the DIAMONDcross has only one packing loop. However, this is sufficient and saves time when packing. The packing loop is attached at the same strap as the front red marking. Stabilo triangles are attached to the lateral corners. A special folding technique for these parts is not required.
- Page 30 Open the gap at the rear corner to position the center lines and place a marker between the other panels. In the picture, an inner container is used as a marker. Position all center lines in the middle and tension them with a light pull (5 lines for DIAMONDcross 100 &...
- Page 31 Continue sorting until all panels are on Put back half of the panels, and remove one side and the red direction indicator the marker. mark is visible again. Lift the edge of the center panel up about 30 cm, and fold it to the left side. Fold the sorted panels inwards twice at about one third of the depth (no S-folds!).
- Page 32 Fold the edge of the center panel to the right side as seen in the direction of flight (the lower side in the picture), and roll the panels of the other side inward as well. Position the now resulting opening over the folded panels, and open the gap as wide as the panels.
- Page 33 Packing into the inner container Tightly roll up the cap approx. 10 to max. Form several vertical S-folds and push 15 cm at the apex and push it all the way them into the container. Multiple small to the bottom of the container. S-folds keep the container flat.
- Page 34 Bundle the lines according to the picture and tie three (max. 4) loops per side and bundle with packing rubbers. Divide the risers (ST versions - left picture ) or line bundles (Basic & HG versions - right picture) and place them in the container. Close the container with the two rubber loops.
- Page 36 FINSTERWALDER GMBH CHARLY PRODUKTE Pagodenburgstr. 8 81247 Munich, Germany Phone +49 89 8116528 E-mail office@finsterwalder-charly.de Website www.finsterwalder-charly.de Webshop shop.finsterwalder-charly.de...
Need help?
Do you have a question about the DIAMONDcross 100 Basic and is the answer not in the manual?
Questions and answers