
Related Manuals for Klarstein MISTRAL


Summary of Contents for Klarstein MISTRAL
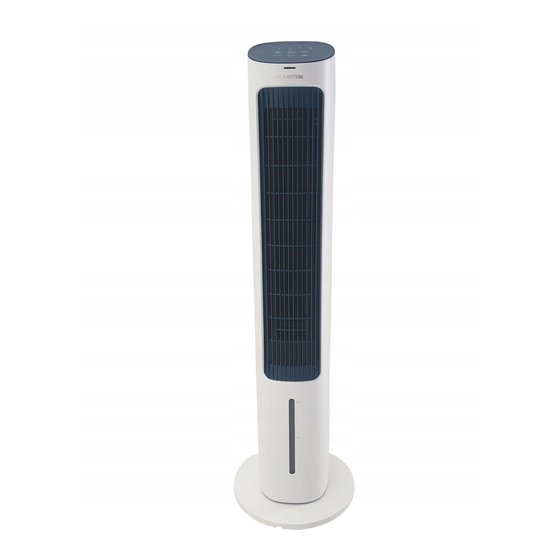
- Page 1 MISTRAL Luftkühler Air Cooler Enfriador de aire Rafraîchisseur d’air Raffreddatore d’aria 10040150 10040151 www.klarstein.com...
-
Page 3: Table Of Contents
Sehr geehrter Kunde, wir gratulieren Ihnen zum Erwerb Ihres Gerätes. Lesen Sie die folgenden Hinweise sorgfältig durch und befolgen Sie diese, um möglichen Schäden vorzubeugen. Für Schäden, die durch Missachtung der Hinweise und unsachgemäßen Gebrauch entstehen, übernehmen wir keine Haftung. Scannen Sie den folgenden QR-Code, um Zugriff auf die aktuellste Bedienungsanleitung und weitere Informationen rund um das Produkt zu erhalten. -
Page 4: Sicherheitshinweise
SICHERHEITSHINWEISE • Prüfen Sie vor der Benutzung die Spannungsangabe auf dem Typenschild. Schließen Sie das Gerät nur an Steckdosen an, die der Spannung des Geräts entsprechen. • Halten Sie das Kabel fern von heißen Oberflächen und scharfkantigen Gegenständen. • Verlegen Sie das Kabel nicht unter einem Teppich und decken Sie es auch nicht mit anderen Gegenständen oder Stoffen ab. - Page 5 • Während des Betriebs befeuchtet das Gerät die Umgebungsluft. Vermeiden Sie jedoch zu hohe Luftfeuchtigkeit. Wir empfehlen Ihnen eine Luftfeuchtigkeit zwischen 40-50 %. Zu hohe Luftfeuchtigkeit kann zu Schimmel oder gesundheitlichen Problemen führen. • Stellen Sie das Gerät nur auf Untergründe, die unempfi ndlich gegenüber Nässe und hoher Luftfeuchtigkeit sind.
-
Page 6: Geräteübersicht
GERÄTEÜBERSICHT Fernbedienung Bedienfeld Schutzgitter Standfuß Frontgehäuse Rückgehäuse Luftauslass Wassertank... -
Page 7: Installation
INSTALLATION Hinweis: Bauen Sie den Standfuß zusammen, wie im Folgenden beschrieben. Es ist strengstens verboten, das Gerät zu verwenden, wenn es nicht richtig zusammengebaut wurde. Entnehmen Sie die beiden Standfußteile sowie das Gerätegehäuse aus der Verpackung. Rotieren Sie die beiden Standfußteile entlang des halbkreisförmigen Positionierschlitzes, bis diese auf der gleichen Stufe wie die untere Ebene sind und die Klammern auf beiden Seiten eingerastet sind. - Page 8 Ziehen Sie das Netzkabel des Geräts durch die Öffnung im Standfuß hindurch. Nachdem Sie die Öffnung des Standfußes (groß) mit der Standfußklammer (groß) ausgerichtet haben, drehen Sie die Öffnung so, dass die Klammer darin positioniert wird. Drehen Sie diese gegen den Uhrzeigersinn und installieren Sie anschließend das Netzkabel in der Kabelrille des Standfußes.
-
Page 9: Bedienfeld
BEDIENFELD Tastenfunktionen Ein/Aus Windgeschwindigkeit: Hoch > Mittel > Niedrig Timer Windmodus: Normaler Wind > Natürlicher Wind > Schlafmodus Schwingfunktion Ionisierung/Luftbefeuchtung... -
Page 10: Bedienung
BEDIENUNG Fernbedienung Die Funktion einiger Tasten auf der Fernbedienung entspricht der Funktion der Tasten auf dem Bedienfeld. Richten Sie den Infrarotsender der Fernbedienung während der Verwendung auf den Empfänger des Geräts. Achten Sie darauf, dass sich zwischen der Fernbedienung und dem Gerät keine Hindernisse befinden. Entnehmen Sie die Batterien aus der Fernbedienung, wenn Sie diese über einen längeren Zeitraum nicht verwenden. - Page 11 Windmodus: Drücken Sie diese Taste, um zwischen normalem Wind, natürlichem Wind und Schlafmodus auszuwählen. • Natürlicher Wind : Natürlicher Wind wird gemäß dem voreingestellten Programm simuliert. Die Lüftergeschwindigkeit wird entsprechend erhöht oder verlangsamt. • Schlafmodus : Die Luft wird gemäß einem voreingestellten Programm vom Gerät abgegeben und eignet sich zum Schlafen.
-
Page 12: Wassertank Mit Wasser Befüllen
WASSERTANK MIT WASSER BEFÜLLEN • Stellen Sie sicher, dass der Netzstecker vor der Entnahme des Wassertanks aus der Steckdose gezogen wurde. • Ziehen Sie den Wassertank aus dem Gerät heraus. Beachten Sie beim Befüllen den Wasserstand im Wassertank. Befüllen Sie den Wassertank nicht höher als zur MAX-Markierung und achten Sie darauf, dass der Wasserstand nicht niedriger als die MIN-Markierung ist. -
Page 13: Eisbehälter Verwenden
EISBEHÄLTER VERWENDEN Hinweis: Stellen Sie vor dem Hineinlegen des Eisbehälters sicher, dass das Gerät ausgeschaltet ist und der Netzstecker aus der Steckdose gezogen wurde. Während der Verwendung ist es untersagt, die den Eisbehälter zu öffnen oder die Eiskristalle im Inneren des Eisbehälters zu essen. Legen Sie den Eisbehälter vor der Verwendung circa 4 Stunden lang in ein Gefrierfach und legen Sie den gefrorenen Eisbehälter anschließend ins Wasser des Wassertanks. -
Page 14: Reinigung Und Pflege
REINIGUNG UND PFLEGE Hinweis: Stellen Sie sicher, dass der Netzstecker vor der Reinigung und Wartung des Geräts aus der Steckdose gezogen wurde. Reinigung des Wassertanks • Platzieren Sie Ihren Daumen in der Pressrille des Wassertanks und drücken Sie die Klemme des Wassertanks nach oben. Ziehen Sie zeitgleich mit den verbleibenden 4 Fingern den Wassertank vollständig aus dem Gerät heraus. -
Page 15: Fehlersuche- Und Fehlerbehebung
Reinigung des Gerätegehäuses • Reinigen Sie die Geräteoberfläche mit einem feuchten Tuch. Es ist verboten, das Gerät unter fließendem Wasser zu reinigen. • Verwenden Sie zur Reinigung des Geräts keine korrosiven Reinigungsmittel. FEHLERSUCHE- UND FEHLERBEHEBUNG Problem Mögliche Ursache Lösungsansatz Das Gerät läuft nicht. Der Stecker wurde nicht Stecken die den Stecker richtig eingesteckt. -
Page 16: Hinweise Zur Entsorgung
HINWEISE ZUR ENTSORGUNG Wenn es in Ihrem Land eine gesetzliche Regelung zur Entsorgung von elektrischen und elektronischen Geräten gibt, weist dieses Symbol auf dem Produkt oder auf der Verpackung darauf hin, dass dieses Produkt nicht im Hausmüll entsorgt werden darf. Stattdessen muss es zu einer Sammelstelle für das Recycling von elektrischen und elektronischen Geräten gebracht werden. - Page 17 Dear customer, Congratulations on the purchase of your appliance. Please read the following instructions carefully and follow them to prevent potential damage. We accept no liability for damage caused by disregarding the instructions and improper use. Please scan the QR code to access the latest operating instructions and further information about the product.
-
Page 18: Safety Instructions
SAFETY INSTRUCTIONS • Check the voltage specification on the type plate before use. Ensure that you only connect the appliance to sockets with the appropriate voltage. • Keep the cable away from hot surfaces and sharp objects. • Do not lay the cable under a carpet or cover it with other objects or fabrics. Lay the cable so that no one falls over it or gets caught on it. - Page 19 Special Notes • This appliance can be used by children aged from 8 years and above and persons with reduced physical, sensory or mental capabilities or lack of experience and knowledge only if they have been given supervision or instruction concerning use of the appliance in a safe way and understand the hazards involved.
-
Page 20: Device Overview
DEVICE OVERVIEW Remote control Control panel Protective grille Stand base Front casing Rear casing Air outlet Water tank... -
Page 21: Installation
INSTALLATION Note: Assemble the stand as described below. It is strictly forbidden to use the appliance if it has not been properly assembled. Remove the two stand parts and the unit casing from the packaging. Rotate the two stand sections along the semi-circular positioning slot until they are at the same level as the lower level and the clips are engaged on both sides. - Page 22 Pull the mains cable of the unit through the opening in the stand. After aligning the opening of the stand (large) with the stand clamp (large), rotate the opening so that the clamp is positioned in it. Turn it anticlockwise and then install the power cable in the cable groove of the stand.
-
Page 23: Control Panel
CONTROL PANEL Button functions On / Off Wind speed: high > medium > low Timer Wind mode: Normal wind > Natural wind > Sleep mode Swing function Ionisation / humidification... -
Page 24: Operation
OPERATION Remote control The function of some buttons on the remote control corresponds to the function of the buttons on the control panel. Point the infrared transmitter of the remote control at the receiver of the unit during use. Make sure that there are no obstacles between the remote control and the unit. - Page 25 Wind mode: Press this button to select between normal wind, natural wind and sleep mode. • Natural wind : Natural wind is simulated according to the preset programme. The fan speed is increased or slowed down accordingly. • Sleep mode : Air is emitted from the unit according to a preset programme and is suitable for sleeping.
-
Page 26: Filling The Water Tank With Water
FILLING THE WATER TANK WITH WATER • Make sure that the mains plug has been disconnected from the socket before removing the water tank. • Pull the water tank out of the machine. Observe the water level in the water tank when filling. -
Page 27: Using The Ice Container
USING THE ICE CONTAINER Note: Before inserting the ice bucket, make sure that the device is switched off and the mains plug has been removed from the socket. During use, it is forbidden to open the ice container or eat the ice crystals inside the ice container. -
Page 28: Cleaning And Care
CLEANING AND CARE Note: Be sure to unplug the mains plug before cleaning or servicing the equipment. Cleaning the water tank • Place your thumb in the press groove of the water tank and press the clamp of the water tank upwards. At the same time, pull the water tank completely out of the appliance with your remaining 4 fingers. -
Page 29: Troubleshooting
Cleaning the unit casing • Clean the surface of the device with a damp cloth. Do not clean the appliance under running water. • Do not use corrosive cleaning agents to clean the unit. TROUBLESHOOTING Problem Potential cause Possible solution The appliance is not The plug has not been Plug the power plug... -
Page 30: Disposal Considerations
DISPOSAL CONSIDERATIONS If there is a legal regulation in your country regarding the disposal of electrical and electronic equipment, this symbol on the product or on the packaging indicates that this product must not be disposed of with household waste. Instead, it must be taken to a collection point for the recycling of electrical and electronic equipment.
Need help?
Do you have a question about the MISTRAL and is the answer not in the manual?
Questions and answers