Table of Contents
Advertisement
Available languages
Available languages
Quick Links
Advertisement
Table of Contents

Related Manuals for Evo-water SOFT MONOMATIK


Summary of Contents for Evo-water SOFT MONOMATIK
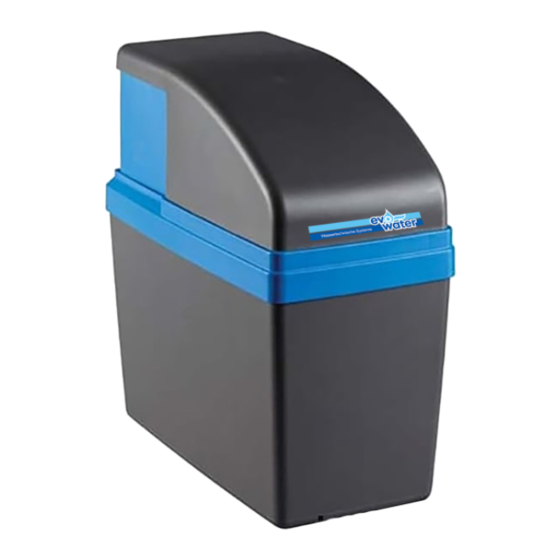
- Page 1 DIGITAL - 2022.03 Seite 2 Installation & Bedienungsanleitung WASSERENTHÄRTER - SIMPLEX Page 8 Installation & Operating Guide WATER SOFTENER - SIMPLEX Page 14 Guide d’Installation & Utilisation ADOUCISSEUR D’EAU - SIMPLEX SOFT MONOMATIK Simplex Monobloc Bypass ¾” M BSP...
- Page 2 Tel. Nummer: _______________________________ evo-water, der Vertreiber dieses Geräts, behält sich alle Rechte am Copyright dieser Installation & Bedienungsanleitung vor. Die Vervielfältigung von Teilen dieses Dokuments in jeglicher Form, ist ohne die ausdrückliche schriftliche Zustimmung des Vertreibers nicht gestattet. Der Vertreiber behält sich das Recht vor, Änderungen ohne vorherige Ankündigung vorzunehmen.
- Page 3 VORSICHTSMAßNAHMEN & EINFÜHRUNG übermäßigen Konzentration von Natriumionen in der Solelösung ALGEMEIN umgekehrt; Harzkügelchen geben ihre Calcium- Magnesiumionen an das Spülwasser ab und ersetzen sie wieder durch ▪ Lesen Sie diese Anleitung sorgfältig durch. Nichtbeachtung der Natriumionen. Wenn sich das Gerät in der Regeneration befindet, Anweisungen in dieser Anleitung: geht es automatisch in Bypass, was zu einer kurzen Zeit 1.
-
Page 4: Wichtiger Hinweis
INSTALLATION Überlauf Salzbehälters Abwassersystem VORBEREITUNG anzuschließen. ▪ Verwenden Sie immer separate Schläuche für den Abfluss des Abbildung 2 Steuerventils und den Überlauf des Salzbehälters. ▪ 1. Bestimmen Sie die bequemste Ausrichtung der Hydraulik- Bei einer festen Verbindung der Schläuche mit dem anschlüsse für den jeweiligen Installationsort. - Page 5 INBETRIEBNAHME & EINSTELLUNGEN START / MANUELLE REGENERATION Abbildung 7 - 8 1. Füllen Sie den Salzbehälter mit Regenerationssalz. 2. Fügen Sie mit Hilfe einem Eimer Wasser in den Salzbehälter : ca. 6 ltr 3. Am Steuerventil des Geräts, drehen Sie mit Hilfe eines Inbusschlüssels n°...
-
Page 6: Wartung
WARTUNG WICHTIGER HINWEIS REINIGUNG ▪ Obwohl das Gerät aus hochwertigen Materialien und Komponenten hergestellt wurde, ist eine Basisinspektion durch WICHTIGER HINWEIS den Benutzer erforderlich, um sicherzustellen, dass es ▪ VERWENDEN SIE NIEMALS AGGRESSIVE, KORROSIVE, SAURE ordnungsgemäß funktioniert und eine optimale Leistung ODER ALKALINE CHEMIKALIEN ZUR REINIGUNG DES GERÄTS, DA erbringt. - Page 7 Seite 7 - DEUTSCH...
-
Page 8: Operating Conditions
_______________________________ evo-Water, the distributor of this device, reserves all rights to the copyright of this Installation & Operating Guide. Reproduction of any part of this document, in any form, is not allowed without the explicit written consent of the distributor. - Page 9 PRECAUTIONS & INTRODUCTION GENERAL The device functions solely by the hydraulic pressure of the incoming water supply; therefore, it has no electrical components, like power ▪ Read this guide carefully. Failure to follow the instructions transformers, motors, switches or cables. All moving parts inside the contained in this guide: device are brought into movement by the water pressure only.
-
Page 10: Important Notice
INSTALLATION ▪ In case of a permanent connection of the hoses to the sewerage PREPARATION system, an air gap must be provided to prevent any form of backflow (required by European standard EN1717). Use the Illustration 2 provided D.O.D. adaptor; make sure it is installed in a standpipe that is at least 20 cm long. -
Page 11: Start-Up & Settings
START-UP & SETTINGS START-UP / MANUAL REGENERATION Illustration 7 - 8 1. Fill the brine cabinet with regeneration salt. 2. Using bucket, water brine cabinet: approx. 6 ltr 3. On the control valve of the device, using a hex key n° 5, turn the program disc counter clockwise until the regeneration starts. -
Page 12: Maintenance
MAINTENANCE IMPORTANT NOTICE CLEANING ▪ Although the device has been manufactured using premium materials and components, a basic inspection by the user is IMPORTANT NOTICE necessary to verify it functions properly and performs optimally. ▪ NEVER USE ANY AGGRESSIVE, CORROSIVE, ACIDIC OR ALKALINE ▪... - Page 13 Page 13 - ENGLISH...
-
Page 14: Conditions De Fonctionnement
______________________________ evo-water, le distributeur de cet appareil, se réserve tous les droits sur le droit d’auteur de ce Guide d’Installation & Utilisation. La reproduction de toute partie de ce document, sous quelque forme que ce soit, n’est pas autorisée sans le consentement explicite en écrit du distributeur. - Page 15 PRÉCAUTIONS & INTRODUCTION il passe automatiquement en bypass, ce qui entraîne une courte période d'eau dure non traitée. GÉNÉRAL L’appareil fonctionne uniquement par la pression hydraulique du ▪ Lisez attentivement ce guide. Ne pas suivre les instructions réseau d’eau entrante; par conséquent, il n'a pas de composants stipulées dans ce guide: électriques, comme des transformateurs, des moteurs, des contacts 1.
- Page 16 INSTALLATION ▪ Utilisez toujours le tuyau flexible renforcé gris fourni pour PRÉPARATION raccorder l’égout de de la vanne de commande et le trop-plein du bac à sel au réseau d’évacuation. Illustration 2 ▪ Utilisez toujours des tuyaux séparés pour la vanne de commande 1.
- Page 17 MISE EN MARCHE & RÉGLAGES MISE EN MARCHE / RÉGÉNÉRATION MANUELLE Illustration 7 - 8 1. Remplissez le bac à sel de sel de régénération. 2. À l'aide d'un seau, ajoutez d'eau dans le bac à sel : environ 6 ltr 3.
-
Page 18: Entretien
ENTRETIEN NOTICE IMPORTANTE NETTOYAGE ▪ Bien que l’appareil ait été fabriqué avec des matériaux et composants de première qualité, une inspection de base par NOTICE IMPORTANTE l’utilisateur est nécessaire pour vérifier qu’il fonctionne ▪ N’UTILISEZ JAMAIS DES PRODUITS CHIMIQUES AGGRESSIFS, correctement et de manière optimale. - Page 19 Page 19 - FRANCAIS...
- Page 20 ABBILDUNGEN - ILLUSTRATIONS Seite / Page 20...
- Page 21 ABBILDUNGEN - ILLUSTRATIONS Seite/ Page 21...
- Page 22 ABBILDUNGEN - ILLUSTRATIONS Seite / Page 22...
- Page 23 ABBILDUNGEN - ILLUSTRATIONS Seite/ Page 23...
- Page 24 GmbH Schulstraße 9, 72535 Heroldstatt, Deutschland Tel.: +49 7389 906680 E-Mail: info@evo-water.com www.evo-water.com...
Need help?
Do you have a question about the SOFT MONOMATIK and is the answer not in the manual?
Questions and answers