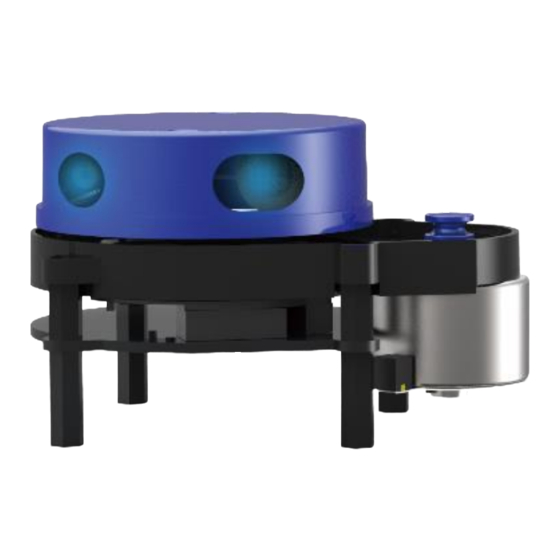
YDLIDAR X4 Lidar User Manual
Hide thumbs
Also See for X4 Lidar:
- User manual (12 pages) ,
- User manual (16 pages) ,
- User manual (14 pages)
Table of Contents
Advertisement
Quick Links
Advertisement
Table of Contents

Summary of Contents for YDLIDAR X4 Lidar
- Page 1 USER MANUAL Shenzhen EAI Technology Co.,Ltd.
-
Page 2: Table Of Contents
CONTENTS 1 YDLIDAR X4 LIDAR DEVELOPMENT KIT ..........1 1.1 Development Kit ..................1 2 USAGE UNDER WINDOWS ..............1 2.1 Device Connection ..................1 2.2 Driver Installation ..................2 2.3 Evaluation Software Usage..............4 2.3.1 Start Scanning ......................5 2.3.2 Data Storage ...................... -
Page 3: Ydlidar X4 Lidar Development Kit
1 YDLIDAR X4 LIDAR DEVELOPMENT KIT The development kit of YDLIDAR X4 lidar (hereinafter referred to as X4) is an accessory tool provided for performance evaluation and early rapid development of the X4. Through the X4 development kit, and with the evaluation software, users can observe point cloud data scanned by X4 on your environment or development on the SDK. -
Page 4: Driver Installation
FIG 2 YDLIDAR X4 DEVICE CONNECTION STEP 1 FIG 3 YDLIDAR X4 DEVICE CONNECTION STEP 2 Connect the adapter board with X4 first, then connect the USB cable to the USB port of the adapter board and the PC. Note that the Type-C interface of the USB cable is connected to the USB_DATA of the USB adapter board. - Page 5 CP210x_VCP_Windows). Please select the 32-bit version (x86) or 64-bit version (x64) installation program according to the version of the windows operating system. FIG 5 YDLIDAR X4 DRIVER VERSION SELECTION Double-click the exe file and follow the prompts to install it.
-
Page 6: Evaluation Software Usage
X4 real-time scanning. Users can intuitively observe the X4 scanning effect chart. GDL real- time point cloud data and real-time scanning frequency are provided on YDLIDAR. At the same time, users can save the scanned data offline to an external file for further analysis. Visualization software download link: https://www.ydlidar.com/Public/upload/download/TOOL.zip... -
Page 7: Start Scanning
FIG 9 POINTCLOUD VIEWER INTERFACE 2.3.1 Start Scanning Click to start scanning and display the environment point cloud, the upper left corner displays the angle & distance information of the red line position (unit: mm). Click to stop it. as shown below: FIG 10 LIDAR SCANNING POINT CLOUD DISPLAY 2.3.2 Data Storage... -
Page 8: Display Mean And Standard Deviation
2.3.3 Display Mean and Standard Deviation Click [Tools] in the main menu, then select [Mean And STD] - [View]. FIG 12 YDLIDAR G4 DISPLAY MEAN AND STANDARD DEVIATION Choose one according to needs, move the mouse to the test position, right-click the pop-up menu, and select [Lock Mouse Tracking]. -
Page 9: Debug
FIG 14 RECORD AND PLAY The main window is displayed as follows: To record lidar data, click to start recording, and click to stop recording. In non-scanning mode, click to start play. The play process is as follows: FIG 15 PLAY PROCESS 2.3.5 Debug Click [Tools] in the main menu, and then select [DebugON] to output the raw lidar data to the "viewer_log.txt"... -
Page 10: Filter
YDLIDAR_ROS_DRIVER depends on the YDLIDAR-SDK library. If never installed the YDlidar-SDK library before, or it has expired, it is necessary to install the YDlidar-SDK library. If the system has installed the latest version of ydlidar-SDK, please skip this step, then go to the next step. -
Page 11: Ros Driver Installation
$ cd YDLidar-SDK/build $ cmake .. $ make $ sudo make install 3.3 ROS Driver Installation 1) Cloning GitHub's YDlidar ROS Driver Package: $ git clone https://github.com/YDLIDAR/ydlidar_ros_driver.git ydlidar_ws/src/ydlidar_ros_driver 2) Build the Ydlidar_ROS_Driver software package: $ cd ydlidar_ws $ catkin_make 3) Package environment Settings: $ source ./devel/setup.sh... -
Page 12: Run The Ydlidar_Ros_Driver
$ roslaunch ydlidar_ros_driver lidar_view.launch Note: Take G4 as an example by default, if use other types of lidar, need to change lidar.launch in lidar_view.launch file to the corresponding **.launch file. (If X4 lidar is used, it needs to be changed to X4.launch) FIG 18 YDLIDAR X4 RVIZ 3.6 Modify Scan Angle... -
Page 13: Caution
Note: For more information about the file contents, please refer to: https://github.com/YDLIDAR/ydlidar_ros_driver#configure-ydlidar_ros_driver-internal-parameter 2) The X4 lidar coordinates follow the right-hand rule within ROS, with an angle range of [-180, 180]. "angle_min" is the start angle, and "angle_max" is the endangle. The specific scope needs to be modified according to actual use. -
Page 14: Ambient Lighting
X4 lidar. Avoid using in high temperature (>50 degrees Celsius) and low temperature (<0 degrees Celsius) conditions. 4.2 Ambient Lighting The ideal working environment of X4 is indoor, and the indoor environment light (including no light) will not affect the work of X4. -
Page 15: Revise
5 REVISE Date Version Content 2017-12-05 Composing a first draft Added auxiliary power connection method, document description, 2018-01-22 configuration description, and power supply requirements 2018-04-03 Adapt to PointCloudViewer2.0 client 2021-08-02 Adapt LidarViewer client, update SDK, ROS tutorial Copyright 2017 EAI All Rights Reserved 13 / 13...


Need help?
Do you have a question about the X4 Lidar and is the answer not in the manual?
Questions and answers