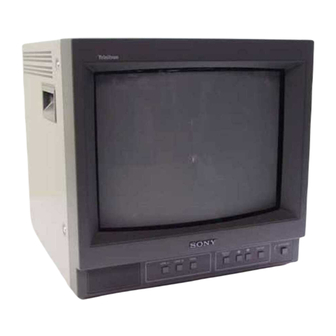
Page 2
PUBLISHED BY SONY. CIRCUIT ADJUSTMENTS THAT ARE FONCTIONNEMENT. NE LES REMPLACER QUE PAR DES CRITICAL TO SAFE OPERATION ARE IDENTIFIED IN THIS COMPOSANTS SONY DONT LE NUMÉRO DE PIÉCE EST INDIQUÉ MANUAL. FOLLOW THESE PROCEDURES WHENEVER CRITICAL DANS LE PRÉSENT MANUEL OU DANS DES SUPPLÉMENTS COMPONENTS ARE REPLACED OR IMPROPER OPERATION IS PUBLIÉS PAR SONY.
Page 6
In the event of a malfunction or when maintenance is About this manual are in any doubt consult a qualified electrician. necessary, consult an authorized Sony dealer. On installation Before operating the unit, please read this manual thoroughly and retain it for future reference.
Page 7
4 UPOWER switch and indicator .......................................... Press to turn the monitor on. The indicator lights in 1) Trinitron green. “Trinitron” is a registered trademark of Sony Corporation. To turn the power off, press this again. 2) NTSC 4.43 The NTSC system refers to an NTSC color system in which the subcarrier frequency is modified to 4.43MHz.
Page 8
Location and Function of Parts and Controls 2 LINE B connectors EXT SYNC (external sync input) connector Rear Panel Input connectors for the composite video, Y/C separate (BNC-type) video and audio signals. Connect to the sync signal output of a video camera, To monitor the input signal fed through these VCR or other video equipment.
Page 9
Using On-Screen Menus You can make various settings and adjustments of the Usable buttons depend on the displayed menu. Buttons Operation through On-Screen monitor using the on-screen menus. that can be used on the menu are displayed at the Menus bottom line of the screen.
Page 10
Using On-Screen Menus To change the item selection menus Note Functions of On-Screen Menus 1b CONTRAST menu (Factory setting: 80) Select NEXT PAGE on the menu to display next item The phase of an NTSC composite video signal or a selection menu and PREVIOUS PAGE on the menu to Y/C separate signal can be corrected on this menu.
Page 11
Connections Specifications Using On-Screen Menus Video signal 2d USER MEMORY menu The following menus are provided with the PVM- How to Connect the AC Power 14N6A/14N6E/14N6U /20N6A/20N6E/20N6U only. Cord Color system NTSC, PAL, SECAM, NTSC 4.43 3a RGB SYNC menu Resolution 500 TV lines Connect the AC power cord (supplied) to the ⁄AC IN...
Page 12
This section may help you isolate the problem. Should Outputs PVM-14N5A/14N5E/14N5U/ the problem persist, unplug the unit and contact your 14N6A/14N6E/14N6U: Sony dealer or local authorized Sony service facility. LINE A 346 × 340 × 414 mm Y/C OUT 4-pin mini-DIN (×1) loop-through, ×...
Page 14
In the event of a malfunction or when maintenance is are in any doubt consult a qualified electrician. Before operating the unit, please read this manual necessary, consult an authorized Sony dealer. On installation thoroughly and retain it for future reference.
Page 15
.......................................... 1) Trinitron “Trinitron” is a registered trademark of Sony Corporation. 2) NTSC 4.43 The NTSC system refers to an NTSC color system in which the subcarrier frequency is modified to 4.43MHz. When an 4.43...
Page 16
Location and Function of Parts and Controls Front Rear Panel LINE A connectors LINE B connectors LINE A LINE B ~ AC IN VIDEO AUDIO VIDEO AUDIO LINE A LINE B MENU/ ENTER POWER Speaker EXIT MENU/ LINE A LINE B ENTER POWER EXIT...
Page 17
Using On-Screen Menus Location and Function of Parts and Controls 2 LINE B connectors You can make various settings and adjustments of the Input connectors for the composite video, Y/C separate monitor using the on-screen menus. video and audio signals. To monitor the input signal fed through these On-Screen Menu Configuration connectors, press the LINE B button on the front...
Page 18
Using On-Screen Menus Usable buttons depend on the displayed menu. Buttons To change the item selection menus Operation through On-Screen Functions of On-Screen Menus that can be used on the menu are displayed at the Select NEXT PAGE on the menu to display next item Menus bottom line of the screen.
Page 19
Attaching the Side Covers Using On-Screen Menus 1c BRIGHTNESS menu (Factory setting: STD) 2a COLOR SELECT menu 2d USER MEMORY menu (Factory setting: AUTO) Tabs on the upper edge Adjust the brightness of the screen. The items have the following functions. Select the color system of the input signal.
Page 20
Connections Specifications How to Connect the AC Power Video signal General Pin assignment Cord Color system NTSC, PAL, SECAM, NTSC Classification of equipment Y/C IN connector (4-pin mini-DIN) 4.43 Horizontal Resolution – Type of protection against electric shock: Class I Connect the AC power cord (supplied) to the ⁄AC IN 500 TV lines equipment...
Page 21
Troubleshooting This section may help you isolate the problem. Should the problem persist, unplug the unit and contact your Sony dealer or local authorized Sony service facility. Symptom Possible causes and remedies If colors are not accurately reproduced The monitor input signal is deviated from the color system specifications (i.e.
Page 23
In the event of a malfunction or when maintenance is About this manual are in any doubt consult a qualified electrician. necessary, consult an authorized Sony dealer. On installation Before operating the unit, please read this manual thoroughly and retain it for future reference.
Page 24
ENTER button > button . button .......................................... 1) Trinitron “Trinitron” is a registered trademark of Sony Corporation. 2) NTSC 4.43 The NTSC system refers to an NTSC color system in which the subcarrier frequency is modified to 4.43 MHz. When an 4.43...
Page 25
Connections Location and Function of Parts and Controls Rear Panel How to Connect the AC Power Cord How to Connect a Cable to a BNC Connector Connect the AC power cord (supplied) to the ⁄AC IN Connect the coaxial cable with the BNC connectors to connector and to a wall outlet.
Page 26
Using On-Screen Menus You can make various settings and adjustments of the Usable buttons depend on the displayed menu. Buttons Operation through On-Screen Menus monitor using the on-screen menus. that can be used on the menu are displayed at the bottom line of the screen.
Page 27
Using On-Screen Menus To change the item selection menus 1b CONTRAST menu (Factory setting: 80) 2a COLOR SELECT menu Functions of On-Screen Menus Select NEXT PAGE on the menu to display next item (Factory setting: AUTO) selection menu and PREVIOUS PAGE on the menu to display the previous item selection menu.
Page 28
Video signal the problem persist, unplug the unit and contact your 100 to 240 V AC, 50/60Hz Color system NTSC, PAL, SECAM, NTSC Sony dealer or local authorized Sony service facility. 4.43 “For use of SSM-14N5U/20N5U”, Resolution 500 TV lines operate these monitors on 120 V AC.
2-2. DISASSEMBLY 2-2-1. Cabinet Removal 2-2-2. A Board Removal 1 Two screws (Claw screw M4 x 8) 4 Cabinet 2 PCB holder 20-inch only 3 A board Remove the connector 1 Connector panel panel pressing the 2 Two screws bottom at BEZNET which shows 0.
2-2-5. Removal of Anode-cap 2. Handling Precautions Note: Short circuit the anode of the picture tube and the anode cap to the metal chassis, picture tube (1) Don’t hurt the surface of anode-caps with sharp shaped shield or carbon painted on the picture tube, material! after removing the anode.
SECTION 3 SET-UP ADJUSTMENTS 3-1. PREPARATIONS (1) Service Mode Screens With no menus displayed state [Tools|required] . Oscilloscope Press the [MENU] and [ENTER] keys simultaneously. . Digital multimeter . Degausser . Video signal generator . Variable AC power supply (or NF power supply) .
Page 34
3. Exiting the Service Mode Service Items of EEPROM Data To exit the service mode, switch to the raster center Default Data adjustment mode, and press the [ENTER] and [MENU] No. String 14-inch 20-inch keys simultaneously. DESTINATION U/C: 1 U/C: 1 4.
Page 35
Default Data Default Data No. String No. String 14-inch 20-inch 14-inch 20-inch 41 C/O B ROUGH 81 H BLK R 60 RGB C/O OFFSET CVBS 82 H BLK L 50 CVBS C/O R FINE CVBS 83 H BLK R 50 CVBS C/O G FINE CVBS 84 H BLK L 50 RGB C/O B FINE CVBS...
3-2. PREPARATIONS (2) 3-3. OUTPUTTING IMAGES Setting the AC Input Voltage . Set the video signal generator as follows, and input the composite video signal. (1) Input the video signals and audio signals into each terminal of the connector panel. Signal Standard Signal...
3-5. LANDING ADJUSTMENT 14-inch Purity control 1. Preparations (1) To reduce geomagnetism effects, face the CRT screen Purity control Purity of this to the east or west. (2) Loosen the fixture of the deflection yoke, and push back the deflection yoke. (3) Turn on the power switch, and degauss with the degausser.
3-6. CONVERGENCE ADJUSTMENT 5. For VMC, use a 6-pole magnet to adjust so that the R and B dots are symmetrical above and below the G dot. 1. Input the dot pattern signal. Set CONTRAST to the position at which it can be seen clearly.
3-7. INCLINATION OF DEFLECTION 2. Insert the wedges into the DY and CRT funnel face to YOKE ADJUSTMENT fix the deflection yoke. The number and position of the wedges are shown in the figure below. If there is misconvergence at both sides of the X or Y axis of the CRT screen, incline the deflection yoke in the arrow direction to reduce the misconvergence for the entire CRT screen to satisfy the tolerance specified.
3-8. G2 ADJUSTMENT 3-9. WHITE BALANCE ADJUSTMENTS 3-9-1. VIDEO (Except SECAM) Adjustment 1. Receive the 525 or 625 monoscope signal. 2. Set as follows in the service mode. 1. Select the LINE A input. Item Data Set the monitor to the levels in the following table in PVM-14N5U/14N6U PVM-20N5U/20N6U the service mode.
3-9-2. Analog RGB Adjustment 11. Copy the data of the items adjusted in steps 1 to 10 to (PVM-14N6A, PVM-14N6E, PVM- the service items for adjusting the SECAM white 14N6U, PVM-20N6E, PVM-20N6U) balance. 42 [C/O|OFFSET|CVBS]- Copied to → 50 [C/O|OFFSET|SECAM] 43 [C/O|R|FINE|CVBS] - Copied to →...
3-10. FOCUS ADJUSTMENT 3-9-3. SECAM Cut-off Adjustment 1. Select LINE-A input. Adjust RV702 of the CA board for the 14-inch model. 2. Input the SECAM all gray signal (Fig. 5) into the Adjust RV at the top of the FBT for the 20-inch model. LINE-A.
SECTION 4 SAFETY RELATED ADJUSTMENTS 4-1. B+ + + + + VOLTAGE CHECK The “4-1. B+ + + + + Voltage Check” and “4-2. Note: Protection Circuit (Hold-down circuit) Check” should always be performed when replacing Note: Be sure to use the NF power supply. If not, use the following components marked on the an ordinary power supply of its distortion...
4-2. PROTECTION CIRCUIT (HOLD- DOWN CIRCUIT) CHECK Note: Be sure to use the NF power supply. If not, use an ordinary power supply of its distortion factor is 3% or less. 1. Protection Circuit Normal Operation Check 120 ± 3 Vac Input voltage: Input signal: Black...
SECTION 5 CIRCUIT ADJUSTMENTS 5-1. PREPARATIONS 5-2-2. Horizontal Deflection Section Adjustment Input signals within ± 2 % of the following specifications. Note 1: Make sure that the “3-4. Raster Centering Adjustment” has been completed before Signal Standard performing this adjustment. Signal Contents Level P-W...
5-2-3. Horizontal Centering Adjustment The register for adjusting the horizontal centering requires 5 adjustments depending on the combination of the input and signal. No. Item Input Adjustment Signal 71 H CENT 60 Hz CVBS LINE-A 525 Monoscope 72 H CENT 60 Hz RGB 525 Monoscope 73 H CENT 50 Hz CVBS LINE-A...
Page 47
LETTER SIDE ERC06-15S RGP15J-6040G23 TOP VIEW 1SS133T-77 64Pin DIP CATHODE MC14052BCP TOP VIEW SLR-56MC3F 16Pin DIP ANODE 2SC3209LK MC7805CT FML-G12S 2SC3209LK-TP MC7809CT NJM7809FA SE115N TA7805S CATHODE CATHODE ANODE ANODE 2SC3852A GPU4JL-6088 2SD2394-EF GND OUT STR-S6708 ‘ ‘ 2SD1878-CA 2SD1877S-SONY-CA A Chassis...
SECTION 7 EXPLODED VIEWS . The construction parts of an assembled NOTE: The components identified by part are indicated with a collation number mark are critical for safety. . Items with no part number and no in the remark column. Replace only with part number description are not stocked because they specified.
SECTION 8 ELECTRICAL PARTS LIST . Items marked “*” are not stocked since they are NOTE: When indicating parts by reference number, seldom required for routine service. Some delay The components identified by please include the board name. should be anticipated when ordering these items. mark are critical for safety.
SECTION 9 BLOCK DIAGRAMS SSM-14N5A,14N5E,14N5U, CN401 SSM-20N5A,20N5E,20N5U ONLY AUDIO-A JW402 IC301(1/2) JW401 DECODER COMPOSITE/S-A CN351 TO Q BOARD VIDEO/Y-A ANALOG R R BUFFER R AMP EXCEPT SSM-14N5A,14N5E,14N5U, Q352 Q353 SSM-20N5A,20N5E,20N5U ANALOG G R/G/B/BLK ANALOG B OSD SW IC402 D002-005 G BUFFER G AMP EXCEPT SSM-14N5A,14N5E,14N5U, VIDEO SW...
Page 68
CA, CB 14 inch MODEL +900V CN1301 LINE A-A RV702 J1305 AUDIO-A BUFFER FOCUS AUDIO IN Q1305 J1306 AUDIO OUT RV703 LINE A-C +900V CN701 H.STAT BUFFER RV701 IC1301(1/2) Q1302 J701 VIDEO SW TO A BOARD J1301 +180V LINE A VIDEO IN CN702 J1302...
SECTION 10 DIAGRAMS 10-1. FRAME SCHEMATIC DIAGRAMS 10-2. SCHEMATIC DIAGRAMS/PRINTED WIRING BOARDS Note: CN1301 CN401 CN501 All capacitors are in µF unless otherwise noted. RED-L :S-MICRO :S-MICRO PF: 50WV or less are not indicated except for VIDEO/Y-A VIDEO/Y-A V DY + J1301 COMPOSITE/S-A COMPOSITE...
A BOARD -B SIDE- SUFFIX: -11 10-2 10-2 A Chassis...
Page 71
A BOARD Note : *: B SIDE The circuit indicated as left contains high voltage of over EY840 EY839 EY842 600 V p-p. Care must be paid to prevent an electric shock IC001 E-11 D2506 IC002 D-12 in inspection or repairing. IC003 E-10 EY887...
Page 72
A (1/2) A (1/2) A (1/2) BOARD IC201 TDA7052A A (1/2) BOARD IC401 MC14052BCP A (1/2) BOARD WAVEFORMS 4.6Vp-p (H) 3.9Vp-p (4MHz) 1.0Vp-p (H) 2XCOM XCOM OUT+ 2.2Vp-p (H) 2.5Vp-p (H) 2.6Vp-p (H) OUT- STABILIZER TEMPERATURE PROTECTION Vref NTSC 3.58, 4.43/PAL 4.6Vp-p (H) 1.3Vp-p (V) 1.0Vp-p (H)
A (1/2) A (1/2) SPEAKER A BOARD (1/2) CN052 CN051 CN201 :S-MICRO :S-MICRO C1441 C1437 C1438 C1439 C1440 Q364 Q363 Q362 Q361 220p 220p 220p 220p 2SC2412K-T-146-Q 2SC2412K-T-146-Q 2SC2412K-T-146-Q 2SC2412K-T-146-Q CH:CHIP CH:CHIP CH:CHIP CH:CHIP CH:CHIP C208 OFFSET CUTOFF R CUTOFF G CUTOFF B CUTOFF 100p...
Page 74
A (2/2) A (2/2) A (2/2) BOARD IC551 STV9739 A (2/2) BOARD WAVEFORMS OUTPUT SUPPLY STAGE FLYBACK VOLTAGE SUPPLY GENERATOR 14” 940Vp-p (H) 14” 7.3Vp-p (V) 14” 16.0Vp-p (H) FLYBACK 20” 960Vp-p (H) 20” 10.0Vp-p (V) 20” 20.0Vp-p (H) GENERATOR –...
Page 75
A (2/2) A (2/2) R551 C1453 100p V DY + V OUT 500V A BOARD (2/2) D103 D102 V DY - Q102 MTZJ-T-77-36B EL1Z-V1 R110 2SC2412K-T-146-Q PROTECTOR H.PROT-RECT H DY - PROTECTOR DRIVE C1488 H DY - H OUT CH:CHIP H DY + C102 D503...
Page 81
The material contained in this manual consists of information that is the property of Sony Corporation and is intended solely for use by the purchasers of the equipment described in this manual. Sony Corporation expressly prohibits the duplication of any portion of this manual or the use thereof for any...