Table of Contents
Advertisement
Quick Links
As one of Australia's leading bedroom furniture manufacturers, we have long established partnerships with
Australia's most successful retailers.
Customers who buy our products recognise our commitment to quality and customer satisfaction.
SilverLynx is a values-based business. Our commitment to quality, evolving design leadership, customer
service and exceeding customer expectations - is unsurpassed in the industry.
Enjoy your SilverLynx product.
Please read through these assembly instructions carefully to ensure that you can assemble your new purchase
without stress. These detailed instructions will guide you on how to prepare and assemble your bedroom
DIFFICULTY
WE ADVISE YOU DO NOT USE POWERED DRILLS TO ASSEMBLE ANY BOLTS ON THIS BED
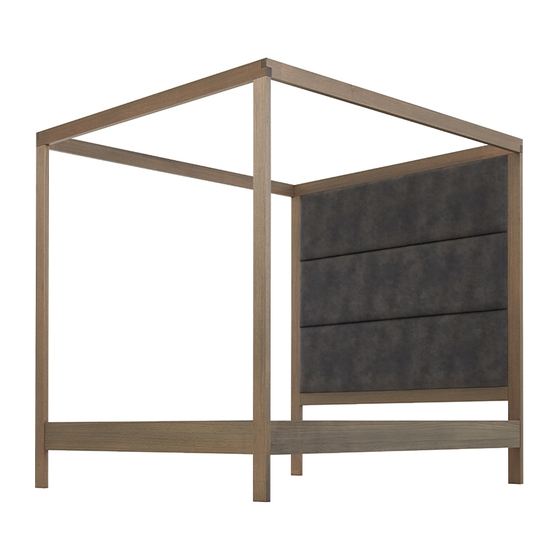
Please note, your bed head may look different to this image, however the following instructions will still apply
Bomi Furniture P/L trading as SilverLynx ABN 99 006 489 541 11-17 Sages Road Glenroy Victoria 3046 Australia
T:+61 3 9359 4000 F:+61 3 9359 4322 E:sales@silverlynx.com.au W:www.silverlynx.com.au
Thank you for purchasing a SilverLynx product
LINCOLN 4 POSTER BED
Assembly Instructions
Please retain these instructions for future reference
suite.
Advertisement
Table of Contents

Related Manuals for Silver Lynx LINCOLN 4


Summary of Contents for Silver Lynx LINCOLN 4
- Page 1 SilverLynx is a values-based business. Our commitment to quality, evolving design leadership, customer service and exceeding customer expectations - is unsurpassed in the industry. Enjoy your SilverLynx product. LINCOLN 4 POSTER BED Assembly Instructions Please retain these instructions for future reference Please read through these assembly instructions carefully to ensure that you can assemble your new purchase without stress.
- Page 2 EQUIPMENT PROVIDED Hardware Pack: containing - 12x (M6) 10mm button head bolts; 2x 38mm screws; 4x M6 110mm bolts; 2x allen keys Bed Frame Parts: Slat System: See the attached document “Amendment to instructions for all SilverLynx beds”. Not Provided: Phillips head screwdriver Bomi Furniture P/L trading as SilverLynx ABN 99 006 489 541 11-17 Sages Road Glenroy Victoria 3046 Australia T:+61 3 9359 4000 F:+61 3 9359 4322 E:sales@silverlynx.com.au W:www.silverlynx.com.au...
- Page 3 NOTE – The Lincoln 4 Poster has been STEP 1(A) shipped as shown on the previous page, however, the Bed Head and Foot can be partially knocked-down to assist delivery through tight spaces if needed. If you are going to partially knock-down your bed before setup, please start at STEP 1.
- Page 4 STEP 5 – Complete the above STEP 5 process on the other Side Rail, then repeat with the Foot Panel. Having trouble? See *Helpful Tips* at the end of this document. STEP 6 – Ensure that the bed is sitting square and then tighten all button head bolts using the allen key.
- Page 5 STEP 8 – To set up the slat and spine system, proceed to the instructions titles “Amendment to instructions for all SilverLynx beds”. Note the 2x 38mm screws provided in the hardware pack can be used in this section of the assembly.
Need help?
Do you have a question about the LINCOLN 4 and is the answer not in the manual?
Questions and answers