Table of Contents
Advertisement
Quick Links
Advertisement
Table of Contents

Related Manuals for Texecom PREMIER RKP8PLUS


Summary of Contents for Texecom PREMIER RKP8PLUS
- Page 1 Installation Manual PREMIER RKP8PLUS/16PLUS INS181-5...
-
Page 2: Table Of Contents
Content 1.0 Installation ..........................1.1 Mounting RKP8/16 Plus ......................1.2 Selecting an Address ......................1.3 Wiring ..........................1.4 Programming/Confirm Devices .................... 1.5 Technical Specifications ...................... 1.6 Standards ..........................1.7 Warranty ..........................INS181-5 2/9... -
Page 3: Installation
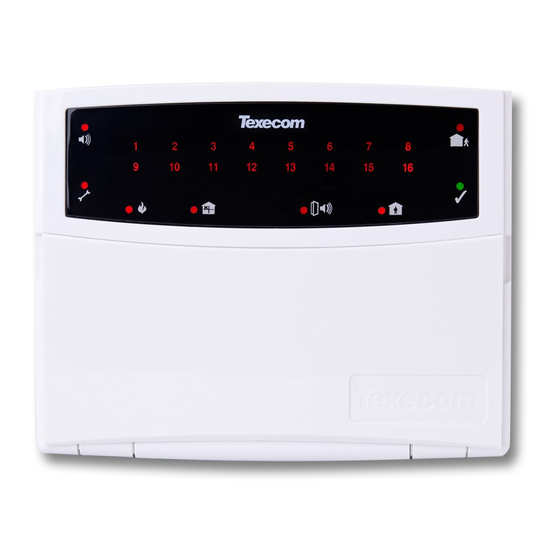
1.0 Installation The Premier RKP8/16 Plus remote keypads are suitable for use with the following Texecom control panels: Premier 412 and Premier 816 with Version 2.1 or higher panel software. Up to 6 keypads may be connected to the system 1.1 Mounting RKP8/16 Plus... -
Page 4: Selecting An Address
1.2 Selecting an Address Each keypad MUST be given a different address using the DIP switch on the left hand side of the PCB as follows: NEVER set two RKPs to the same address. Keypads are factory set to Address 1 (all switches off). -
Page 5: Wiring
1.3 Wiring It is strongly recommended that the system is completely powered down (mains and battery) before wiring a keypad. Connect the keypad to the control panel using 4-core cable as follows: Up to six keypads may be connected in parallel (‘star’) or series (‘daisy‑chain’) or any combination. -
Page 6: Programming/Confirm Devices
1.4 Programming/Confirm Devices When the system is powered up you will need to confirm the devices connected to the data bus. To Confirm Devices on all types of RKP’s panel firmware version 14.06 onwards please use the following procedures. The method for each keypad is detailed. For previous versions (14.04 and below) you can only confirm devices with an LCD RKP. -
Page 7: Technical Specifications
day mode operation Any premier International panels containing a software version prior to V14.02 that is flashed with version V14.02 or later, The Confirm Devices strings are not loaded in the panel’s memory so any reference to them results in black squares being shown. -
Page 8: Standards
Texecom cannot accept responsibility or liability for any damages whatsoever based on a claim that the Premier RKP8/16 Plus failed to function correctly. Due to our policy of continuous improvement Texecom reserve the right to change specification without prior notice. - Page 9 © Texecom Ltd 2011. INS181-5 9/9...
Need help?
Do you have a question about the PREMIER RKP8PLUS and is the answer not in the manual?
Questions and answers