Table of Contents
Advertisement
Quick Links
Advertisement
Table of Contents

Related Manuals for Yolink YS7201-UC


Summary of Contents for Yolink YS7201-UC
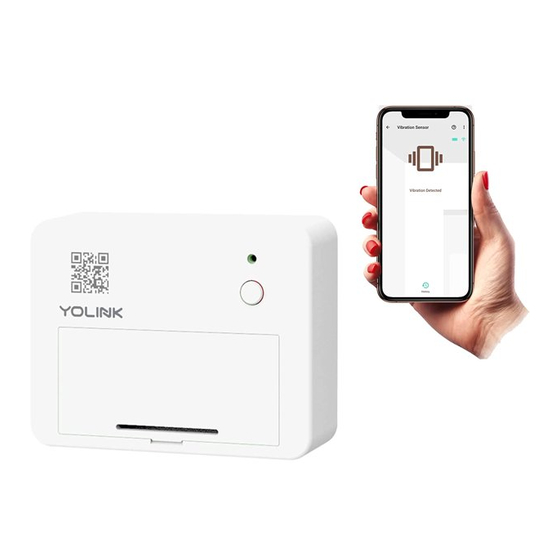
- Page 1 Vibra on Sensor YS7201-UC Installa on & User Guide Rev 1.0...
- Page 2 Thank you for purchasing YoLink products and for entrus ng us with your smart home needs! Your 100% sa sfac on is our goal. If you experience any problems with se ng up your new YoLink Vibra on Sensor, please give us a chance to assist you, before returning your purchase.
-
Page 3: Table Of Contents
Introduc on ······························································································ 2 · Set Up ····································································································· · 4 · · Installa on ······························································································ · 6 · · Using the YoLink App ·················································································12 YoLink Control ···························································································19 Maintenance ······················································································· ····23 · Specifica ons ····················································································· ·····26 · Troubleshoo ng ················································································· ·····27 ·... -
Page 4: In The Box
A. In the Box A. Vibration Sensor B. Quick Start Guide... -
Page 5: Introduc On
B. Introduc on T h e V i b r a o n S e n s o r c a n b e u s e d t o d e t e c t v i b r a o n i n a n a r e a * , a n d b a s e d o n t h e p r e s e n c e o r a b s e n c e o f v i b r a o n i t c a n t r i g g e r a c o n s b y o t h e r d e v i c e s . - Page 6 Connec ng to Cloud Slow Blinking Green Upda ng Fast Blinking Green Establishing Connec on with YoLink System (YoLink Control) Blinking Red Once Device Alerts or Device is Connected to the Cloud and is Func oning Normally Fast Blinking Red...
-
Page 7: Set Up
C. Set Up C-1. Set Up - First-Time YoLink Users (Exis ng users proceed to C-2. Add Device, next page) Download the YoLink app through Apple App Store or Google Play Apple iPhone or tablet that is iOS 9.0 Store (Search in the store or use... - Page 8 C-2. Add Device Ta p “ ” b u o n , t h e n s c a n Q R C o d e o n t h e d e v i c e . F o l l o w t h e s t e p s t o a d d t h e d e v i c e Press the SET bu on (on front of the device) once to turn on the...
-
Page 9: Installa On
D. Installa on D-1. Test the Vibra on Sensor Loca on Before Installa on Test your vibra on sensor loca on before affixing it to the surface. Use masking or painters tape to secure the sensor to the surface. Once you have the sensor temporarily mounted, test it out. - Page 10 D - 2 . A p p l i c a o n s Window Mail Box Drawer Safe (and Gun) Box Fa c to rs s u c h a s te m p e rat u re ca n a d v e r s e l y i m p a c t t h e o p e r a o n o f t h e s e n s o r.
- Page 11 D-3. Begin Installa on D - 3 - 1 . M et h o d A : I n sta l l F i n d a s u i t a b l e l o c a o n f o r t h e V i b ra o n S e n s o r w i t h t h e s e n s o r.
- Page 12 D - 3 - 2 . M et h o d B : M o u nt t h e V i b ra o n S e n s o r to t h e s u r fa c e w i t h s c rews ( n o t i n c l u d e d ) O p e n t h e b a e r y M o u n t t h e s e n s o r R e i n s t a l l t h e...
- Page 13 D - 3 - 3 . M e t h o d C : P l a c e i n o r o n a n o b j e c t y o u w a n t t o m o n i t o r P l a c e , a ffi...
- Page 14 D-4. Test the Vibra on Sensor I t i s b e s t t o p e r f o r m a ‘ f u n c o n a l t e s t ’ o f t h e s e n s o r. F o r e x a m p l e , i f a n a l e r t i s d e s i r e d w h e n a fi...
-
Page 15: Using The Yolink App
E. Using the YoLink App E-1. Device Page - Tap to get device manual link, feedback, contact us informa on, etc. Details - Tap to go to Details page(refer to page 13 & 14) Connec on Status Vibra on Sensor... - Page 16 - Tap to get device manual link, feedback, contact us informa on, etc. E-2. Details Page a. Device Type b. Rename the Device c. Choose a Room for device d. Alarm Strategy - Select an alarm strategy for the device, default is Alarm Strategy (Default) e.
- Page 17 Shown red if ba ery level is low p. Firmware Version - “#### ready now ” indicates a new update is available (refer to page 23) q. Remove Device From Current Account Tap to delete the device from your YoLink account...
- Page 18 E-3. Device Alerts E n a b l e a l e r t s i n d e v i c e s e n g s t o u s e y o u r v i b ra o n s e n s o r fo r i n t r u s i o n d e t e c o n o r o t h e r c r i c a l f u n c o n s .
- Page 19 E-4. Automa on Go to the “Smart” screen, tap “Automa on” Vibra on Sensor can be set as a trigger only, with two trigger op ons: Vibra on Detected; No Vibra on Detected b. Add an automa on b-1 Edit name b-2 Edit trigger b-3 Edit behavior (You must have at least one ac on device, or you cannot set a behavior)
- Page 20 E-5. Alarm Strategy Set up rules to ac vate scene or alarm when a device alert is detected (such as Vibra on Sensor, Water Leak Sensor, Mo on Sensor, etc.). Follow instruc ons below to enable Device Alert first Tap “ ”...
- Page 21 Go to Se ngs > Third-Party Ser vices and select the applicable ser vice Follow the instruc ons, to authorize and add the connec on to your YoLink account Refer to the associated app or website for addi onal informa on specific to the third-party service.
-
Page 22: Yolink Control
Examples of a controller are a Vibra on Sensor or Water Leak Sensor, while examples of a responder are a Siren or a YoLink Relay The YoLink Vibra on Sensor can work as the controller of YoLink Control F-1. - Page 23 (this may happen a er only blinking two or three mes) 1. If you want to turn off the YoLink Relay when vibra on is detected, turn off the YoLink Relay first , and let it enter pairing mode 2. For the same Vibra on Sensor and YoLink Relay, you can only choose to either turn on or turn off the...
- Page 24 Opera on When the Vibra on Sensor detects vibra on or impact, the YoLink Relay will now immediately turn on. The relay will remain turned on un l turned off using the OFF bu on or via the app More advanced sequences, controlling mul ple outputs (e.g. turn off plug and ac vate siren)
- Page 25 ( g re e n fo r t u r n e d o n , re d fo r t u r n e d o ff ) The YoLink Relay will no longer respond when the vibra on is detected...
-
Page 26: Maintenance
G. Maintenance G-1. Firmware Update To ensure our customers have the best user experience, we highly recommend you update to the newest version firmware when an update is available In “Firmware”, if a new version is listed as available (#### ready now), click it to start the firmware update process The device’s firmware will be updated automa cally within 4... - Page 27 Factory reset will erase all of your se ngs and restore it to factory defaults. A er the factory reset, your device will remain in your Yolink account Hold the SET bu on for 20-25 seconds un l the status light blinks red and green alternately,...
- Page 28 G-3. Replacing the Ba eries Re m o v e t h e b a e r y R e m o v e t h e o l d I n s t a l l t w o n e w a l k a l i n e cover by gently prying...
-
Page 29: Specifica Ons
H. Specifica ons Voltage: 3V DC (2 - alkaline non-rechargeable AAA ba er ies) ≤ 135mA opera ng ), ≤ 15uA (standby) Device Current Draw: Dimensions: 2.56 x 1.97 x 0.69 inch (65 x 50 x 16 millimeters, L x W x D) RF Protocol: LoRa Environment:... -
Page 30: Troubleshoo
I. Troubleshoo ng Symptom: 1. Device is offline or no alert received from vibra on/no vibra on events - If sensor is not connected to the cloud, press the SET bu on on Vibra on Sensor once - If Hub is offline, reconnect the Hub to the Internet and press the SET bu on on Vibra on Sensor once - If Hub is not on, power on the Hub again and press the SET bu on on Vibra on Sensor once - If sensor is out of range with Hub, reloca ng the Vibra on Sensor or Hub may be required... -
Page 31: Warning
J. Warning Please install, operate and maintain the Vibra on Sensor only as outlined in this manual. Improper use may damage the unit and/or void the warranty Use only new, name brand, alkaline non-rechargeable AAA ba eries Do not use rechargeable ba eries Do not use zinc blend ba eries Do not mix new and old ba eries Do not puncture or damage ba eries. - Page 32 If your Vibra on Sensor gets dirty, please clean it by wiping it down with a clean, dry cloth. Do not use strong chemicals or detergents, which may discolor or damage the exterior and/or damage the electronics, voiding the warranty Do not install or use this device where it will be subjected to physical impacts and/or strong vibra on.
-
Page 33: Customer Service & Warranty
If you have any difficul es installing or using YoLink products, please contact our Customer Service department during business hours: US Live Tech Support: 1-949-825-5958 M-F 9am - 5pm PST Email: service@yosmart.com YoSmart Inc. 15375 Barranca Parkway, Ste G-105 Irvine, CA 92618, USA... - Page 34 FCC Cau on This device complies with part 15 of the FCC Rules. Opera on is subject to the following two condi ons: (1) This device may not cause harmful interference, and (2) this device must accept any interference received, including interference that may cause undesired opera on. Any Changes or modifica ons not expressly approved by the party responsible for compliance could void the user ’s authority to operate the equipment.
Need help?
Do you have a question about the YS7201-UC and is the answer not in the manual?
Questions and answers