
Subscribe to Our Youtube Channel
Related Manuals for Viofo A119 mini


Summary of Contents for Viofo A119 mini
- Page 1 The user manual is available on https://support.viofo.com Copyright 2022 VIOFO ltd. All Rights Reserved.
-
Page 2: Table Of Contents
Table of Contents Product Overview Table of Contents Product Overview Product Overview Standard Items Standard Items Optional Accessory Product Diagram Inserting / Removing the Memory Card LED Indicators Dashcam Type-C Data Car Charger GPS Module Cable Adapter Buttons and Icons Display Overview Installation Operation... -
Page 3: Product Diagram
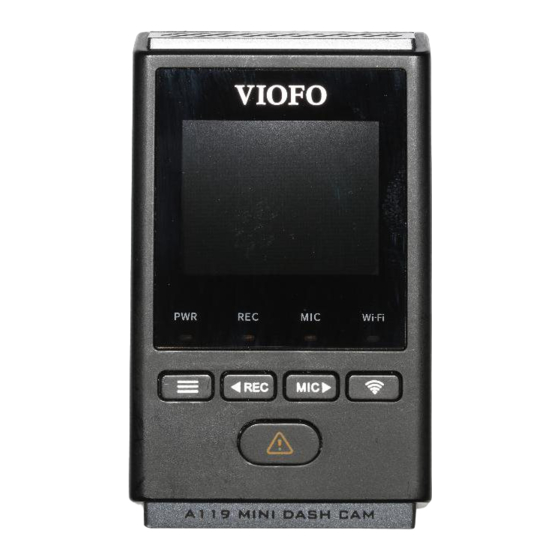
Product Overview Product Overview Product Diagram USB Power Port 1 - Menu / Power On|Off 2 - Menu Up / Recording Start / Stop 3 - Menu Confirm / Video Protect / Playback Mount 4 - Menu Down / Microphone Enable / Disable 5 - Wi-Fi On|Off 6 - Power in / MicroSD Card Reader Mode 7 - Memory Card Slot... -
Page 4: Led Indicators
64GB,128GB and 256GB microSD cards must be formatted with the FAT32 file system, either on a computer or in the camera. Flashing Blue Wi-Fi Enabled and waiting connecting We recommend you buy the VIOFO brand memory card which are Wi-Fi Solid Blue Wi-Fi Connected... -
Page 5: Buttons And Icons
Product Overview Product Overview Buttons and Icons Buttons Mode Behavior Mode Buttons Behavior Return to previous menu / Exit playlist Long press to power off Menu up / Change playback speed / Delete the video Click once to stop recording Playlist Select the current video / Play / Pause Recording... -
Page 6: Display Overview
Product Overview Installation Installation Display Overview 1) Insert the clips, then slide the mount horizontally into the slot on the back of camera. 1440P30 2022/02/01 08:32:10 Recording Mode 2) Select a location on the windshield behind the rear-view mirror. Recording Status Emergency Lock Microphone Best mounting location... - Page 7 Installation Installation Connecting to Power 5) Fix the dashcam on the selected location. 6) Adjust the lens angle - Look at the live view on the LCD. - Adjust the angle of the lens up / down if necessary. Plug the USB power adapter into your vehicle’s 12V / 24V female power socket.
-
Page 8: Operation
Installation Operation Tips Operation 1. Do not install / mount the camera in a location that interferes with the driver’s visibility and safety. 2. Install / mount the camera close to the rearview mirror so that When you start the engine, the camera will turn on and begin both sides of the scene being recorded are equally covered by the recording automatically. -
Page 9: Playback Videos
Follow the instructions on this website to upgrade the firmware: Use the arrow buttons [ ] to select the desired video and https://viofo.com/en/content/42-help-and-support/ press the button [ ] to play. Press the [ ] button to exit. -
Page 10: System Settings
System Settings System Settings System Settings Note: We recommend to buy VIOFO HK4 ACC hardwire kit cable for Press the Menu button during video mode to access the settings. parking mode recording. (recording need to be stopped) • Enter Parking Mode Timer: Parking Recording Duration. - Page 11 System Settings System Settings • Speed Unit: Set the speed unit, kilometer per hour (KPH) or miles per hour (MPH). • Image Rotation: Turn the screen upside down. • G-sensor: The G-sensor measures g-shock forces. The setting from 'Low’ to' High’ determines the amount of force needed to lock the file •...
-
Page 12: Review And Control On Smartphone
2022/02/01 08:32:10 Connecting the camera to a smartphone • Search "VIOFO" on Google play store on an Android device or Apple app store on an iOS device, or scan below code to download the APP. Download on the GET IT ON... -
Page 13: Notice
Shenzhen VIOFO Technology Co.,Ltd, declares that this Radio and on, the user is encouraged to try to correct the interference by... -
Page 14: Customer Service
12 months and all accessories are warranted for 3 months. a mysterious gift at marketing@viofo.com. VIOFO offers lifetime technical support for all our users. We are committed to making sure that you are 100% satisfied with our products and services. - Page 15 FCC Caution This device complies with part 15 of the FCC Rules. Operation is subject to the following two conditions: (1) This device may not cause harmful interference, and (2) this device must accept any interference received, including interference that may cause undesired operation.
- Page 16 IC Caution: ’ This device complies w it h Indust ry Canada s licence-exempt RSSs. Operat ion is subject to t he follow ing t wo condit ions: (1) This device may not cause interference; and (2) This device must accept any interference, including interference t hat may cause undesired operat ion of t he device.
Need help?
Do you have a question about the A119 mini and is the answer not in the manual?
Questions and answers