
Subscribe to Our Youtube Channel
Related Manuals for amzchef 3005D


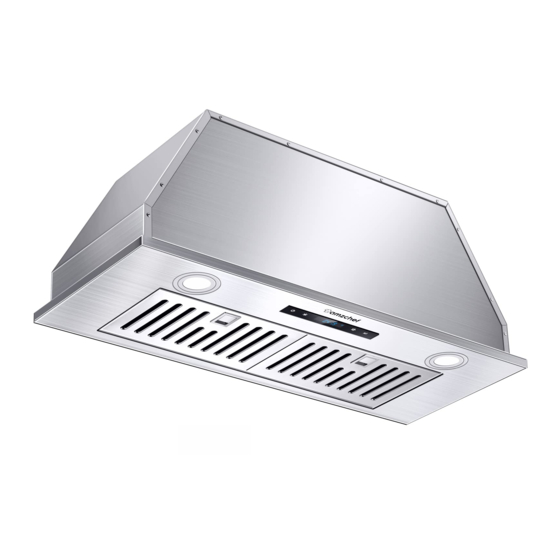
Summary of Contents for amzchef 3005D
- Page 1 INSTRUCTION MANUAL RANGE HOOD MODEL:3005D Available size:30'' AC 120V 60Hz PLEASE READ INSTRUCTIONS CAREFULLY BEFORE ASSEMBLY RETAIN THIS MANUAL FOR FUTURE REFERENCE...
-
Page 2: Table Of Contents
CONTENTS SAFETY WARNING ....................01 NOTICE OF INSTALLATION ..................03 INSTALLATION......................03 TOUCH CONTROL PANEL INSTRUCTION ...............06 REMOTE CONTROL FUNCTION ................07 MAINTENANCE......................08 TROUBLESHOOTING ....................10... -
Page 3: Safety Warning
SAFETY WARNING Thank you for choosing our cooker hood. Please read the instruction manual carefully before use. The cooker hood is used on 120V,60Hz. Never let the children operate the machine. The cooker hood is for home use only, not suitable for barbecue, roast shop and other commercial purpose. - Page 4 the appliance by a person responsible for their safely. Children should be supervised to ensure that they do not play with the appliance. When the range hood and appliances supplied with energy other than electricity are simultaneously in operation,the negative pressure in the room must not exceed 4 Pa (4x10⁻⁵ bar) CAUTION:Accessible parts may become hot when used with cooking appliance.
-
Page 5: Notice Of Installation
extractor hood should be installed at least 65cm above the cooking surface. -Regulations concerning the discharge of air have to be fulfilled. NOTICE OF INSTALLATION 1.Before installation, please ensure the area is clean to avoid suction of the remaining bits of broken wood and dust. 2.It cannot share the same air ventilation tube with other appliance such as gas tube, warmer tube,and hot wind tube. - Page 6 INSTALLATION CAUTION For general ventilating use only. Do not use to exhaust hazardous or explosive materials and vapors. Mount your range hood so that the bottom of the hood is 26" to 30" above the cooking surface. The minimum hood distance above cooktop must not be less than 26"; any installation less than 26"...
-
Page 7: Installation
TALLATION Tools needed for the installation Parts included [01] x 1 [02] x 8 [04] x 8 [05] x 8 [03] x 1 (4x40 mm) (Φ12*0.8) - Page 8 Ø 150mm (6’’) Whole view 280 mm(11’’) 259.4mm 65mm (10.2’’) 15mm(0.6’’) (2.6’’) 296mm(11.7’’) 400mm(15.7’’) Back view 259.4mm (10.2’’) Side view 69.7mm (2.7’’) 120mm (4.7’’) 296mm (11.7’’)
- Page 9 (26 inch) (30 inch) The cooker hood should be placed at a distance of 65-75cm(26-30inch) from the cooking surface for the best effect. 160mm (6.3’’) Ø drill the holes on the wood frame Cut-out dimension:Length 716~719mm(28.2’’~28.3’’) X Width 260~263 mm (10.2’’~10.4’’) 1) Mearsure and cut an opening at the bottom of the cabinet to fit the range hood housing.
- Page 10 Remove two stainless steel filters,then lift the range hood into the cabinet. Optional assembly [02]×8 [04]×8 [05]×8 1) Align range hood to the pre-drilled holes on both sides and screw in using the screws provided. 2) User could also drill screws on the top wood plate, it’s optional assembly.
- Page 11 [01] x 1 Connect the duct tube to air outlet connector on the top of range hood and seal with aluminum foil tape to make all joints secure and air tight. VENTING METHODS: • This range hood is factory set for venting through the roof or wall. •...
- Page 12 Put the stainless steel filters back to the range hood.
-
Page 13: Touch Control Panel Instruction
TOUCH CONTROL PANEL INSTRUCTION LCD screen ON/OFF Light Speed Signal receiver When the range hood is plugged in,it’s in stand-by mode. ON/OFF button 1) Time setting function In stand-by mode, press ON/OFF button for 3 seconds, the buzzer sounds, and the LCD screen flashes for 3 seconds, indicating that it enters into the time setting function. -
Page 14: Remote Control Function
Light button In stand-by mode,touch light button,the light is on. Touch again,the light is off. Speed button In stand-by mode,touch speed button,the range hood runs at low speed . LCD screen displays the low speed icon.Press speed button again, the range hood runs at medium speed, LCD screen displays the medium speed icon,and so on. -
Page 15: Maintenance
Light key In stand-by mode,touch light key,the light is on. Touch again,the light is off. Low speed key Medium speed key High speed key MAINTENANCE Disconnect the power cord from the wall outlet before cleaning and maintenance. To clean the appliance outside, use a damp cloth, a soft brush or a fine sponge, and then wipe it dry.Do not use coarse abrasive cleaning agents or sharp metal scrapers for cleaning of the appliance as this could result in surface scoring. - Page 16 Do not use the appliance without the metal grease filters properly installed! 1.Remove the metal filters as shown in Fig. 1. 2.Let the metal filters soak in warm water with addition of a detergent or put them into a washer with a cleaning agent and set temperature below 60 °C.
-
Page 17: Troubleshooting
Closed Opened Opened Closed Fig. 2 TROUBLE SHOOTING Problem Possible Reasons Suggested Solution Light -The leaf blocked - Get rid of the blocking motor does not -The capacitor damaged - Replace capacitor work -The motor jammed bearing - Replace motor damaged - Replace motor -The internal with of motor off or... - Page 18 drops from Heavily fouled filer. Immediately clean or replace the the metal grease metal grease filer filer Shake -The leaf damaged and causes -Replace the leaf body Shaking -Lock the motor tightly -The motor is not tightly hanged -Fixed the body tightly -The body is not tightly hanged Insufficient -Readjust the distance...
Need help?
Do you have a question about the 3005D and is the answer not in the manual?
Questions and answers