Table of Contents
Advertisement
Quick Links
Advertisement
Table of Contents

Related Manuals for HITEC PositionPRO


Summary of Contents for HITEC PositionPRO
- Page 1 PositionPRO GNSS Receiver USER MANUAL – V1.1 (Rev. January 2022)
- Page 2 The Septentrio mosaic™ module at the heart of the PositionPRO has been specifically designed with the needs of mass market applications like robotics and autonomous systems in mind, and is capable of tracking all Global Navigation Satellite System (GNSS) constellations and supporting current and future signals.
- Page 3 PositionPRO GNSS / mosaic-X5 With mosaic™-X5, RTK positioning provides the lowest power consumption of any comparable device on the market. PositionPRO GNSS / mosaic-H With dual-antenna input, mosaic™-H provides precise and reliable heading combined with centimeter-level RTK positioning. Hardware & Sensors...
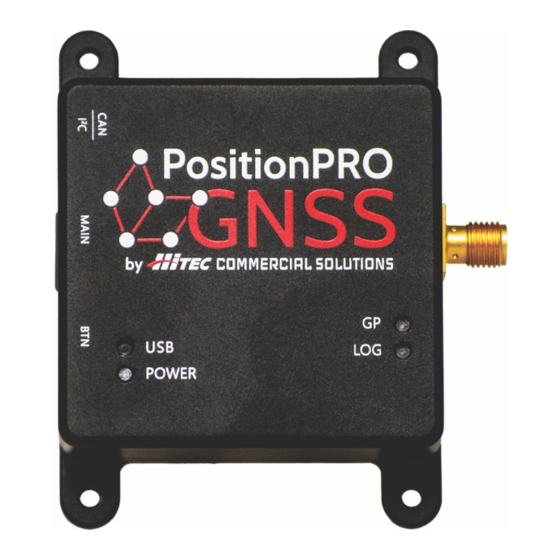
- Page 4 Components & Functions Main JST-GH 12-pin UART to GNSS, I2C to mag & baro, USB, hot shoe JST-GH 4-pin DroneCAN connection to GNSS, mag, & baro JST-GH 4-pin I2C connection to mag & baro JST-GH 2-pin Start/stop mosaic logging session Type C Serial connectivity to mosaic module SMA Jack...
- Page 5 Ardupilot Integration Guide Serial + I2C Connecting to the PositionPRO using the main connector uses a direct serial connection to the mosaic GNSS and an I2C connection for the magnetometer and barometer peripherals. Connect the main connector of the PositionPRO to the autopilot’s GPS1 or GPS2 connector using the provided JST-GH cables. Or make your own wiring harness using the pinouts detailed previously.
- Page 6 Configure your compass priority parameters as desired. Firmware Update The AP_Periph firmware on the PositionPRO can be updated over SLCAN using Mission Planner. The latest firmware releases are automatically maintained by the Ardupilot firmware server. Use the “SLCan Mode CAN1” (or “SLCan Mode CAN2 if appropriate)” button in Mission Planner to enter SLCan mode.
- Page 7 The update will be performed, and the device will restart once complete.
Need help?
Do you have a question about the PositionPRO and is the answer not in the manual?
Questions and answers