Table of Contents
Advertisement
Quick Links
PC Software Version
2.0.1.00
Firmware Version 1.04
10/ 2011
Operating Manual
LB 985
NightSHADE
with indiGO Software
Id No.: 55393 BA2
Rev. No.: 03
These units are not designed for use in hazardous areas.
The units must not be repaired by any person other than Berthold Technologies
service engineers or technicians authorized by Berthold Technologies.
In case of operation trouble please contact your local service organization
or the central service department.
Advertisement
Chapters
Table of Contents

Related Manuals for Berthold LB 985


Summary of Contents for Berthold LB 985
- Page 1 Rev. No.: 03 These units are not designed for use in hazardous areas. The units must not be repaired by any person other than Berthold Technologies service engineers or technicians authorized by Berthold Technologies. In case of operation trouble please contact your local service organization...
- Page 2 Berthold Technologies GmbH & Co.KG Calmbacher Str. 22 75323 Bad Wildbad Germany Phone +49 7081 177-0 Fax +49 7081 177-100 bio@Berthold.com www.Berthold.com/bio...
-
Page 3: Table Of Contents
LB 983 NightSHADE Operating Manual Prefatory Comments Contents PREFATORY COMMENTS Typographical conventions Warning signs at the instrument SAFETY INSTRUCTIONS Consignes de Sécurité Sicherheitshinweise WARRANTY AND CUSTOMER SERVICE Warranty Statement Customer Service QUICK START Installation First Acquisitions Image Processing and Evaluation Functions Creating a Report SYSTEM DESCRIPTION Use and Function... - Page 4 Prefatory Comments LB 983 NightSHADE II Operating Manual...
-
Page 5: Prefatory Comments
LB 983 NightSHADE Operating Manual Prefatory Comments 1 Prefatory Comments 1.1 Typographical conventions The following typographical conventions will be used in this operating manual: Caution! Danger! Important information Example Menus and options in the software are printed in bold type Measurement, View The selection of a menu item is written as a sequence of commands, separated by a vertical line... -
Page 6: Safety Instructions
% for temperatures up to 31 °C decreasing linearly to 50 % relative humidity up to 40 °C. BERTHOLD TECHNOLOGIES assumes no liability for any damages, including those to third parties, caused by improper use or handling of the instrument. ... - Page 7 LB 983 NightSHADE Operating Manual Safety Instructions The mains supply voltage fluctuations must not exceed +/- 10 % of the nominal voltage. Maximum voltage to be applied is 253 VAC. The instrument is provided with a 3-pole grounded plug. If your wall outlet does not allow connection of a 3-pole plug, have a suitable wall outlet installed by qual- ified personnel or use an adapter for safe grounding.
- Page 8 Safety Instructions LB 983 NightSHADE II Operating Manual The instrument should be shipped in its own case. For transport all transportation locks (e.g. for the plate carrier) have to be installed. For instrument cleaning, please refer to the respective sections in this manual. ...
-
Page 9: Consignes De Sécurité
LB 983 NightSHADE Operating Manual Safety Instructions 2.1 Consignes de Sécurité Attention! Ce symbole d’alarme, vous avertit de prêter attention aux consignes opératoires. En effet si vous ne suivez pas ces instructions, il peu y avoir un risque d’endommagement du matériel et également vous faire ecourir des risques pour votre propre sécurité. - Page 10 31 °C et diminue linéairement jusqu'à 50% humidité relative pour une température d’ambiance allant jusqu’à 40 °C. BERTHOLD TECHNOLOGIES décline toute responsabilité de dom- mages résultant d’une utilisation non conforme à l’emploi prévu, y com- pris les dommages causés à des tiers.
- Page 11 LB 983 NightSHADE Operating Manual Safety Instructions Si vous vous apercevez que le fonctionnement de l’appareil n’est plus sûr, il faut alors l’arrêter et le débrancher de la prise secteur. Si du liquide a pénétré dans l’appareil il faut immédiatement le débran- cher.
-
Page 12: Sicherheitshinweise
Transportsicherungen vor dem Einschalten entfernen. Die Geräte dürfen nur für den vorgesehenen Zweck eingesetzt werden. Berthold Technologies übernimmt keinerlei Gewährleistung, auch für Schäden gegenüber Dritten, die durch unsachgemäße Handhabung der Geräte hervorgerufen werden. Die Geräte dürfen nur innerhalb geschlossenen Räumen betrieben werden. - Page 13 Achtung: Die interene Batterie kann bei falschem Einbau explodieren! Die interne Batterie darf nur mit dem gleichen oder einem empfohlenen Ersatzmodell von einer von Berthold Technologies autorisierten Person ausgetauscht werden. Verbrauchte Batterien müssen entsprechend den Herstelleranweisungen entsorgt werden. ...
- Page 14 Safety Instructions LB 983 NightSHADE II Operating Manual Elektrostatische Aufladungen (z.B. durch Teppichböden) müssen beim Öffnen des Gerätes verhindert werden, da Entladungen am Gerät zur Beschädigung elektronischer Teile führen können. System muss immer ausreichend Reagenzienhersteller empfohlenen Lösungen gespült werden. ...
-
Page 15: Warranty And Customer Service
This warranty does not apply to any third party product involved in the application. Berthold Technologies reserves the right to refuse to accept the return of any product that has been used with radioactive or (micro)-biological substances, or any other material that may be deemed hazardous to employees of Berthold Technologies. -
Page 16: Customer Service
LB 983 NightSHADE II Operating Manual 3.2 Customer Service Customer service will be provided in the first instance by the network of Berthold Tech- nologies representatives. In the event of any problem experienced with your instrument, the first recourse should be your local Berthold Technologies representative. For further prob- lems requiring hardware or software expertise, the Technical Support group at Berthold Technol- ogies GmbH &... -
Page 17: Quick Start
LB 983 NightSHADE Operating Manual Quick Start 4 Quick Start These quick start instructions provide a quick access to the program. You are guided step by step through the major program functions. The page numbers in the headers refer to the indi- vidual sections in the manual that provide more detailed information about the respective func- tions. -
Page 18: Installation
Quick Start LB 983 NightSHADE II Operating Manual Installation 4.1.1 Safety Instructions Whenever you are working with UV transilluminators you have to wear safety equipment (safety glass, face protecting mask) to rule out any hazards due to ultraviolet rays. The transilluminator is designed for operation in the Night- SHADE and should not be operated outside the device. -
Page 19: Unpacking
LB 983 NightSHADE Operating Manual Quick Start 4.1.3 Unpacking Unpack the boxes and make sure that the delivery is complete. If you should discover any sign of damage on the instruments or instrument parts, please notify the shipping agent and/or the dis- tributor immediately. -
Page 20: Side View Camera
Quick Start LB 983 NightSHADE II Operating Manual 4.1.4.2 Side view Camera The NightSHADE offers the special option that the camera can be mounted on the side, too. This feature enables the system to take images of plants from the side or to measure the sample dishes in an upright standing position. -
Page 21: Connecting
LB 983 NightSHADE Operating Manual Quick Start 4.1.5 Connecting The power supply and device communication ports are located on the rear panel of the NightSHADE. Plug the power cord into the mains inlet (1). The main power switch is lo- cated next to the mains inlet. -
Page 22: Connecting To The Pc
Quick Start LB 983 NightSHADE II Operating Manual 4.1.7 Connecting to the PC To assure the proper operation of the NightSHADE device drivers are necessary. All device drivers are automatically installed through the indiGO software setup. When connecting the instrument to PC, new devices are detected through the windows device manager. - Page 23 LB 983 NightSHADE Operating Manual Quick Start In this case the default systems filter management file will be copied to your computer. If you reinstall the software the current active systems filter management file will be overwritten. Note: Due to the fact that the setup will install virtual device drivers for the NightShade hardware on your computer, the Windows-system might show a warning that a signa- ture of a Windows driver cannot be verified.
-
Page 24: Instrument Controller First Time Initialization Setup
You can check the instrument ident-number by starting „Scan Devices“. If the calibration for your device was stored on the NightShade by Berthold Technologies before it was delivered you can download the stored calibration parameters from the instruments flash memory now by confirming „Yes“. - Page 25 LB 983 NightSHADE Operating Manual Quick Start This step of the NightShade Controller First Time Initialization Setup allows you to import fur- ther created backups of the NightShade configuration and calibration files. If there is a back- up available, chose the command that suits you best. Select to continue.
-
Page 26: First Time Initialization Setup
Quick Start LB 983 NightSHADE II Operating Manual Select to continue. On this screen you can chose when you want to start the controller. With regular installations it is recommended to select the first option (Start controller with indiGO). The indiGO control- ler takes care of the hardware control and performs the measurements even when indiGO it- self is not running. - Page 27 LB 983 NightSHADE Operating Manual Quick Start The first time initialization setup will start. If the PC running indiGO is conneted to the NightSHADE directly through USB choose “Server” to install the instrument controller as well as the evaluation part. In case of a network connection to a NightSHADE, select “Client”...
- Page 28 Quick Start LB 983 NightSHADE II Operating Manual Click to continue. This dialog box defines the connection to the NightSHADE controller. If the controller is running on the same computer the default settings “LOCALHOST-1024”can be ap- plied. If the NightSHADE controller is running on a remote OC in the network, please set up the correspondending IP-address or the host name like”192.168.1.2-1024”...
- Page 29 LB 983 NightSHADE Operating Manual Quick Start To set up indiGO to automatically logon to the database using a default user account, tick the box <Set a default user account>. By selecting <Next> you will be asked to set up a user name and a passwort. Please note that the created account will have administrator rights.
-
Page 30: User Management
Quick Start LB 983 NightSHADE II Operating Manual 4.1.11 User Management IndiGO supports an integrated user management. The User Management can be enabled or disabled via the system administrator. Refer to the <User Management> <Advanced> settings to enable or disable the user management. Only Admins can access the user management. -
Page 31: Installing Fluorescence Filters
LB 983 NightSHADE Operating Manual Quick Start 4.1.12 Installing Fluorescence Filters Excitation Filter Slider The NightSHADE LuFlu is equipped with automatic filter changers for the excitation and emis- sion path. The excitation filter is located on a filter slider, which is accessible after opening the cover on the front panel of the NightSHADE. -
Page 32: Filter Management
Quick Start LB 983 NightSHADE II Operating Manual The emission filters are located on a filter wheel behind the lens. A filter wheel can hold up to five filters with a diameter up to 50 mm using specific filter holder inserts. An illustration of the filter wheel is given below (filter wheel shown from above). -
Page 33: Filter Inventory
LB 983 NightSHADE Operating Manual Quick Start 4.1.14 Filter Inventory The filter inventory is used to describe the available filters. indiGO governs two filter inventory lists. One is used for the excitation filters, the other for the emission filters. The inventory lists can be reached via <Excitation Inventory> <Filter Inventory> for the exci- tations filters or via <Emission Inventory>... -
Page 34: Filter Manager
Quick Start LB 983 NightSHADE II Operating Manual Each filter is described using the following properties: A name for the filter The center wave length of the filter The half band width of the filter The transmission 4.1.15 Filter Manager Once a filter was added to the filter inventory list the filter can be placed on an excitation filter slider or an emission filter wheel. -
Page 35: Filter Manager - Backup And Restore
LB 983 NightSHADE Operating Manual Quick Start The charging can be changed using the filter droplist <Filter N>. Please keep in mind, that only available and unused filters are displayed in the droplist. Before you can assign a new position for the filter you have to add a new filter to the <Filter Inventory>... -
Page 36: First Acquisitions
Quick Start LB 983 NightSHADE II Operating Manual 4.2 First Acquisitions 4.2.1 Quick Start Glossary Projects, Applications and Identities: All parameters necessary to run a measurement are defined in an application. Individual probes, called identities, can be associated to a project. The project is connected to an applica- tion. -
Page 37: Defining The First Application
LB 983 NightSHADE Operating Manual Quick Start 4.2.3 Defining the First Application In indiGO different measurement methods (e.g. luminescence measurement, fluorescence measurement) are defined by diverse applications. For an application the measurement mode, the exposure time, the measurement sequence and the filter settings, if available, can be as- signed. - Page 38 Quick Start LB 983 NightSHADE II Operating Manual Select to define the measurement workflow. Four different kinds of meaurements can be performed. Please note that depending on the sys- tem configuration some of the selections might not be possible (e.g. due to a missing fluores- cence module).
- Page 39 LB 983 NightSHADE Operating Manual Quick Start The Post Processor page offers additional image processing features which can be performed after the exposure to increase the image quality. Cosmic suppression is an imaging filter to get rid of small high intensity pixels caused by cosmic ray during the exposure.
- Page 40 Quick Start LB 983 NightSHADE II Operating Manual To insert a photographic exposure to the list of measurements select <Add>, <Photo>. The default parameters (100ms exposure time, 10% illumination intensity) can be used for most applications. Disable all Post Processors in the corresponding section. To close the photographic parameter wizard select To get to the sample size definition dialog box select...
- Page 41 LB 983 NightSHADE Operating Manual Quick Start You can either select an already existing format using the load button or define a new sample format. The following parameters are required: Sample Size: The sample size refers to the image size (width) in mm. To make sure that the sample will be measured completely it is recommended to define the image size a little bit larger than the actual size of the sample ...
- Page 42 Quick Start LB 983 NightSHADE II Operating Manual By using the “Region of Interest” a section of the CCD chip can be defined to get faster framerates. By default the whole chip area is used which is 1 to 1024 in X and Y. The MultiSample feature allows the possibility to split the image into sections.
-
Page 43: Defining A Controller Template
LB 983 NightSHADE Operating Manual Quick Start 4.2.4 Defining a Controller Template When creating a controller template the workflow is about the same than with a measurement sequence. The difference is that no measurements are performed. The controller templates are mainly used to control the LED panels in order to simulate environmental parameters (day night cycle). - Page 44 Quick Start LB 983 NightSHADE II Operating Manual Adjust the required intensities and click on to accept the parameters. The control com- mand will show up in the work flow list. When all commands are set close the dialog box and save the template by clicking on Please note that while a control sequence is running no measurements can be performed.
- Page 45 LB 983 NightSHADE Operating Manual Quick Start exposures. Heater Sets the target temperature of the temperature controlled measuring table (Option). Relay Out Controls the power socket inside the dark room (Relay 1). Relay 2 is not used yet. ...
- Page 46 Quick Start LB 983 NightSHADE II Operating Manual tems.
-
Page 47: Defining The First Project
LB 983 NightSHADE Operating Manual Quick Start 4.2.5 Defining the First Project To define a new project refer to <Project & Analysis> <Available Projects>. Select <New Project > from the <Available Projects > context menu. Projects are used to define non measurement-specific parameters, like user access rights, scale settings, etc. - Page 48 Quick Start LB 983 NightSHADE II Operating Manual A prefix, the current year and month, the 3 digit sample ID counter as well as a suffix can be specified if required. The resulting sample ID name can be seen under “Result”. The box “Number of Identities to Create”...
- Page 49 LB 983 NightSHADE Operating Manual Quick Start On the last page you can assign users to the project. The projects creator automatically re- ceives ownership for the project. Other users can be added to the project. To create new users refer to the indiGO user manager.
-
Page 50: The First Acquisition
Quick Start LB 983 NightSHADE II Operating Manual 4.2.6 The First Acquisition The system can carry out measurements on demand or scheduled using a time table. In the first step it is a lot easier to create your first acquisitions on demand. Further details about how to use the scheduler can be found at the end of the chapter. - Page 51 LB 983 NightSHADE Operating Manual Quick Start To start the actual measurement sequence select . Upon completion of the measure- ment, the data is automatically stored and displayed on the screen. The measurement consists of a photographic image in grayscales and the luminescence image combined in pseudo color.
-
Page 52: Image Sequences
Quick Start LB 983 NightSHADE II Operating Manual 4.2.7 Image Sequences In addition to single measurements indigo also offers automatic sequence measurements. These kind of measurements allows automatically triggered measurements in a predefined schedule. To creat a sequence measurement proceed as follows. To start a sequence refer to <Acquisition &... - Page 53 LB 983 NightSHADE Operating Manual Quick Start In this dialog box the Starting time for the first measurement or control sequence can be adjust- ed. In the section “Execution calendar” the total number of measurements / sequences as well as the interval time can be selected. Clicking on will close the sequence wizard and the sequence is handed over to the scheduler.
-
Page 54: Image Processing And Evaluation Functions
Quick Start LB 983 NightSHADE II Operating Manual 4.3 Image Processing and Evaluation Functions 4.3.1 Load Images During the first acquisition images have been created and stored in the project folder. To re-open the previously taken images refer to the project folder first and select the appropriate identity. -
Page 55: The Graphical User Interface
LB 983 NightSHADE Operating Manual Quick Start 4.3.2 The Graphical User Interface After an acquisition or the opening of an identity the measurement and the photographic image are displayed. By default the photographic image is overlaid by the measurement or signal im- age using pseudocolors. - Page 56 Quick Start LB 983 NightSHADE II Operating Manual The system offers the possibility to zoom the histogram by using . The maximum range of the histogram is displayed on the zoom toolbar. By selecting <xxx> the histogram can be set to fullscale. With <xxx>...
- Page 57 LB 983 NightSHADE Operating Manual Quick Start The command has to be confirmed and can be parameterized using the dialog shown below. The following options are available: <Apply Image and Contrast settings> will apply the image and contrast settings from the cur- rent image to all other measurements in the project.
-
Page 58: Line Plot
Quick Start LB 983 NightSHADE II Operating Manual 4.3.3 Line Plot For further analysis of the measurements it might be helpful to create a 1D-line plot of the measured data. This function is recommendet to evaluate the measuring data. To use this function select An additional window is opened where the line profile created from a given lead is displayed. -
Page 59: Surface Plot
LB 983 NightSHADE Operating Manual Quick Start 4.3.4 Surface Plot To get a 3D surface plot select <Surface> from the <Report> menu.The surface can be used for 3D visualization of the measured data. To create a 3D surface plot from the photographic image only please refer to associated command. -
Page 60: Peaksearch
Quick Start LB 983 NightSHADE II Operating Manual 4.3.5 Peaksearch Once the image has been loaded and the color view has been set up, you can start to analyse the evaluation. In the first step the desired areas has to be marked; now indiGO can calculate the intensity val- ues. -
Page 61: Define Areas Manually
LB 983 NightSHADE Operating Manual Quick Start None No discrimination method is being used. Every spot which is above the given lower threshold will be treated as peak. Advanced - Remove Areas inside Areas If this option is set areas which are located inside other areas will be declined. Maximum Areas This parameter defines the maximum amount of peaks. - Page 62 Quick Start LB 983 NightSHADE II Operating Manual To define a freehand shape circle the desired area with several clicks on the left mouse button or hold it down completely (pencil mode). A double-click will end the procedure. The painted shape will be connected automatically and the freehand shape will be closed by a frame.
- Page 63 LB 983 NightSHADE Operating Manual Quick Start To export areas the <Export> command from the “Overlay Properties” can be used. To import areas the <Import> command from the “Overlay Properties” can be used.
-
Page 64: Creating A Report
Quick Start LB 983 NightSHADE II Operating Manual 4.4 Creating a Report 4.4.1 Creating a Rich-Text-Report indiGO offers the possibility to create and display measurement reports. The output can be adapted to the user's requirements. Using the <Rich-Text-Report> command in the <Report> menu will start the Rich-Text-Report- Creation-Wizard. - Page 65 LB 983 NightSHADE Operating Manual Quick Start higher than 50mm. In case of a different sample size height or position, the calibration is not valid and wrong results will be calculated using the default calibration. In this case a dedicated calibra- tion must be performed using the light standard.
-
Page 66: Excel Export
Quick Start LB 983 NightSHADE II Operating Manual 4.4.2 Excel Export indiGO provides a very comfortable report function, the possibility to create Excel exports. In an Excel export, a complete measurement report, including all images, analysis data and in addi- tion, diagrams containing a graphical view of the measurement results can be created. - Page 67 LB 983 NightSHADE Operating Manual Quick Start Measured Data Different units for the measured data can be selected. Excel Export Options The report can be opened to be printed or stored into a file for further usage. The spreadsheet will contain one to three worksheets depending on the selected options: ...
-
Page 68: Using The Scheduler
Quick Start LB 983 NightSHADE II Operating Manual 4.4.3 Using the Scheduler Control sequences like sunset and sunrise or measurements for selected identities can be con- trolled via a scheduler. You can think of the scheduler as a simple list of time controlled events. To start an acquisition, refer to <Acquisition &... - Page 69 LB 983 NightSHADE Operating Manual Quick Start When selecting <Schedule Controller Template> a dialog box pops up to select the desired control sequence. Chose to confirm the selected template and continue. On the next page the <Start Execution> time can be selected. In the sample above, the first measurement will be executed on Wednesday the 22th of September at 15:15:00.
- Page 70 Quick Start LB 983 NightSHADE II Operating Manual Note: If you open the selected project and the scheduled identity, the measured image data will be displayed automatically, too.
-
Page 71: System Description
LB 983 NightSHADE Operating Manual System Description 5 System Description Use and Function Design of the Acquisition Device Acquisition Chamber 5.3.1 Light-tight Door with Door Button 5.3.2 Illumination of the Acquisition Chamber (Dark Box) 5.3.3 Connector Field 5.3.4 Camera and Lens 5.3.5 Filter Wheel 5.3.6 Filter Slider 5.3.7 Fluorescence Illumination... -
Page 72: Use And Function
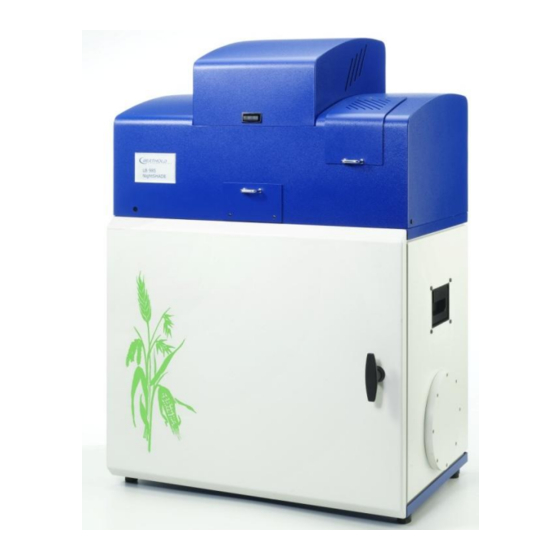
(face protection mask or eye protection) NightSHADE LB 985 includes the following compo- nents: Acquisition device including the transport mechanism with camera and lens and the electronics. The high-resolution CCD camera and the special wide open lens guarantee excellent sensitivity and image quality. -
Page 73: Design Of The Acquisition Device
LB 983 NightSHADE Operating Manual System Description 5.2 Design of the Acquisition Device The acquisition device includes the hardware and electronics required for image acquisition. It comprises the acquisition chamber (dark box) including the camera lift with camera, lens and filter wheel. The elec- tronics and excitation light source for fluorescence measurements are accommodated in the upper part of the device. - Page 74 System Description LB 983 NightSHADE II Operating Manual Front side Light-tight door with handle to close the acquisition chamber Door for loading and unloading the filter slider for fluorescence emission (LuFlu only) Operating status indicator Inside the acquisition chamber Inductive sensor detecting the door position Bottom plate (removable) to position the acquisition objects 4 LED's illuminating the acquisition chamber Connector field...
-
Page 75: Acquisition Chamber
LB 983 NightSHADE Operating Manual System Description 5.3 Acquisition Chamber 5.3.1 Light-tight Door with Door Button To close the acquisition chamber light-tight, the door frame is provided with an elastic sealing and a handle which, when turned by 180°, will pull the door into the frame and squeeze it against the sealing. -
Page 76: Camera And Lens
System Description LB 983 NightSHADE II Operating Manual 5.3.4 Camera and Lens NightSHADE LB 983 can operate with different camera systems. The following cameras are supplied: NightSHADE Cam Ikon, hermetically vacuum encapsulated and cooled down by a Pel- tier element to -70°C (the operating temperature is reached after about 10 minutes). ... -
Page 77: Filter Slider
When loading the filter please observe the correct installation direction (arrow on the filter wheel). To reload the slider select . After that the slider will be initialized by the instrument. The Berthold Application Support is available to recommend filters when you are selecting the optimum filter combination for your fluorescence application. -
Page 78: Fluorescence Illumination
System Description LB 983 NightSHADE II Operating Manual 5.3.7 Fluorescence Illumination The built in halogen light source together with the filter slider creat the excitation light for flourescence measurements. The light is guided into the dark box using a 4 fold fibreoptic gooseneck (1). -
Page 79: Bottom Plate
LB 983 NightSHADE Operating Manual System Description 5.3.8 Bottom Plate The bottom plate helps you to position the acquisition objects. It includes two bolt heads on the front panel to help you position and fix the samples or sample masks accurately. In addition, there are two drilled holes for accurate positioning of sample holders. -
Page 81: Indigo Software Documentation
LB 983 NightSHADE Operating Manual indiGO Software Documentation 6 indiGO Software Documentation Graphical User Interface Application Toolbar Identity Context Identities and Measurements Contrast Slider 6.5.1 Photo Properties Quick Menu 6.5.2 Photo Properties Dialog Data Slider 6.6.1 Data Properties Quick Menu 6.6.2 Data Properties Dialog Toolbar IndiGO Menu... -
Page 82: Graphical User Interface
indiGO Software Documentation LB 983 NightSHADE II Operating Manual 6.1 Graphical User Interface The indiGO graphical user interface is clearly structured and offers a variety of setup options. Measurements are automatically displayed as overlay. 6.2 Application Toolbar On the toolbar you find the following commands: ... -
Page 83: Identity Context
LB 983 NightSHADE Operating Manual indiGO Software Documentation Quick Check Start the <Quick Check> utility to create a photo or run a measurement for test circumstanc- Device State Open a window to display the current state of the NightShade. ... - Page 84 indiGO Software Documentation LB 983 NightSHADE II Operating Manual Apply to Identity With this command the current image and contrast settings, as well as the overlay proper- ties of the annotation and the manual layers can be applied to all measurements of the cur- rent identity.
-
Page 85: Identities And Measurements
LB 983 NightSHADE Operating Manual indiGO Software Documentation 6.4 Identities and Measurements Top Row Currently opened identities Center Row List of all measurements belonging to the current selected identity Bottom Row Measurement or data toolbar 6.5 Contrast Slider With the contrast slider on the left side of the image the brightness of the pho- tographic display is defined. -
Page 86: Photo Properties Quick Menu
indiGO Software Documentation LB 983 NightSHADE II Operating Manual 6.5.1 Photo Properties Quick Menu To access the drop down menu simply click on the arrow next to the icon shown below. Reload Settings Reload the last stored settings for the scaling and the alignment. ... - Page 87 LB 983 NightSHADE Operating Manual indiGO Software Documentation Reference: real name photo displayed link. example: 20100301005800.photo.000, where 201003 is the date the photo was taken. In our example: 03. March 2010. 005800 is the recording time. In our example: 12:58:00 AM. By following the link, the indiGO image viewer will be opened and the photo will be displayed.
-
Page 88: Data Slider
indiGO Software Documentation LB 983 NightSHADE II Operating Manual 6.6 Data Slider On the right margin of the screen you see the intensity scale of the measurement, together with the associated slider. With these two sliders you can set the scaling of the pseudocolor signal image and the lower threshold of the color view. - Page 89 LB 983 NightSHADE Operating Manual indiGO Software Documentation Range The Range page can be used to setup the data slider. For further analysis a LUT and a surface is supported. In addition the overlay intensity can be set through <Overlay level>. ...
- Page 90 indiGO Software Documentation LB 983 NightSHADE II Operating Manual The following options are available: False Color Table Activates the system default false color table Record Filter Activates the filter properties used for recording Custom Filer Enables the user to setup a custom filter, using a center wave length and a bandwidth. ...
-
Page 91: Toolbar
LB 983 NightSHADE Operating Manual indiGO Software Documentation 6.7 Toolbar Decrease the zoom Used to decrement the zoom Increase the zoom Used to increment the zoom Current zoom Used to setup the zoom manually, displays current zoom factor ... - Page 92 indiGO Software Documentation LB 983 NightSHADE II Operating Manual Manually (Menu) Create manual areas Peak Search (Menu) Starts the peak search Peak Search (Command)
- Page 93 LB 983 NightSHADE Operating Manual indiGO Software Documentation Overlay Properties (Dialog) The <Overlay Properties> dialog can be opened via the <Annotaion>, <Manually> or <Peak Search> commands Line Plot Starts the Line Plot Tool Report (Menu) Report (Command) Starts the wizard to create an Excel report.
-
Page 94: Indigo Menu
indiGO Software Documentation LB 983 NightSHADE II Operating Manual 6.8 IndiGO Menu 6.8.1 New Project To create a new project, start the wizard. For further details please refer to section 4.2.4. Controller Template To create a new controller template, start the wizard. For further details please refer to section 4.2.4. -
Page 95: Print Report
LB 983 NightSHADE Operating Manual indiGO Software Documentation 6.8.6 Print Report indiGO offers the possibility to create and display measurement reports. The output can be adapted to the user's requirements. For further details please refer to chapter 4.4. 6.8.7 Logoff This command will change the current user account. -
Page 96: Tools Menu
indiGO Software Documentation LB 983 NightSHADE II Operating Manual 6.9 Tools Menu 6.9.1 Backup Projects IndiGO can create backups of the database or selected projects. Backups are created using the backup smart wizard. The wizard will guide you through the steps necessary to successfully create a backup. When selecteing the Backup first define which projects have to be backed up. -
Page 97: Import Winlight Data
LB 983 NightSHADE Operating Manual indiGO Software Documentation After launching the wizard just select the project file (.proj) of the indiGO 1.x project to import. The “Destination Project” will define the Project name where the imported files will be copied to. An import project name cannot be used for data acquisitions. -
Page 98: Service Menu
indiGO Software Documentation LB 983 NightSHADE II Operating Manual 6.10 Service Menu 6.10.1 Filter Manager This command will start the indiGO filter manager. For further details please refer to section 4.1.14 6.10.2 User Manager This command will start the indiGO user manager. For further details please refer to section 4.1.12. -
Page 99: Device State
LB 983 NightSHADE Operating Manual indiGO Software Documentation The Instrument Controller Setup is used to setup your NightShade or NightOwl device and to perform all system calibration tasks. 6.10.4 Device State The <Device State> command can be used to display the current states of the instrument, the camera and the scheduler. -
Page 100: Controller Version
indiGO Software Documentation LB 983 NightSHADE II Operating Manual Each highlevel quickcheck command will start a smart wizard which will guide you through the neccessary steps to perform the quickcheck. 6.10.6 Controller Version The command will display the current controller and instrument version information. Please note: Watch the owl while moving the mouse. - Page 101 LB 983 NightSHADE Operating Manual indiGO Software Documentation...
-
Page 102: Options
indiGO Software Documentation LB 983 NightSHADE II Operating Manual 6.10.8 Options The Options command allows you to setup further indiGO options. Overlay Access to overlay colour options. Here user specific colors for the different data types (peak search areas, manual areas etc.) can be defined. IndiGO Access to setup configuration wizards and connectivity settings necessary for update and sup- port mail access. - Page 103 LB 983 NightSHADE Operating Manual indiGO Software Documentation Finally the connection must be entered. In case of a local connection, the default “LOCALHOST-1024” is OK. Setup Default User With this wizard a default user can be assigned who logs in automatically after launching indiGO.
- Page 104 indiGO Software Documentation LB 983 NightSHADE II Operating Manual...
-
Page 105: View Menu
LB 983 NightSHADE Operating Manual indiGO Software Documentation 6.11 View Menu 6.11.1 Toolbar This command shows or hides the toolbar. This option is not persistent and the toolbar will be shown on the next start of indiGO. 6.11.2 Statusbar This command shows or hides the status bar. This option is not persistent and the statusbar will be shown on the next start of indiGO. -
Page 106: Trouble Shooting
Trouble Shooting LB 983 NightSHADE II Operating Manual 7 Trouble Shooting Hardware 7.1.1 Door status always open 7.1.2 Fluorescence lamp not working Software 7.2.1 Surface plot not visible... -
Page 107: Hardware
LB 983 NightSHADE Operating Manual Trouble Shooting 7.1 Hardware 7.1.1 Door status always open If the door status is always open, the reason could be a disaligned door sensor. The door senssor is located at the upper right front side of the dark box. To adjust the door sensor refer to 8.2.3 7.1.2 Fluorescence lamp not working The built in halogen fluorescence excitation light source has a lifetime of approx. -
Page 108: Software
Trouble Shooting LB 983 NightSHADE II Operating Manual 7.2 Software 7.2.1 Surface plot not visible When running the surface plot from the Report menu a box with an error message (D3D device error) pops up instead of the surface plot. This indicates that the installed graphics card or the corresponding driver does not support Microsoft Windows DirectX 9 features. -
Page 109: Cleaning And Maintenance
LB 983 NightSHADE Operating Manual Cleaning and Maintenance 8 Cleaning and Maintenance Camera and Lens 8.1.1 Removing the bottom plate 8.1.2 Cleaning the Dark Box 8.1.3 Cleaning the Camera 8.1.4 Cleaning the Lens Darkbox 8.2.1 Replacing the Air Filter 8.2.2 Replacing the Fuse 8.2.3 Setting the Door Sensor 8.2.4 Replacing the halogen lamp... -
Page 110: Camera And Lens
Cleaning and Maintenance LB 983 NightSHADE II Operating Manual 8.1 Camera and Lens 8.1.1 Removing the bottom plate The retractable bottom plate is removable. The bottom plate is locked by a latch un- derneath the telescopic rail. To remove the plate open the latch on both rails. The black plastic latch is located inside the rail. -
Page 111: Darkbox
LB 983 NightSHADE Operating Manual Cleaning and Maintenance 8.2 Darkbox 8.2.1 Replacing the Air Filter The air filter should either be cleaned or replaced, depending on the level of contamination. Remove the black ventilator cover on the rear of the instrument and clean the filter (blow it out or wash it) or replace it. - Page 112 Cleaning and Maintenance LB 983 NightSHADE II Operating Manual 8.2.4 Replacing the halogen lamp The halogen lamp is located close to the excitation filters. It is protected by a black cover plate. To replace the lamp proceed as follows. Make sure that the same type of lamp is used to guar- antee proper light output.
-
Page 113: Technical Data
LB 983 NightSHADE Operating Manual Technical Data 9 Technical Data Camera Peltier/air-cooled slow scan CCD camera C-Mount adapter Resolution 1024 x 1024 Pixel x 13,6µ (back illuminated NC-100 Camera) 1004 x 1002 Pixel x 8µ (front illuminated emCCD Camera) Quantum efficiency (max.) 90% (Luca 65%). -
Page 114: Appendix
Appendix LB 983 NightSHADE II Operating Manual Appendix 10.1 Accessories 10.1.1 LED Panels The LED panels are used to simulate environmental conditions like day / night changes while the sample is placed inside the dark box and no measurement is running. The LED panels are available in 2 different versions with the following wvelenght configuration: ... - Page 115 LB 983 NightSHADE Operating Manual Appendix The control cable of each panel is plugged into the socket at the corresponding side of the con- nection box (see 5.3.3). Water cooling connects to the water supply bar located at the rear side of the dark box. The plug at the lower side of the is a bypass plug (instead of the temperature controlled sample ta- ble) and must be present to ensure a flow of cooling water.
- Page 116 Appendix LB 983 NightSHADE II Operating Manual 10.1.2 Turntable The turntable is used together with the sideview option. Using the turntable up to 6 samples can be measured in a automatic sequence. 3 different sample holders can be selected: 100mm square petri dishes ...
- Page 117 LB 983 NightSHADE Operating Manual Appendix Connect the 9 pin cable supplied with the turn table to the connector at the connecting panel at the upper position inside the dark box. Make sure the cable is not blocking the table or gets sqeezed by the retractable base plate.
- Page 118 Appendix LB 983 NightSHADE II Operating Manual 10.1.3 Transilluminator General Safety Instructions When connecting the transilluminator to the power supply make sure to use a grounded mains outlet! Connect the transilluminator only to the power supply specified on the type label of the device! Never leave the transilluminator powered up without any supervision! Before carrying out any maintenance and repair work pull the power cord and make sure that all parts of the device you may possibly come into contact with have cooled down to room temper-...
- Page 119 LB 983 NightSHADE Operating Manual Appendix a) UV Transilluminators If you are working with UV transilluminators, it is extremely important that optimum protection of skin and eyes will be guaranteed. You should wear UV safety glasses (CE EN 170) or a UV face protection mask.
- Page 120 Appendix LB 983 NightSHADE II Operating Manual 10.1.4 Temperature Controlled Measurement Table The temperature controlled measurement table is used for measurements which require a tem- perature controlled environment. If you are working with the heated macro table, plug the connector into the 9-pole Sub-D- connector on the power box at the center top inside the darkbox (see 5.3.3.) The device must be switched off, since after the NightSHADE is switched on the heating system is detected and may get initialized.
- Page 121 LB 983 NightSHADE Operating Manual Appendix 10.1.5 Line Light The line light is used to illuminate reflecting fluorescence samples. Reflections on the sample are ruled out by the fact that the lights are positioned at the side. The angle of illumination can be set by adjusting the two lights. To this end, you have to open the knurled screws and move the fiber optics lights to the desired position.
- Page 122 Appendix LB 983 NightSHADE II Operating Manual 10.1.7 Test Light Source The Test Light Source is used to calibrate and test the System. It contains a low light source which will glow for about 15 min. without external supply. To charge the unit, use the included mains adapter.
-
Page 123: Customer Reply Form
LB 983 NightSHADE Operating Manual Appendix 10.2 Customer Reply Form Please send the Customer Reply Form to: Berthold Technologies GmbH & Co.KG Technical Support Calmbacher Str. 22 75323 Bad Wildbad Germany Phone: +49 7081 177 171 Fax: +49 7081 177 446 Email: service@berthold.com... - Page 124 Appendix LB 983 NightSHADE II Operating Manual Customer Reply Form Date: Customer no.: Name: Company: Department: Address: Address: Phone: Fax: Email: Instrument: ID no.: Serial no.: Embedded software version: Instrument driver software version: Accessory instruments: PC Software: PC software version: Windows version: Computer type: CPU type:...
-
Page 125: Confirmation On Decontamination
Appendix 10.3 Confirmation on Decontamination If you return an instrument to BERTHOLD TECHNOLOGIES for servicing purposes which is not properly decontaminated, there will be a health risk for BERTHOLD TECHNOLOGIES employ- ees. We therefore need your confirmation that the instrument was decontaminated and cleaned properly before shipping. -
Page 126: Index
Appendix LB 983 NightSHADE II Operating Manual 10.4 Index 1D-line plot Fluorescence Filters acquisition fuse Admin Fuse Air Filter Gain Application goose neck light guide Area Guest Peaksearch halogen lamp Areas Identities Manual Import Artificial daylight indiGO 1.x Data Background Correction WinLight Data Backup Projects LED Panels...
Need help?
Do you have a question about the LB 985 and is the answer not in the manual?
Questions and answers