GORMAN-RUPP PUMPS 80 Series Installation, Operation And Maintenance Manual
Hide thumbs
Also See for 80 Series:
Table of Contents
Advertisement
Quick Links
ACE
INSTALLATION, OPERATION,
AND MAINTENANCE MANUAL
THE GORMAN-RUPP COMPANY D MANSFIELD, OHIO
GORMAN-RUPP OF CANADA LIMITED
WITH PARTS LIST
80 SERIES PUMPS
MODEL
88B2−F5L
www.gormanrupp.com
D
ST. THOMAS, ONTARIO, CANADA
e
Copyright by the Gorman-Rupp Company
OM-02301-07
September 12, 2005
Printed in U.S.A.
Advertisement
Table of Contents

Related Manuals for GORMAN-RUPP PUMPS 80 Series


Summary of Contents for GORMAN-RUPP PUMPS 80 Series
- Page 1 OM-02301-07 September 12, 2005 INSTALLATION, OPERATION, AND MAINTENANCE MANUAL WITH PARTS LIST 80 SERIES PUMPS MODEL 88B2−F5L THE GORMAN-RUPP COMPANY D MANSFIELD, OHIO www.gormanrupp.com GORMAN-RUPP OF CANADA LIMITED ST. THOMAS, ONTARIO, CANADA Printed in U.S.A. Copyright by the Gorman-Rupp Company...
- Page 2 The engine exhaust from this product contains chemicals known to the State of California to cause cancer, birth defects or other reproductive harm.
-
Page 3: Table Of Contents
TABLE OF CONTENTS INTRODUCTION ..........PAGE I −... - Page 4 TABLE OF CONTENTS (continued) Cold Weather Preservation ..........PAGE C −...
-
Page 5: Introduction
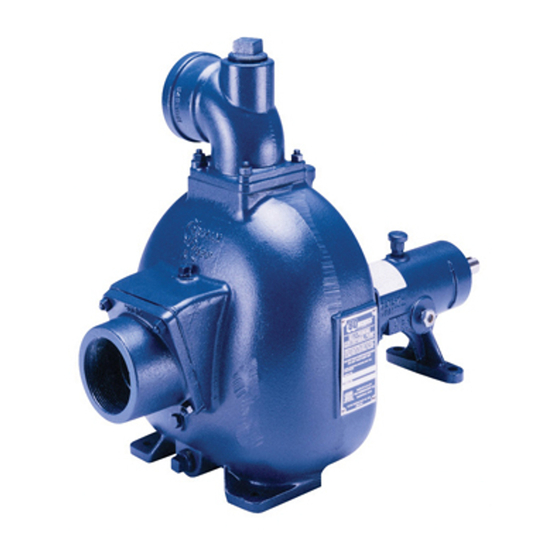
Gorman- to those which could be dangerous to personnel: Rupp pump. This pump is an 80 Series, semi-open impeller, self- priming centrifugal model with a suction check valve. The pump is designed for handling most non-volatile, non-flammable liquids containing specified entrained solids. -
Page 6: Safety - Section A
80 SERIES OM−02301 SAFETY − SECTION A This information applies to 80 Series 5. Close the suction and discharge Engine-Driven pumps. Refer to the man- valves. ual accompanying the engine before at- 6. Vent the pump slowly and cau- tempting to begin operation. - Page 7 OM−02301 80 SERIES to a boil, build pressure, and cause the pump casing to rupture or explode. Never tamper with the governor to gain more power. The governor establishes safe operating limits that should not be Do not remove plates, covers, gauges, exceeded.
-
Page 8: Installation − Section Bpage B
80 SERIES OM−02301 INSTALLATION − SECTION B Review all SAFETY information in Section A. to the pump is critical to performance and safety, be sure to limit the incoming pressure to 50% of the Since pump installations are seldom identical, this... -
Page 9: Preinstallation Inspection Page B
OM−02301 80 SERIES Table 1. Battery Specifications PREINSTALLATION INSPECTION Cold Reserve Approx. Crank Capacity Amp/ Overall Amps @80°F Dims. The pump assembly was inspected and tested be- Voltage @ 0°F (Minutes) Rating (Inches) fore shipment from the factory. Before installation, 20.5L... -
Page 10: Mounting
80 SERIES OM−02301 Mounting Connections to Pump Before tightening a connecting flange, align it ex- Locate the pump in an accessible place as close as actly with the pump port. Never pull a pipe line into practical to the liquid being pumped. Level mount- place by tightening the flange bolts and/or cou- ing is essential for proper operation. -
Page 11: Sealing
OM−02301 80 SERIES strainer furnished with the pump will also pass tion inlet because the inflow will carry air down into through the pump itself. the sump, and air entering the suction line will re- duce pump efficiency. If a strainer is not furnished with the pump, but is... -
Page 12: Discharge Lines
80 SERIES OM−02301 Figure 2. Recommended Minimum Suction Line Submergence vs. Velocity DISCHARGE LINES Siphoning If the application involves a high discharge head, gradually close the discharge throttling valve before stopping the pump. Do not terminate the discharge line at a level lower than that of the liquid being pumped unless a si- phon breaker is used in the line. -
Page 13: Operation − Section C
OM−02301 80 SERIES OPERATION − SECTION C Review all SAFETY information in Section A. cated (see LUBRICATION in MAINTENANCE AND REPAIR). Follow the instructions on all tags, labels and This pump is self priming, but the pump should decals attached to the pump. -
Page 14: Starting
OM−02301 80 SERIES When installed in a flooded suction application, OPERATION simply open the system valves and permit the in- coming liquid to evacuate the air. After the pump and piping system have completely filled, evacu- ate any remaining air pockets in the pump or suc-... -
Page 15: Leakage
OM−02301 80 SERIES stalled, monitor and record the readings regularly the liquid could come to a boil, build to detect strainer blockage. pressure, and cause the pump casing to rupture or explode. Never introduce air or steam pressure into the pump casing or piping to remove a blockage. -
Page 16: Safety Shutdown System
OM−02301 80 SERIES head, gradually close the discharge OPERATION IN EXTREME HEAT throttling valve before stopping the pump. The safety shutdown system will automatically After stopping the pump, close and lock the control stop the unit if engine operating temperature ex- panel cover, or disconnect the positive battery ceeds design limits. - Page 17 OM−02301 80 SERIES tinued operation should bring the temperatures remaining liquid that could freeze the pump rotat- down to normal levels. ing parts. If the pump will be idle for more than a few hours, or if it has been pumping liquids con-...
- Page 18 80 SERIES OM−02301 TROUBLESHOOTING − SECTION D Review all SAFETY information in Section A. Before attempting to open or service the pump: 1. Familiarize yourself with this man- ual. 2. Switch off engine ignition and dis- connect the positive battery cable to ensure that the pump will re- main inoperative.
- Page 19 OM−02301 80 SERIES TROUBLE POSSIBLE CAUSE PROBABLE REMEDY PUMP STOPS OR FAILS Suction intake not submerged at Check installation and correct sub- proper level or sump too small. mergence as needed. DELIVER RATED FLOW OR PRESSURE Strainer clogged. Check strainer and clean if neces- (cont.)
- Page 20 80 SERIES OM−02301 PREVENTIVE MAINTENANCE equipped) between regularly scheduled inspec- tions can indicate problems that can be corrected Since pump applications are seldom identical, and before system damage or catastrophic failure oc- pump wear is directly affected by such things as curs.
- Page 21 80 SERIES OM−02301 PUMP MAINTENANCE AND REPAIR - SECTION E MAINTENANCE AND REPAIR OF THE WEARING PARTS OF THE PUMP WILL MAINTAIN PEAK OPERATING PERFORMANCE. STANDARD PERFORMANCE FOR PUMP MODEL 88B2−F5L Based on 70_ F (21_ C) clear water at sea level Contact the Gorman-Rupp Company to verify per- formance or part numbers.
- Page 22 OM−02301 80 SERIES SECTION DRAWING PARTS PAGE Figure 1. Pump Model 88B2−F5L PAGE E − 2 MAINTENANCE & REPAIR...
- Page 23 80 SERIES OM−02301 PARTS LIST Pump Model 88B2−F5L (From S/N 1323330 up) If your pump serial number is followed by an N", your pump is NOT a standard production model. Contact the Gorman-Rupp Company to verify part numbers. ITEM PART NAME PART MAT’L...
- Page 24 OM−02301 80 SERIES SECTION DRAWING Figure 2. Pump End Assembly 88B2−(SAE 4/10) PAGE E − 4 MAINTENANCE & REPAIR...
- Page 25 80 SERIES OM−02301 PARTS LIST Pump End Assembly 88B2−(SAE 4/10) ITEM PART NAME PART MAT’L ITEM PART NAME PART MAT’L NUMBER CODE NUMBER CODE PUMP CASING 6722 10010 HEX NUT 15991 IMPELLER 2702E 10010 WEAR PLATE 7209A 10010 STUD C0808...
- Page 26 OM−02301 80 SERIES SECTION DRAWING Figure 3. Drive Assembly For Pump Model 88B2−(SAE 4/10) ITEM PART MAT’L PART NAME NUMBER CODE COUPLING KIT 48112−001 −−− −BUSHING 24131−345 −−− −COUPLING ASSEMBLY 44165−011 −−− −LOCKWASHER 21171−536 −−− −SOCKET HD CAPSCREW 22644−220 −−−...
- Page 27 80 SERIES OM−02301 PUMP AND SEAL DISASSEMBLY 3. Allow the pump to completely cool if overheated. AND REASSEMBLY 4. Check the temperature before opening any covers, plates, or Review all SAFETY information in Section A. plugs. 5. Close the suction and discharge Follow the instructions on all tags, label and de- valves.
- Page 28 OM−02301 80 SERIES Disengage the hardware (6 and 7) securing the shaft (23) with the V" notch positioned over the drive assembly to the intermediate. Separate the shaft key. pump end and drive assembly from the engine by With the impeller rotation still blocked, see Figure 4...
- Page 29 80 SERIES OM−02301 Carefully remove the outer stationary seat, rotating element, packing ring and seal spring from the seal plate. Remove the spacer sleeve, packing ring, stationary seat and rotating element. Use a stiff Use lifting and moving equipment in wire with a hooked end if necessary.
- Page 30 OM−02301 80 SERIES from the intermediate cavity. Place a drip pan under Rotate the bearings by hand to check for rough- the intermediate before removing the shaft and ness or binding and inspect the bearing rollers. If bearings. rotation is rough or the rollers are discolored, re- place the bearings.
- Page 31 80 SERIES OM−02301 shims to establish the correct endplay. ly shorten bearing life. Do not spin dry bearings. This may scratch the rollers or races, and cause premature bearing fail- Lubricate the bearings as indicated in LUBRICA- ure. TION at the end of this section.
- Page 32 OM−02301 80 SERIES GREASE CUP SEAL PIPING PLATE PACKING RINGS SEAL IMPELLER LINER STATIONARY SEAL SEAL SEATS WASHER IMPELLER SHAFT ROTATING ELEMENTS IMPELLER SHIMS SPRING SPACER SLEEVE STATIONARY WASHERS Figure 5. GS1250 Seal Assembly Slide the seal plate onto the shaft until fully seated against the intermediate.
- Page 33 80 SERIES OM−02301 spacer washer (58) onto the shaft with the cham- Securing Intermediate And Drive Assembly To Engine fered side facing the shaft shoulder. (Figure 3) Install the shaft key (22, Figure 2) in the shaft key- Reinstall the automatic grease cup and piping (15, way.
- Page 34 OM−02301 80 SERIES Using a suitable lifting device, position the interme- the base (48) with the previously removed hard- diate (20, Figure 2) so the flexible portion of the ware (49, 50, 51 and 52). coupling seats inside the outer ring attached to the engine flywheel.
- Page 35 80 SERIES OM−02301 POSITION POSITION POSITION WHEN WHEN EMPTY FILLING IN USE GREASE FITTING CROSS RELIEF HOLE Figure 6. Automatic Lubricating Grease Cup Bearings new grease is added, the bearing cavity is full and should be disassembled and (Figure 2) cleaned immediately.
- Page 36 For U.S. and International Warranty Information, Please Visit www.grpumps.com/warranty or call: U.S.: 419−755−1280 International: +1−419−755−1352 For Canadian Warranty Information, Please Visit www.grcanada.com/warranty or call: 519−631−2870 THE GORMAN-RUPP COMPANY D MANSFIELD, OHIO GORMAN-RUPP OF CANADA LIMITED ST. THOMAS, ONTARIO, CANADA...
Need help?
Do you have a question about the 80 Series and is the answer not in the manual?
Questions and answers