Sony XR-4950X Operating Instructions Manual
Sony fm/mw/sw cassette car stereo
Hide thumbs
Also See for XR-4950X:
- Service manual (42 pages) ,
- Operating instructions manual (36 pages) ,
- Installation and connections (4 pages)
Table of Contents
Advertisement
Available languages
Available languages
Quick Links
FM/MW/SW
Cassette
Car Stereo
Operating Instructions
Manual de instrucciones
For installation and connections, see the supplied installation/connections
manual.
Para obtener información sobre la instalación y las conexiones, consulte el manual
de instalación/conexiones suministrado.
XR-C5600X
XR-C5500
XR-4950X
2000 Sony Corporation
3-044-361-31 (1)
GB
ES
CT
Advertisement
Chapters
Table of Contents

Related Manuals for Sony XR-4950X


Summary of Contents for Sony XR-4950X
-
Page 1: Operating Instructions
Cassette Car Stereo Operating Instructions Manual de instrucciones For installation and connections, see the supplied installation/connections manual. Para obtener información sobre la instalación y las conexiones, consulte el manual de instalación/conexiones suministrado. XR-C5600X XR-C5500 XR-4950X 2000 Sony Corporation 3-044-361-31 (1) - Page 2 Welcome ! Thank you for purchasing this Sony Cassette Player. This unit lets you enjoy a variety of features using the following controller accessory: Supplied accessory Card remote commander RM-X74 (XR-C5600X only) Optional accessory Rotary commander RM-X4S Card remote commander RM-X91...
-
Page 3: Notes On Cassettes
Notes on Cassettes Cassette care • Do not touch the tape surface of a cassette, as any dirt or dust will contaminate the heads. • Keep cassettes away from equipment with built-in magnets such as speakers and amplifiers, as erasure or distortion on the recorded tape could occur. -
Page 4: Table Of Contents
Table of Contents This Unit Only Location of controls ... 5 Getting Started Resetting the unit ... 7 Detaching the front panel ... 7 Turning the unit on/off ... 8 How to use the menu ... 8 Setting the clock ... 9 Cassette Player Listening to a tape ... -
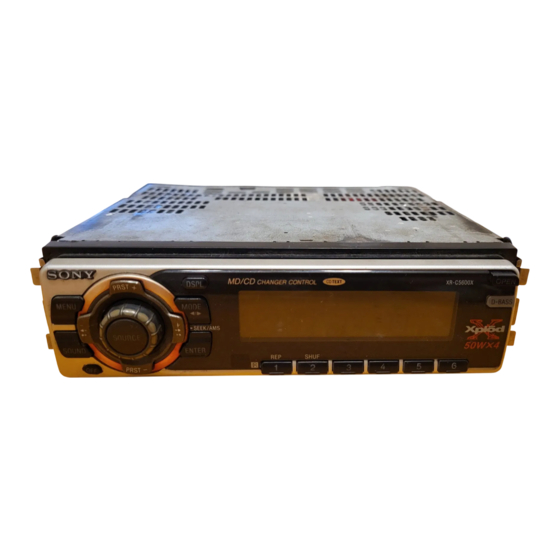
Page 5: Location Of Controls
3 SOURCE (TUNER/TAPE/CD* button 8, 10, 12, 17 4 XR-C5600X/C5500: PRST/DISC +/– (cursor up/down) buttons 8, 9, 11, 12, 13, 16, 18 XR-4950X: PRST +/– (cursor up/down) buttons 8, 9, 11, 12, 13, 16, 18 During radio reception: Preset stations select 12... - Page 6 Card remote commander XR-C5600X (supplied): RM-X74 MENU DISC SEEK SOURCE SOUND DISC DSPL The corresponding buttons of the card remote commander control the same functions as those on this unit. 1 OFF button 2 MENU button 3 SOURCE button 4 SEEK/AMS (cursor </,) button 5 SOUND button 6 DSPL button A unit turned off by pressing (OFF) for two seconds cannot be operated with the card remote...
-
Page 7: Getting Started
Getting Started Resetting the unit Before operating the unit for the first time or after replacing the car battery, you must reset the unit. Remove the front panel and press the reset button with a pointed object, such as a ballpoint pen. -
Page 8: Turning The Unit On/Off
Turning the unit on/off Turning on the unit Press (SOURCE) or insert a cassette in the unit. For details on operation, refer to page 10 (cassette player) and page 12 (radio). Turning off the unit Press (OFF) to stop tape playback or FM/ MW/SW reception (the key illumination and display remains on.) Press (OFF) for two seconds to completely... -
Page 9: Setting The Clock
Setting the clock The clock uses a 12-hour digital indication. Example: To set the clock to 10:08 Press (MENU), then press either side of (PRST/DISC) or (PRST) repeatedly until “CLOCK” appears. 1 Press (ENTER). The hour indication flashes. 2 Press either side of (PRST/DISC) or (PRST) to set the hour. -
Page 10: Cassette Player
Cassette Player Listening to a tape Press (OPEN) and insert a cassette. Playback starts automatically. Close the front panel. If a cassette is already inserted, to start playback, press (SOURCE) repeatedly until “FWD” or “REV” appears. The side facing up is played. The side facing down is played. -
Page 11: Playing A Tape In Various Modes
To return to normal playback mode, select “OFF” in step 3. While the ATA function is activated, the display (TAPE y TUNER) can be changed by pressing (DSPL) (for the XR-4950X only on the optional rotary commander). Playing tracks repeatedly — Repeat Play During playback, press (1) (REP) repeatedly until “REP-ON”... -
Page 12: Radio
Radio Memorising stations automatically — Best Tuning Memory (BTM) The unit selects the stations with the strongest signals and memorises them in the order of their frequencies. You can store up to 6 stations on each band (FM1, FM2, FM3, MW, SW1 and SW2). - Page 13 If you cannot tune in a preset station Press either side of (SEEK/AMS) to search for the station (automatic tuning). Scanning stops when the unit receives a station. Press either side of (SEEK/AMS) repeatedly until the desired station is received. Note If the automatic tuning stops too frequently, press (MENU), then press either side of (PRST/DISC) or...
-
Page 14: Other Functions
Other Functions You can also control this unit with the rotary commander (optional). Labelling the rotary commander Depending on how you mount the rotary commander, attach the appropriate label as shown in the illustration below. D S P L M O D E S O U N D Using the rotary commander... - Page 15 By rotating the control (the SEEK/AMS control) Rotate the control and release it to: •Locate the beginnings of tracks on the tape. Rotate and hold the control, and release it to fast-wind the tape. To start playback while fast-winding the tape, press (MODE).
-
Page 16: Adjusting The Sound Characteristics
Adjusting the sound characteristics You can adjust the bass, treble, balance, and fader. You can store the bass and treble levels independently for each source. Select the item you want to adjust by pressing (SOUND) repeatedly. Each time you press (SOUND) , the item changes as follows: BAS (bass) t TRE (treble) t BAL (left –... -
Page 17: Boosting The Bass Sound
Boosting the bass sound — D-bass You can enjoy a clear and powerful bass sound. The D-bass function boosts the low frequency signal and high frequency signal with a sharper curve than conventional bass boost. You can hear the bass line more clearly even while the vocal volume remains the same. -
Page 19: Playing Tracks Repeatedly
If the fuse blows again after replacement, there may be an internal malfunction. In such a case, consult your nearest Sony dealer. Warning Never use a fuse with an amperage rating exceeding the one supplied with the unit as this could damage the unit. -
Page 20: Dismounting The Unit
Cleaning the connectors The unit may not function properly if the connectors between the unit and the front panel are not clean. In order to prevent this, open the front panel by pressing (OPEN), then detach it and clean the connectors with a cotton swab dipped in alcohol. -
Page 21: Specifications
Optional equipment XR-C5600X/C5500: CD changer (10 discs) CDX-838, CDX-828, CDX-737, CDX-636 MD changer (6 discs) MDX-65 Other CD/MD changers with the Sony-BUS system Source selector XA-C30 Design and specifications are subject to change without notice. 50 183 mm 53 162 mm... -
Page 22: Troubleshooting Guide
Troubleshooting guide The following checklist will help you remedy the problems you may encounter with your unit. Before going through the checklist below, check the connections and operating procedures. General Problem No sound. The contents of the memory have been erased. Indications do not appear in the display. - Page 23 When an error occurs during playback of a CD or MD, the disc number of the CD or MD does not appear in the display. The disc number of the disc causing the error appears in the display. If the above-mentioned solutions do not help improve the situation, consult your nearest Sony dealer. Cause/Solution A dirty or defective disc.
- Page 24 Si desea realizar alguna consulta o solucionar algún problema referentes a la unidad que no se mencionen en este manual, póngase en contacto con el proveedor Sony más próximo. Para mantener una alta calidad de sonido Si existen soportes para bebidas cerca del...
- Page 25 Notas sobre los cassettes Cuidados de los cassettes • No toque la superficie de la cinta del cassette, ya que la suciedad o el polvo ensucian los cabezales. • Mantenga los cassettes alejados de equipos provistos de imanes incorporados, como altavoces y amplificadores, ya que el sonido de la cinta grabada podría borrarse o distorsionarse.
- Page 26 Indice Sólo esta unidad Localización de los controles ... 5 Procedimientos iniciales Restauración de la unidad ... 7 Extracción del panel frontal ... 7 Encendido y apagado de la unidad ... 8 Cómo utilizar el menú ... 8 Ajuste del reloj ... 9 Reproductor de cassettes Escucha de cintas ...
-
Page 27: Localización De Los Controles
) 8, 10, 12, 17 4 XR-C5600X/C5500: Botones PRST/DISC +/– (cursor arriba/ abajo) 8, 9, 11, 12, 13, 16, 18 XR-4950X: Botones PRST +/– (cursor arriba) 8, 9, 11, 12, 13, 16, 18 Durante la recepción de radio: Selección de emisoras memorizadas Durante la reproducción de CD/MD*... - Page 28 Mando a distancia de tarjeta XR-C5600X (suministrado): RM-X74 MENU DISC SEEK SOURCE SOUND DISC DSPL Los botones correspondientes del mando a distancia de tarjeta tienen las mismas funciones que los de esta unidad. 1 Botón OFF 2 Botón MENU 3 Botón SOURCE 4 Botón SEEK/AMS (Cursor </,) 5 Botón SOUND 6 Botón DSPL...
-
Page 29: Procedimientos Iniciales
Procedimientos iniciales Restauración de la unidad Antes de utilizar la unidad por primera vez o después de sustituir la batería del automóvil, es necesario restaurar dicha unidad. Extraiga el panel frontal y pulse el botón de restauración con un objeto puntiagudo, como un bolígrafo. -
Page 30: Encendido Y Apagado De La Unidad
Encendido y apagado de la unidad Encendido de la unidad Pulse (SOURCE) o inserte un cassette en la unidad. Para obtener información detallada sobre la utilización, consulte las páginas 10 (reproductor de cassettes) y 12 (radio). Apagado de la unidad Pulse (OFF) para detener la reproducción de la cinta o la recepción de FM/MW/SW (la iluminación de las teclas y el visor... -
Page 31: Ajuste Del Reloj
Ajuste del reloj El reloj dispone de una indicación digital de 12 horas. Ejemplo: Para ajustar el reloj a las 10:08 Pulse (MENU) y, a continuación, pulse cualquier lado de (PRST/DISC) o (PRST) varias veces hasta que aparezca “CLOCK“. 1 Pulse (ENTER). La indicación de hora parpadea. -
Page 32: Reproductor De Cassettes
Reproductor de cassettes Escucha de cintas Pulse (OPEN) e inserte el cassette. La reproducción se iniciará de forma automática. Cierre el panel frontal. Si ya hay un cassette insertado, para iniciar la reproducción pulse (SOURCE) varias veces hasta que aparezca “FWD” o “REV”. Se reproduce la cara orientada hacia arriba. -
Page 33: Reproducción De Cintas En Diversos Modos
“OFF” en el paso 3. Consejo Mientras la función ATA está activada, la indicación (TAPE y TUNER) puede cambiarse pulsando (DSPL) (para le XR-4950X en le Mando a distancia de terjeta solamente). Reproducción repetida de temas — Reproducción repetida Durante la reproducción, pulse (1) (REP) -
Page 34: Radio
Radio Memorización automática de emisoras — Memorización de la mejor sintonía (BTM) Esta unidad selecciona las emisoras de señal más intensa y las memoriza por orden de frecuencia. Es posible almacenar hasta 6 emisoras de cada banda (FM1, FM2, FM3, MW, SW1 y SW2). - Page 35 Si no puede sintonizar una emisora programada Pulse cualquier lado de (SEEK/AMS) para buscar la emisora (sintonización automática). La exploración se detiene cuando la unidad recibe una emisora. Pulse cualquier lado de (SEEK/AMS) varias veces hasta recibir la emisora deseada. Nota Si la sintonización automática se detiene con demasiada frecuencia, pulse (MENU) y, a...
-
Page 36: Otras Funciones
Otras funciones Esta unidad también puede controlarse con el mando rotativo (opcional). Etiquetado del mando rotativo En función de cómo monte el mando rotativo, adhiera la etiqueta adecuada como se muestra en la siguiente ilustración. S O U N D D S P L M O D E S O U N D... - Page 37 Mediante el giro del control (SEEK/AMS) Gire el control y suéltelo para: • Localizar el principio de los temas de la cinta. Gire y mantenga girado el control y suéltelo para realizar un avance rápido de la cinta. Para iniciar la reproducción durante el avance rápido de la cinta, pulse (MODE).
-
Page 38: Ajuste De Las Características De Sonido
Ajuste de las características de sonido Es posible ajustar los graves, los agudos, el balance y el equilibrio entre altavoces. Es posible almacenar los niveles de graves y agudos de forma independiente para cada fuente. Pulse (SOUND) varias veces para seleccionar el elemento que desee ajustar. -
Page 39: Refuerzo De Los Graves
Refuerzo de los graves — D-bass Es posible disfrutar de graves nítidos e intensos. La función D-bass refuerza las señales de baja y alta frecuencia con una curva más marcada que la del refuerzo de graves convencional. Es posible recibir la línea de graves con mayor nitidez aunque el volumen del sonido vocal no haya variado. -
Page 41: Reproducción Repetida De Temas
En tal caso, póngase en contacto con el proveedor Sony más próximo. Advertencia No utilice nunca un fusible con un amperaje superior al del suministrado con la unidad, ya que ésta podría dañarse. -
Page 42: Desmontaje De La Unidad
Limpieza de los conectores Es posible que la unidad no funcione correctamente si los conectores de la unidad y del panel frontal no están limpios. Para evitar que ocurra esto, abra el panel fontal pulsando (OPEN) y, a continuación, extráigalo y limpie los conectores con un bastoncillo de algodón humedecido en alcohol. -
Page 43: Especificaciones
(10 discos) CDX-838, CDX-828, CDX-737, CDX-636 Cambiador de MD (6 discos) MDX-65 Otros cambiadores de CD/MD con el sistema BUS de Sony Selector de fuente XA-C30 Diseño y especificaciones sujetos a cambios sin previo aviso. 50 183 mm 53 162 mm... -
Page 44: Guía De Solución De Problemas
Guía de solución de problemas La siguiente lista de comprobaciones resulta útil para solucionar los problemas que puedan producirse al utilizar la unidad. Antes de consultar la lista que aparece a continuación, compruebe los procedimientos de conexión y funcionamiento. Generales Problema Ausencia de sonido. - Page 45 El visor mostrará el número del disco que causa el error. Si el problema no se soluciona con las sugerencias anteriormente enumeradas, póngase en contacto con el proveedor Sony más próximo. Causa/Solución Disco sucio o defectuoso.
- Page 46 Sony Corporation Printed in Thailand...
Need help?
Do you have a question about the XR-4950X and is the answer not in the manual?
Questions and answers