Advertisement
Quick Links
Advertisement

Related Manuals for FrontLine AQUAGLASS Plus

Summary of Contents for FrontLine AQUAGLASS Plus
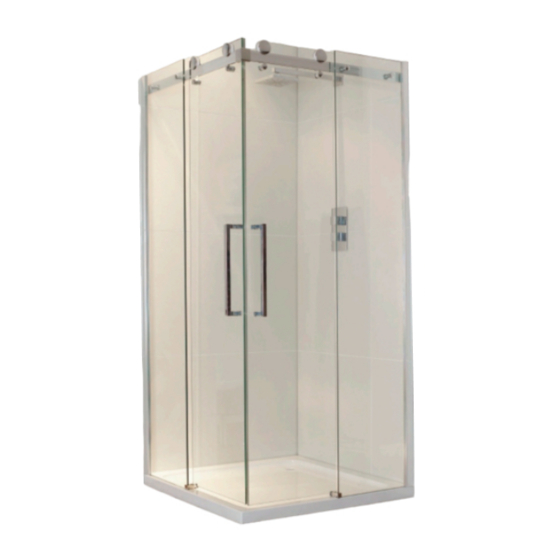
- Page 1 AQUAGLASS+ FRAMELESS CORNER ENTRY Installtion Instructions 900x900x1900mm...
-
Page 2: General Safety Instructions
● Please read these instructions in full before installing IMPORTANT ● Check that the tray has been installed to the manufacturer’s instructions. Please note - All product is supplied without a tray. ● Opening wall adjustments 900x900mm Corner Entry - adjustment = (875 - 900)x(875 - 900)mm GENERAL SAFETY INSTRUCTIONS ●... -
Page 3: Identification Of Parts
IDENTIFICATION OF PARTS 8EE19 8EE20 8EE21 8EE17 8EE18 8EE12 8EE3 8EE5 8EE23 8EE22 8EE1 8EE14 8EE2 8EE4a 8EE4b 8EE4c 8EE11 8EE10 8EE13 8EE14 8EE6 8EE8a 8EE8b 8EE7a 8EE9a 8EE9b 8EE15 8EE7b 8EE16 8EE24 Fixings & fittings supplied Quantity Item No.: Part Item No.: Part... - Page 4 - Take a spirit level to make sure the tray is placed horizontally. 8EE3 - Put the wall profiles(8EE3) against the wall and make sure the profiles to be 5mm away from the outside edge. Adjust the profiles to ensure they are vertical by using a spirit level. - Mark the holes on the wall.
- Page 5 - Put T templet(8EE27) next to the wall profiles on the corner 8EE1 8EE2 8EE27 8EE19 and make sure T templet is right against wall profile on the corner. Mark the holes on the wall accordingly. ST4X30 - Drill the holes(Ø6mm) according to the marks and insert the wall plugs(8EE1) into the holes.
- Page 6 - Put the bottom brackets(8EE7) on the bottom of the the fixed 8EE8 8EE7 8EE2 8EE6 8EE1 panels and mark the holes for the brackets. Drill the holes (Ø 6 mm) according to the marks and insert the wall plugs ST4X30 (8EE1) into the holes.
- Page 7 - Put the door panels onto the rail profiles. 8EE11 8EE26 - Assemble the fixing parts( 8EE11) on the door panels below the rail profiles. 8EE11 is eccentric, please adjust the distance between rail profile and 8EE11 to be 0. 5mm. - Adjust the top rollers to make sure the door panels is vertical and the magetic seals can be well absorbed.
- Page 8 - Drill the holes (Ø 3.2 mm) on vertical profiles into wall profiles. 8EE4 - Use rubber washers(8EE4c) and screws(8EE4b) to fix them in place. Cover the screws with caps(8EE4a). ST4X10 8EE4c 8EE4b 8EE4a - Put top caps(8EE18) on the vertical profiles and top caps 8EE17 8EE18 (8EE17) on the wall profiles.
- Page 9 - Finally, at all points connected to the wall, shower tray/floor and the profiles, use silicone sealant only on the outside of the shower enclosure. Please do ot use showering within 24 hours after silicon sealant. Cleaning and Maintenance: Please do not use abrasive or strong cleaning solution on the shower enclosure, such as alcohol, petroleum liquids or any other chemical clearner with acidic contents.
Need help?
Do you have a question about the AQUAGLASS Plus and is the answer not in the manual?
Questions and answers