Table of Contents
Advertisement
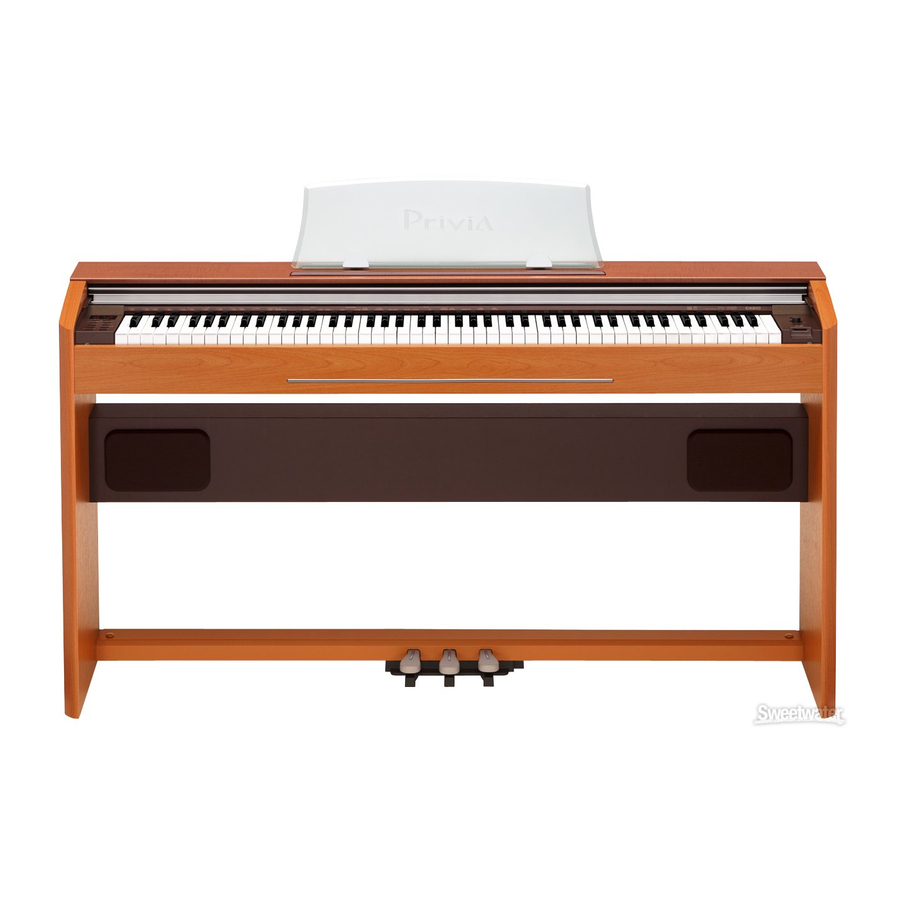
USER'S GUIDE
GUÍA DEL USUARIO
Please keep all information for future reference.
Guarde toda información para tener como referencia futura.
PX800ES1B
Safety Precautions
Before trying to use the piano, be sure to read
the separate "Safety Precautions".
Precauciones de seguridad
Antes de intentar usar el piano, asegúrese de
leer las "Precauciones de seguridad" separadas.
ES
Advertisement
Table of Contents

Related Manuals for Casio Privia PX-800


Summary of Contents for Casio Privia PX-800
- Page 1 USER’S GUIDE GUÍA DEL USUARIO Please keep all information for future reference. Guarde toda información para tener como referencia futura. PX800ES1B Safety Precautions Before trying to use the piano, be sure to read the separate “Safety Precautions”. Precauciones de seguridad Antes de intentar usar el piano, asegúrese de leer las “Precauciones de seguridad”...
-
Page 2: Important Safety Instructions
When you need to have the apparatus completely disconnected from the MAINS, you must unplug the power cord. For that purpose, locate the apparatus in a way that secures easy access to the power cord. Model Number: PX-800 Trade Name: CASIO COMPUTER CO., LTD. Responsible party: CASIO, INC. Address: 570 MT. PLEASANT AVENUE, DOVER, NEW JERSEY 07801... - Page 3 This equipment has been tested and found to comply with the limits for a Class B digital device, pursuant to Part 15 of the FCC Rules. These limits are designed to provide reasonable protection against harmful interference in a residential installation. This equipment generates, uses and can radiate radio frequency energy and, if not installed and used in accordance with the instructions, may cause harmful interference to radio communications.
- Page 4 Company and product names used in this manual may be registered trademarks of others. This mark applies in EU countries only. CASIO Europe GmbH Bornbarch 10, 22848 Norderstedt, Germany This mark applies to the PX-800V only. Please keep all information for future reference.
-
Page 5: Table Of Contents
Contents Assembling the Stand ... E-35 Unpacking... E-35 Assembling the Stand... E-35 General Guide ... E-2 TEMPO/SETTING Button ... E-4 – ( /NO) Button and + ( /YES) Button ... E-4 Power Supply ... E-5 Connections ... E-6 Connecting Headphones ... E-6 Connecting Audio Equipment or an Amplifier ... -
Page 6: General Guide
General Guide Bottom * The power cord of the PX-800 is hard-wired to the digital piano. Front... - Page 7 CAUTION • Make sure that the cover is fully open whenever you are playing on the keyboard. A partially open cover can suddenly close unexpectedly and pinch your fingers. NOTE • The names shown here are always indicated in bold when they appear within the text of this manual. Power supply box AC power jack 2 Pedal connector...
-
Page 8: Tempo/Setting Button
General Guide TEMPO/SETTING Button The TEMPO/SETTING button is used when configuring a variety of different digital piano settings. The following are TEMPO/SETTING button basics. The lamp above the TEMPO/SETTING button flashes while the button is depressed, and goes out when the button is released. Flashing To change a setting, hold down the TEMPO/ SETTING button as you press the keyboard key that... -
Page 9: Power Supply
The illustration shows just one example of the shapes that are available. • The power cord of the PX-800 is hard-wired to the digital piano. Make sure the power lamp is completely turned off before unplugging the power cord from the power outlet. -
Page 10: Connections
Connections IMPORTANT! • Whenever connecting something to the digital piano, first use the VOLUME controller to set the volume to a low level. After connecting, you can adjust the volume to the level you want. Connecting Headphones Bottom PHONES jack Stereo standard plug Connect commercially available headphones to the PHONES jack. -
Page 11: Playing With Different Tones
Playing with Different Tones TONE TEMPO/SETTING METRONOME GRAND PIANO Selecting and Playing a Tone Your digital piano has the following types of tones built in. Tone Numbers Tone Type 01 to 12 Keyboard* 001 to 020 Various 021 to 148 GM (General MIDI) 149, 150 Drum Sets... - Page 12 Playing with Different Tones NOTE • The DSP* effect will be applied if you select a tone with DSP. • Note that the digital piano’s DSP resources are limited. Because of this, selecting a tone with DSP can cause notes that are currently being played to cut off (if they are being played using a tone with DSP), or it can remove the DSP effect from an operation (layer, split, demo tune) that was previously assigned a tone with DSP.
-
Page 13: To Assign A Tone To The Various/Gm Tones Keyboard Key
To assign a tone to the VARIOUS/GM TONES keyboard key While holding down the TEMPO/SETTING button, press the VARIOUS/GM TONES keyboard key. Keep the TEMPO/SETTING button depressed until you finish step 2 of this procedure. • This will cause the TEMPO/SETTING button to flash and the tone number of the Various, GM, or Drum Sets Tone currently assigned to the keyboard key to appear on the display. -
Page 14: Layering Two Tones
Playing with Different Tones Layering Two Tones Use the following procedure to layer two tones, so they sound at the same time. Hold down the TEMPO/SETTING button until you finish step 2 of this procedure. While holding down the keyboard key that corresponds to the main tone, press any nearby keyboard key that corresponds to another tone. -
Page 15: Using Effects
Use the + and – buttons to turn keyboard split on or off. When the display It means this: shows this: Keyboard split off Keyboard split on • Releasing the TEMPO/SETTING button will cause the display to change to the number of the currently selected low-range tone. - Page 16 Playing with Different Tones Use the + and – buttons to change the displayed value. • Reverb Value To do this: Select this setting: Turn off reverb 1: Room 2: Small Hall Turn on reverb 3: Large Hall 4: Stadium •...
-
Page 17: Using The Digital Piano's Pedals
Use the + and – buttons to change the displayed setting. When the display It means this: shows this: Effect off Effect on NOTE • While the keyboard is layered, the DSP on/off setting affects the layered tone only. While the keyboard is split, the DSP on/off setting affects the low range tone only. - Page 18 Playing with Different Tones To adjust the metronome volume NOTE • You can perform the following procedure at any time, regardless of whether or not the metronome is sounding. While holding down the TEMPO/SETTING button, press the METRONOME VOLUME keyboard key. Keep the TEMPO/SETTING button depressed until you finish step 2 of this procedure.
-
Page 19: Playing Back Built-In Songs
Playing Back Built-in Songs SONG TONE TONE/SONG SONG PLAY/STOP PART/TRACK IMPORTANT! • After you select a built-in song, it can take a number of seconds for the song data to be loaded. While the data is being loaded, the song number will flash on the display, and the keyboard keys and button operations will be disabled. -
Page 20: Playing Back A Specific Music Library Song
Playing Back Built-in Songs Playing Back a Specific Music Library Song The Music Library includes both preset songs (01 to 60), plus up to 10 songs (61 to 70) that have been saved to digital piano memory from a computer* or loaded SD memory card (page E-29). -
Page 21: Recording And Play Back
See “Using an SD Memory Card” on page E-29 for more information. IMPORTANT! • CASIO COMPUTER CO., LTD. takes no responsibility for any damages, lost profits, or claims by third parties arising from the deletion of recorded data due to While playing malfunction, repair, or for any other reason. -
Page 22: To Record To A Specific Track Of A Specific Song
Recording and Play Back To record to a specific track of a specific song After recording to either of the tracks of a song, you can record to the other track while listening to playback what you recorded in the first track. Press the RECORDER button so the PLAY lamp is lit. -
Page 23: To Record To One Track Of A Song While Listening To The Playback Of The Other Track
To record to one track of a song while listening to the playback of the other track Press the RECORDER button so the PLAY lamp is lit. Use the + and – buttons to display a song number (1 to 5). This indicator appears when the track already contains recorded data. -
Page 24: Deleting Recorded Data
Recording and Play Back Deleting Recorded Data The following procedure deletes a specific track of a song. IMPORTANT! • The procedure below deletes all of the data of the selected track. Note that the delete operation cannot be undone. Check to make sure you really do not need the data in digital piano memory before you perform the following steps. -
Page 25: Configuring Settings With The Keyboard
Configuring Settings with the Keyboard TEMPO/SETTING You can use the TEMPO/SETTING button in combination with the keyboard keys to configure a wide range of digital piano settings, including the key, keyboard touch, MIDI settings, etc. • The same basic procedure (explained under “To configure settings with the keyboard” on page E-22) can be used for all settings. -
Page 26: To Configure Settings With The Keyboard
Configuring Settings with the Keyboard To configure settings with the keyboard Use the “Keyboard Setting Reference” on page E-23 to find the setting you want to configure, and note its keyboard key. Example: To change the key, you would need to use the keyboard key labeled TRANSPOSE While holding down the TEMPO/SETTING button, press the keyboard key for the setting... -
Page 27: Keyboard Setting Reference
Keyboard Setting Reference I Keyboard To change this Use this keyboard setting: key: Keyboard touch TOUCH RESPONSE response Key of the keyboard TRANSPOSE Keyboard tuning TUNE/OTHERS Settings oFF : Off Specifies the relative touch of the keyboard keys. : Strong sound is produced even when relatively light pressure is... - Page 28 Configuring Settings with the Keyboard I Tones To change this Use this keyboard setting: key: Tone selection TONE Layered tone volume LAYER BALANCE balance Split on/off SPLIT ON/OFF Split point SPLIT POINT Brilliance BRILLIANCE Reverb REVERB Chorus CHORUS EFFECT Acoustic Resonance EFFECT *Display Indicator Display...
- Page 29 I MIDI To change this Use this keyboard setting: key: Send Channel MIDI/OTHERS Local Control MIDI/OTHERS Settings C.01 to C.16 Specifies one of the MIDI channels (1 through 16) as the Send Channel, which is used for sending MIDI messages to an external device. When configuring this setting, use the procedure under “To configure a setting using the MIDI/OTHERS key”...
-
Page 30: Connecting To The Midi Terminal
MIDI software on your computer to exchange MIDI data with the digital piano. You can also transfer data you downloaded from the CASIO MUSIC SITE to the digital piano. Note that you need to purchase a commercially available USB cable to connect the digital piano’s USB... -
Page 31: Usb Mode And Midi Mode
*1 You need to have Adobe Reader or Acrobat Reader installed on your computer in order to view the contents of the “CASIO USB MIDI Driver User’s Guide” (manual_e.pdf). If your computer does not have Adobe Reader or Acrobat Reader installed already, use the procedure below to install it. -
Page 32: Expanding The Selections In The Music Library
CASIO Website. CASIO MUSIC SITE http://music.casio.com/ • In addition to the software itself, the CASIO MUSIC SITE will also provide you with information about its installation and use. You can also find out the latest news about your digital piano and other CASIO musical instruments, and much more. -
Page 33: Using An Sd Memory Card
SD memory card. The digital piano also can read SMF song data and CASIO format song data from an SD memory card. Supported SD Memory Cards The maximum supported SD memory card size is 1 GB. -
Page 34: Inserting And Removing An Sd Memory Card
When this happens, you need to purchase a new SD memory card. * Note that CASIO COMPUTER CO., LTD. shall not be held liable for any loss of data stored on an SD memory card. -
Page 35: Transferring Song Data From An Sd Memory Card To Digital Piano Memory
Supported Data User Area..SMF format data and song data converted using SMF conversion software (CASIO CM2 format) Recorder Area. . .Song data recorded on the digital piano (CASIO CSR format) PREPARATION •... -
Page 36: Saving Song Data Recorded On The Digital Piano To An Sd Memory Card
“SvC” (Save as CSR file) to appear on the display. This indicates that the song will be saved as CASIO format CSR data. press the CARD button again. This will cause “SvS” (Save as SMF0 file) to appear on the display. -
Page 37: Formatting An Sd Memory Card
Use the + and – buttons to select the file number where you want to save the song data. This mark indicates that the currently displayed song number has data stored already. When everything is the way you want, press the TEMPO/SETTING button to begin saving data. -
Page 38: Sd Memory Card Errors
Using an SD Memory Card SD Memory Card Errors Display Message No SD memory card loaded in the SD memory card slot or the card is not loaded correctly. You are trying to load data from an SD memory card that does not contain any data that is supported by this digital piano. -
Page 39: Assembling The Stand
Assembling the Stand Unpacking PREPARATION • Before starting assembly, check to make sure that you have all the parts shown below. You can find the screws in a plastic bag inside of the polystyrene foam packing material. • This stand does not include any of the tools required for assembly. - Page 40 Assembling the Stand PREPARATION • Before starting assembly of the stand, divide the polystyrene foam packing material K into the sections shown in Figure 1. Use the packing material to secure side panels A and B as shown in Figure 2. You will have an easier time assembling the stand if the side panels are raised as shown in the illustration.
- Page 41 With the speaker box C laying on its side as shown in the illustration, secure side panels A and B to the speaker box C. Secure the side panels using four screws D. • Align the screw holes of the speaker box C with the screw holes of the side panels as you install the screws D.
- Page 42 Assembling the Stand Turn around the corner brackets as shown in the illustration, and insert them between pedal unit brackets I -(a) edges of the side panels. -(a) -( b ) -( b ) WARNING • The corner brackets help to prevent the stand from tipping over.
- Page 43 To tighten the joint connector and screw (1) Rotate the screw counterclockwise about three turns to ensure that the screw is in the center of the joint connector. (2) Slowly rotate the screw clockwise and confirm that it tightens without resistance. If you feel any resistance, it means that the screw is not engaging properly with the joint connector.
- Page 44 • The shape of the power cord plug and household power outlet receptacle differ according to country and geographical area. The illustration shows just one example of the shapes that are available. • The power cord of the PX-800 is hard-wired to the digital piano. Power plug CAUTION •...
-
Page 45: Reference
Reference Troubleshooting Problem No sound is 1. The VOLUME controller is set to produced when I “MIN”. press a keyboard key. 2. Headphones are connected to the digital piano. 3. MIDI Local Control is turned off. The pitch of the 1. - Page 46 * Multiple digital samples are taken for the low range, middle range, and high range of the original volume sounds slightly different musical instrument. Because of this, there may be a very slight difference in tonal quality and volume depending where it is between sample ranges.
-
Page 47: Product Specifications
Product Specifications All of the items in these specifications apply to the PX-800 and PX-800V, unless specifically noted otherwise. Model PX-800/PX-800V Keyboard 88-key piano keyboard, with Touch Response Maximum Polyphony 128 notes Tones 162 (with Layer and Split) Effects DSP, Reverb (4 types), chorus (4 types), Acoustic Resonance, Brilliance (–3 to +3) Metronome •... -
Page 48: Operating Precautions
CASIO is prohibited under copyright laws. • IN NO EVENT SHALL CASIO BE LIABLE FOR ANY DAMAGES WHATSOEVER (INCLUDING, WITHOUT LIMITATION, DAMAGES FOR LOSS... -
Page 49: Appendix
Appendix/Apéndice Tone List/Lista de tonos Bank Select Program MSB/ No./ Tone Name/ Change/ MSB de N º Nombre de tonos Cambio de selección programa de banco GRAND PIANO GRAND PIANO 2 GRAND PIANO 3 ELEC PIANO 1 ELEC PIANO 2 ELEC PIANO 3 HARPSICHORD VIBRAPHONE... -
Page 50: Drum Assignment List
Appendix/Apéndice Bank Select Program MSB/ No./ Tone Name/ Change/ MSB de N º Nombre de tonos Cambio de selección programa de banco 099 GM WHISTLE 100 GM OCARINA 101 GM SQUARE LEAD GM SAWTOOTH LEAD 103 GM CALLIOPE 104 GM CHIFF LEAD 105 GM CHARANG 106 GM VOICE LEAD 107 GM FIFTH LEAD... -
Page 51: Song List
Song List/Lista de canciones No./Nº Song Name/Nombre de canciones Nocturne Op.9-2 Fantaisie-Impromptu Op.66 Étude Op.10-3 “Chanson de l’adieu” Étude Op.10-5 “Black Keys” Étude Op.10-12 “Revolutionary” Étude Op.25-9 “Butterflies” Prélude Op.28-7 Valse Op.64-1 “Petit Chien” Valse Op.64-2 Moments Musicaux 3 Impromptu Op.90-2 Marche Militaire 1 (Duet) Frühlingslied [Lieder Ohne Worte Heft 5] Fröhlicher Landmann [Album für die Jugend]... -
Page 52: Midi Implementation Chart
• For details about footnotes 3 through 5, see MIDI Implementation at http://world.casio.com/. *5 : Mensaje exclusivo del sistema de este modelo • Si desea más información sobre los pies de página, vea Implementación MIDI en http://world.casio.com/. Mode 2 : OMNI ON, MONO... - Page 53 This recycle mark indicates that the packaging conforms to the environmental protection legislation in Germany. Esta marca de reciclaje indica que el empaquetado se ajusta a la legislación de protección ambiental en Alemania. MA0706-B Printed in China PX800ES1B...
Need help?
Do you have a question about the Privia PX-800 and is the answer not in the manual?
Questions and answers