
Related Manuals for Casio PS-20


Summary of Contents for Casio PS-20
- Page 1 USER’S GUIDE GUÍA DEL USUARIO PS20-ES-1 Page 1 02.2.4, 7:11 PM PS20_ES_cover.p65 Adobe PageMaker 6.5J/PPC...
- Page 2 Never let children use an AC adaptor that is seriously damaged. • The product is not intended for children under 3 years. • Use only CASIO AD-12 adaptor. • The AC adaptor is not a toy. • Be sure to disconnect the AC adaptor before cleaning the product.
-
Page 3: Safety Precautions
Safety Precautions Congratulations on your selection of the CASIO Digital Piano. This digital piano is a sophisticated musical instrument that blends the very best of traditional piano feel and sound quality with the latest that modern electronics technology has to offer. - Page 4 2. If you are using the AC adaptor for power, unplug it from the wall outlet. 3. Contact your original retailer or an authorized CASIO Service Provider. AC Adaptor Misuse of the AC adaptor creates the risk of fire and electric shock.
- Page 5 2. If you are using the AC adaptor for power, unplug it from the wall outlet. 3. Contact your original retailer or an authorized CASIO Service Provider. Plastic Bags Never place the plastic bag the product comes in over your head or in your mouth.
- Page 6 CAUTION AC Adaptor Misuse of the AC adaptor creates the risk of fire and electric shock. Always make sure you observe the following precautions. • Do not locate the electric cord near a stove or other sources of heat. • Never pull on the cord when unplugging from the electrical outlet.
- Page 7 Heavy Objects Never place heavy object on top of the product. Doing so can make the product top heavy, causing the product to tip over or the object to fall from it, creating the risk of personal injury. Correct Stand* Assembly Failure to do so can cause the stand to fall over and the digital piano to fall from the stand, creating the risk...
-
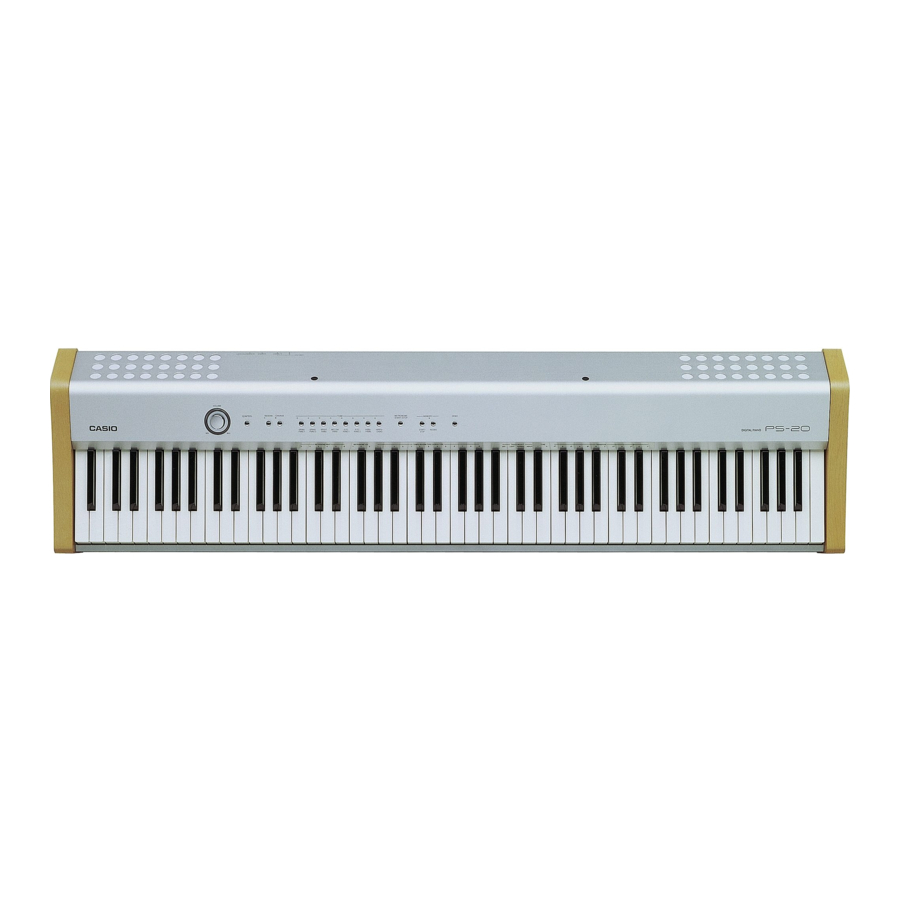
Page 8: Main Features
Touch Select adjusts the intensity of the output sound in accordance with the amount of pressure you apply to the keyboard. MIDI terminal Connecting to another MIDI musical instrument lets you play two instruments from the keyboard of this digital piano. You can also connect to a commercially available MIDI sequencer to increase the number of parts you can play. -
Page 9: Table Of Contents
Contents Safety Precautions ... E-1 Main Features ... E-6 Contents ... E-7 General Guide ... E-8 Attachment of the Score Stand ... E-8 Power Suppply ... E-10 Using the AC Adaptor ...E-10 Connections... E-11 Accessories and Options ... E-11 Basic Operation ... E-12 Using Tones ...E-12 Using Digital Effects ...E-13 Adjusting the Sound Quality ...E-14... -
Page 10: General Guide
General Guide Attachment of the Back Panel Score Stand Install the music stand by inserting its pegs into the holes in the digital piano. Left Side Panel 424A-E-010A Page 8 02.2.4, 7:12 PM PS20_E_08-16.p65 Adobe PageMaker 6.5J/PPC... - Page 11 1 LINE OUT jacks (R, L/MONO ) 2 DAMPER PEDAL jack, SOFT/SOSTENUTO PEDAL jack 3 POWER button 4 DC 12V jack 5 MIDI IN terminal, MIDI OUT terminal 6 PHONES jack 7 VOLUME knob 8 CONTROL button 9 REVERB button 0 CHORUS button A TONE buttons •...
-
Page 12: Power Suppply
• Never twist or stretch the cord. • Should the electric cord or plug become damaged, contact your original retailer or authorized CASIO Service Provider. • Never touch the AC adaptor while your hands are wet. Doing so creates the risk of electric shock. -
Page 13: Accessories And Options
Connections Connecting to an audio or musical instrument amplifier provides even clearer, more powerful sound through external speakers. Left Side Headphones IMPORTANT! • Whenever connecting external equipment, first set the VOLUME knob of the digital piano and the volume controller of the external equipment to relatively low volume settings. -
Page 14: Basic Operation
Touch response affects the HARPSICHORD tone only slightly, because the original musical instrument normally produces the same sound, no matter how much pressure is applied. HARPSI-... -
Page 15: Using Digital Effects
Using Digital Effects This digital piano provides you with a selection of digital effects that you can apply to tones. The following provides general descriptions of each effect, but the best way to find out how they affect tones is to experiment for yourself. Digital Effect Types REVERB The REVERB effect gives you a choice of the eight variations... -
Page 16: Adjusting The Sound Quality
Power on default effect settings The table below shows the effect settings that are assigned to each tone whenever you turn on the digital piano power. Digital Effect Setting Tone Name REVERB GRAND PIANO 1 Hall 1 GRAND PIANO 2 Hall 1 BRIGHT PIANO Room 3... -
Page 17: Using The Pedals
Sound Quality Setting Keyboard Setting keys Type 1 Type 3 Type 2 To change the sound quality of the built- in speakers PREPARATION The setting you select here is applied whenever headphones are not connected to the digital piano. While holding down the REVERB and CHORUS buttons, press the keyboard key that corresponds to the number of the sound quality type you want to select. -
Page 18: Using The Metronome
Using the Metronome The metronome provides a reference beat that you can use during your performances or practice sessions. You can change the beat and the tempo of the metronome. • The names of the settings are marked above the keyboard keys to which they are assigned. -
Page 19: Using The Memory
• Turning off power while a record operation is in progress deletes anything recorded up to that point. • CASIO shall not be held responsible for any losses by you or any third party due to loss of data caused by malfunction or repair of this digital piano, or by battery replacement. -
Page 20: Playback
Playback Use the following procedure to play back from memory. To play back from memory Press the START/STOP button to start playback. • You can toggle the playback metronome sound on and off by pressing the METRONOME button. • Playback stops automatically when the end of the tune is reached. -
Page 21: Using Demo Tunes
Using Demo Tunes This digital piano comes with four built-in demo tunes, each of which features one of the built-in tones. Playing the Demo Tunes in Sequence To play the demo tunes in sequence Press the DEMO button to start demo tune play. •... -
Page 22: Keyboard Settings
Keyboard Settings Using Touch Select This setting lets you adjust the touch of the keyboard to suit your own playing style. This means you can select a stronger touch for those with powerful hands, and a lighter touch for beginners and anyone else with less strength. Use the keys shown below to change the Touch Select setting. -
Page 23: Adjusting The Tuning Of The Digital Piano
Adjusting the Tuning of the Digital Piano You can adjust the overall tuning of the digital piano for play along with another instrument. You can adjust tuning within a range of ±50 cents* from A = 440.0Hz. Use the keyboard keys noted below to adjust the tuning of the digital piano. -
Page 24: Midi
MIDI What is MIDI? The letters MIDI stand for Musical Instrument Digital Interface, which is the name of a worldwide standard for digital signals and connectors that makes it possible to exchange musical data between musical instruments and computers (machines) produced by different manufacturers. -
Page 25: Simultaneous Receive Over Multiple Channels (Multi-Timbre
Simultaneous Receive Over Multiple Channels (Multi-Timbre) The Multi-Timbre mode makes it possible to assign the digital piano’s built-in tones to MIDI channels 1 through 16. Then you can simultaneously sound multiple channels to play from a commercially available multi-track sequencer. NOTE •... -
Page 26: Turning Local Control On And Off
Turning Local Control On and Off This setting effectively determines whether or not the keyboard and pedals of the digital piano are connected to the digital piano’s sound source, as illustrated below. Keyboard Pedals Local Control When Local Control is on (the normal setting), anything played on the keyboard is sounded by the internal sound source and simultaneously output from the MIDI OUT terminal. - Page 27 Tone Change Data (Program Change) A program number is data used for tone selection. Program numbers come in handy when using the tones of this digital piano to play MIDI data received from an external sequencer or other MIDI device. When the program number received from another devices does not match one of the built-in tones of this digital piano, however, the tone change is ignored and play continues without a tone change.
-
Page 28: Troubleshooting
1. Move the VOLUME knob more towards MAX. 2. Disconnect the headphones from digital piano. the digital piano. Contact your CASIO Service Provider for replacement of the lithium battery. 1. Change the Keyboard Channel Channel does not match the settings so they are identical. -
Page 29: Specifications
Weight: • Design and specifications are subject to change without notice. 424A-E-029A Page 27 PS20_E_26-29.p65 PS-20 88 piano keys (with touch response) 64 notes, maximum Reverb (8 types), Chorus (8 types) 3 types each for built-in speakers and headphones • Number of Tunes: 4 •... -
Page 30: Operational Precautions
• Unauthorized reproduction of this manual in its entirety or in part is expressly forbidden. All rights reserved. • CASIO COMPUTER CO., LTD. shall not be held liable for any damages or losses or any claims by third parties arising from use of this product or this manual. - Page 31 424A-E-031A Page 29 02.2.4, 7:12 PM PS20_E_26-29.p65 Adobe PageMaker 6.5J/PPC...
-
Page 32: Initial Power On Settings
Appendix/Apéndice Initial Power On Settings The table below shows the initial settings of the digital piano whenever power is turned on. Item Tone Effect Reverb Chorus Sound Quality Speakers Adjustment Headphones Metronome Volume Tempo Beat Touch Select Transpose Tuning MIDI Keyboard Channel Local Control Tone Assigned to Each Channel... -
Page 33: Midi Data Format
MIDI Data Format 424A-E-062A Page 2 02.2.4, 7:13 PM PS20_E_MIDI Data.p65 Adobe PageMaker 6.5J/PPC... - Page 34 424A-E-063A Page 3 02.2.4, 7:13 PM PS20_E_MIDI Data.p65 Adobe PageMaker 6.5J/PPC...
- Page 35 424A-E-064A Page 4 02.2.4, 7:13 PM PS20_E_MIDI Data.p65 Adobe PageMaker 6.5J/PPC...
- Page 36 424A-E-065A Page 5 02.2.15, 2:25 PM PS20_E_MIDI Data.p65 Adobe PageMaker 6.5J/PPC...
- Page 37 424A-E-066A Page 6 02.2.4, 7:13 PM PS20_E_MIDI Data.p65 Adobe PageMaker 6.5J/PPC...
- Page 38 424A-E-078A Page 2 02.2.4, 7:13 PM PS20_ES_MIDI Chart.p65 Adobe PageMaker 6.5J/PPC...
- Page 39 424A-E-079A Page 3 02.2.4, 7:13 PM PS20_ES_MIDI Chart.p65 Adobe PageMaker 6.5J/PPC...
- Page 40 This recycle mark indicates that the packaging conforms to the environmental protection legislation in Germany. Esta marca de reciclaje indica que el empaquetado conforma a la legislación de protección ambiental en Alemania. CASIO COMPUTER CO.,LTD. 6-2, Hon-machi 1-chome Shibuya-ku, Tokyo 151-8543, Japan Page 2 PS20_ES_cover.p65...
Need help?
Do you have a question about the PS-20 and is the answer not in the manual?
Questions and answers