Table of Contents
Advertisement
USER'S GUIDE
GUÍA DEL USUARIO
Please keep all information for future reference.
Guarde toda información para tener como referencia futura.
PX130ES1A
Safety Precautions
Before trying to use the piano, be sure to read
the separate "Safety Precautions".
Precauciones de seguridad
Antes de intentar usar el piano, asegúrese de
leer las "Precauciones de seguridad" separadas.
ES
Advertisement
Table of Contents

Subscribe to Our Youtube Channel
Related Manuals for Casio PRIVIA PX130ES1A


Summary of Contents for Casio PRIVIA PX130ES1A
- Page 1 USER’S GUIDE GUÍA DEL USUARIO Please keep all information for future reference. Guarde toda información para tener como referencia futura. PX130ES1A Safety Precautions Before trying to use the piano, be sure to read the separate “Safety Precautions”. Precauciones de seguridad Antes de intentar usar el piano, asegúrese de leer las “Precauciones de seguridad”...
-
Page 2: Important Safety Instructions
TO REDUCE THE RISK OF FIRE OR ELECTRIC SHOCK, REFER SERVICING TO QUALIFIED SERVICE PERSONNEL. 1. Read these instructions. 2. Keep these instructions. 3. Heed all warnings. 4. Follow all instructions. 5. Do not use this apparatus near water. 6. Clean only with dry cloth. 7. -
Page 3: Table Of Contents
Contents General Guide ... E-2 FUNCTION Button... E-3 Saving Settings and Using Operation Lock ... E-3 Power Outlet... E-4 Using an AC Adaptor ... E-4 Connections ... E-5 Connecting Headphones ... E-5 Connecting Audio Equipment or an Amplifier ... E-5 Connecting a Pedal ... -
Page 4: General Guide
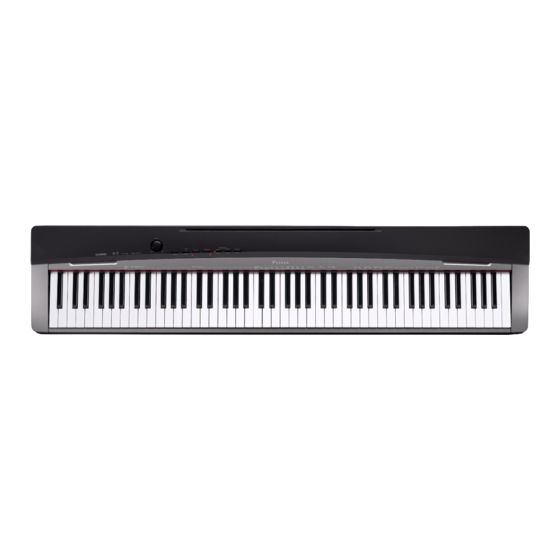
General Guide Back Left Side Installing the Music Stand Insert the bottom of the music stand into the groove on the top of the digital piano’s console. Bottom... -
Page 5: Function Button
NOTE • The names shown here are always indicated in bold when they appear within the text of this manual. 1 VOLUME controller 2 FUNCTION button 3 SONG a, DEMO button 4 RECORDER (L) button 5 METRONOME (R) button 6 GRAND PIANO (MODERN), REVERB button 7 GRAND PIANO (CLASSIC), CHORUS button FUNCTION Button The FUNCTION button is used when configuring a variety of different digital piano settings. -
Page 6: Power Outlet
Power Outlet Your digital piano runs on standard household power. Be sure to turn off power whenever you are not using the digital piano. Using an AC Adaptor Use only the AC adaptor (JEITA Standard, with unified polarity plug) that comes with this digital piano. Use of a different type of AC adaptor can cause malfunction of the digital piano. -
Page 7: Connections
Connections IMPORTANT! • Whenever connecting something to the digital piano, first use the VOLUME controller to set the volume to a low level. After connecting, you can adjust the volume to the level you want. Connecting Headphones Left side PHONES jacks Commercially available headphones Stereo mini plug... -
Page 8: Connecting A Pedal
Connections Connecting a Pedal Connecting the supplied pedal (SP-3) to the DAMPER PEDAL jack makes it possible to use the pedal as a damper pedal. Pressing the damper pedal while playing will cause the notes you play to reverberate for a very long time. •... -
Page 9: Playing With Different Tones
Playing with Different Tones POWER VOLUME Selecting and Playing a Tone The piano comes with 16 built-in tones. • The names of the tones are marked above the keyboard keys to which they are assigned. To select a tone Press the POWER button. IMPORTANT! •... -
Page 10: To Adjust The Brilliance Of A Tone
Playing with Different Tones NOTE • GRAND PIANO tones (MODERN, CLASSIC) Your digital piano has a total of 16 built-in tones. The MODERN and CLASSIC tones are stereo sampled tones that can be selected using the GRAND PIANO buttons. Try using the GRAND PIANO tones to familiarize yourself with their distinctive sounds and characteristics. -
Page 11: Layering Two Tones
Layering Two Tones Use the following procedure to layer two tones, so they sound at the same time. When specifying two tones for layering, first tone you select will be the main tone, while the second tone will be the layered tone. While holding down the FUNCTION button, hold down the keyboard key for the main tone as you press the keyboard key for the layered... -
Page 12: Using Effects
Playing with Different Tones Using Effects Reverb : Makes your notes resonate. Chorus : Adds more breadth to your notes. To turn reverb on and off While holding down the FUNCTION button, press the MODERN button to toggle reverb on (lamp lit) and off (lamp unlit). To turn chorus on and off While holding down the FUNCTION button, press the CLASSIC button to toggle chorus... -
Page 13: Playing A Piano Duet
While holding down the FUNCTION button, use the TEMPO keys to specify a tempo value in the range of 20 to 255 beats per minute. • Each press of the + or – key raises or lowers the tempo value by 1. •... - Page 14 Playing with Different Tones Changing the Octaves of the duet keyboards You can change the ranges of the left and right keyboards in octave units from their initial default settings. This comes in handy, for example, if the initial default range is not enough when one person is playing the left hand part and another person is playing the right hand part.
-
Page 15: Playing Back Built-In Songs
Playing Back Built-in Songs Your digital piano comes with a Music Library of 60 built-in tunes. You can play all 60 tunes in sequence, from beginning to end. IMPORTANT! • After you select a built-in song, it can take a number of seconds for the song data to be loaded. -
Page 16: Practicing With A Music Library Song
Playing Back Built-in Songs Press the SONG a button. • This starts the playback of the song. To stop playback, press the SONG a button again. • Playback will stop automatically when the end of the song is reached. NOTE •... -
Page 17: Recording And Play Back
Recording and Play Back You can store the notes you play in digital piano memory for later playback. Tracks A track is a container of recorded data, and a song consists of two tracks: Track 1 and Track 2. You can record each track separately and then combine them so they play back together as a single song. -
Page 18: To Record To A Specific Track Of A Song
Recording and Play Back To record to a specific track of a song After recording to either of the tracks of a song, you can record to the other track while listening to playback what you recorded in the first track. Press the RECORDER button twice so its lamp is flashing. -
Page 19: To Record To One Track Of A Song While Listening To The Playback Of The Other Track
To record to one track of a song while listening to the playback of the other track Press the RECORDER button so its lamp is lit. While holding down the FUNCTION button, press the RECORDER (L) button or METRONOME (R) button to select the track you want to play back while recording. -
Page 20: Deleting Recorded Data
Recording and Play Back Deleting Recorded Data The following procedure deletes a specific track of a song. IMPORTANT! • The procedure below deletes all of the data of the selected track. Note that the delete operation cannot be undone. Check to make sure you really do not need the data in digital piano memory before you perform the following steps. -
Page 21: Configuring Settings With The Keyboard
Configuring Settings with the Keyboard In addition to selecting tones and Music Library tunes, you also can use the FUNCTION button in combination with the keyboard keys to configure effect, keyboard touch, and other settings. To configure settings with the keyboard Use the “Parameter List”... -
Page 22: Keyboard Keys Used For Configuring Settings
Configuring Settings with the Keyboard Keyboard Keys Used for Configuring Settings • The numbers 1 through cl correspond to the same numbers in the “Parameter List” on pages E-21 - E-23. [Left keyboard] Reverb Chorus [Overall] [Center keyboard] Song select/Base note [Right keyboard] Metronome volume Song volume... -
Page 23: Metronome Beat (Metronome Beat
Parameter List ■ Tones Parameter Settings Reverb 1 to 4 Default: 2 Chorus 1 to 4 Default: 2 Tone selection See page E-7. Default: GRAND PIANO (MODERN) Brilliance –3 to 0 to 3 (BRILLIANCE) Default: 0 Layer balance –24 to 0 to 24 Default: 0 ■... -
Page 24: Temperament Base Note (Base Note)
Configuring Settings with the Keyboard ■ Keyboard Parameter Settings Keyboard key –12 to 0 to 12 (Transpose) Default: 0 Keyboard tuning –99 to 0 to 99 (Tuning) Default: 0 Octave shift –2 to 0 to 2 Default: 0 Temperament Temperament: (TEMPERAMENT) 00 to 16 Temperament... -
Page 25: Operation Tone
■ MIDI and Other Settings Parameter Settings USB device MIDI, Storage mode (USB Default: MIDI DEVICE MODE) Send channel 01 to 16 Default: 01 Local control Off, On Default: On Operation tone Off, On Default: On Back up Off, On Default: Off Operation lock Off, On... -
Page 26: Connecting To A Computer
Connecting to a Computer You can connect the digital piano to a computer and exchange MIDI data between them. You can send play data from the digital piano to music software running on your computer, or you can send MIDI data from your computer to the digital piano for playback. -
Page 27: Using Midi
Using MIDI What is MIDI? The letters MIDI stand for Musical Instrument Digital Interface, which is the name of a worldwide standard for digital signals and connectors that makes it possible to exchange musical data between musical instruments and computers (machines) produced by different manufacturers. - Page 28 Connecting to a Computer Double-click “PIANO”. • “PIANO” contains folders named MUSICLIB and RECORDER. Use MUSICLIB to load a song into the piano’s user song memory (Music Library 61), and RECORDER to transfer Recorder memory data to and from your computer. Folder Data Type File Name and Extension...
- Page 29 After the file copy operation is complete, return the USB device mode to MIDI. • If you are using a Macintosh, perform the eject operation (drag them to the trash can). • While holding down the FUNCTION button, press the applicable keyboard key. See “USB device mode (USB DEVICE MODE)”...
-
Page 30: Reference
Reference Troubleshooting Problem No sound is produced when I 1. The VOLUME controller is set to press a keyboard key. “MIN”. 2. Headphones or an adaptor plug is plugged into one of the PHONES jacks. 3. MIDI Local control is turned off. The pitch of the digital piano 1. -
Page 31: Product Specifications
Product Specifications Model PX-130BK/PX-130WE Keyboard 88-key piano keyboard, with Touch Response Maximum Polyphony 128 notes Tones • Layer (excluding bass tones) • Split (Low-range bass tones only) Effects Brilliance (–3 to 0 to 3), Reverb (4 types), Chorus (4 types), DSP, Acoustic Resonance Metronome •... -
Page 32: Operating Precautions
Reference Operating Precautions Be sure to read and observe the following operating precautions. ■ Location Avoid the following locations for this product. • Areas exposed to direct sunlight and high humidity • Areas subjected to temperature extremes • Near a radio, TV, video deck, or tuner The above devices will not cause malfunction of the product, but the product can cause interference in the audio or video of a nearby device. - Page 33 AC Adaptor Handling Precautions Model: AD-A12150LW 1. Read these instructions. 2. Keep these instructions on hand. 3. Heed all warnings. 4. Follow all instructions. 5. Do not use this product near water. 6. Clean only with a dry cloth. 7. Do not install near radiators, heat registers, stoves, or any other source of heat (including amplifiers). 8.
-
Page 34: Appendix
Appendix/Apéndice Tone List/Lista de tonos Tone Name/ Program Change/ Nombre de tonos Cambio de programa GRAND PIANO MODERN GRAND PIANO CLASSIC GRAND PIANO VARIATION ELEC PIANO FM E.PIANO 60’S E.PIANO HARPSICHORD VIBRAPHONE PIPE ORGAN JAZZ ORGAN ELEC ORGAN 1 ELEC ORGAN 2 STRINGS 1 STRINGS 2 BASS (LOWER) 1... -
Page 35: Midi Implementation Chart
Model PX-130 Function Basic Default Channel Changed Default Mode Messages Altered Note Number True voice Note ON Velocity Note OFF After Key’s Touch Ch’s Pitch Bender 0,32 6, 38 Control Change 100, 101 Program Change :True # System Exclusive System : Song Pos Common : Song Sel... - Page 36 This recycle mark indicates that the packaging conforms to the environmental protection legislation in Germany. Esta marca de reciclaje indica que el empaquetado se ajusta a la legislación de protección ambiental en Alemania. MA0905-A Printed in China PX130ES1A...
Need help?
Do you have a question about the PRIVIA PX130ES1A and is the answer not in the manual?
Questions and answers