
Related Manuals for Cleanmate S2000 PRO MAX


Summary of Contents for Cleanmate S2000 PRO MAX
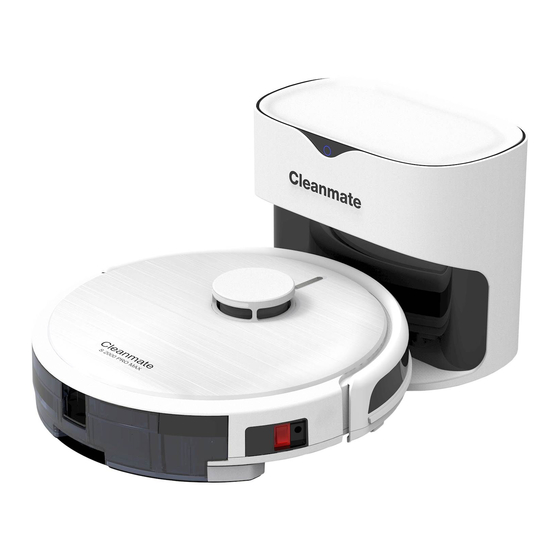
- Page 1 User Manual Robot Vacuum Cleaner Cleanmate S2000 PRO MAX Please read through this user manual before using the product and keep the manual for future use.
- Page 2 Security Specifications When using the product, please maintain constant vigility and follow the following instructions: please read this user manual carefully before using the product and keep it property. ! NOTE: 1. The problems that may occur during the cleaning of the product should be eliminated as soon as possible. Clean the power cords and small objects on the ground to prevent the product from being blocked during the cleaning process.
- Page 3 Warnings: 1. Only applicable to the original charging stand specially equipped by the manufacturer. It is formerly for the user to replace the battery privately. If the battery is suspended to be damaged, please contact the manufacturer, authorized dealer or a professional in similar departments to replace it.
- Page 4 Description of Obsolete Batteries: 1. If you want to discard the battery in this machine, please do not discard them along with domestic garbage, but hand them over to the nearest waste battery recycling station or after-sales service center for centralized treatment. 2.
-
Page 5: Table Of Contents
Install the side brushes correctly Check the status of dust collector Remote control and the charging station Operation charging Indication and pairing with WiFi Cleanmate-APP download Robot Operation First Use Start cleaning/ Cleaning the Floor/ Mopping the Floor Start cleaning with watertank... -
Page 6: List Of Contents
List of Contents Side brush 2 pair Machine HEPA-filter Dust brushes Magnetic stripe 2 pcs Carpet brush Mop cloth 2 pcs Electric Water tank Dust box assembly Power adapter Suction mount Dust collector (for dust collector) (for charging station) Dust bag Remote control Manual Charging station... -
Page 7: Product Composition Front Of The Robot
Product Composition - Front of the robot Front of the robot (under the face cover) Lidar unit Top panel Start/Pause button Voice broadcast loudspeaker Power switch Centrifugal fan Air duct WiFi-indicator Dust box for watertank Dust box handle High efficiency primary filter Lidar Dust box lower cover... -
Page 8: Underside Of The Robot
Product Composition - Underside of the robot Underside of the robot Sensors Charging plates Front wheel Battery compa- Side brush rtment cover Bottom cover Rolling brush Driving wheel Watertank assembly Dust box assembly Water tank Primary filter filling pipe end Mop holder Water tank plug Dust box upper cover... -
Page 9: Dust Collector
Product Composition- Dust collector Front of the dust collector Back of the dust collector Button for dust collector cover Status indicator Power cord storage Air outlet Bump switch Dust suction port Signal transmitter Charging pole piece... - Page 10 Product Composition - Dust collector Dustcollecting station (open cover) Dustcollecting station (Under side) Bottom cover screw Air suction bucket Air duct canal bottom cover Dust bag insertion port Air duct cover screw...
- Page 11 Product Composition - Dust collector Dust bag Dust bag handle...
-
Page 12: Preparations Organize Spaces
Preparations Organize spaces Organize the space to be cleaned Open the door to help the host explore Before use, please put furniture such In order to better help the robot explore the The robot senses large solid objects as tables and chairs before use, store through infrared sensors and LDS, so whole space and create a furniture map, please make sure to put way irregular... -
Page 13: Removing Protective Strips
Removing protective strips Remove host guard strips Install the power cord on the back of the dust collector Removing protective film of dust collection station... -
Page 14: Install The Side Brushes Correctly
Install the side brushes correctly Install the sidebrushes L-and R on the current markning of the robot Until a "click" hears to indicate that it is installed in place... -
Page 15: Check The Status Of Dust Collector
Check the status of dust collector Open the cover of the dust collector and check that dust bags are placed in the correct way. (Continue to Place the dust collector and connect it to the the next step after packing the dust bag). power supply (please place the charging stand against the wall and place it on a flat ground, keeping 0.5M on the left and right sides, and more... -
Page 16: Remote Control And The Charging Station
Remote control and the charging 1. ON/OFF - station switch 2. Direction buttons for the The remote control robot 3. Recharge the You can use the remote robot control to operate your robot Start/turn of your robot Operate the robot movement remotely Recharging of the robot The charging station Battery Charging with charging station and placing... -
Page 17: Operation Charging
Operation charging Turn on the side power switch on the robot Charging “ I ” -Indicates power on. “ O ”-Indicates shutdown Please place the machine on the dust collection ! please note that the host cannot be charged station to charge, make sure that the electrode with the power off) chip on the host is aligned with the chip on the dust collection station, double-click “... -
Page 18: Indication And Pairing With Wifi
Indication and pairing with WiFi Indicator Status Wifi-Indicator White light flashing slowly, starting/charging Blue Flash: Host WI-FI Reset Successfully White light is on for a long time: starting is Blue light flashing slowly: in network connection completed/charging is completed Long blue light: successful network connection Red light flashes slowly: power is low Red light flashing slowly: network connection failed Red Light Flash: Abnormal State (Host Failure) -
Page 19: Cleanmate-App Download
Cleanmate-APP download Download Cleanmate APP and experience more functions. Methods: Open the mobile phone application store, search for "Cleanmate APP" to download and install. Android Scan the QR code below for more information about advanced APP-functions Cleanmate APP Tip: * After the installation is completed, please complete the registration, login and distribution according to the guidance of the mobile phone APP page. -
Page 20: First Use
First use When building the map for the first time, please follow behind the robot to see if the robot gets stuck. Wake up from standby For example, the main machine may get stuck in the low part of furniture, which can be solved by referring to Pause for more than 10 minutes, all indicators on the the following methods. -
Page 21: Start Cleaning/ Cleaning The Floor/ Mopping The Floor
Start cleaning/ / Cleaning the floor/ / Mopping the floor Collect dust: Select the dust box without the watertank Install the dust box , click “ ” on the robot to start cleaning * Do not switch the vacuuming mode in APP before install Start cleaning Click “... -
Page 22: Start Cleaning With Watertank
Start cleaning with watertank Filling of water in the tank Mopping the floor: select the water tank with the dust The water tank is integrated with the small dust box assembly. Please take out the small dust box assembly Tip: before water injection 1. -
Page 23: Various States Of The Dust Collector Indicator
Dust collection mode Function Description: Automatic dust collection after the host computer is finished; More functions: choose auto recharge in Cleanmate APP or double-click the cleaning button on the main panel. Various statuses of the status light on the dust collector Applicable scenario: After cleaning is completed. -
Page 24: Component Maintenance Frequency
Component Maintenance Frequency In order to maintain the peak performance of the main engine, it is recommended to refer to the frequency listed below for Component Maintenance of the main engine Component Maintenance intervals Replacement intervals Mop cloth Every three months/if necesseary After each use Replace the dust bag when the APP Dust bag... -
Page 25: Watertank Maintenance
Water tank maintenance Tip: Before maintaining the robot, turn the main engine power switch to "O" to turn it off. Cleaning water tank assembly Wipe the water tank * When wiping the water tank, please wipe it with Remove the water tank a clean cloth and do not rinse it with water assembly on the robot Empty the water tank... -
Page 26: Maintenance Mopfunction
Maintenance Mop function Dry the mop cloth when its not in use Clean the mop cloth in normal indoor temperature. * Be careful not to use strong acid or alkaline detergents Cleaning of the washable mop cloth Remove the washable mop cloth Let the mop cloth dry indoors in room temperature. -
Page 27: Cleaning The Dust Box For The Watertank
Cleaning the Dust box for the water tank Dust box upper and lower cover Dust box filter Remove the dust boxffrom the water tank Remove the primary filter and the HEPA-filter Open dust Tap the HEPA filter to remove dust effectively locking and empty it Clean the high-efficiency primary filter using the cleaning brush... -
Page 28: Cleaning The Dust Box (Dustcollecting)
Cleaning the Dust box (Dust collecting) Cleaning the filters Remove the dust box from the robot Remove the primary filter and HEPA-filter Press and hold the dust box release key to remove the dust box Tap HEPA-filter to remove dust more effective Open the upper and lower covers of the dust box and dump the dust Cleaning the high-efficiency primary filter... -
Page 29: Maintenance Roller Brush And Side Brushes
Maintenance roller brush and Side brushes Cleaning the roller brush Remove the side brushes Open the roller brush coverplate from the Remove the side brushes by removing roller engine them upwards. Take out that roller brush. Clean the side brushes attachments Clean the side brushes for hair residents. -
Page 30: Maintenance Lidar, Fall Sensors, Anti-Collision Board
Maintenance Lidar, fall sensors, Anti-collision Board Wipe of the lidar unit Clean the bumper anti-collision boardd Clean all the fall sensors Fall sensors (3pcs) Lidar tower infrared bumper anti-collision board *Please use a dry cloth when cleaning the lidar, infrared buffer bumper, and down-view sensor. Do not use a wet cloth to avoid damage caused by water. -
Page 31: Maintenance Charging Pole Piece, Driving Wheel And Front Wheel
Maintainence charging plates, drive wheels and front wheels Clean the charging plates pieces Cleaning the driving Remove and clean the front wheel wheels free fof dust Clean the charging plates on the robot, dustcollector and the charging station The front wheel is removed by The Driving wheels a screwdriver * When cleaning charging pole pieces, driving wheels and front wheel, please use dry cloth. -
Page 32: Change Of The Dust Bag
Change of the dust bag Open the lid of the dust collection station Discard the old dust bag Install a new dust bag carefully Take out the old dust bag Close the lid tightly... -
Page 33: Trouble Shooting Dust Channel
Trouble Shooting Dust Channel Clean air ducts with the Loosen the screws to the Remove the air duct cover panel cleaning tools air duct cover panel... -
Page 34: Preparation For Long Storage
Preparation for long storage If the robot is not used for a long time, please fully charge it before storage, then turn off the power switch, and insist on supplementing it with charge, every 3 months to prevent over discharge of the of the battery. Turn off the power switch !... -
Page 35: Troubleshooting Of The Robot And The Dust Collector
Troubleshooting on robot and the dust collector Please see following chart for troubleshooting of the robot Item Fault prompt Cause Solution Main brush fault, please Main brush stuck. Pls dismantle and the clean main brush. Pls clean the main brush remove all fragile objects and cords, clothing, paper, loose cables, make sure No scattered items on the ground. -
Page 36: Trouble Shooting Robot
Trouble shooting robot Please turn on the power switch. Power switch turned off Please turn on the power switch during charging Please poke the surface of the The laser sensor is Pls clean the laser sensor gently laser sensor. stuck or covered. Something stick or shaded Please clean the laser sensor lens Pls clean the laser sensor and start-up robot... -
Page 37: Trouble Shooting Dustcollector
Trouble shooting dustcollector If there is an abnormal state during the operation of the dust collection station, please refer to the following table for investigation. Item Fault Prompt Possible cause Solution The blue light flashes all the time in The switch in front of the dust collection Clean the front magnet by manually the standby state of the dust station does not rebound or there are... -
Page 38: Specifications
Specifications Model Cleanmate S 2000 Pro Max Voltage 24V=1A Charging time About 5.3 H Cleaning (auto) <210 minutes Rated Input 220V-240V ~ 50-60Hz (State of Charge) 0.3 A Current (dust collection state) Power (dust collection state) 600W Rated output 24V=1. 25A * The approval code is reflected on the product nameplate. -
Page 39: Specifications Robot And Dustcollector
Specifications robot and dustcollector Diameter 325mm Height 96mm Weight 2.4 kg Rated voltage 14.4 V Battery 5200mAH lithium battery Water tank capacity 220ML 230ML Dust box capacity with water tank Dust box capacity (dust collection) 180ML Dust bag capacity Outline dimensions of the dust collection station 318 (L) * 230 (W) * 255 (H) - Page 40 Customer Support & Warranty Do you have questions regarding your Cleanmate product? Please contact www.cleanmale.se New filters and accessories can be brought at www.cleanmate.se or at your local retailer. For service & warranty issues Visit www.cleanmale.se, fill the warrany form...
Need help?
Do you have a question about the S2000 PRO MAX and is the answer not in the manual?
Questions and answers
Mln cleanmste 2000 stannar efter en kort stund.och rob biter säger kommunikations error. Går det att gå tillbaka till fabriksinställningarna?