Samsung OfficeServ WIP-5000M User Manual
Enterprise ip solutions officeserv wip phone
Hide thumbs
Also See for OfficeServ WIP-5000M:
- User manual (109 pages) ,
- Manual (108 pages) ,
- Instructions manual (84 pages)
Table of Contents
Advertisement
Quick Links
Advertisement
Table of Contents

Related Manuals for Samsung OfficeServ WIP-5000M


Summary of Contents for Samsung OfficeServ WIP-5000M
-
Page 1: User Guide
Enterprise IP Solutions OfficeServ WIP Phone User Guide... - Page 3 COPYRIGHT This manual is proprietary to SAMSUNG Electronics Co., Ltd. and is protected by copyright. No information contained herein may be copied, translated, transcribed or duplicated for any commercial purposes or disclosed to third parties in any form without the prior written consent of SAMSUNG Electronics Co., Ltd.
- Page 4 This guide may be changed for the product improvement, standardization and other technical reasons without prior notice. For further information on the updated manual or have a question the content of manual, contact your Authorised Samsung Reseller. ©2003 SAMSUNG Electronics Co., Ltd. All rights reserved.
-
Page 5: Symbols
WIP-5000M Phone. Symbols Caution Indication of a general caution Restriction Indication for prohibiting an action for a product Instruction © SAMSUNG Electronics Co., Ltd. Page I... - Page 6 SAFETY CONCERNS Indication for commanding a specifically required action Page II © SAMSUNG Electronics Co., Ltd.
-
Page 7: Warning
It may cause severe damage to the parts of the digital phone, and your phone may not work properly. Do not place the phone in a dusty area or in fluctuating temperature environments. It may cause a fire or electric shocks. Page III © SAMSUNG Electronics Co., Ltd. - Page 8 Do not store them near the phone. It may cause a fire or electric shocks. If the phone makes(horrible) noise, bad smell, or smoke, immediately call the Service Center. It may cause a fire or electric shocks. Page IV © SAMSUNG Electronics Co., Ltd.
-
Page 9: Caution
It may cause damage to the parts. Do not separate, repair nor remodel the phone arbitrarily. If a repair is needed, please contact where the phone was purchased or call the Service Center. Page V © SAMSUNG Electronics Co., Ltd. -
Page 11: About This Guide
ABOUT THIS GUIDE This user guide provides instructions for the use of Samsung’s latest WIP-5000M wireless IP phone Mobile type that can be used in connection with the Samsung’s Enterprise IP Solutions OfficeServ System. Please take the time to study this guide to become familiar with the operation of your WIP- 5000M and the benefits this new phone can provide. -
Page 12: Conventions
Indicates a potentially hazardous situation, which if not avoided, may result in injury or damage to your WIP-5000M phone. It may also be used to alert against unsafe practices. NOTE Indicates additional information for reference. NOTE Page VIII © SAMSUNG Electronics Co., Ltd. -
Page 13: Table Of Contents
PREPARATION Introduction to the WIP-5000M ... 1 Checking the Parts in the Package ... 2 Names and Features for the WIP-5000M Phone ... 3 Button Descriptions ...4 Icon Descriptions on the Screen ...6 © SAMSUNG Electronics Co., Ltd. Page IX... - Page 14 To Turn the Power Off...12 Making a call ... 14 Making a Call by Pressing the Phone Numbers...14 Answering a call... 15 Calling from Your Recent Call Log ... 15 Voice Volume Adjustment ... 17 Page X © SAMSUNG Electronics Co., Ltd.
- Page 15 Setting / Disabling the Automatic Key Lock ... 17 To Set up the Automatic Key Lock ...18 To Disable the Automatic Key Lock...18 Setting the Etiquette Mode... 19 To Set up the Etiquette Mode...19 To Disable the Etiquette Mode ...19 Call Transfer ...
- Page 16 Soft Menu... 48 Volume Adjustment... 49 Selecting the Bell and Vibration ...50 Selecting the Bell Sound ...52 Adjusting the Bell Volume ...53 Adjustung the Volume of the Key Buttons...54 Setting My Phone... 55 Page XII © SAMSUNG Electronics Co., Ltd.
- Page 17 User Guide Viewing My Extension Number ...56 Entering the Users’ Names ...57 Selecting the Background Screen...59 Changing a Password ...60 Setting the Language ...62 Deleting a Phone Number...63 Selecting the Screen Lighting ...67 Setting the Forward Type ...70 Setting the Programmed Message...72 Locking the Phone ...73 Initialization ...74 Setting Auto Lock ...77...
- Page 18 TABLE OF CONTENTS ANNEX Entering Characters... 87 Buttons Used for Entering Characters ...87 Entering Characters ...87 Page XIV © SAMSUNG Electronics Co., Ltd.
-
Page 19: Introduction To The Wip-5000M
WLAN) to satisfy the wireless LAN specifications and the data is transferred/received through IP network. When moving between Access Points(WBS24), as well as between the data terminals like laptop computers with wireless LAN card, the handover function is supplied. © SAMSUNG Electronics Co., Ltd. Page 1... -
Page 20: Checking The Parts In The Package
Checking the Parts in the Package After purchasing the WIP-5000M phone, you have to check that the following items have been packed in the box. WIP-5000M Mobile Phone Page 2 Battery Charger (1 standard type) © SAMSUNG Electronics Co., Ltd. User Guide... -
Page 21: Names And Features For The Wip-5000M Phone
Names and Features for the WIP-5000M Phone © SAMSUNG Electronics Co., Ltd. Hold Buttons Headset Connection Hole Transfer Buttons Dial Buttons Microphone LCD Screen Volume Buttons Navigation Buttons Conference Buttons Speaker User Guide Page 3... -
Page 22: Button Descriptions
PREPATATION Button Descriptions Button Names Features Used when calling or receiving an outside trunk call/when transferring a call Page 4 © SAMSUNG Electronics Co., Ltd. - Page 23 Used when applying the etiquette mode [0]~[9] Used when dialing or entering characters Used when applying the automatic key lock Used when turning the power on/off or when returning to the initial screen © SAMSUNG Electronics Co., Ltd. User Guide Features Page 5...
-
Page 24: Icon Descriptions On The Screen
Etiquette function or vibration function is enabled. Indicates that the automatic key lock is enabled. Indicates the battery charging level. : needs to be charged immediately Page 6 Features : strong signal fully charged sufficient © SAMSUNG Electronics Co., Ltd. insufficient... -
Page 25: Inserting / Removing The Battery
. Insert the projecting part at the bottom of battery into the recess compartment area of the back of the WIP-5000M phone. . Press it in the direction of the arrow until it clicks into place. © SAMSUNG Electronics Co., Ltd. User Guide Page 7... -
Page 26: To Take Out The Battery
PREPATATION To Take out the Battery In order to take out the battery from the WIP-5000M phone, slide the battery cover in the direction of the arrow while simultaneously pressing the separator button. Page 8 © SAMSUNG Electronics Co., Ltd. -
Page 27: Charging The Battery
Charging the Battery After checking each component of the WIP-5000M phone, charge the battery as shown in the figure below. © SAMSUNG Electronics Co., Ltd. User Guide Page 9... -
Page 28: Checking The Battery Status
It is recommended to change to a new battery or charge the battery immediately. If the phone is still used after the warning sound and blinking, the battery will be completely discharged and the power will automatically go off. Page 10 Almost discharged Fully discharged © SAMSUNG Electronics Co., Ltd. -
Page 29: Basic Features
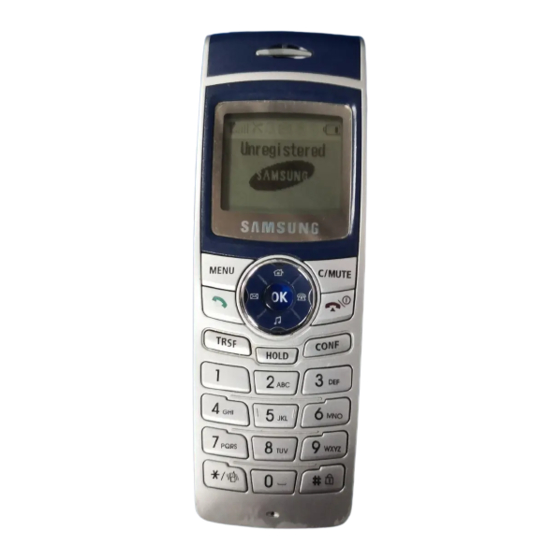
. Press the [ ] button for more than 2 seconds. . Samsung logo will then be displayed as shown on the right-hand side picture and an animation shows up until the phone has been normally registered to the system. -
Page 30: To Turn The Power Off
BASIC FEATURES page. Refer to ‘Selecting the background picture’ section in ‘Application Menus’ of this guide Page 12 © SAMSUNG Electronics Co., Ltd. - Page 31 User Guide The short animation is displayed on the screen and then the phone automatically turns off. Page 13 © SAMSUNG Electronics Co., Ltd.
-
Page 32: Making A Call
Press the [C/MUTE] button for a short time to modify an incorrectly entered number, one by one. Press the [C/MUTE] button for a long time to completely delete all the incorrectly entered numbers at once. Page 14 0668164812 © SAMSUNG Electronics Co., Ltd. -
Page 33: Answering A Call
If the right-hand side ‘receiving a call’ animation shows up while the phone is ringing, press the [ to start a conversation. After the call is finished, press the [ ] button. © SAMSUNG Electronics Co., Ltd. ] button to ] button User Guide Page 15... - Page 34 Each icon next to the phone number has the following meanings.( : Latest received number called number) Page 16 Call List 1 : 06-6702-5322 : Latest 2 : 411-1204-5688 3 : #9876 © SAMSUNG Electronics Co., Ltd.
-
Page 35: Voice Volume Adjustment
[ ] button are all disabled. However, if there is an incoming call at this particular time, you can receive a call by pressing the [ © SAMSUNG Electronics Co., Ltd. User Guide ] button to make a call. -
Page 36: To Set Up The Automatic Key Lock
Once the password is entered, the phone returns to the initial screen and the automatic key lock function is disabled. Page 18 Key Lock 1234 07/12[Sa] 4 : 05 PM ] button for a long time and then the password © SAMSUNG Electronics Co., Ltd. -
Page 37: Setting The Etiquette Mode
To Disable the Etiquette Mode Press the button for more than 2 seconds. Then the etiquette mode icon disappears and the etiquette mode will be disabled. © SAMSUNG Electronics Co., Ltd. User Guide ) will be Page 19... -
Page 38: Call Transfer
This function is used to transfer a call to a designated phone number during a phone conversation. . Press the [ ] button during a phone conversation. . Enter the phone number to be transferred, then press the [ Page 20 ] button and hang up. © SAMSUNG Electronics Co., Ltd. -
Page 39: Call Status Indication
If this function is set up, the ‘FWD’ message will be displayed on the initial screen. © SAMSUNG Electronics Co., Ltd. User Guide 07/12[Sa] Page 21... -
Page 40: Call Camp On
If the other party is busy, you can reserve a busy station callback. When the busy station becomes free, your phone will ring. If you receive the call, the other person’s phone will also ring. Page 22 © SAMSUNG Electronics Co., Ltd. -
Page 41: Application Menus
APPLICATION MENUS Entering the Application Menus Press the [Menu] button, then the main application menu will appear on the LCD screen. 1. Phone book Press the buttons 4. Vol/Effect Page 23 © SAMSUNG Electronics Co., Ltd. -
Page 42: Phone Book
APPLICATION MENUS Phone book Press the [MENU] button and the [1. Phone book] icon to find out various methods to make a call. Page 24 1. Phone book © SAMSUNG Electronics Co., Ltd. -
Page 43: Calling From The Lists Of The Latest Calling Number
[MENU] → [1] → [1] → [ [MENU] → [1] → [1] → [ [MENU] → [1] → [1] → [ © SAMSUNG Electronics Co., Ltd. ] → [OK] : Query ] → [OK] → [ ] : Query and call ] →... - Page 44 (e.g., calling date, time and phone number) and can make a call right away by simply pressing the [ ] button. Page 26 Dialed Call 1 : 06-6702-5322 2 : #4321 3 : #9876 : Failed call) © SAMSUNG Electronics Co., Ltd.
-
Page 45: Calling From The Lists Of The Latest Called Number
[MENU] → [1] → [2] → [ [MENU] → [1] → [2] → [ [MENU] → [1] → [2] → [ © SAMSUNG Electronics Co., Ltd. ] → [OK] : Query ] → [OK] → [ ]: Query and call ] →... - Page 46 [ ] button. Page 28 Recent Call 1 : 06-6702-5322 2 : 411-1204-5688 : Failed call) 3 : #9876 © SAMSUNG Electronics Co., Ltd.
-
Page 47: Searching/Calling A Phone Number Using Name
. Press the [MENU] button, then select the [1. Phone book] icon and press the [OK] button. . Select the [3. Search] and then press the [OK] button. . Select the [1. Search Name] and then press the [OK] button. © SAMSUNG Electronics Co., Ltd. User Guide ] → [... - Page 48 . When the related phone number appears on the screen, press the [ to make a call. Page 30 06-6702-5322 Jack James Jane ] buttons to select ] button to make a call. ] button © SAMSUNG Electronics Co., Ltd.
-
Page 49: Searching/Calling A Phone Number Using Address
. Press the [MENU] button, then select [1. Phone book] icon and press the [OK] button. . Select [3. Search] and then press the [OK] button. . Select [2. Search Number] and then press the [OK] button. © SAMSUNG Electronics Co., Ltd. User Guide ] → [... - Page 50 2 and corresponding phone number will be displayed.) . Select the number using the [ Page 32 06-6702-5322 Jack James Jane ] buttons and press the [OK] button to make call. © SAMSUNG Electronics Co., Ltd.
-
Page 51: Searching/Calling A Phone Number Using A Speed Dial Number
. The phone number saved for that number then appears on the screen and directly makes a call. . Press the [ ] button after a call is finished. © SAMSUNG Electronics Co., Ltd. User Guide 2204 Page 33... -
Page 52: Registering A Phone Number
Phone number registration(initial screen) → [MENU] → Name, Speed dial number Input → [OK] . On the initial screen, directly enter the phone number that you want to save and press the [MENU] button. Page 34 Name 06-6702-5322 [_ _] [_ _] © SAMSUNG Electronics Co., Ltd. - Page 53 Refer to the ‘Annex’ for how to enter the characters. . Assign the speed dial number for that name and enter it. . Press the [OK] button to save the associated phone number. © SAMSUNG Electronics Co., Ltd. User Guide Page 35...
- Page 54 . Select [4. New Entry] and press the [OK] button. . Enter the name, phone number and its abbreviated number by using dial buttons and then press the [OK] button. Page 36 Jack [_ _] [_ _] [_ _] © SAMSUNG Electronics Co., Ltd.
-
Page 55: Modifying The Saved Phone Number
. Select [1. Search Name] or [2. Search Number] and then press the [OK] button. . If [1. Search Name] is selected, the name input field appears on the screen and if [2. Search Number] is selected, the address input field appears on the screen. © SAMSUNG Electronics Co., Ltd. User Guide Page 37... - Page 56 . When the information of the phone number that you want to modify appears on the screen, press the [MENU] button. Page 38 ] buttons and press the [OK] button. © SAMSUNG Electronics Co., Ltd.
- Page 57 [Delete] button on the popup window and press the [OK] button. . Using the [C/MUTE] button and dial buttons, modify the phone number and press the [OK] button to save it. © SAMSUNG Electronics Co., Ltd. User Guide Page 39...
-
Page 58: Utilities
APPLICATION MENUS Utilities Press the [MENU] button and select the [2. Utilities] icon. 2. Utilities Page 40 © SAMSUNG Electronics Co., Ltd. - Page 59 : Alarm setup /Ring always [MENU] → [2] → [1] → [2] : Disable the alarm [MENU] → [2] → [1] → [3] → Select melody → [OK] : Select any alarm melody © SAMSUNG Electronics Co., Ltd. User Guide Page 41...
- Page 60 . Select [3. Alarm Melody] to select the alarm melody then, 10 alarm melodies will be displayed. Page 42 ] buttons to select the ) will appear on the top of the screen. ] buttons to select © SAMSUNG Electronics Co., Ltd.
-
Page 61: Setting/Disabling The Alarm Time
[MENU] → [2] → [2] → Select dates → [OK] → Time/Task Input → [OK] → Select an alarm → [OK] © SAMSUNG Electronics Co., Ltd. User Guide Page 43... - Page 62 Here, you can select one alarm with a bell sound, melody selections and press the [OK] button. Page 44 ] buttons to select [2. Schedule] and press the [OK] button. © SAMSUNG Electronics Co., Ltd.
-
Page 63: Using The Electronic Calculator
[MENU] → [2] → [3] → Enter Numbers → [ Numbers → [OK] . Press the [MENU] button and select the [2. Utilities], then use the [ to select the [3. Calculator], and press the [OK] button. © SAMSUNG Electronics Co., Ltd. User Guide ] button. ] button. - Page 64 . Enter the numbers to be calculated and choose the right arithmetic operation button on the screen using the [ . Enter any second set of numbers and press the [OK] button. Then, the result will appear on the screen. Page 46 ] buttons. © SAMSUNG Electronics Co., Ltd.
-
Page 65: Checking World Time
. When pressing either [ ]/[ ] buttons, the meridian line moves along the countries on the screen. Then, the corresponding time of each capital name will be shown. © SAMSUNG Electronics Co., Ltd. User Guide Seoul, Tokyo 07/12[Sa] 4:05 PM... -
Page 66: Soft Menu
Soft Menus are used to set system features. The soft menu List is decided by system. You can set the various system menus such as DND(Do Not Disturb), Conference, Transfer. Page 48 3. Soft Menu © SAMSUNG Electronics Co., Ltd. -
Page 67: Volume Adjustment
User Guide Volume Adjustment Press the [MENU] button and select the [4. Vol/Effect] icon. 4. Vol/Effect Page 49 © SAMSUNG Electronics Co., Ltd. -
Page 68: Selecting The Bell And Vibration
Selecting the Bell and Vibration You can select the modes of call sound such as the bell, vibration, bell after vibrating, or increasingly higher bell. [MENU] → [4] → [1] → Select a Mode → [OK] Page 50 © SAMSUNG Electronics Co., Ltd. - Page 69 3 seconds to change from the bell mode to etiquette mode(Vibrates) automatically. For information about how to set the etiquette mode, refer to the description of ‘Setting the Etiquette Mode’ section in ‘Basic Features’ of this guide. NOTE © SAMSUNG Electronics Co., Ltd. User Guide Page 51...
-
Page 70: Selecting The Bell Sound
. Press the [ ] button and select a desired bell sound. Press the [OK] button to save the bell sound. Page 52 Ring Type 01 : Melody 1 02 : Melody 2 03 : Melody 3 © SAMSUNG Electronics Co., Ltd. -
Page 71: Adjusting The Bell Volume
Volume], then press the [OK] button. This will result in the following screen appearing. . Press the [ ] button and select the desired bell volume, then press the [OK] button. © SAMSUNG Electronics Co., Ltd. User Guide Bell Volume Page 53... -
Page 72: Adjustung The Volume Of The Key Buttons
. Press the [MENU] button and select [4. Vol/Effect], then press the [OK] button. . Press the [ ] button and select [4. Key Tone]. Use the [ ]/[ ] buttons to set the key volume and then press the [OK] button. Page 54 © SAMSUNG Electronics Co., Ltd. -
Page 73: Setting My Phone
Press the [MENU] button and select [5. Settings] icon to see a screen which prompts you to enter a password. The submenus are not displayed until a password is entered in the [5.Settings] screen. © SAMSUNG Electronics Co., Ltd. User Guide 5. Settings Page 55... -
Page 74: Viewing My Extension Number
This feature enables you to view your extension phone number on the LCD screen of the phone. [MENU] → [5] → Enter a Password → [0] . Press the [MENU] button and select [5. Settings], then press the [OK] button. . Enter a password on the screen when prompted. Page 56 © SAMSUNG Electronics Co., Ltd. -
Page 75: Entering The Users' Names
[MENU] → [5] → Enter a Password → [1] → Enter a Name → [OK] . Press the [MENU] button and select [5. Settings], then press the [OK] button. . Enter a password on the screen when prompted. © SAMSUNG Electronics Co., Ltd. User Guide Internal NO. - Page 76 . A screen prompting you to enter a user’s name then appears. Enter the desired characters and press the [OK] button. For information about how to enter the characters, refer to ‘Annex’ section. NOTE Page 58 © SAMSUNG Electronics Co., Ltd.
-
Page 77: Selecting The Background Screen
. Press the [MENU] button and select [5. Settings], then press the [OK] button. . Enter a password on the screen that prompts you to enter a password. . Press the [ ] buttons and select [2: Display], then press the [OK] button. © SAMSUNG Electronics Co., Ltd. User Guide Page 59... -
Page 78: Changing A Password
This function enables you to prevent others from using your phone by changing the initial factory set password of the phone. The initial password is set to 0000. Page 60 DND FWD 1234 DND FWD 1234 Jack 12 : 34 am 07/12[Sa] 4:05 PM 07/12[Sa] Time Display Name Display © SAMSUNG Electronics Co., Ltd. - Page 79 ] buttons and select the [3: PIN change], then press the [OK] button. . If the following screen prompts you to enter a password, enter a new password and press the [OK] button. © SAMSUNG Electronics Co., Ltd. User Guide Page 61...
-
Page 80: Setting The Language
] buttons and select [4: Language], then press the [OK] button. . Press the [ ] buttons and select [2: English], then press the [OK] button. Page 62 Language 1 : Korean 2 : English 3 : Italian © SAMSUNG Electronics Co., Ltd. -
Page 81: Deleting A Phone Number
. Enter a password on the screen that prompts you to enter a password. . Press the [ ] button and select the [5: Delete Entry], then press the [OK] button. © SAMSUNG Electronics Co., Ltd. User Guide Page 63... - Page 82 This function enables you to clear the list of calling numbers saved within the phone book. [MENU] → [5] → Enter a Password → [5] → [2] → Enter a Password → Select Yes/No → [OK] Page 64 Confirm ? 1 : Yes ] buttons 2 : No © SAMSUNG Electronics Co., Ltd.
- Page 83 ] buttons and press the [OK] button. Deleting a called Number This function enables you to clear the list of called numbers saved within the phone book. © SAMSUNG Electronics Co., Ltd. User Guide Confirm ? 1 : Yes 2 : No...
- Page 84 Then, a screen appears as shown and prompts you to clear a called number. Select Yes or No using the [ ] buttons and press the [OK] button. Page 66 Confirm ? 1 : Yes 2 : No © SAMSUNG Electronics Co., Ltd.
-
Page 85: Selecting The Screen Lighting
. Press the [MENU] button and select the [5. Settings], then press the [OK] button. . Enter a password on the screen that prompts you to enter a password. . Press the [ ] button and select [6: Back Light], then press the [OK] button. © SAMSUNG Electronics Co., Ltd. User Guide Page 67... - Page 86 [MENU] → [5] → Enter a Password → [6] → [2] → Set/Disable Energy Saving Lighting → [OK] Page 68 Light Time 1 : 8 sec On 2 : 20 sec On 3 : Always Disable © SAMSUNG Electronics Co., Ltd.
- Page 87 . A screen prompt appears and enables you to set or disable the energy saving lighting. Select Set or Disable using the [ ] button and press the [OK] button. © SAMSUNG Electronics Co., Ltd. User Guide Power Saving 1 : On...
-
Page 88: Setting The Forward Type
. Press the [MENU] button and select [5. Setting], then press the [OK] button. . Enter a password on the screen when prompted. . Press the [ ] buttons and select [7: Forward Type], then press the [OK] button. Page 70 © SAMSUNG Electronics Co., Ltd. - Page 89 - No Answer : Your incoming calls can be forwarded to another number if you cannot answer the call within the specified time. - Do Not Disturb : Busy : You can forward incoming calls to another number when the DND feature is set up. © SAMSUNG Electronics Co., Ltd. User Guide Setting 1 : Off...
-
Page 90: Setting The Programmed Message
] buttons and select [8: Program Msg], then press the [OK] button. . Press the [ ] buttons and select [1: On], then press the [OK] button. Page 72 Program Msg. 1 : On 2 : Off © SAMSUNG Electronics Co., Ltd. -
Page 91: Locking The Phone
. Press the [MENU] button and select [5. Setting], then press the [OK] button. . Enter a password on the screen when prompted. . Press the [ ] buttons and select [9: Station Lock], then press the [OK] button. © SAMSUNG Electronics Co., Ltd. User Guide Page 73... -
Page 92: Initialization
This function enables you to initialize the status of a phone. All the saved records as well as the phone options are deleted. [MENU] → [5] → Enter a Password → Select Yes/No → [OK] Page 74 Station Lock 1 : On 2 : Off → [1] → Enter a Password → © SAMSUNG Electronics Co., Ltd. - Page 93 Select Yes or No using the [ press the [OK] button. Initializing featares only This function enables you to initialize the options for the phone functions only. © SAMSUNG Electronics Co., Ltd. Reset All ] buttons and 1 : Yes...
- Page 94 . If you enter a password, the following dialog box appears. Select Yes or No using the [ press the [OK] button. Page 76 ] → [2] → Enter a Password → Reset Func. ] buttons and 1 : Yes 2 : No © SAMSUNG Electronics Co., Ltd.
-
Page 95: Setting Auto Lock
] button so that the auto lock can be set. If this function is set, the auto lock icon( on the upper part of the screen. If you want to cancel this function, enter a password. © SAMSUNG Electronics Co., Ltd. User Guide ) appears Page 77... -
Page 96: Setting The System
APPLICATION MENUS Setting the System Press the [MENU] button to see the main menu on the screen. Select [6. System] and use the desired functions. Page 78 6. System © SAMSUNG Electronics Co., Ltd. -
Page 97: Registering A Phone
This function enables you to register a phone via the sytem. [MENU] → [6] → [1] → Select System → [OK] → Enter a System ID → [OK] → Enter a User ID → [OK] → Enter a Password → [OK] Page 79 © SAMSUNG Electronics Co., Ltd. - Page 98 ID and press the [OK] button. . If the screen as shown prompts you to enter a user ID, enter the user ID and press the [OK] button. Page 80 Input Sys. ID Input User ID © SAMSUNG Electronics Co., Ltd.
- Page 99 If the encryption key is not set up in the system, you can press the [OK] button without entering the encryption key. . If the screen as shown prompts you to enter a password and press the [OK] button to start the registration. © SAMSUNG Electronics Co., Ltd. User Guide Input Password Page 81...
-
Page 100: Selecting A System
. You can set the encryption key(WEP key) in the system which should be entered when you register the phone. Page 82 System Setting 1 : System1 ] buttons. Press the [OK] 2 : System2 3 : Encryption Key © SAMSUNG Electronics Co., Ltd. -
Page 101: Viewing The Ip Of A Phone
. Press the [MENU] button and select the [6. System], then press the [OK] button. . Press the [ ] button and select the [3: IP Address], then press the [OK] button. . The current IP address registered with the phone then appears. © SAMSUNG Electronics Co., Ltd. User Guide Page 83... -
Page 102: Viewing The Mac Address Of The Phone
Press the [MENU] button and select the [6. System], then press the [OK] button. . Press the [ ] button and select the [4: MAC Address], then press the [OK] button. . The current MAC address registered with the phone then appears. Page 84 © SAMSUNG Electronics Co., Ltd. -
Page 103: Viewing The Signal Quality Of The Phone
] button and select the [5: CommsQuality], then press the [OK] button. . Display every one second the current Wireless Signal Quality Values if the phone was registered. CQ: Call Quality, ASL: Signal Strength, ANL: Signal Noise. © SAMSUNG Electronics Co., Ltd. User Guide Signal Quality CQ : 92(0 ~ 92) -
Page 104: Setting Lcd Contrast Of The Phone
. Press the [ ] button and select the [6. LCD Contrast], then press the [OK] button. . Press the [ ]/[ ] button and control ‘Dark’/’Bright’ density, then press the [OK] button. Page 86 © SAMSUNG Electronics Co., Ltd. -
Page 105: Entering Characters
Pressing the [MENU] button allows you to enter English Uppercase letters automatically and to select one type from the [English Lowercase/Special Characters] located on the lower part of the screen using the [ ]/[ ] buttons. © SAMSUNG Electronics Co., Ltd. Page 87... - Page 106 If a character to be entered is the same as the last entered character, press the ]/ [ ] buttons to move the cursor right one space. Annex 88 ] buttons to move the cursor. Modify the desired characters © SAMSUNG Electronics Co., Ltd.
- Page 107 To enter characters, press the button where a desired character is displayed repetitively to display the next character.(e.g., If the number [5] button is pressed, the character ‘J’ is entered. If the [5] button is pressed once more, the ‘K’ is entered.) © SAMSUNG Electronics Co., Ltd. Dial Button Character...
- Page 108 How to enter numbers Press the dial button so that numbers are entered irrespective of which character has been selected from out of the English Uppercase/English Lowercase/Special Characters has been entered. Annex 90 ] buttons and press © SAMSUNG Electronics Co., Ltd.
- Page 109 OfficeServ User Guide ©2003 Samsung Electronics Co., Ltd. All rights reserved. Information in this document is proprietary to SAMSUNG Electronics Co., Ltd No information contained here may be copied, translated, transcribed or duplicated by any form without the prior written consent of SAMSUNG.
Need help?
Do you have a question about the OfficeServ WIP-5000M and is the answer not in the manual?
Questions and answers