Table of Contents
Advertisement
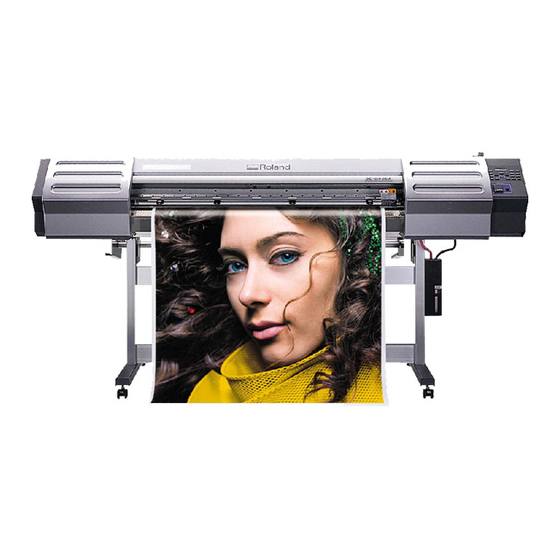
User's Manual
Thank you very much for purchasing the product.
• To ensure correct and safe usage with a full understanding of this product's performance, please be sure to read
through this manual completely and store it in a safe location.
• Unauthorized copying or transferral, in whole or in part, of this manual is prohibited.
• The contents of this operation manual and the specifications of this product are subject to change without notice.
• The operation manual and the product have been prepared and tested as much as possible. If you find any
misprint or error, please inform us.
• Roland DG Corp. assumes no responsibility for any direct or indirect loss or damage which may occur through
use of this product, regardless of any failure to perform on the part of this product.
• Roland DG Corp. assumes no responsibility for any direct or indirect loss or damage which may occur with
respect to any article made using this product.
Advertisement
Table of Contents

Related Manuals for Roland SJ-645EX


Summary of Contents for Roland SJ-645EX
- Page 1 • Roland DG Corp. assumes no responsibility for any direct or indirect loss or damage which may occur through use of this product, regardless of any failure to perform on the part of this product.
- Page 2 AVIS Cet appareil numérique de la classe A respecte toutes les exigences du Règlement sur le matériel brouilleur du Canada. ROLAND DG CORPORATION 1-6-4 Shinmiyakoda, Hamamatsu-shi, Shizuoka-ken, JAPAN 431-2103 MODEL NAME RELEVANT DIRECTIVE : EC LOW VOLTAGE DIRECTIVE (73/23/EEC) WARNING This is a Class A product.
-
Page 3: Table Of Contents
Contents Features of the SJ-745EX/645EX ...4 To Ensure Safe Use ...5 Pour utiliser en toute sécurité...9 Chapter 1: Getting Started...15 1-1 Checking Accessories ... 16 1-2 Part Names ... 17 1-3 Assembling and Installing ... 20 Installation Environment ... 20 Step 1: Assemble the Stand ... - Page 4 Contents Chapter 4: A Wide Variety of Operations...51 4-1 Replacing the Ink Cartridges ... 52 Care and Handling of Ink Cartridges ... 52 Replacing with New Ink Cartridges ... 53 If Ink Runs Out During Printing ... 54 4-2 Checking the Remaining Ink Level ... 55 4-3 Setting the Location Where Printing Starts ...
- Page 5 8-4 Locations of the Power Rating and Serial Number Labels ... 111 8-5 Specifications ... 112 SOLJET and ECO-SOL INK are trademarks of Roland DG Corporation. Other company names and product name are trademarks or registered trademarks of their respective holders. Copyright © 2004 Roland DG Corporation Contents...
-
Page 6: Features Of The Sj-745Ex/645Ex
It also achieves better weatherability through the use of ECO-SOL INK. Built-in Print Server This machine has a built-in print server (Roland-PrintServer) as a network interface. When you use the print server, you can send printing data to the machine from anywhere on the network. -
Page 7: To Ensure Safe Use
Immediately switch off first the sub power, then the main power, unplug the power cord from the electrical outlet, and contact your authorized Roland DG Corp. dealer or ser- vice center. Do not operate in a location exposed to open flame, sparking, or static... - Page 8 To Ensure Safe Use Do not use with any electrical power supply that does not meet the ratings displayed on the unit. Use with any other power supply may lead to fire or electrocution. Ground the unit with the ground wire. Failure to do so may result in risk of electri- cal shock in the even of a mechanical prob- lem.
- Page 9 Install in a level and stable location. Failure to do so may result in the unit tipping over, leading to injury. Unpacking, and installation must be carried out by four or more persons. Otherwise the machine or the stand may fall, resulting in injury.
-
Page 10: About The Labels Affixed To The Unit
To Ensure Safe Use About the Labels Affixed to the Unit These labels are affixed to the body of this product. The following figure describes the location and content of these messages. Front Rear Inside the front cover In addition to the : Indicates information to prevent machine breakdown or malfunction and ensure correct use. -
Page 11: Pour Utiliser En Toute Sécurité
Débranchez le fil électrique et contacter votre revendeur ou votre centre de service de la société Roland DG autorisé. indésirable sur la maison, tous les meubles et même les animaux domestiques. attire l'attention de l'utilisateur sur les instructions importantes ou les avertit l'utilisateur de ce qu'il ne doit pas faire, ce qui est interdit. - Page 12 Pour utiliser en toute sécurité jamais potentiellement inflammables sur la plaque d’exposition lorsque le chauffage fonctionne. Cela crée un risque d'incendie. Ne pas répandre de liquide combus- tible sur la plaque d’exposition. Cela crée un risque d'incendie. Ne pas utiliser avec une source d'alimentation conforme à...
- Page 13 S'assurer que le lieu de travail est bien aéré. Sinon, des odeurs fortes peuvent se dégager et il y a risque de malaises physiques ou d'incendie. Ne pas mettre le liquide nettoyant en contact avec les yeux ou la peau. Ne pas boire ou ni respirer délibérément l'encre ou le liquide nettoyant.
- Page 14 Pour utiliser en toute sécurité Ne pas toucher la plaque d’exposition lorsque le chauffage fonctionne. La plaque étant très chaude, il est possible de se brûler. Ne pas toucher le bout de la lame séparatrice avec les doigts. Une négligence à ce niveau pourrait provoquer des blessures.
- Page 15 À propos des étiquettes collées sur l'appareil Ces étiquettes sont collées à l'extérieur de l'appareil. Les dessins suivants indiquent l'endroit et le contenu des messages. Avant Arrière Intérieur de le couvercle de l'imprimante Pour utiliser en toute sécurité Ne pas mettre les mains dans l'espace devant l'élément quand celui-ci est en marche.
-
Page 17: Chapter 1: Getting Started
Chapter 1: Getting Started This section describes what to do when you first open the packing carton, including installing the machine and connecting it to a com- puter. -
Page 18: Checking Accessories
Bottle stand : 1 Software RIP : 1 User’s manual : 1 Replacement blade for separating knife : 1 Roland-PrintServer Roland PrintServer SOL INK Cleaning CD-ROM : 1 Network Settings Guide : 1 cartridges : 4 Cleaning kit Cleaning sticks : 10... -
Page 19: Part Names
1-2 Part Names Front View Cover Rear View Main power switch RJ-45 (Ethernet) connector POWER Power connector Ink cartridge ports Drain bottle Front cover Loading lever Operation panel Cover Chapter 1: Getting Started... - Page 20 1-2 Part Names Inside the Front Cover Pinch roller Grit roller Reflective tape Platen (equipped with the print heater) Operation Panel (1) [TEST PRINT] key [CLEANING] key [SHEET CUT] key Chapter 1: Getting Started Knife guide Guide line Display TEST PRINT CLEANING SHEET CUT MENU...
- Page 21 Operation Panel (2) Temperature display panel [C1] Indicator This indicator lights when the print heater is operating. It goes dark when the temperature reaches the preset temperature and the print heater stops operating. This indicator lights when the print heater is switched on. [SEL] Key Do not press the [SEL] key.
-
Page 22: Assembling And Installing
SJ-745EX : 4200 (W) x 2000 (D) x 1800 (H) mm (165-3/8 (W) x 78-3/4 (D) x 70-7/8 (H) in.) SJ-645EX : 4000 (W) x 2000 (D) x 1800 (H) mm (157-1/2 (W) x 78-3/4 (D) x 70-7/8 (H) in.) -
Page 23: Step 1: Assemble The Stand
Step 1: Assemble the Stand First assemble the stand, then mount the machine on top of the stand. Invert the stand legs as shown in the figure. While supporting the stand legs with your hand, attach the left- and right-hand casters. Tighten the bolts securely. - Page 24 1-3 Assembling and Installing Use the included large bolts to secure the machine to the stand. Three places each on the left and right. Washers Bolts (Large) Chapter 1: Getting Started...
-
Page 25: Step 2: Install The Included Items
Step 2: Install the Included Items Attach the stays onto the back of the machine at the locations shown in the figure. Left-hand side of the back of the unit Place the media guide on the stays and secure it in place using the included small bolts. Media guide Bolts (Small) Pass the media flanges onto the retainers and secure in place with the flange retaining pins. -
Page 26: Step 3: Install The Drain Bottle
1-3 Assembling and Installing Step 3: Install the Drain Bottle Leave the drain bottle attached at all times, removing it only when moving the machine or disposing of collected ink. Use the included large bolts to secure the bottle stand in place. Remove the stopper from the drain tube. - Page 27 Remove BOTH the lid and the inner cover from the drain bottle. Attach the drain bottle to the back of the machine. For more information about how to dispose of discharged ink. "5-5 Disposing of Discharged Ink" Drain bottle When the level of collected fluid is in this range, detach the drain bottle and dispose of the discharged ink.
-
Page 28: Step 4: Remove The Protective Media
1-3 Assembling and Installing Step 4: Remove the Protective Media The protective media shown below is attached to this machine when it is shipped from the factory. When you have finished installing the machine, remove all protective media. Front Packing 5) Peel off the tape. -
Page 29: Connecting The Cables
1-4 Connecting the Cables Use only with a power supply of the same rating as indicated on the unit. Use with any other power supply may lead to fire or electrocution. Ground the unit with the ground wire. Failure to do so may result in risk of electrical shock in the even of a mechanical problem. Use only with the power cord included with this product. -
Page 30: Connecting To The Computer
Connecting to the Computer RJ-45 (Ethernet) connector Various settings are required when using this machine in a network environment. For more information, see the "Roland- PrintServer Network Settings Guide". * Cables are available separately. One which you are sure matches the model of computer being used should be selected. - Page 31 1-4 Connecting the Cables Securing the Cable Pass the cable through the established location, making sure that it does not touch the loaded media. If the cable touches the media during printing, media feed may be obstructed, resulting in poor printing accuracy. Pass the cable through here.
-
Page 32: Switching On The Power For The First Time
1-5 Switching On the Power for the First Time Install Ink Cartridges Store ink cartridges out of the reach of children. If ink or cleaning liquid comes in contact with the eyes, immediately flush with running water for at least 15 minutes. -
Page 33: Filling Ink
Filling Ink Make the setting for the ink type to install. You can make the setting for the ink type when you switch on the power for the first time, or when you switch on the power after removing ink. Installing ink cartridges for the first time after purchase requires four unused SOL INK cleaning cartridges. - Page 34 1-5 Switching On the Power for the First Time Firmly insert the ECO-SOL INK cartridges for each of the colors as far as they will go. Ink filling starts. When this screen appears, filling ink is finished. SETUP SHEET Chapter 1: Getting Started SET SOL CRT.
-
Page 35: Chapter 2: Basic Operation
Chapter 2: Basic Operation This describes the sequence of basic operations from switching on the power to performing printing. -
Page 36: Switching The Power On And Off
2-1 Switching the Power On and Off Switching On the Power Leave the main power switch turned on, and use the [POWER] key to switch the power on and off in day-to- day use. Points to Keep in Mind When Switching the Power On and Off Do not switch off the main power while the sub power is switched on. -
Page 37: Switching Off The Power At The End Of The Day
Switching Off the Power at the End of the Day Press and hold down the [POWER] key for one second or longer to switch off the sub power. Leave the pinch rollers raised when not in use. Deformation may occur if left lowered for a prolonged period. 2-1 Switching the Power On and Off The POWER LED goes out Raise... -
Page 38: Loading Media
2-2 Loading Media Be sure to install the media guide when loading roll media. Otherwise the roll may fall and cause injury. Load roll media at the proper position. Otherwise the roll may fall, resulting in injury. When the reinforcement pipe is inserted into the paper tube, do not angle the roll media. The reinforcement pipe may protrude from the roll media and cause injury. - Page 39 Fit the right-hand media flange all the way into the hole on the right-hand side of the roll media, and tighten the retainer screw to secure in place. Roll media When roll media sag severely, use the reinforcement pipe inserted into the roll media.
- Page 40 2-2 Loading Media Grasp the center of the end of the media at the front of the machine, and slowly pull the media out straight to the position shown in the figure. Slowly turn the media flanges at the back of the machine to pull back the media to the position shown in the figure.
- Page 41 When the machine will remain unused for an extended period, remove roll media from the machine and store it. If roll media is left mounted on the machine for an extended period, these entire roll may warp, resulting in poor printed image quality or motor errors.
-
Page 42: Loading Sheet Media
2-2 Loading Media Loading Sheet Media Before attempting to load sheet media, check the following points. Front View Line up the right edge of the media with the guide line, and align the front edge with the location shown in the figure. If the front edge of the media is cut at an angle, load the media so that its edge is lined up straight with the guide line. -
Page 43: When Loading Thick Media
When Loading Thick Media Media that is thick or that warps easily may lead to problems with media feed or jamming. When you are using such media, adjust the height of the print heads. When the height of the print head has been adjusted, it is necessary to perform bidirectional correction. For more information about bidirectional correction, refer to "4-6 Making Corrections for Printing"... -
Page 44: When Loading Media That Warps Easily
2-2 Loading Media When Loading Media That Warps Easily When you are loading media whose left and right edges are prone to warping, use the media clamps. The media clamps can be used to secure media that is up to 0.7 mm (0.027 in.) or so in thickness. The following media cannot be used even when secured in place by the media clamps. -
Page 45: Separating The Media
Separating the Media Make sure the [SETUP] LED lights up. To cut off a printed portion from the roll, hold down the [SHEET CUT] key for at least one second. The piece is cut off at the present location of the printing-start line. This step is not necessary when cutoff is performed automatically by sending a media-cutoff command from the computer. -
Page 46: Printing
2-3 Printing Do not open the front cover. Opening the front cover while printing is in progress causes an emergency stop. This means that printing may not be carried out correctly even if operation is resumed, due to drop-out or misalignment of the image. During printing, do not touch the portion of the media that's already been discharged. -
Page 47: Performing A Printing Test
Performing a Printing Test Before starting to print, carry out a printing test to check the state of the head. Problems such as missing dots may reduce the printing quality. If the test results show a problem, carry out head cleaning to restore the head to its normal state. Press and hold the [TEST PRINT] key for at least one second to carry out a printing test. -
Page 49: Chapter 3: Using The Print Heater
Chapter 3: Using the Print Heater This section describes how to print while using the print heater and the like. -
Page 50: Switching The Print Heater On And Off
The print heater starts operating. When the temperature display panel shows characters other than numerical figures, such as UUUU or LLLL, immediately switch off the print heater and contact your authorized Roland DG Corp. dealer or service center. Power Source for the Print Heater The print heater is connected to the sub power for the printer. -
Page 51: Loading Media
3-2 Loading Media About the Ambient Temperature During Print Heater Use To ensure stable printing quality, we recommend use in an environment where the ambient temperature is 20˚C (68˚F) or higher. At low temperatures, warm-up may take a long time, or the temperature may fail to reach the preset value, or large differences in temperature may occur. -
Page 52: Printing
3-3 Printing Printing Before performing printing, set the preset temperature to 40˚C (104˚F) and wait until media becomes sufficiently warm. The recommended ambient temperature for ensuring acceptable quality when performing printing is 20 to 32˚C (68 to 89.6˚F). When the ambient temperature is less than 20˚C, the media doesn't heat up enough to ensure acceptable quality. In such cases, set the preset temperature to higher value. -
Page 53: Chapter 4: A Wide Variety Of Operations
Chapter 4: A Wide Variety of Operations This section describes a wide variety of operations and functions, grouped by task. -
Page 54: Replacing The Ink Cartridges
4-1 Replacing the Ink Cartridges Care and Handling of Ink Cartridges • Do not use anything other ECO-SOL INK cartridge. Do not attempt to refill and reuse an empty ink cartridge. • Do not attempt to disassemble an ink cartridge. •... -
Page 55: Replacing With New Ink Cartridges
Gently shake the new cartridge. Insert new ink cartridge. Be sure to use genuine ECO-SOL INK cartridges from Roland DG Corp. Installing other types of ink may result in breakdown or faulty operation. 4-1 Replacing the Ink Cartridges Removing or inserting an ink cartridge while operation is in progress may cause air to get inside the cartridge, resulting in poor image quality. -
Page 56: If Ink Runs Out During Printing
4-1 Replacing the Ink Cartridges If Ink Runs Out During Printing If ink runs out during printing, a warning beep sounds and the screen shown in the figure appears. Replace the ink cartridge. Ignoring the message and continuing printing without replacing the ink may adversely affect image quality, resulting in faintness or other problems. -
Page 57: Checking The Remaining Ink Level
4-2 Checking the Remaining Ink Level You can use [INK REMAINING] on the menu to check how much ink is left after the ink cartridges have been installed. Use this information as a guide for replacing the ink cartridges. In situations such as the following, the installed ink cartridge is taken to be an unused cartridge and the default amount of remaining ink is displayed, which does not match the actual amount of ink remaining. -
Page 58: Setting The Location Where Printing Starts
4-3 Setting the Location Where Printing Starts Setting the Start Location Set the location where printing starts at the desired place. ], [ ], [ ], and [ ] keys and the [BASE POINT] key to set the start points (origin points) for the feed direction (the direction of forward and backward movement) and the scan direction (the direction of movement of the print-head carriage). -
Page 59: Specifying A Location In The Feed Direction
Specifying a Location in the Feed Direction Use the [ ] keys to move the media to the location where you want to start printing. In the figure, the next printing operation starts from the location shown. The next printing operation starts here. Front edge of the media Whenever possible, avoid using the [ •... -
Page 60: Specifying A Location In The Scan Direction
4-3 Setting the Location Where Printing Starts Specifying a Location in the Scan Direction Press the [ ] key to move the print-head car- riage to the present starting location for print- ing in the scan direction. Use the [ ] and [ to the new print-start position. -
Page 61: Setting The Margins
4-4 Setting the Margins Setting the Margins in the Feed Direction You can set the margins in the feed direction using the software RIP (raster image processor). For information about how to make the settings for the margins, refer to the documentation for the RIP you're using. Setting made using the software RIP Margin... -
Page 62: Setting The Margins In The Scan Direction
4-4 Setting the Margins Setting the Margins in the Scan Direction Set the left and right margins for the printing area. You can set the scan-direction (left and right) margins only at the time of media setup. If the print-head carriage moves away from the standby position when not printing, problems such as drying-out of the print heads or dot drop-out during printing may occur. - Page 63 Press the [MENU] key, and press the [ to display the screen shown in the figure. Press the [ ] key to display the screen shown in the figure. Press the [ ] key to display the screen shown in the figure. When you do this, the print-head carriage moves to the right edge of the printing area.
-
Page 64: Using Transparent Media
4-5 Using Transparent Media If the media loaded on the unit is transparent, then at the [SHEET TYPE] menu, select [CLEAR]. When [SHEET TYPE] is set to [CLEAR], the media width is not detected during media setup. This means it is necessary to specify a printing area that matches the actual width of the media. -
Page 65: Making Corrections For Printing
4-6 Making Corrections for Printing Feed Correction This corrects for errors in the amount of feed of the grit rollers due the type of media. Be sure to make this setting when you have replaced the media with a different type. Correcting the amount of feed improves the dot-positioning accuracy in the feed direction, which can help enhance image quality. -
Page 66: Bidirectional Correction
4-6 Making Corrections for Printing Bidirectional Correction This adjusts for misalignment that occurs during bidirectional printing. Perform adjustment for bidirectional correction in situations such as the following. • When media is replaced with a different type • When the head height has been adjusted •... - Page 67 Press the [ ] key to make the following screen appear on the display. Press the [ ] key to make the following screen appear on the display. Use the [ ], [ ], [ ] and [ the value you checked in step 4, then press the [ENTER] key.
- Page 68 4-6 Making Corrections for Printing Loading an Adjustment Value Press the [MENU] key, and press the [ to make the following screen appear on the dis- play. Press the [ ] key to make the following screen appear on the display. Press the [ ] key to make the following screen appear on the display.
-
Page 69: Stopping Printing Operations
4-7 Stopping Printing Operations Stopping Printing Operations Stopping Printing Press the [PAUSE] key. Halt transmission of printing instructions from the computer. Hold down the [SETUP] key for one second or longer. Any remaining data is cleared. Pausing Printing Operations Press the [PAUSE] key. The PAUSE LED lights up. To resume printing Press the [PAUSE] key again. -
Page 70: Recording The Amount Of Remaining Media
4-8 Recording the Amount of Remaining Media Displaying the Amount of Remaining Media on the Screen You can display how much of the media in use is left. Once you set the amount of media remaining, the amount remaining is displayed at the top menu until it reaches zero. If you cancel the setup such as by removing the media or raising the loading lever, the amount remaining at that time flashes on the screen. -
Page 71: Changing The Type Of Ink
4-9 Changing the Type of Ink When changing the type of ink in use, follow the steps below to replace the ink. Ink replacement requires four SOL INK cleaning cartridges. You can change the type of ink three times per four cleaning cartridges. - Page 72 4-9 Changing the Type of Ink Pull out the ink cartridges indicated by the flash- ing number. Replacement of ink starts. Follow the on-screen instructions to insert and remove the cleaning cartridges. When the display shown in the figure appears, empty the drain bottle and press the [ENTER] key.
-
Page 73: When Not In Use For A Prolonged Period
4-10 When Not in Use for a Prolonged Period When the machine is out of use for an extended period, then once a month, switch on the power and perform cleaning. When the machine's main power switch is left on, a warning beep sounds about once a month to remind you to perform cleaning. -
Page 75: Chapter 5: Maintenance
Chapter 5: Maintenance This section describes how to clean the print heads, daily care and maintenance, and the like. -
Page 76: Cleaning The Print Heads
5-1 Cleaning the Print heads Switching on the sub power automatically performs maintenance operations, including cleaning of the print head. This means that there is normally no need to perform cleaning otherwise. If drop-out occurs with printed images, clean the print head. -
Page 77: If Drop-Out Persists Even After Carrying Out Cleaning Several Times
If Drop-out Persists Even After Carrying Out Cleaning Several Times Perform head cleaning only when there is dot drop-out (gaps) or printing becomes faint. Performing head cleaning more than necessary subjects the heads to wear and consumes ink. In particular, cleaning performed at the [POWERFUL] menu for [HEAD CLEANING] can cause premature head wear and consume large amounts of ink. -
Page 78: Cleaning Using The Cleaning Kit
If image drop-out persists even after performing cleaning with the cleaning kit, or if the cleaning kit is used up, contact your authorized Roland DG Corp. dealer or Roland DG Corp. service center. The heads are consumable parts. The useful life is six billion shots per nozzle. - Page 79 To discharge static electricity from your body, touch the location shown in the figure. Clean the heads and the area around the heads on the left side of the machine. Use a cleaning stick to wipe off any grime from the stainless- steel frame for the heads and the plastic areas on either side of the heads.
- Page 80 5-2 Cleaning Using the Cleaning Kit Clean the wiper. Use a cleaning stick to wipe away any buildup of dust and grime from the wiper. Replacing the Wiper If the message [REPLACE WIPER] appears on the display, replace the wiper with a new one. As a rule of thumb, the message prompting you to replace the wiper appears when cleaning has been per- formed 500 times (with [ALL] selected for head...
-
Page 81: Replacing The Wiper
5-3 Replacing the Wiper If the message shown in the figure appears, replace the wiper with a new part. Follow steps 1 through 3 in "5-2 Cleaning Us- ing the Cleaning Kit" to display the screen shown in the figure, and press the [ENTER] key. Follow steps 5 and 6 in "5-2 Cleaning Using the Cleaning Kit"... -
Page 82: Other Cleaning Tasks
5-4 Other Cleaning Tasks When cleaning the unit, be sure to wait approximately 30 minutes or more after switching off the power until the temperature of the platen falls sufficiently. Doing so may cause burns because the platen is hot. Never clean with solvents (such as benzine or thinners). -
Page 83: Disposing Of Discharged Ink
5-5 Disposing of Discharged Ink The bottle stand for the drain bottle is provided with a window to help determine when discharged ink needs to be disposed. Dispose of ink in the drain bottle as described below. Discharged ink is flammable and contains toxic ingredients. Do not attempt to incinerate discharged ink or discard it with ordinary trash. -
Page 84: How To Replace The Separating Knife
5-6 How to Replace the Separating Knife Do not touch the tip of the separating knife with your fingers. Doing so may result in injury. Do not touch the control panel while head cleaning or other cleaning is in progress. The print-head carriage may move and cause injury. -
Page 85: When Moving The Unit
5-7 When Moving the Unit Procedures from Preparing to Move Through Reinstalling To move the machine, you must completely drain all ink inside the machine and secure the print heads in place with retainers to protect them. Attempting to move the machine without first doing this may result in damage to internal components due to leaking ink or damage to the heads. - Page 86 For information on how to secure in place, go to "1-3 Assembling and Installing" and refer to "Step 4: Remove the Protective Media." Lower the roll media from the printer. If necessary, also detach the media flanges, left and right stays, media guide and the stand.
-
Page 87: Chapter 6: Menus And Keys
Chapter 6: Menus and Keys This section contains a flowchart of the menus and describes the operation-panel keys and the menu items. -
Page 88: Menus Flowchart
6-1 Menus Flowchart For details about each of the menus, see the "6-2 Description of Menus." Roland SJ-745EX Ver. 1.00 When the po wer is turned on f or the fir st time , or turned on after remo ving the ink... - Page 89 Press the [CLEANING] key to perform all head cleaning. CLEANING Press the [ENTER] key to perform head cleaning. Press the [ENTER] key CLEANING to perform head cleaning A GROUP of A Group. CLEANING Press the [ENTER] key to perform head cleaning B GROUP of B Group.
- Page 90 6-1 Menus Flowchart MENU SHEET TYPE Displayed only when the media has been set up. MENU PRINT AREA MENU HEAD HEIGHT MENU ADJUST BI-DIR MENU CALIBRATION To the [INK CONTROL] menu Chapter 6: Menus and Keys SHEET TYPE OPAQUE OPAQUE OPAQUE/CLEAR PRINT AREA RIGHT EDGE...
- Page 91 [CALIBRATION] menu MENU INK CONTROL INK CONTROL EMPTY MODE INK CONTROL PUMP UP INK CONTROL HEAD WASH INK CONTROL CHANGE INK SET MENU FULL WIDTH S FULL WIDTH S FULL FULL/MEDIA/OFF MENU SCAN INTERVAL SCAN INTERVAL OFF / 0.1 to 10.0 sec. (In steps of 0.1 sec.) MENU VACUUM POWER VACUUM POWER...
- Page 92 6-1 Menus Flowchart [REPLACE KNIFE] menu MENU INK REMAINING MENU SHEET REMAIN MENU HEAD CLEANING To the [SHEET TYPE] menu Chapter 6: Menus and Keys SHEET REMAIN PRINT MEMO SHEET REMAIN SET LENGTH SET LENGTH 0.0 m SHEET REMAIN SET AT LOADING SET AT LOADING DISABLE DISABLE HEAD CLEANING...
-
Page 93: Description Of Menus
6-2 Description of Menus Top menu Submenu SHEET TYPE — PRINT AREA RIGHT EDGE LEFT EDGE HEAD HEIGHT HEAD CLEANING ALL MEDIUM A MEDIUM B MEDIUM C MEDIUM ALL POWERFUL A POWERFUL B POWERFUL C POWERFUL INK CONTROL EMPTY MODE PUMP UP HEAD WASH CHANGE INK SET... - Page 94 6-2 Description of Menus Top menu Submenu ADJUST BI-DIR TEST PRINT SETTING NO.1 SETTING NO.2 SETTING NO.3 SETTING NO.4 LOAD PRESETTING SAVE PRESETTING CARIBRATION TEST PRINT SETTING FULL WIDTH S — SCAN INTERVAL — VACUUM POWER — PERIODIC CL. — UNIT —...
- Page 95 Top menu Submenu SYSTEM REPORT — REPLACE KNIFE — A L T E R N A T E — HEAD FACTORY — FAULT — REMAINING SHEET REMAIN SET LENGTH SET AT LOADING PRINT MEMO Function This prints the current status of settings and other system informa- tion.
-
Page 96: Description Of Keys
6-3 Description of Keys Top menu — — — — — — — Chapter 6: Menus and Keys Function This switches on and off the sub power . When the power is switched on, the POWER LED lights up. This detects the presence and the width of the media, and displays the printable width. - Page 97 Top menu — Pressing and holding the [SHEET CUT] key for one second or longer cuts off the media at the location of the present print-start line. Press this to separate the portion that has been printed from the roll. You cannot sever a piece of me- dia while printing is in progress.
-
Page 99: Chapter 7: What To Do If
Chapter 7: What to Do If... This section describes error messages that may appear on the dis- play and how to resolve problems that can occur during operation. -
Page 100: What To Do If
Are the network settings correct? Make sure there are no errors in the network settings. For more information about making the connection to a network, see "Roland-PrintServer Network Settings Guide." Has media been loaded (the SETUP LED is lit)? If the SETUP LED is not illuminated, make sure the media is loaded correctly and press the [SETUP] key to illuminate the SETUP LED. -
Page 101: Clean, Attractive Printing Is Impossible
Clean, Attractive Printing Is Impossible If drop-out occurs with printed images. Clean the print heads (see "5-1 Cleaning the Print Heads"). The printed images are not clean. Clean the platen and pinch rollers. (See "5-4 Other Cleaning Tasks") The print heads scrape the surface of the media. Is the loaded media very thick? If media feed is not smooth because the media catches on the head, then adjust the height of the print heads. - Page 102 7-1 What to Do If... During printing, ink drips from the print-head carriage and soils the media (the printing surface) The following may cause ink to drip on the media during printing. • Dust or fiber-containing grime around the heads may have absorbed ink. •...
-
Page 103: Media Wrinkles Or Warps
Media Wrinkles or Warps Media Wrinkles When Performing Printing Was the media allowed to stand while heated? Depending on the type of media, it may wrinkle when performing printing after it is left on the platen for 30 minutes to an hour with the print heater temperature at 40˚C. -
Page 104: What To Do If The Print-Head Carriage Does Not Operate
During operation, if for some reason the print-head carriage does not return to the standby position, then following the procedure, cap the print heads, and contact the your authorized Roland DG Corp. dealer or service center. If the print-head carriage is allowed to stand for a prolonged period with the print heads uncapped (that is with the print- head carriage over the platen), the heads may become clogged or even damaged. - Page 105 When the print-head carriage comes into con- tact with the caps, rotate the pipe one or two turns more. Make sure the print-head carriage and the caps are touching, then contact your authorized Roland DG Corp. dealer or service center. 7-1 What to Do If...
-
Page 106: What To Do If An Error Message Appears
7-2 What to Do If an Error Message Appears Messages CLOSE THE COVER An operation command was given while the cover or front cover is open. SHEET NOT LOADED Test printing was attempted with no media loaded. PRESS SETUP KEY 1_ 2 Ink has been used up. - Page 107 Check the number shown on the display, then press the [POWER] key to switch off the power. After you switch off the power, inform your authorized Roland DG Corp. dealer or service center of the number that appeared on the display.
-
Page 109: Chapter 8: Specifications
Chapter 8: Specifications... -
Page 110: Media Conditions
• Media that cannot withstand the heat of the print heater • Media whose paper pipe (core) is bent or crushed Acceptable Media Widths SJ-745EX: 210 to 1879 mm (8-5/16 to 74 in.) SJ-645EX: 210 to 1625 mm (8-5/16 to 64 in.) Chapter 8: Specifications... -
Page 111: Printing Area
8-2 Printing Area The media's printable width (the direction of print-head carriage movement) is determined by the width of the loaded media. When the [SETUP] key is pressed after loading the media, the width of the media is detected and the printing area appears on the display. -
Page 112: The Media-Cutoff Location During Continuous Printing
8-3 The Media-cutoff Location During Continuous Printing The media-cutoff location that is used when a media-cutoff command is sent from the computer is determined as follows. Location where separated Chapter 8: Specifications Start of the next printing operation End of printing 75 mm Margin (setting on the computer) -
Page 113: Locations Of The Power Rating And Serial Number Labels
8-4 Locations of the Power Rating and Serial Number Labels Serial Number This is require when you seek maintenance, servicing, or support. Never peel off the la- bel or let it get dirty. Power Rating Use an electrical outlet that meets the re- quirements for voltage, frequency, and am- perage given here. -
Page 114: Specifications
2, flange retaining pins: 2, drain bottle: 1, bottle stand: 1, transport bars: 2, media reinforcement pipe: 1, Software RIP: 1, user’s manual: 1, replacement blade for separating knife: 1, Roland-PrintServer CD-ROM: 1, Roland-PrintServer Net- work Settings Guide: 1, SOL INK cleaning cartridges: 4, cleaning kit: 1 (clean-... - Page 115 • Media type: Roland SV-G-1270G, print travel: 1 m • Preset temperature for the print heater: 40˚C • Temperature: 20°C, humidity: 50% • Media type: Roland PET-G-1050, print travel: 1 m The print heater temperature may not reach the preset temperature depending on ambient conditions or the width of the media.
- Page 117 R2-041129...
Need help?
Do you have a question about the SJ-645EX and is the answer not in the manual?
Questions and answers
Waar zit Sensor pitchroll
The pitch roll sensor on the Roland SJ-645EX is located behind the media and becomes visible when the media is rolled back and stretched taut. It is positioned so that when the media is pulled back correctly, it forms a tight seal with the platen and the sensor comes into view.
This answer is automatically generated