Table of Contents
Advertisement
Advertisement
Table of Contents

Related Manuals for Eaton Malux solutions ResistTel IP4


Summary of Contents for Eaton Malux solutions ResistTel IP4
- Page 1 Weatherproof VoIP phone ResistTel IP4 / IP162 New pictures? FHF BA9710-100...
- Page 2 FHF BA 9710-100 03/22 ResistTel IP4 / IP162 – User manual Goods names are used without guarantee of free usability. Almost all hardware and software names in this Short User Guide are simultaneously registered trademarks or should be considered as such. All rights reserved.
-
Page 3: Table Of Contents
Table of contents VoIP Phone ResistTel IP4/IP162 ..................7 Device description ........................7 Scope of delivery .......................... 7 1.2.1 Sling holder ..........................7 1.2.2 Compatibility of hearing aids ...................... 7 CE mark ............................8 Assembly and installation ....................8 Preparatory work .......................... 8 Montage ............................ - Page 4 4.1.3 Conversation mode headset ..................... 24 4.1.4 Conversation mode headset open listening ................24 4.1.5 Conversation mode hands-free ....................24 4.1.6 Change of operating mode, textual description ................ 24 4.1.6.1 Handset mode -> handset mode with open listening ............24 4.1.6.2 Handset mode with open listening ->...
- Page 5 5.1.3 Main menu – Messages ......................39 5.1.4 Main menu – User settings ....................... 39 5.1.4.1 Call diversion, optional ....................39 5.1.4.2 Presence (optional) ......................41 5.1.4.3 Do not disturb ......................... 41 5.1.4.4 Call waiting: On def. | On once | On mute | Off .............. 42 5.1.4.5 display phone no.
- Page 6 5.1.7.2 IP settings ........................60 5.1.7.3 Registration ........................60 5.1.7.4 STUN ..........................61 5.1.7.5 Reset configuration ......................61 Specifications ........................62 Warnings and safety instructions ..................64 Operating instructions ResistTel IP4/IP162 03/22...
-
Page 7: Voip Phone Resisttel Ip4/Ip162
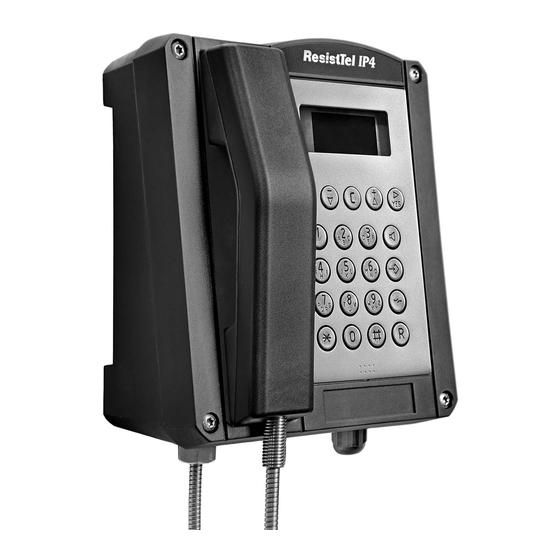
1 VoIP Phone ResistTel IP4/IP162 Congratulations on purchasing a ResistTel IP4/IP162 VoIP phone. This guide should help you to get to know the device better and to familiarize you with its handling. 1.1 Device description The ResistTel IP4/IP162 with Voice over IP technology is a modern means of communication, which was developed for industrial use. -
Page 8: Ce Mark
1.3 CE mark We hereby declare that this product is manufactured in accordance with the essential health and safety requirements EMC Directive 2014/30/EU Low Voltage Directive 2014/35/EU is located. The device is compliant with Directive 2011/65/EU and Delegated Directives 2017/2102/EU and (EU)2015/863. - Page 9 Figure 2 - Interior view of the upper part of the housing Figure 3 - Chassis Bottom Interior View Operating instructions ResistTel IP4/IP162 03/22...
-
Page 10: Montage
2.2 Montage Insert four screws with a head diameter of 10 to 13 mm into the opening (20) and attach the telephone base (3) to the wall or on a plate. In the case of a telephone with a factory-fitted plastic cable entry, the telephone line must be routed through the cable entry (KLE) (4). - Page 11 Figure 5 - Connection diagram of the electronic assemblies Plug No.: Description (Carrier Module) X100 Headset – Hearing capsule (ge) Headset – Hearing capsule (gr) Headset - Microphone (ws) - (+) Headset – Microphone (br) – (-) Output contact Relay-Onboard Output contact Relay-Onboard External power supply DCPower (+) External power supply DCPower (-)
-
Page 12: Connections
2.3 Connections 2.3.1 Connection versions 2.3.1.1 LAN ports and RJ45 socket The phone has 2 internal LAN connections, each with a cable gland (4) - (KLE). For connection, a LAN cable must be pulled through the gland (KLE). Inside the phone, the supplied LAN socket must be pressed onto the cable. -
Page 13: Connection Cables
2.3.1.3 Connection cables For the connection of the external power supply DCPower, the relay outputs Relay-1 & Relay-2, the output contact Relay-Onboard and the inputs Input-1 – 3, sheathed cables are to be used, which are inserted into the device via the cable entries (KLE). Attention! The telephone housing must not be opened when the relay contacts are under voltage Cables and wires must be insulated. -
Page 14: Headset Connection
button. The transmitting diode of the opto-coupler, which is connected in series, then transmits the switching state of the button galvanically isolated into the electronics. 22,8 VDC ≤ VB ≤ 57,0 VDC IB ≤ 10,0 mADC = 22 kΩ 2.3.4 Headset Connection The headset must be connected to terminals 1-4 of the X100 terminal block located in the connection chamber. -
Page 15: Output Contacts Relay-1 And Relay-2
Be sure to use sufficient conductor cross-sections so that the minimum required DC voltage is always available at the terminals. For more information, please refer to the technical data of this operating manual. 22,8 V ≤ V ≤ 53,0 VDC DCPower ≤... -
Page 16: Final Work
Final work Please carry out a final check of the fasteners and connections to ensure proper commissioning and safety. Connect the keyboard in the top of the phone (1) via the strip (8) to the connector inside the case (7) on the circuit board (X305). -
Page 17: Commissioning
3 Commissioning The phone includes numerous setting options to adapt the operation of the device to the different requirements. For this purpose, the main device menu and/or the web interface of the phone are avail- able to configure the device to meet your requirements. In this section of the user manual, we will guide you on how to set the configurable functions of the phone. -
Page 18: Navigation In Menus
only described in the last section 3.1.1.4 Save or section. Although effective in each section, key discard changed settings . In the setting notes of this commissioning chapter, we refer to configuration parameters to be set only with specification of the path Main menu\Phone settings\Headset and the values to be set On or Off. We consider the concrete navigation, setting and storage of the parameters to be sufficiently clarified. -
Page 19: Setting Selection Parameters
3.1.1.2 Setting Selection Parameters Selection elements are configuration parameters for which a 1 from N selection must be made. Behind the left-aligned parameter name and its trailing colon, the currently selected setting value is displayed right-aligned. The N named setting values form a list that can be inspected in the selected configuration parameter by the keys and/or in both directions to find the desired setting. -
Page 20: Save Or Discard Changed Settings
3.1.1.4 Save or discard changed settings After you change settings, the changes must be saved explicitly. To do this, press the menu button until the saving is confirmed or a security prompt appears, which you can answer in the affirmative or deny by pressing the button sequence . -
Page 21: Headset Control
3.3 Headset Control By default, the connected headset is controlled by the Shift Speaker button sequence, which activates and disables the headset conversation mode, as shown in the figure below. However, the prerequisite for this is that the headset operation in the main menu is switched on or released, which is indicated by the display of the pictogram in the lower display line, to the right of the date/time display. -
Page 22: Relay-Onboard, Relay-1 And Relay-2 Outputs
Destination no. 5011 Key not assigned Key not assigned 3.6 Relay-Onboard, Relay-1 and Relay-2 outputs The control of the relay-onboard, relay-1 and relay-2 outputs is configurable to signal selected states of the phone via connected external equipment, such as for example the ringing of the telephone via an optical signaling device. -
Page 23: Operation
4 Operation 4.1 Operation, conversation modes Below are the conversation modes available to you to make your phone calls. In order to set and change the selected operating mode, the handset and buttons must be operated as shown in Figure 9. The arrows symbolize the respective changes between the operating modes represented as ellipses, which the phone performs when you carry out the action specified in the arrow. -
Page 24: Conversation Mode Headset
4.1.3 Conversation mode headset The conversation shall be conducted via the microphone and hearing capsule of the headset; the speaker is turned off. 4.1.4 Conversation mode headset open listening The conversation shall be conducted via the microphone and hearing capsule of the headset. People present can listen to the conversation via the turned on loudspeaker. -
Page 25: Headset Mode (W/Wo Open Listening) -> Handset Mode
4.1.6.9 Headset mode (w/wo open listening) -> handset mode To switch from headset mode (with or without open listening) to handset mode, pick up the handset 4.2 Operation, adjusting volumes During signaling an incoming call (ringing) and during the call in one of the conversation modes, you can decrease the respective volume of the mode by pressing the key or increase it by pressing the . -
Page 26: Call Someone
the subscriber number for call partner B and establishes the connection to him after you con- firm the entry by pressing the right arrow key During your call with partner A, another caller reaches you. Acoustically signaled as a call waiting tone and displayed as a waiting call, you have the following options for dealing with the waiting caller. - Page 27 -------------- Dialling --------------- Manual dialling. Enter the subscriber number using the keypad keys. In this operating mode you can enter digits and text characters and correct the entry if necessary. Finally, switch to the desired conversation mode (e.g. handset mode ) or press the right arrow key to start the dialing process.
-
Page 28: Operate Multiple Connections
4.3.3 Operate multiple connections 4.3.3.1 Consultation/Toggle calls/Conference When the query is initiated by pressing the key , call partner A is put on hold and the telephone asks you to enter the subscriber number for your call partner B. Once the entry has been made, the telephone establishes the connection to caller B. -
Page 29: Transfer (Put A Call Through)
4.3.3.2 Transfer (Put a call through) By initiating the transfer by pressing the key , you initially remain connected to your call partner A and the telephone asks you to enter the subscriber number for subscriber B, whom you want to connect to your call partner A. -
Page 30: Use Contacts (Telephone Book)
Indicates the numeric mode of manual input (dial preparation) Input of numeric and text characters. Move the cursor one character to the left. Move the cursor one character to the right or, if the insertion point is after the last character of the entry, finish the entry and start the dialling process for the entry. -
Page 31: Use The Dial Preparation Context Menu
= 2,0 s If you miss T and en- ter a digit, perform one of the corrections i) or ii) alongside. If you do not know the name of the party you want to call, briefly press the key to display all the parties in your contacts (telephone book). -
Page 32: Turn Call Protection On/Off
..Opens the call diversion dialog, sets the Busy selection parameter to On and Divert to - Busy enters the entered subscriber number as a redirect destination in the nameless input parameter below Busy. Finally, press the key to activate call forwarding. Opens the Call diversion dialog, sets the selection parameter No reply to On Divert to –... -
Page 33: Operation, Messages/Displays On The Display
Connection status (pictograms) Unconnected (Missed) Voice connection voice connection, redirected Voice connection, transferred Text message Use the keys to select the caller you want to redial and then press the right arrow key start the dialing process. 4.4 Operation, messages/displays on the display 4.4.1 Pictogram (call protection enabled) This pictogram in the display area indicates that call protection has been activated. -
Page 34: Text Overlay "Attention, No Emergency Calls Possible
4.4.7 Text overlay "Attention, no emergency calls possible! " This text overlay in the display area of the display is an indication that the phone lock is activated. The locked telephone cannot be used for outgoing calls, nor are incoming calls signalled. To unlock the phone, first press the menu key , then enter your PIN in the Authentication query that opens and complete your entry by pressing the menu key... -
Page 35: Menu
5 Menu 5.1 Main Menu Overview □-Call lists... | □-Calls (combined)..| □-Calls (inbound)..| □-Calls (outbound)..| □-Active callbacks..□-Contacts..... | □-Directory input..| □-Search (local)..| □-Search (external)..| □-Search (PBX)..| □-Search (combined)..□-Messages..... | □-New message..| □-Messages(incoming)... -
Page 36: Main Menu - Call Lists
5.1.1 Main menu – Call lists The telephone keeps lists of incoming and outgoing calls and messages in chronological order, the information from which can be transferred to the contact list (telephone book) or used to initiate recall or redial calls. The call lists menu branches into various list views in which the entries from the original lists are compiled into an ordered list. -
Page 37: Main Menu - Contacts
h:mm:ssTalk duration in hours, minutes & seconds or -:--:--, if no connection had been established. Save no. in directory Opens the register input dialog of the contacts list (phone book) and transfers the connection data from the entry of the call list into the corresponding input fields of the register entry. -
Page 38: Settings
After you have made your selections, press the menu key repeatedly until the text message Entry saved appears. Settings Settings dialog for setting the ringer signaling (ringing) to be used when the subscriber specified in the Subscriber input parameter of the contact calls. Ringing: .... -
Page 39: Main Menu - Messages
------------ Key actions ------------ Enter the first letters of the subscriber you are looking for or enter characters * if you want to display all subscribers in the list. Move the cursor one character to the left Move selection to the next contact within the search results Delete characters before cursor. - Page 40 The call forwarding dialog is optional and only visible if the requirements, which are explained below, are met. If visible, the dialog can be used to set up diversions that route incoming calls to other sub- scriber numbers, the destination of the diversion. For example, during your absence, forward all calls to your mobile phone so that you can be reached at any time.
-
Page 41: Presence (Optional)
(optional) 5.1.4.2 Presence Main menu\User settings\Presence The effects of the menu item shown here depend on the PBX used. Dialog availability allows you to easily define your availability and to associate it with the automatic output of a message that is sent to a potential caller to inform them why you are currently unavailable. The determination is made with the selection parameter Activity, which is to be set to the value that justifies the unavailability or to the nameless (empty) value that is to be set if you can be reached again and no message is sent shall be. -
Page 42: Call Waiting: On Def. | On Once | On Mute | Off
Call protection is to be applied to all calls. Every call Call protection is to be applied to external calls. External calls Call protection is to be applied to internal calls. Internal calls Input parameter for entering a text message to the caller. Out of office note Factory settings: Do not disturb: .. -
Page 43: Main Menu - Phone Settings
Factory settings: display phone no.: ..On // Number transmission to the called party is switched on 5.1.5 Main menu – Phone settings 5.1.5.1 Headset: Off | On Main menu\Phone settings\Headset Headset selection parameter determines whether the headset conversation modes are enabled and whether they are activated or deactivated when the corresponding key is pressed. -
Page 44: Lock Phone
5.1.5.3 Lock phone Main menu\Phone settings\Lock phone Action button Lock activates the lock of the phone, which can neither be used for outgoing calls nor will incoming calls be signaled when the lock is activated. To apply the lock, first press the key , after which you will be prompted to enter the PIN of the device in the opened Authentication query. -
Page 45: Main Menu - User List
5.1.6 Main menu – User list Main menu\User list The phone supports registration of up to 6 users; one activated user and up to 5 co-users. Outgoing calls are always made with the identity (subscriber number) of the activated user, while all incoming calls to one of the registered and logged-in users are signaled on the phone (ringing). -
Page 46: Setting The Voip Gatekeeper
VoIP Gatekeeper: ..Open the dialog of the same name to determine the gatekeepers. 5.1.6.3.1 Setting the VoIP Gatekeeper Page 46 Options: ....Open the dialog of the same name to set options. 5.1.6.3.2 Options Page 46 Setting the VoIP Gatekeeper 5.1.6.3.1.1 VoIP Gatekeeper H323, TH323 &... -
Page 47: Set Menu Language And Time Format For Users 1-6
Sweden sweden France france Switzerland swiss Belgium belgium Netherlands netherlands Norway norway Denmark denmark Germany germany Spain spain Finland finland Austria austria Ireland ireland Australia australia New Zealand new zealand Malaysia malaysia Turkey turkey Russia russia South Africa south africa Brasilien brazil 5.1.6.4 Set menu language and time format for users 1-6... -
Page 48: Set Ring Melody For Users 1-6
Menu language Hungarian Magyar Menu Language Thai Thai Time: ......Selection parameter to select the time format to use Date and time display in standard format dd.mm.yy hh:mm Default Date and time display in 24 h format dd.mm.yy hh:mm Date and time display in 12 h format mm/dd hh:mm xm AM/PM After you have made your specifications, press the menu key... -
Page 49: Set Function Keys For Users 1-6
5.1.6.6 Set function keys for users 1-6 Main menu\User list\n UserName\Function keys Navigate to the Function keys item in the user menu of the user whose function keys you want to define. Then press the key to open the Function Keys list, which allows you to assign a selectable function to each of the 16 function keys, which is executed when the corresponding key on the tele- phone is pressed. -
Page 50: Function "Destination No. " For Selected Key F
functional status to change. In the example, successive presses toggle the feature on and off continuously. Functional description for state 1 . Feature is turned off. Functional description for state 2. Feature is turned on. [ 1] [2] ..... Input parameters for optional specification of labeling texts. Text: No effect on the ResistTel IP4/IP162, except for Text , which replaces the... -
Page 51: Park" Function For Selected Key F
Presence: ....Selection parameters to display partner availability Partner availability is not displayed. Partner availability is displayed. Preconditions The PBX used must support the partner function feature, both phones must belong to the same group and the partner function must be activated. "Park"... -
Page 52: Function "Mwi" For Selected Key F
Preconditions The PBX used must support the partner function feature, both telephones must belong to the same group and the partner function must be enabled. Function "MWI" for selected key f Function key f controls the connection to the message center specified in the dialog in order to listen to messages stored there. -
Page 53: Function "Call Group" For Selected Key F
Function "Call group" for selected key f Function key f controls the login/logout of the registered user in a call group of the PBX. In the dialog below, enter the name of the call group. Call group . Selection parameter set to function type Call group Type: State: ....... -
Page 54: Ringing Off" Function For Selected Key F
the other user-specific settings of the new user also take effect. Depending on the chosen activation method Act.next reg. the user specified in Reg.ID or the next user registered in the user list is acti- vated. Activate . Selection parameter set to function type Activate Type: Text: ...... -
Page 55: Function "Display Phone No" For Selected Key F
State: ....... Selection element for setting the functional state Call waiting is switched off, the call is not signalled. Call waiting is activated, the call is signaled visually and acoustically. [1] [2] ..... Input parameters for optional specification of labeling texts. Text: [1] [2] ..... -
Page 56: Headset" Function For Selected Key F
Phone lock is off, phone can be used. Phone lock is turned on, phone cannot be used. [1] [2] ..... Input parameters for the optional definition of labeling texts. Text: [1] [2] ..... Selection parameter for the optional definition of pictograms. Icon: ...... -
Page 57: Function "Delete Reg. " For Selected Key F
Protocol H323, see also 5.1.6.3 on page 45 H323... Name: ......Input parameters for optionally specifying the user name. Number: ..... Input parameter for optionally specifying the user number. Passw.: ...... Input parameter for optional setting of a user password. VoIP gatekeeper: .. -
Page 58: Function "Boolean Obj. " For Selected Key F
Recording is enabled. [1] [2] ..... Input parameters for the optional definition of labeling text. Text: [1] [2] ..... Selection parameter for the optional definition of a pictogram. Icon: [ 2] ......Selection parameter for defining the LED operating mode in state 2 LED: Function "Boolean obj. -
Page 59: Function "Toggle" For Selected Key F
Alternatively, Caller Override | Diversion Override can be defined in order to overwrite the user's default phone number - or set call diversions of the called party. All definitions of how this function works can only be made in the web interface WebIp162\Phone\User- n\Function-Keys! Type: Prep. -
Page 60: Main Menu - Administration
5.1.7 Main menu – Administration This menu contains the administrative information about the network and the registration of the IP phone. 5.1.7.1 Information In this menu you can find the serial number, the firmware version number and the boot code version number. -
Page 61: Stun
5.1.7.4 STUN In the "STUN" menu, presets for STUN and TURN Server can be configured. These are only of interest to the administrator and must not be changed by the operator. User-specific settings must be entered 5.1.6.3 5.1.7.5 Reset configuration It is possible to restore the delivery state of the device. -
Page 62: Specifications
6 Specifications Type Unit Ethernet ports LAN 1 & LAN 2 LAN1 VoIP RJ45 Port 1000 BASE-T with PoE LAN2 RJ45 Port 1000 BASE-T Connection LAN1, PoE (Power over Ethernet) ac- cording to IEEE 802.3af Supply Voltage 37,0 57,0 Supply Stream VersorgungsleistungClass 0 12,95 Connection terminals X100, X700, X702 &... - Page 63 Ambient conditions Degree of protection IP 66 according to EN/IEC 60529 Impact resistance IK 09 according to EN/IEC 50102 Humidity 5% - 85% RH (non-condensing, non-icing) Operating Temperature °C Transport and storage temperature °C Menu Minimum duration of actuation of secondary key function Time limit key secondary function Shift SHIFT_TO...
-
Page 64: Warnings And Safety Instructions
Gewerbeallee 15 - 19 • D-45478 Mülheim an der Ruhr • Web: http://www.fhf.de Phone: +49 – 208 - 8268-0 • Fax: +49 – 208 - 8268-286 • Mail: info@fhf.de Orders: fhf-orders@eaton.de • Requests: fhf-sales@eaton.com Support: fhf-support@eaton.com Operating instructions ResistTel IP4/IP162...
Need help?
Do you have a question about the Malux solutions ResistTel IP4 and is the answer not in the manual?
Questions and answers