
Subscribe to Our Youtube Channel
Related Manuals for Catler SB 810


Summary of Contents for Catler SB 810
- Page 1 STICK BLENDER WITH VACUUM ATTACHMENT Instructions for use STICK BLENDER WITH VACUUM ATTACHMENT SB 810...
- Page 2 STICK BLENDER WITH VACUUM ATTACHMENT...
-
Page 3: Table Of Contents
TABLE OF CONTENTS Catler recommends safety fi rst Know your SB 810 blender Assembly and disassembly of your SB 810 blender Operating your SB 810 blender Care and cleaning Troubleshooting TABLE OF CONTENTS... -
Page 4: Catler Recommends Safety First
CATLER RECOMMENDS SAFETY FIRST We understand the importance of safety and that’s why we put your safety first from the initial design concept to the production itself. Nevertheless, please be careful and follow the instructions below when using this appliance. • This appliance is not to be used by children. - Page 5 • Do not use the appliance if it is not working correctly, if it has been damaged or has been submerged in water. • Always switch off the appliance and unplug it after use. CATLER RECOMMENDS SAFETY FIRST...
- Page 6 Keep your appliance clean. Follow the cleaning instructions provided in this user's manual. • Do not store or use any explosive and/or fl ammable substances inside or in the vicinity of this appliance, such as fl ammable gas sprays. CATLER RECOMMENDS SAFETY FIRST...
- Page 7 Otherwise, there is a risk of personal injury. • Any maintenance other than standard cleaning must be performed at authorised Catler service centre. To avoid the risk of electric shock, do not repair and/or make any adjustments to the appliance by yourselves. •...
-
Page 8: Know Your Sb 810 Blender
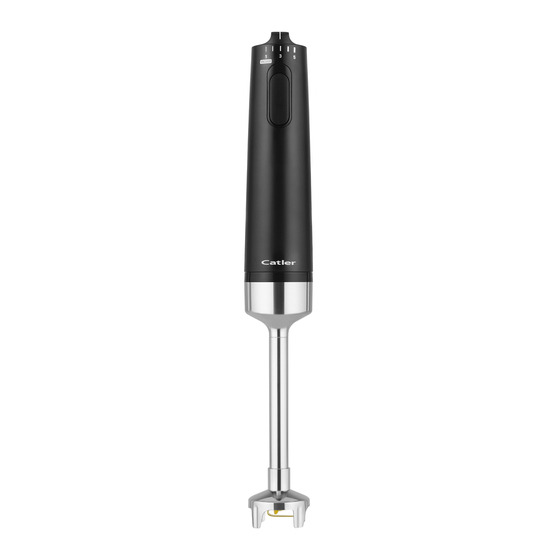
KNOW YOUR SB 810 BLENDER STICK BLENDER 1. Speed control 8. Multifunctional cutting blade - provided with 2. Power on/off switch a layer of titanium in gold colour 3. Motor unit 9. Grinding blade 4. Accessory release button 10. Whipping knife - used mainly for preparation of 5. - Page 9 5. Anti-skid base 3. Chopping knife ACCESSORIES 1. Vacuum attachment 5. Adapter for attaching a whisk or cleaning 2. Mayonnaise making attachment brush to the motor unit (2 pcs in the 3. Whisk package) 4. Cleaning brush KNOW YOUR SB 810 BLENDER...
-
Page 10: Assembly And Disassembly Of Your Sb 810 Blender
ASSEMBLY AND DISASSEMBLY OF YOUR SB 810 BLENDER You can attach selected accessories to the motor unit and use the appliance as: 1. Stick blender - attach the stick attachment. 2. Chopper - attach the motor unit to the chopper lid. - Page 11 Make sure that fi rst press the accessory release button the stick attachment is properly attached and then pull down to remove the stick and does not move. attachment. Click ASSEMBLY AND DISASSEMBLY OF YOUR SB 810 BLENDER...
- Page 12 INSERTING THE BLADE The SB 810 stick blender comes with three blades that allow you to process diff erent types of food quickly and effi ciently. MULTIFUNCTION GRINDING BLADE WHIPPING KNIFE CUTTING BLADE Mincing meat, fi sh, etc. Whipping eggs, making Suitable for mixing, mayonnaise, etc.
- Page 13 During use, the knife walls may deform slightly. This is normal. If you need to spread the walls, use a small screwdriver with a fl at end and insert it into the knife - see the picture below. ASSEMBLY AND DISASSEMBLY OF YOUR SB 810 BLENDER...
- Page 14 Remove the lid and then the chopping knife from the container. WARNING! THE CHOPPING KNIFE IS VERY SHARP. TAKE EXTRA CARE WHILE HANDLING. ONLY USE THE UPPER PART OF THE CHOPPING KNIFE WHEN HANDLING. ASSEMBLY AND DISASSEMBLY OF YOUR SB 810 BLENDER...
- Page 15 Grasp the sure that the whisk is properly attached and adapter with one hand and the whisk with does not move. the other. Push to release the whisk from the adapter. Click ASSEMBLY AND DISASSEMBLY OF YOUR SB 810 BLENDER...
- Page 16 Make sure attachment, fi rst press the accessory release that the vacuum attachment is properly button and then pull down to remove the attached and does not move. vacuum attachment. Click ASSEMBLY AND DISASSEMBLY OF YOUR SB 810 BLENDER...
- Page 17 Grasp the adapter with one hand brush is properly attached and does not and the cleaning brush with the other. move. Push to release the cleaning brush from the adapter. Click ASSEMBLY AND DISASSEMBLY OF YOUR SB 810 BLENDER...
-
Page 18: Operating Your Sb 810 Blender
OPERATING YOUR SB 810 BLENDER BEFORE FIRST USE WARNING! Before fi rst use, remove all packaging ALWAYS BE and advertising labels / stickers from the appliance. Be sure to remove all accessories CAREFUL WHEN from the package material. HANDLING THE Wipe the blender parts with a soft sponge... - Page 19 Whisk Whipping egg whites, cream, whipped Max. 60 seconds cream, etc. Vacuum Vacuuming air from special containers Max. 60 seconds attachment or bags Cleaning tool Cleaning bottles, tall containers, 10– 20 seconds mayonnaise attachments, etc. OPERATING YOUR SB 810 BLENDER...
- Page 20 The narrower end of the cap is suitable for extracting air from the bag Set speed "1" and press hold down the switch. You can use the vacuum attachment for a maximum of 1 minute. OPERATING YOUR SB 810 BLENDER...
-
Page 21: Care And Cleaning
CARE AND CLEANING Before cleaning the appliance, always Wipe the blender parts with a soft sponge disconnect the plug of the power cord from slightly moistened in warm water. Dry with the mains socket and let it to cool down a clean cloth. Never immerse these parts in properly. - Page 22 STORAGE Before storing, make sure that the appliance is clean, dry and completely cooled down. Store it in a well-ventilated dry place out of reach of children and animals. Insert two chopping knives in the storage box. Place the third one on the stick attachment and insert it into the hole in the middle of the storage box - see the picture below.
-
Page 23: Troubleshooting
TROUBLESHOOTING This chapter describes the most common problems you may encounter while using this appliance. If your problem is either not stated here or persists, stop using the appliance, unplug the power cord and contact your authorized service centre. UNDER NO CONDITION SHOULD YOU REPAIR OR DISASSEMBLE THE APPLIANCE YOURSELVES. - Page 24 INSTRUCTIONS AND INFORMATION ON DISPOSING OF USED PACKAGING MATERIALS Dispose of used packaging material at a site designated for waste in your municipality. DISPOSING OF USED ELECTRICAL AND ELECTRONIC EQUIPMENT This symbol on products or original documents means that used electric or electronic products must not be added to ordinary municipal waste.
- Page 25 STICK BLENDER WITH VACUUM ATTACHMENT WWW.CATLER.EU CUSTOMER SERVICE • ZÁKAZNICKÝ SERVIS • ZÁKAZNICKÝ SERVIS • ÜGYFÉLSZOLGÁLAT • SERWIS KLIENTA • ОБСЛУЖИВАНИЕ КЛИЕНТОВ INFO@CATLER.EU...
Need help?
Do you have a question about the SB 810 and is the answer not in the manual?
Questions and answers