Table of Contents
Advertisement
Quick Links
Questions or concerns about your
rice cooker?
Before returning to the store...
Ingenious Design LLC's customer service
experts are happy to help. Call us toll-free at
1-800-248-3002.
Helpful hints can be found online
@ www.AromaCo.com.
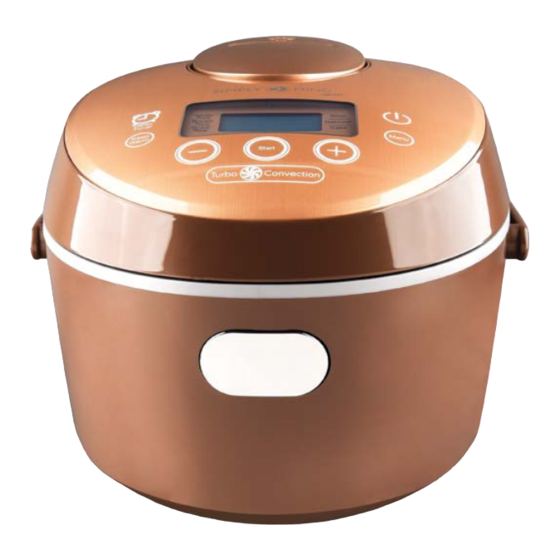
Instruction Manual
Turbo Convection
Rice Cooker & Food Steamer
ARC-6506
Advertisement
Table of Contents

Related Manuals for Aroma SIMPLY MING ARC-6506


Summary of Contents for Aroma SIMPLY MING ARC-6506
- Page 1 Instruction Manual ARC-6506 Turbo Convection Rice Cooker & Food Steamer Questions or concerns about your rice cooker? Before returning to the store... Ingenious Design LLC’s customer service experts are happy to help. Call us toll-free at 1-800-248-3002. Helpful hints can be found online @ www.AromaCo.com.
- Page 2 Or cook delicious and tender homemade roasts, stews and more with the “Slow Cook” function. It sets from 2 to 10 hours to easily prepare all of your family’s slow-cooked favorites. Aroma’s patented Sauté-...
-
Page 3: Important Safeguards
7. Do not operate any appliance with a damaged cord or plug or after the product to malfunction. appliance malfunctions or has been damaged in any manner. Contact Aroma ® customer service for examination, repair or adjustment. -
Page 4: Short Cord Instructions
IMPORTANT SAFEGUARDS DO NOT DRAPE CORD! Short Cord Instructions 1. A short power-supply cord is provided to reduce the risks resulting from becoming entangled in or tripping over a longer cord. 2. Longer extension cords are available and may be used if care is exercised with their use. -
Page 5: Parts Identification
Soup, Steam and Slow Cook functions. The SLOW COOK button sets to slow cook from 2 to 10 hours. Slow Cook Aroma’s patented Sauté-Then-Simmer Technology will sauté foods at ™ Sauté-then- a high heat and automatically switch over to its simmer mode once liquid Simmer™... -
Page 6: Before First Use
BEFORE FIRST USE 1. Read all instructions and important safeguards. 2. Remove all packaging materials and check that all items have been received in good condition. 3. Tear up all plastic bags and dispose of properly as they can pose a risk to children. 4. - Page 7 TO COOK RICE Using the provided measuring cup, Rinse rice to remove excess starch. Fill with water to the line which Place the inner cooking pot into the add rice to the inner cooking pot. Drain. matches the number of cups of rice cooker.
- Page 8 TO COOK RICE (CONT.) Close the lid securely. Connect the power cord to the rice Press the POWER button to turn on Press the MENU button to cycle to cooker and plug into an available the rice cooker. the “White Rice,” “Brown Rice,” or 120V AC outlet.
- Page 9 TO COOK RICE (CONT.) Press the START button to begin The rice cooker will countdown the Once rice is finished, the rice cooker For best results, stir the rice with cooking the rice. The digital display final 12 minutes of cook time. will beep and automatically switch to the serving spatula to distribute any will show a “chasing”...
-
Page 10: Rice/Water Measurement Table
RICE/WATER MEASUREMENT TABLE US cups The provided rice cooker cup is the equivalent to a ¾ standard US cup. UNCOOKED RICE RICE WATER LINE INSIDE POT APPROX. COOKED RICE YIELD COOKING TIMES WHITE RICE: 40-45 Min. 2 Rice Cooker Cups* Line 2 4 Rice Cooker Cups* BROWN RICE: 65-70 Min. - Page 11 TO USE THE DELAY TIMER Follow steps 1 to 7 of “To Cook Rice” beginning on page 5. Press the DELAY TIMER button. Use Once the needed time is selected, Press the START button to set the Once the rice begins cooking, the the + or –...
- Page 12 TO USE THE DELAY TIMER (CONT.) The rice cooker will countdown the Once rice is finished, the rice cooker For best results, stir the rice with When finished serving, turn the rice cooker off by pressing CANCEL and final 12 minutes of cook time. will beep and automatically switch to the serving spatula to distribute any then POWER. “Keep-Warm.” The digital display will remaining moisture.
-
Page 13: To Slow Cook
TO SLOW COOK Add food to be slow cooked to the Place the inner cooking pot into the Close the lid securely. Plug the power cord into an inner cooking pot. slow cooker. available 120V AC outlet. • If too little water is added, the rice cooker will stop prematurely. - Page 14 TO SLOW COOK (CONT.) Use the + or – buttons to set the Press the START button to begin The rice cooker will begin to slow Once the selected time has passed, time. These buttons will adjust slow cooking at the selected time. cook.
- Page 15 TO STEAM Using the provided measuring cup, Place the inner cooking pot into the Place food to be steamed onto the Place the steam tray into the rice add 3 cups of water to the inner rice cooker. steam tray. cooker.
- Page 16 TO STEAM (CONT.) Use the + or – buttons to set the time. Press the START button to begin Once the water reaches a boil, the Once the selected time has passed, These buttons will adjust cooking steaming at the selected time. digital display will count down in the rice cooker will beep and switch time in one minute increments...
- Page 17 TO STEAM FOOD & SIMULTANEOUSLY COOK RICE To steam while cooking rice, begin cooking rice by following steps 1 to 9 of “To Cook Rice” on page 5. Place food to be steamed onto the Using caution to avoid escaping Place steam tray into the rice Close the lid securely.
- Page 18 TO STEAM FOOD & SIMULTANEOUSLY COOK RICE (CONT.) Using caution, open the lid to check Check steamed food for doneness. Allow the rice cooker to continue Once the selected time has passed, food for doneness. If finished steaming, remove food cooking rice. the rice cooker will beep and switch immediately to avoid overcooking.
- Page 19 STEAMING TABLES When steaming, Aroma recommends using 2 cups of water with the provided measuring cup. ® Meat Steaming Table Vegetable Steaming Table SAFE INTERNAL MEAT STEAMING TIME VEGETABLE STEAMING TIME TEMPERATURE Asparagus 9-11 Minutes Fish 25 Min. 140°F Broccoli...
- Page 20 TO USE SAUTÉ-THEN-SIMMER ™ Place the inner cooking pot into the Plug the power cord into an available Press the POWER button to turn on Press the MENU button to cycle to rice cooker. 120V AC outlet. the rice cooker. the Saute-then-Simmer™...
- Page 21 TO USE SAUTÉ-THEN-SIMMER (CONT.) ™ Add other called for ingredients and Close the lid securely and allow the After a few minutes, the rice cooker Once the meal has cooked, the rice liquid to the inner cooking pot. rice cooker to cook. will automatically switch to its cooker will beep and automatically “Simmer”...
- Page 22 TO USE THE SOUP FUNCTION Add ingredients to the inner cooking Place the inner cooking pot into the Close the lid securely. Plug the power cord into an available pot. rice cooker. 120V AC outlet. • Before placing the inner cooking pot into the rice cooker, check that the cooking pot is dry and free of debris.
- Page 23 TO USE THE SOUP FUNCTION (CONT.) Use the + or – buttons to set the time. Once food is finished, the rice cooker Press the START button to begin The rice cooker will count down the These buttons will adjust cooking will beep and automatically switch to cooking on the selected function.
- Page 24 TO USE THE OATMEAL FUNCTION Follow packaging instructions for Place the inner cooking pot into the Close the lid securely. Plug the power cord into an available suggested oatmeal/water ratio, rice cooker. 120V AC outlet. add oatmeal and water to the inner cooking pot.
- Page 25 TO USE THE OATMEAL FUNCTION (CONT.) Press the MENU button to cycle to the Press the POWER button to turn the Press the START button to begin cooking The rice cooker will countdown the “Oatmeal” function. rice cooker on. on the selected function. The digital final minutes of cook time starting at display will show a “chasing”...
- Page 26 TO USE THE CAKE FUNCTION Follow instructions on cake mix Place the inner cooking pot into the Close the lid securely. Plug the power cord into an available packaging or recipe to mix liquid rice cooker. 120V AC wall outlet. ingredients and cake mix.
- Page 27 TO USE THE CAKE FUNCTION (CONT.) Once cake is finished, the rice cooker Remove the cake carefully by Press the START button to begin The rice cooker will countdown the will beep and automatically switch inverting the inner pot onto a flat dish cooking on the selected function. final minutes of cook time starting at The digital display will show a 10 minutes.
- Page 28 TO CLEAN Remove the steam vent. Remove the Inner Lid by pressing Remove the Convection Fan. Hand wash the inner cooking pot upwards on the tab buttons. and all accessories or wash them in the top rack of the dishwasher. NOTE •...
-
Page 29: Troubleshooting
TROUBLESHOOTING Because rice varieties may vary in their make-up, results may differ. Below are some troubleshooting tips to help you achieve the desired consistency. If your rice is dry or hard/chewy when the rice cooker switches to “Keep-Warm” mode, additional water and cooking time will soften the rice. -
Page 30: Mushroom Risotto
RECIPES Mushroom Risotto Ingredients 2 tblsp olive oil 3 cups chicken stock Set the rice cooker to the Sauté-Then-Simmer (STS ) function ™ ™ 1 cup sliced mushrooms of ½ cup heavy cream and add olive oil, garlic, mushrooms and onion. Sauté until your choice ½... -
Page 31: Chicken Noodle Soup
RECIPES (CONT.) Chicken Noodle Soup Ingredients 2 lbs chicken thighs Add olive oil, onions and celery to the inner pot and place it inside the rice cooker. Select yellow onion, cut into small quarters the Sauté-Then-Simmer (STS ) function and cook until fragrant or about ten minutes. ™... - Page 32 LIMITED ONE-YEAR WARRANTY contact Ingenious Designs LLC customer service toll-free at: 1-800-248-3002. Congratulations on your purchase of the Simply Ming by Aroma Turbo Helpful hints can be found online at www.AromaCo.com Convection, 16 Cup Rice Cooker & Food Steamer. This product is...
Need help?
Do you have a question about the SIMPLY MING ARC-6506 and is the answer not in the manual?
Questions and answers