Abbott FreeStyle Libre 3 User Manual
Hide thumbs
Also See for FreeStyle Libre 3:
- User manual (141 pages) ,
- Quick start manual (39 pages) ,
- Getting started (31 pages)

Related Manuals for Abbott FreeStyle Libre 3


Summary of Contents for Abbott FreeStyle Libre 3
- Page 1 DOC44383_rev-C 1:14pm 22-SEP-2021 User's Manual | User's Manual Language 1 | Language 2...
- Page 2 DOC44383_rev-C 1:14pm 22-SEP-2021...
- Page 3 WARNING: Before you use the FreeStyle Libre 3 System, review all the product instructions and the Interactive Tutorial. The Quick Reference Guide and Interactive Tutorial give you quick access to important aspects and limitations of the System. The User’s Manual includes all safety information and instructions for use.
- Page 4 Use of the Sensor with devices, apps, and software that are not listed may cause inaccurate glucose readings. FreeStyle Libre 3 app is only compatible with certain mobile devices and operating systems. Please check www.FreeStyleLibre.com for more information about device compatibility before upgrading your phone or its operating system.
- Page 5 DOC44383_rev-C 1:14pm 22-SEP-2021 Use your blood glucose meter to make diabetes treatment decisions when you see the symbol during the first 12 hours of wearing a Sensor, if your Sensor glucose reading does not match how you feel, or if the reading does not include a number.
- Page 6 Some operating system features may impact your ability to receive alarms. For example, if you use the iOS Screen Time feature, add the FreeStyle Libre 3 app to the list of Always Allowed apps to ensure that you receive alarms.
- Page 7 DOC44383_rev-C 1:14pm 22-SEP-2021 performance of the System. Performance of the System when used with other implanted medical devices, such as pacemakers, has not been evaluated. What should you know about wearing a Sensor: Wash application site on the back of your upper arm using a plain soap, dry, and then clean with an alcohol wipe.
- Page 8 Do NOT use if Sensor Kit contents are past expiration date. What to know about the System: The FreeStyle Libre 3 System is intended for use by a single person. It must not be used by more than one person due to the risk of misinterpreting glucose information.
- Page 9 DOC44383_rev-C 1:14pm 22-SEP-2021 proceeding. Carefully preparing the site according to these instructions will help the Sensor stay on your body for the full 14 day wear period and help prevent it from falling off early. Clean hands prior to Sensor handling/insertion to help prevent infection. Change the application site for the next Sensor application to prevent discomfort or skin irritation.
- Page 10 DOC44383_rev-C 1:14pm 22-SEP-2021 you feel, perform a blood glucose test on your finger to confirm your glucose. If the problem continues, remove the current Sensor, apply a new one, and contact Customer Service. Customer Service is available at 1-855-632-8658 7 Days a Week from 8AM to 8PM Eastern Standard Time.
- Page 11 DOC44383_rev-C 1:14pm 22-SEP-2021 wearing a Sensor, confirm Sensor glucose readings with a blood glucose test before making treatment decisions Add/edit notes Food note Insulin (Rapid or Long-acting) note Alarm Exercise note Time change Main menu Multiple/Custom notes Share report Additional information Calendar Sensor too cold...
- Page 12 Sensor too hot Getting to Know Your System The FreeStyle Libre 3 System (“System”) has two main parts: a disposable Sensor and mobile App to wirelessly receive and display glucose readings from the Sensor. When they’re in range, the Sensor and app automatically communicate to give you glucose alarms.
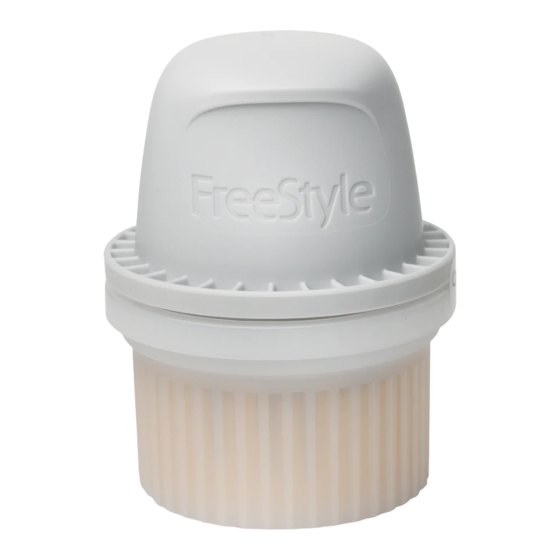
- Page 13 DOC44383_rev-C 1:14pm 22-SEP-2021 Sensor Kit The FreeStyle Libre 3 Sensor Kit includes: Sensor Applicator Alcohol wipe Product insert The Sensor (only visible after applied) measures and stores glucose readings when worn on your body. By following the instructions, you use the Sensor Applicator to apply the Sensor on the back of your upper arm.
- Page 14 App, so you will not receive alarms or be able to check your glucose. You are responsible for properly securing and managing your phone. If you suspect an adverse cybersecurity event related to FreeStyle Libre 3, contact Customer Service.
- Page 15 DOC44383_rev-C 1:14pm 22-SEP-2021 FreeStyle Libre 3 is not intended for use on a phone that has been altered or customized to remove, replace or circumvent the manufacturer’s approved configuration or use restriction, or that otherwise violates the manufacturer’s warranty. Home Screen The App Home Screen displays your current glucose, glucose trend arrow, and glucose graph.
- Page 16 Setting up Your System for the First Time Note: FreeStyle Libre 3 app is only compatible with certain mobile devices and operating systems. Please check www.FreeStyleLibre.com for more information...
- Page 17 DOC44383_rev-C 1:14pm 22-SEP-2021 1. Check that your phone is connected to a network (WiFi or cellular). You can then install FreeStyle Libre 3 app from the App Store. Tap the App icon to open the App. Note: You only need to be connected to a network for setup, using LibreView, and sharing with other authorized apps through the Connected Apps menu option within the FreeStyle Libre 3 app.
- Page 18 DOC44383_rev-C 1:14pm 22-SEP-2021 1. Apply Sensors only on the back of your upper arm. If placed in other areas, the Sensor may not function properly and could give inaccurate readings. Avoid areas with scars, moles, stretch marks or lumps. Select an area of skin that generally stays flat during your normal daily activities (no bending or folding).
- Page 19 DOC44383_rev-C 1:14pm 22-SEP-2021 Note: The area MUST be clean and dry following these instructions, or the Sensor may not stay on for the full 14 day wear period. 3. Unscrew the cap from the Sensor Applicator and set the cap aside. CAUTION: Do NOT use if the Sensor Kit package or Sensor Applicator appear to be damaged or tamper label indicates Sensor Applicator has already been...
- Page 20 DOC44383_rev-C 1:14pm 22-SEP-2021 4. Place the Sensor Applicator over the prepared site and push down firmly to apply the Sensor to your body. CAUTION: Do NOT push down on Sensor Applicator until placed over prepared site to prevent unintended results or injury.
- Page 21 DOC44383_rev-C 1:14pm 22-SEP-2021 5. Gently pull the Sensor Applicator away from your body. The Sensor should now be attached to your skin. Note: Applying the Sensor may cause bruising or bleeding. If there is bleeding that does not stop, remove the Sensor, and contact your health care professional.
- Page 22 DOC44383_rev-C 1:14pm 22-SEP-2021 6. Make sure Sensor is secure after application. Put the cap back on the Sensor Applicator. Discard the used Sensor Applicator according to local regulations. Note: You can tap Help in the Main Menu to access an in-app tutorial on applying a Sensor.
- Page 23 DOC44383_rev-C 1:14pm 22-SEP-2021 Starting Your Sensor IMPORTANT: The App requires that your phone has date and time enabled to set automatically. You can check this in your phone settings. Manual changes to your phone’s time and date setting can lead to incorrect time stamp or inability to use the App.
- Page 24 DOC44383_rev-C 1:14pm 22-SEP-2021 and orientation, other factors can affect NFC performance. For example, a bulky or metallic case can interfere with the NFC signal. Keep in mind that the ease of scanning a Sensor may vary between phone models. For more information on device compatibility, access the Mobile Device & OS Compatibility guide at www.FreeStyleLibre.com.
- Page 25 DOC44383_rev-C 1:14pm 22-SEP-2021 Note: If you need help, tap HOW TO SCAN A SENSOR to view an in-app tutorial. You can also access this later by going to the Main Menu and then tapping Help. If your Sensor is not successfully scanned, you may receive a Scan Error message.
- Page 26 DOC44383_rev-C 1:14pm 22-SEP-2021 Current Glucose – Your most recent glucose value Glucose Trend Arrow – Direction your glucose is going Glucose Graph – Graph of your current and stored glucose readings Note: The graph displays glucose readings above 350 mg/dL as 350 mg/dL. For consecutive readings above 350 mg/dL, a line is displayed at 350 mg/dL.
- Page 27 If you are not receiving glucose readings you will not receive Low or High Glucose Alarms. In order for the FreeStyle Libre 3 app to share data with other connected apps, please do the following: Enable WiFi or cellular service.
- Page 28 DOC44383_rev-C 1:14pm 22-SEP-2021 Glucose is falling quickly (more than 2 mg/dL per minute Messages Below are messages you may see with your glucose readings. LO | HI: If LO appears, your reading is lower than 40 mg/dL. If HI appears, your reading is higher than 400 mg/dL.
- Page 29 DOC44383_rev-C 1:14pm 22-SEP-2021 Glucose Going Low | Glucose Going High: If your glucose is projected to be higher than 250 mg/dL or lower than 70 mg/dL within 15 minutes, you will see a message on the screen. You can tap the symbol for more information and set a reminder to check your glucose.
- Page 30 DOC44383_rev-C 1:14pm 22-SEP-2021 During the first 12 hours of Sensor wear the symbol will display, and you cannot use Sensor values to make treatment decisions during this time. Confirm Sensor glucose readings with a blood glucose test before making treatment decisions during the first 12 hours of Sensor wear when you see the symbol.
- Page 31 DOC44383_rev-C 1:14pm 22-SEP-2021 Do a blood glucose test when you see the symbol during the first 12 hours of wearing a Sensor or the Sensor glucose reading does not include a Current Glucose number. Making Treatment Decisions – Getting Started Before you start using the System for treatment decisions, make sure you have a good understanding of how the System works for your body.
- Page 32 DOC44383_rev-C 1:14pm 22-SEP-2021 more you check readings from the System with a blood glucose meter, the better you will understand how the System works for you. Work with your health care professional to put together a plan for managing your diabetes that includes when to use the System information for making treatment decisions.
- Page 33 DOC44383_rev-C 1:14pm 22-SEP-2021 your blood glucose is changing quickly. If your glucose readings and alarms from the System do not match your symptoms or expectations, use a fingerstick blood glucose value from a blood glucose meter to make diabetes treatment decisions.
- Page 34 DOC44383_rev-C 1:14pm 22-SEP-2021 When there is no Current Glucose number, such as when you receive an error message or a LO or HI result, you don’t have enough information to make a treatment decision. Do a blood glucose test and treat based on that result. When you see the symbol during the first 12 hours of wearing a Sensor During the first 12 hours of Sensor wear the...
- Page 35 DOC44383_rev-C 1:14pm 22-SEP-2021 the right treatment decision may be to do nothing and check again later. Don’t take a correction dose within 2 hours of your meal dose. This may result in “insulin stacking” and low glucose. Using Your Glucose Reading to Make a Treatment Decision After you check your glucose, use all of the information on the screen when deciding what to do or what treatment decision to make.
- Page 36 DOC44383_rev-C 1:14pm 22-SEP-2021 The below provides some information on how you can factor the Glucose Trend Arrow into your treatment decisions. Remember that you should never make a treatment decision based on the Glucose Trend Arrow alone. Treatment Decision Considerations for Glucose Trend Arrow: Low Glucose (<...
- Page 37 DOC44383_rev-C 1:14pm 22-SEP-2021 have taken insulin recently. If you have taken insulin recently, do nothing and check again later. Avoid “insulin stacking”. Treatment Decision Considerations for Glucose Trend Arrow: Low Glucose (< 70 mg/dL): Treat low glucose according to your health care professional’s recommendation.
- Page 38 DOC44383_rev-C 1:14pm 22-SEP-2021 Treatment Decision Considerations for Glucose Trend Arrow: Low Glucose (< 70 mg/dL): Treat low glucose according to your health care professional’s recommendation. Glucose in Target Range: If you are about to eat, take insulin to cover your meal. Consider taking a little less since glucose is falling quickly.
- Page 39 DOC44383_rev-C 1:14pm 22-SEP-2021 What it means When you wake-up on your first day of wearing a Sensor, your current glucose is 110 mg/dL. There is also the symbol on the screen. During the first 12 hours of Sensor wear the symbol will display, and you cannot...
- Page 40 DOC44383_rev-C 1:14pm 22-SEP-2021 use Sensor values to make treatment decisions during this time. Confirm Sensor glucose readings with a blood glucose test before making treatment decisions during the first 12 hours of Sensor wear when you see the symbol. What you see - Before breakfast...
- Page 41 DOC44383_rev-C 1:14pm 22-SEP-2021 What it means Before breakfast, your current glucose is 115 mg/dL. The graph shows that your glucose is going up and so does the trend arrow Consider what might be causing your glucose to go up and what you might do to...
- Page 42 DOC44383_rev-C 1:14pm 22-SEP-2021 prevent a high glucose. For example: How much insulin should you take before your meal? Since you see , should you consider taking a little more insulin? What you see - Before lunch...
- Page 43 DOC44383_rev-C 1:14pm 22-SEP-2021 What it means When you checked your glucose before lunch, it was 90 mg/dL and rising. Before eating lunch, you took enough insulin to cover the meal and a little more since your trend arrow was ...
- Page 44 DOC44383_rev-C 1:14pm 22-SEP-2021 What you see - After lunch What it means 90 minutes later, your current glucose is 225 mg/dL. The graph shows that your glucose is still going up, and so does the trend arrow...
- Page 45 DOC44383_rev-C 1:14pm 22-SEP-2021 Don’t take a correction dose within 2 hours of your meal dose. This may result in “insulin stacking” and low glucose. Consider what might be causing your glucose to go up and what you might do to prevent a high glucose.
- Page 46 DOC44383_rev-C 1:14pm 22-SEP-2021 What it means Between meals, your current glucose is 72 mg/dL. The Glucose Going Low message tells you that your glucose is projected to be low within 15 minutes. Think about what might be causing your glucose to go low. Consider eating a...
- Page 47 DOC44383_rev-C 1:14pm 22-SEP-2021 snack to stay within target. Avoid taking insulin as this can cause low glucose. What you see - After exercising...
- Page 48 DOC44383_rev-C 1:14pm 22-SEP-2021 What it means After exercising, you are feeling shaky, sweaty, and dizzy – symptoms you generally get when you have low glucose. But, your current glucose is 204 mg/dL. Anytime you get a reading that doesn’t match how you feel, do a blood glucose test.
- Page 49 DOC44383_rev-C 1:14pm 22-SEP-2021 What it means Before dinner, your current glucose is 134 mg/dL. The graph shows that your glucose is going down and so does the trend arrow Consider what might be causing your glucose to go down and what you might do...
- Page 50 DOC44383_rev-C 1:14pm 22-SEP-2021 to prevent a low glucose. For example: How much insulin should you take to cover your meal? Since you see , should you think about taking a little less insulin? Other considerations Deciding how much rapid-acting insulin to take for different meals and situations can be difficult.
- Page 51 How do you adjust your insulin doses for illness? App Alarms FreeStyle Libre 3 App includes several types of alarms. Optional Glucose Alarms: Low Glucose and High Glucose Alarms are turned on by default, but can be turned off or customized to alarm at different glucose levels.
- Page 52 DOC44383_rev-C 1:14pm 22-SEP-2021 it can be customized based on your preference. The Override Do Not Disturb setting is turned on by default for this alarm, so you will receive a visual and audio notification regardless of your phone’s sound or Do Not Disturb settings. Note: Turn OFF Override Do Not Disturb if you want the Optional Signal Loss Alarm volume to follow your phone's volume setting, and be silent when Do Not...
- Page 53 Some operating system features may impact your ability to receive alarms. For example, if you use the iOS Screen Time feature, add FreeStyle Libre 3 to the list of always allowed apps to ensure that you receive alarms.
- Page 54 DOC44383_rev-C 1:14pm 22-SEP-2021 glucose alarms, and you may miss detecting low glucose or high glucose episodes. You will see the symbol on the screen when the Sensor is not communicating with the App. If the Signal Loss Alarm is on, you will be notified if your Sensor has not communicated with the App for 20 minutes.
- Page 55 DOC44383_rev-C 1:14pm 22-SEP-2021 enabled. Visual and Vibratory notification for the alarm may be presented based on your phone's settings. You must keep Allow Critical Alerts ON for the App in the phone settings. 4. Tap the back button to return to the main alarm settings screen. High Glucose Alarm 1.
- Page 56 DOC44383_rev-C 1:14pm 22-SEP-2021 4. Tap the back button to return to the main alarm settings screen. Signal Loss Alarm 1. If the alarm is on, you will be notified when your Sensor has not communicated with the App for 20 minutes and you are not receiving glucose readings, Urgent Low, Low or High Glucose Alarms.
- Page 57 DOC44383_rev-C 1:14pm 22-SEP-2021 Using App Alarms Urgent Low Glucose Alarm: Notifies you if your glucose drops below 55 mg/dL. Open the App or tap the Dismiss button to dismiss the alarm. You will receive the Urgent Low Glucose Alarm every 30 minutes until your glucose reading is at or above 55 mg/dL.
- Page 58 DOC44383_rev-C 1:14pm 22-SEP-2021 Signal Loss Alarm: Notifies you if your Sensor has not communicated with the App for 20 minutes and you are not receiving glucose readings or Urgent Low, Low, or High Glucose Alarms. Signal loss could be caused by the Sensor being too far away from your phone (over 33 feet) or another issue such as an error or problem with your Sensor.
- Page 59 DOC44383_rev-C 1:14pm 22-SEP-2021 App Stopped Alarm: Notifies you if your App has been closed. The App must be running in the background to receive alarms. Tap the alarm to re-open the App. Adding Notes Notes can be saved with your glucose readings to help you track food, insulin, and exercise.
- Page 60 DOC44383_rev-C 1:14pm 22-SEP-2021 Insulin (Rapid or Long-acting) Exercise Food + insulin Multiple/Custom notes – indicates different types of notes entered together or notes entered within a short period of time. A numbered badge next to the symbol indicates the number of notes.
- Page 61 DOC44383_rev-C 1:14pm 22-SEP-2021 main Logbook screen. Tap the symbol if you want to add a note on a different date. Other History Options Daily Patterns: A graph showing the pattern and variability of your Sensor glucose readings over a typical day. The thick black line shows the median (midpoint) of your glucose readings.
- Page 62 DOC44383_rev-C 1:14pm 22-SEP-2021 readings above 350 mg/dL, a line is displayed at 350 mg/dL. symbol may appear indicating a time change. Gaps in the graph may result or glucose readings may be hidden. Sensor Usage: Information about how often you viewed your Sensor glucose readings in the App and how much information has been captured from your Sensor.
- Page 63 DOC44383_rev-C 1:14pm 22-SEP-2021 2. Discard the used Sensor following directions from your health care professional. See Maintenance and Disposal. When you are ready to apply a new Sensor, follow the instructions in Applying Your Sensor Starting Your Sensor. If you removed your last Sensor before it ended, go to "Start New Sensor"...
- Page 64 DOC44383_rev-C 1:14pm 22-SEP-2021 CAUTION: If the Sensor is becoming loose or if the Sensor tip is coming out of your skin, you may get no readings or unreliable readings, which may not match how you feel. Check to make sure your Sensor has not come loose. If it has come loose, remove it, apply a new one, and contact Customer Service.
- Page 65 DOC44383_rev-C 1:14pm 22-SEP-2021 Note: If you would like the reminder to repeat, tap the slider to the right. You can also select which days you would like to receive the reminder. 4. Tap DONE. You will now see your reminder on the list along with the time you...
- Page 66 DOC44383_rev-C 1:14pm 22-SEP-2021 will receive it. Note: There is one default reminder to help you remember to check your glucose. This Check Glucose reminder can be changed or disabled but cannot be deleted. To turn off a reminder, tap the slider to the left. To delete a reminder, swipe the reminder and tap the symbol.
- Page 67 DOC44383_rev-C 1:14pm 22-SEP-2021 you do choose to go through a full-body scanner, you must remove your Sensor. The Sensor can be exposed to common electrostatic (ESD) and electromagnetic interference (EMI), including airport metal detectors. Note: Changing the time and date affects the graphs and statistics. The ...
- Page 68 DOC44383_rev-C 1:14pm 22-SEP-2021 View in-app tutorials, access the product labeling, and review the App’s legal information. You can also view the Event Log, which is a list of events recorded by the App. This may be used by Customer Service to help troubleshoot. About: View App software version and other information.
- Page 69 DOC44383_rev-C 1:14pm 22-SEP-2021 Problem: The Sensor is not sticking to your skin. What it may mean: The site is not free of dirt, oil, hair, or sweat. What to do: 1. Remove the Sensor. 2. Clean the site with a plain soap and water and then clean with an alcohol wipe. 3.
- Page 70 DOC44383_rev-C 1:14pm 22-SEP-2021 What to do: Your App can only be used with a Sensor started with the same LibreView account. If you're unable to use the Sensor with your App, check your glucose with the device that started it. Or, apply and start a new Sensor. Display: Enable Bluetooth What it may mean: The Bluetooth setting on your phone is turned off.
- Page 71 DOC44383_rev-C 1:14pm 22-SEP-2021 Display: Sensor ready in X minutes What it may mean: The Sensor is unable to provide a glucose reading during the start-up period. What do to: Check again after the duration specified on the screen. Display: Replace Sensor What it may mean: The App has detected a problem with your Sensor.
- Page 72 DOC44383_rev-C 1:14pm 22-SEP-2021 then ON again. Display: Bluetooth Off What it may mean: Bluetooth is turned off. What to do: Go to your phone settings and enable Bluetooth. Display: Sensor Error What it may mean: The Sensor is unable to provide a glucose reading. Tap the symbol for more information.
- Page 73 DOC44383_rev-C 1:14pm 22-SEP-2021 What it may mean: Access to Critical Alerts was disabled. What to do: Follow the instructions on the screen to allow permission for Critical Alerts. You will not be able to use the App to check your glucose or start a new Sensor until the permission is allowed.
- Page 74 What to do: Make sure the App is always open in the background. Customer Service Customer Service is available to answer any questions you may have about your FreeStyle Libre 3 System. Customer Service is available at 1-855-632-8658 7 Days a...
- Page 75 DOC44383_rev-C 1:14pm 22-SEP-2021 Week from 8AM to 8PM Eastern Standard Time. A printed copy of this User's Manual is available upon request. System Specifications Sensor glucose assay method: Amperometric electrochemical sensor Sensor glucose reading range: 40 to 400 mg/dL Sensor size: 2.9 mm height and 21 mm diameter Sensor weight: 1 gram Sensor power source: One silver oxide battery Sensor data: Up to 14 days...
- Page 76 Quality of Service (QoS): QoS for the FreeStyle Libre 3 App and Sensor wireless communications using BLE is assured at regular 1- minute intervals. If connection is lost between the App and Sensor for 5-minutes, the App will display an indication of “Signal Loss”...
- Page 77 DOC44383_rev-C 1:14pm 22-SEP-2021 Use-by date Catalog number Serial number Keep Dry Non-ionizing radiation Caution Sterilized by irradiation Humidity limitation Do not use if package is damaged Not made with natural rubber latex CAUTION: Federal law restricts this device to sale by or on the order of a physician.
- Page 78 Overview of Clinical Studies Three studies were conducted in the United States (US) to evaluate the performance, safety, effectiveness, and precision of the FreeStyle Libre 3 Continuous Glucose Monitoring System (System). One study included adults (Study 1), one study included pediatrics (Study 2) and one study included both adults and pediatrics (Study 3).
- Page 79 DOC44383_rev-C 1:14pm 22-SEP-2021 System over the range that the System measures glucose (40 – 400 mg/dL). 48 subjects were analyzed during the beginning of the Sensor wear period (day 1 or 2), 50 subjects were analyzed during the early middle period (day 7 or 8), 51 subjects were analyzed during the late middle period (day 9 or 12), and 51 subjects were analyzed during the end period (day 13 or 14).
- Page 80 DOC44383_rev-C 1:14pm 22-SEP-2021 * No YSI measurements were obtained for children ages 4-5; results displayed are from CGM-SMBG matched paired measurements. The accuracy of different CGM glucose ranges versus YSI reference was assessed by calculating the percentage of System readings that were within 15%, 20%, and 40% for reference values ≥...
- Page 81 DOC44383_rev-C 1:14pm 22-SEP-2021 * Includes children 6-17 years of age. No YSI measurements were obtained for children 4-5 years of age. † System range is 40-400 mg/dL. Table 1d: Accuracy to YSI within YSI Glucose Ranges (Adult; n=200) Table 1e: Accuracy to YSI within YSI Glucose Ranges (Pediatric*; n=168) * Includes children 6-17 years of age.
- Page 82 DOC44383_rev-C 1:14pm 22-SEP-2021 reference glucose when CGM reads ‘LO’. For example, in the Adult subject group, when CGM reading was ‘LO’, YSI glucose values were less than 50 mg/dL 20.0% of the time, less than 60 mg/dL 40.0% of the time, less than 70 mg/dL 40.0% of the time, less than 80 mg/dL 80.0% of the time, and equal to or above 80 mg/dL 20.0% of the time.
- Page 83 DOC44383_rev-C 1:14pm 22-SEP-2021 * Includes children 6-17 years of age. No YSI measurements were obtained for children 4-5 years of age. Concurrence of System and Reference (CGM vs. YSI) The percentage of concurring glucose values (CGM vs. YSI) in each glucose reference range is presented for each CGM range in Tables 3a and 3b and for each YSI range in Tables 3c and 3d.
- Page 84 DOC44383_rev-C 1:14pm 22-SEP-2021 * Includes children 6-17 years of age. No YSI measurements were obtained for children 4-5 years of age. † Levels out of System dynamic range. Table 3c: Concurrence Analysis by YSI Glucose Level (Adult; n=200) † Levels out of System dynamic range. Table 3d: Concurrence Analysis by YSI Glucose Level (Pediatric*;...
- Page 85 DOC44383_rev-C 1:14pm 22-SEP-2021 * Includes children 6-17 years of age. No YSI measurements were obtained for children 4-5 years of age. † Levels out of System dynamic range. Glucose Rate of Change Accuracy The System’s glucose rate of change (ROC) accuracy, as assessed by concurrence analysis, is presented in Tables 4a and 4b.
- Page 86 DOC44383_rev-C 1:14pm 22-SEP-2021 Table 4b: Concurrence Analysis by Glucose Rate of Change (Pediatric*; n=168) * Includes children 6-17 years of age. No YSI measurements were obtained for children 4-5 years of age. Alarm Performance The tables in this section show the accuracy of the System’s Low and High Glucose Alarms.
- Page 87 DOC44383_rev-C 1:14pm 22-SEP-2021 Definition: Percentage of time blood glucose was below the alarm level and the alarm issued within 15 minutes before or after the glucose event. Missed Detection Rate Tells you: When you were low, did you miss a low glucose alarm? Definition: Percentage of time blood glucose was below the alarm level and the alarm didn’t issue within 15 minutes before or after the glucose event.
- Page 88 DOC44383_rev-C 1:14pm 22-SEP-2021 * Includes children 6-17 years of age. No YSI measurements were obtained for children 4-5 years of age. High Glucose Alarm Performance Tables 5c and 5d display the percentages for these parameters: True Alarm Rate Tells you: When you got a high glucose alarm, were you actually high? Definition: Percentage of time the alarm issued and blood glucose was above the alarm level within 15 minutes before or after the alarm.
- Page 89 DOC44383_rev-C 1:14pm 22-SEP-2021 For example, the Adult subject group found that for a High Glucose alarm level set to 200 mg/dL: 98.7% of the time a high glucose alarm was received when blood glucose was indeed above the alarm level but 1.3% of the time a high glucose alarm was received when blood glucose wasn’t actually above the alarm level.
- Page 90 DOC44383_rev-C 1:14pm 22-SEP-2021 Sensor Accuracy Over Time The Sensor can be worn for up to 14 days. The percentage of System readings within YSI values and the Mean Absolute Relative Difference (MARD) is presented for the following different wear periods in Tables 6a and 6b: Beginning (Adult: 198 Subjects, Day 1, 2 or 3;...
- Page 91 DOC44383_rev-C 1:14pm 22-SEP-2021 day of use. 15 Sensors (14.9%) had “early Sensor shut-off” where the Sensor algorithm detected that the Sensors did not function as intended and presented the user with a Replace Sensor message. Table 7 displays the data for each day in the wear duration for Study 3.
- Page 92 DOC44383_rev-C 1:14pm 22-SEP-2021 Precision Precision of the System was evaluated by comparing the results from two separate Sensors worn on the same subject at the same time. Table 9 provides data from 100 subjects in Study 3. For adults, the paired absolute relative difference (PARD) between the two Sensors was 5.9% with coefficient of variation (CV) of 4.2%.
- Page 93 DOC44383_rev-C 1:14pm 22-SEP-2021 instance of mild pain. In Study 2, there were 8 instances of erythema (4 “well- defined redness”, and 4 “slight pink”), 5 instances of edema (3 slight edema, 2 slight edema with defined edges), 2 instances of mild bleeding, one instance of mild induration and one instance of mild rash.
- Page 94 EMC information provided in this manual. Portable and mobile RF communications equipment can affect the System. Use of accessories, transducers, and cables other than those specified or provided by Abbott Diabetes Care could result in increased electromagnetic emissions or decreased electromagnetic immunity of the System and result in improper operation.
- Page 95 30 cm (12 inches) to any part of the System, including cables specified by Abbott Diabetes Care. Otherwise, degradation of the performance of the System could result. The table below lists the immunity test levels at specific test frequencies for testing the effects of some wireless communications equipment.
- Page 96 DOC44383_rev-C 1:14pm 22-SEP-2021 For some services, only the uplink frequencies are included. The carrier is modulated using a 50% duty cycle square wave signal. As an alternative to FM modulation, 50% pulse modulation at 18 Hz may be used because while it does not represent actual modulation, it would be worst case.
- Page 97 Standards of Medical Care in Diabetes—2019. Diabetes Care, 42(Supplement 1), pp.S13-S28 Customer Service: www.FreeStyleLibre.com Patent: https://www.abbott.com/patents The circular shape of the sensor housing, FreeStyle, Libre, and related brand marks are marks of Abbott. Other trademarks are the property of their respective owners. Manufacturer ©2021 Abbott DOC44383 Rev. C 09/21...
Need help?
Do you have a question about the FreeStyle Libre 3 and is the answer not in the manual?
Questions and answers
Does the FreeStyle Libre 3 Reader display measurement data every minute, just like on a smartphone?
No, the Abbott FreeStyle Libre 3 Reader does not display measurement data every minute like a smartphone. It stores glucose readings every 5 minutes.
This answer is automatically generated
@Mr. Anderson Thank you. Will it be saved every 5 minutes even if I don't scan the sensor with the Reader?
I applied a new sensor and after the scan it started the countdown for the 60 minutes and now it is telling me "sensor error" . I don't know what to do.
If your Abbott FreeStyle Libre 3 sensor shows a "sensor error" after applying a new sensor, wait at least 10 minutes and then try scanning again. If the issue persists, ensure that the sensor is properly applied on the back of your upper arm, as placing it in other areas may cause inaccurate readings. If the sensor becomes loose or falls off, replace it with a new one. If problems continue, contact customer service for further assistance.
This answer is automatically generated
@Mr. Anderson
Will it be saved every 5 minutes even if I don't scan the sensor with the Reader?
Yes. The Abbott FreeStyle Libre 3 saves glucose readings every 5 minutes without needing to scan the sensor with the Reader.
This answer is automatically generated
The Replace Sensor message keeps coming on my phone every 5 minutes even though I replaced the sensor
The "Replace Sensor" message keeps appearing because the system may still be recognizing the old sensor as active or faulty. Even after replacing the sensor, the app might not have properly registered the new one. Restarting the phone does not resolve the issue. Abbott support assumed the new sensor might also be defective and offered a replacement but did not provide a specific fix for the alert. The issue may be app-related or due to improper pairing with the new sensor.
This answer is automatically generated
how share information with family work
To share glucose information with family using the Abbott FreeStyle Libre 3, follow these steps:
1. Enter the email address of the person you want to share your glucose readings with and tap "Add."
2. They will receive an email invitation to download the LibreLinkUp app.
3. The family member taps the link in the email, downloads the app from the app store, and follows the prompts to create an account and connect.
4. Once connected, they will receive glucose data automatically every minute through the LibreLinkUp app.
5. They can view current glucose, trend arrows, and a 12-hour interactive glucose graph.
6. Notifications and alarms can be customized in the app’s notification settings.
You can share your data with up to 20 people. The recipient does not need to keep the app open to receive updates.
This answer is automatically generated
Are the direcctions for using the Lbre 3 and different from those that I've used for the two successfully
Yes, the Abbott FreeStyle Libre 3 differs from previous models in how data is transferred. Unlike Libre 1 and Libre 2, which require scanning the sensor with a receiver or phone using NFC, Libre 3 automatically updates glucose information on the receiving device as long as it is within a 33-foot distance. Additionally, Libre 3 has a smaller adhesive contact area, making it more prone to peeling off, so users may need to take extra precautions, such as using an over-patch.
This answer is automatically generated
I am still getting "sensor error " after waiting 10 minutes. Could it be something in my settings.
A "sensor error" on the Abbott FreeStyle Libre 3 after waiting 10 minutes could be caused by erratic blood sugar levels, leading to inconsistent sensor data that the system cannot process. If the sensor is still not working after waiting, it may indicate a faulty sensor that needs to be replaced. If the sensor fails before the 14-day wear period, it may be eligible for a free replacement.
This answer is automatically generated
When the time runs out on my sensor and I apply a new one on my arm, do I just scan it with my phone and that is all.
To start using a new Abbott FreeStyle Libre 3 sensor after the old one expires, follow these steps:
1. Remove the old sensor – Peel off the expired sensor from the back of your upper arm.
2. Prepare the new sensor site – Wash the application site with plain soap, dry it, and clean it with an alcohol wipe. Let it air dry completely.
3. Change the application site – Apply the new sensor to a different spot on the back of your upper arm to avoid skin irritation.
4. Attach the new sensor – Follow the instructions to apply the sensor securely.
5. Activate the new sensor – Scan it with your reader or compatible device to start the 14-day wear period.
Ensure your hands are clean before handling the sensor to prevent infection.
This answer is automatically generated
If my phone alarms due to low or high glucose warning, will it continue to alarm or is it just once for that particular high or low. How do I get that message off of my screen.
Yes, the Abbott FreeStyle Libre 3 will continue to alarm for low or high glucose warnings if alarms are enabled. To remove the alert from your screen, touch "Dismiss Alarm" or press the Home Button.
This answer is automatically generated
I thought that you could tap the sensor and record reading. I haven't been able to do this. How do I do it?
To record a reading with the Abbott FreeStyle Libre 3 sensor, open the app on your phone and scan the sensor. The sensor sends data straight to your phone, providing a new reading every minute.
This answer is automatically generated