Table of Contents
Advertisement
Index
Important tips when ordering spare parts ................................................................................................ 2
Safety and maintenance instructions ...................................................................................................... 2
Danger list ................................................................................................................................................ 3
Operating instructions .............................................................................................................................. 3
Normal and prohibited use ...................................................................................................................... 5
Acoustic levels and dust emission ........................................................................................................... 6
General dimensions S410 ..................................................................................................................... 7
General dimensions SD410 .................................................................................................................. 9
Starting up the machine SD410 (Fig 2) ................................................................................................... 12
Safety instructions during planing.......................................................................................................... 13
Changing and setting of the planer knives (Fig.4) ................................................................................... 13
Adjustment of the planer tables (Fig.5) .................................................................................................. 14
Adjusting the planer depth cut (Fig.9) .................................................................................................... 15
Safety instructions planer ...................................................................................................................... 16
Adjusting the cut of depth on the thicknesser (Fig.12)............................................................................ 16
Calibrating of the digital read out (Fig.13) .............................................................................................. 17
Option friction reduction rollers on the thicknesser bed (Fig.14) ............................................................. 17
Changing and tensionning the belts (Fig.15) ......................................................................................... 18
Maintenance of the machine ................................................................................................................. 18
Adjusting the engine brake .................................................................................................................... 19
1
Advertisement
Table of Contents

Subscribe to Our Youtube Channel
Related Manuals for Robland SD410


Summary of Contents for Robland SD410
-
Page 1: Table Of Contents
Acoustic levels and dust emission ......................6 General dimensions S410 ........................7 General dimensions SD410 ........................9 Starting up the machine SD410 (Fig 2) ....................12 Safety instructions during planing......................13 Changing and setting of the planer knives (Fig.4) ................... 13 Adjustment of the planer tables (Fig.5) .................... -
Page 2: Important Tips When Ordering Spare Parts
- your references: contact name of consignee and address at place of destination. FOR YOUR SAFETY AND THE OPERATING RELIABILITY OF THE MACHINE: USE ROBLAND PARTS ONLY. Safety and maintenance instructions The risks associated with using woodworking machinery are high since they use high-speed sharp cutters to do the job and in many cases these are necessarily exposed to enable the machining process to take place. -
Page 3: Danger List
Be sure to use only blades corresponding to the dimensions indicated in the technical data and relevant to your work. Make sure that periodic maintenance be carried out in due time. Try out weekly the emergency stops. Read the instructions of maintenance and adjustment of the automatic brake of the motor. - Page 4 - The risks involved in working with the machine; - The operating principles, the correct usage and adjustment of the machine; - The safe handling of the parts to be processed; - The position of the hands in relation to the cutting tools; - Storing the workpieces safely before and after machining them.
-
Page 5: Normal And Prohibited Use
Normal and prohibited use NORMAL USE The machine is designed for the following work and is equipped with protective devices for these processes only: - Planing the wide surface of workpieces on the planer unit; - Planing the narrow side of workpieces on the planer unit; - Beveling an edge on workpieces on the planer unit;... -
Page 6: Acoustic Levels And Dust Emission
Acoustic levels and dust emission People working in most woodworking shops are likely to have a noise exposure that exceeds the upper exposure action value of 85 dB. This means that you must put noise controls in place. There are several ways in which noise levels can be reduced in a workshop, such as: - Consider the positioning of sources of noise such as machines, the extraction unit, radios etc. -
Page 7: General Dimensions S410
General dimensions S410... - Page 8 Technical data S410 Voltage 3 x 230 V / 400 V 3 x 230 V / 400 V Weight 475 kg 1.047,19 LB Planer 16” 5/32 Planer width 410 mm 92” 29/32 Total length planer tables 2360 mm Diameter cutter block 3”...
-
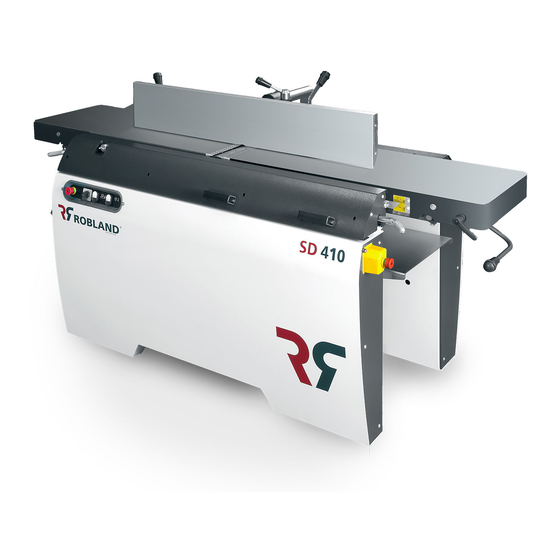
Page 9: General Dimensions Sd410
General dimensions SD410... - Page 10 Technical data SD410 Voltage 3 x 230 V / 400 V 3 x 230 V / 400 V Weight 500 kg 1.102,31 lb Planer 16” 5/32 Planer width 410 mm 78” ¾ Total length planer tables 2000 mm Diameter cutter block 3”...
- Page 11 Transportation of the machine Depending on the method of transportation or shipping, you will receive the machine in a crate or on transport blocks.. Always check if the payload of your hoist is sufficiently large. Lift the machine a few inches up and take the bars or the bottom of the coffin away.
-
Page 12: Starting Up The Machine Sd410 (Fig 2)
Starting up the machine SD410 (Fig 2) Turn the main switch Q1 (1) to position “ 1” in order to put the machine under tension. The motor for the planer arbor can be started by pressing the start button. (1) The engine starts automatically in “star - triangle”. -
Page 13: Safety Instructions During Planing
Fig.3 Safety instructions during planing Check that all the knives are well placed and properly tightened. If this is not the case, the knives will be thrown away from the machine with very serious consequences for user and machine. Always use the protective equipment provided on the machine. The minimum height of a sharpened blade must be at least 20 mm. -
Page 14: Adjustment Of The Planer Tables (Fig.5)
Adjustment of the planer tables (Fig.5) Both planer tables are set at the factory and do not require readjustment. When starting up the machine, and after changing the knives, the output table should be perfectly aligned with the knives. To ensure this, there is a handy little tool that you can make yourself : take a square planed hardwood bar of about 30 cm in length and put 10 marks at 1 mm interval ( see drawing). -
Page 15: Adjusting The Planer Depth Cut (Fig.9)
Planer guard (Fig.7-8) The planer guard above the cutter block and the planer fence is the so-called “ bridge type “, the adjustment according to the workpiece is done manually. The suspension system in the security ensures that, after the pressing down of the bridge to the table surface, the bridge will automatically spring back up to the set height. -
Page 16: Safety Instructions Planer
Changing from planing to thicknessing (Fig.10-11) After unlocking both handles, both tables can be opened simultanious. Open the tables far enough so the safety device can lock the tables (fig.10).There is a limit so the tables can’t flip over. Flip the thicknessing guard and lock it. An electrical contact prevents the machine from starting if the guard is in planing position. -
Page 17: Calibrating Of The Digital Read Out (Fig.13)
Calibrating of the digital read out (Fig.13) It is highly reommmended that each time the planer knives are changed, the digital read out is calibrated, this to avoid measurement errors. Calibration is done as follows: Set the thicknesser table at random height and thickness a sample; now measure exactly the thickness of the sample. -
Page 18: Changing And Tensionning The Belts (Fig.15)
Changing and tensionning the belts (Fig.15) The belts of the motor can be tensionned as follows: Unlock the bolt (1) which holds the motor mounting plate and push the motor down in order to tension the belts and lock the bolt again. Belt type: 13 x 1450 (A57) Maintenance of the machine Maintenance work should only be carried out by people who have the combination of... -
Page 19: Adjusting The Engine Brake
air) and frequent evacuation of sawdust and shavings of the workshop. Wood dust, whatever the origin, is likely to cause short-term illnesses and cancers, decades after exposure. To limit the emission of dust to the lowest possible level, use an industrial vacuum cleaner equipped with a high efficiency filter Adjusting the engine brake If the run down time of the motor exceeds 10 seconds, the brake will need to be readjusted.
Need help?
Do you have a question about the SD410 and is the answer not in the manual?
Questions and answers