
Subscribe to Our Youtube Channel
Related Manuals for YESOUL M1


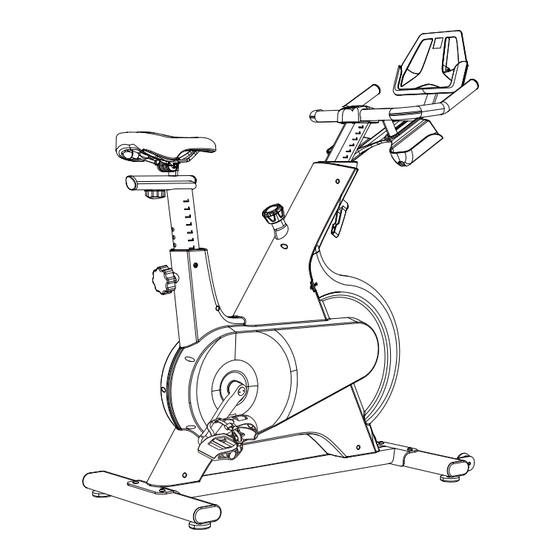
Summary of Contents for YESOUL M1
- Page 1 Befo re us in g th i s pro d u ct, caref u l l y rea d a nd YESOUL BIKE p ro p er l y kee p t h i s m a nu a l . YESOUL BIKE M1 Product Manual Product model: YS-002...
-
Page 2: Product Parameters
YESOUL BIKE M1 Product Parameters Tablet (mobile phone) holder size Maximum tablet width: 260mm Supporting software version iOS 10.0 or higher, Android 5.0 or higher Resistance system Magnetron resistance system Drive mode Belt drive Power supply Button battery (model: CR2477) -
Page 3: Important Safety Instructions
Important Safety Instructions Please read them carefully. Improper use may result in personal injury or death! 1. Make sure that the saddle height adjustment knob is secured correctly, and will not affect motion during exercise. 2. Keep children and pets away from this product. This product is for those over 16 years old only. 3. - Page 4 Installation Guide --------- List of Parts STEP1: Check of parts 2×hexagon socket cap screw 4×hexagon socket cap M6×12 screw M6×12 2 × Spring washer 2× hexagon socket cap screw M6×12 4×hexagon socket button head screw M8×45 4× flat gasket Hexagon socket cap screw M6×35 Manual Hex wrench L-type cross head hex wrench...
- Page 5 Installation Guide - List of Parts Name Quantity Picture L-type cross head hex wrench Hex wrench Hexagon socket cap screw M6X35 Open-ended wrench...
- Page 6 Installation Guide STEP 2: Installation of bottom tube 1. Take L-type cross head hex wrench (A) out of the ziplock bag. 2. Remove four screws (M8×45) and washers of the front tube ② and rear tube ③ via the wrench. Washer 3.
- Page 7 Installation Guide STEP 3: Installation of bottle holder 1. Take the hex wrench (B) out of the ziplock bag. 2. Remove two screws (M6×12) of the dual-purpose bracket ⑥ via the wrench. 3. Insert the bottle holder ⑧ along the slot into the dual-purpose bracket. Align the hole of the bottle holder with that of the bracket ⑥, manually install two screws (M6×12) into holes, and tighten them via the hex wrench (B).
- Page 8 Installation Guide STEP 4: Installation of handlebar and dual-purpose bracket 1. Remove four screws (M6×12) of the riser via the hex wrench (B). 2. Align the holes of the handlebar ⑤ with those of the riser, manually install screws into two rear holes (without tightening), and insert the dual-purpose bracket ⑥...
- Page 9 Installation Guide STEP 5: Installation of tablet (mobile phone) holder 1. Remove two screws (M6×12) and elastic washers of the dual-purpose bracket ⑥ via the hex wrench (B). Spring washer 2. Align the holes of the tablet holder ⑦ with those of the dual-purpose bracket ⑥, manually install screws (M6×12) and tighten them via the hex wrench (B).
-
Page 10: Step 6: Pedal Installation
Installation Guide STEP 6: Pedal installation 1. Take out the pedal assemblies L and R④. 2. Separate the pedal assemblies L and R④. 3. Lock the pedal assembly L④ into the left crank, and tighten with the box-ended wrench (D) along the direction indicated by the arrow. 4. - Page 11 Installation Guide STEP 7: Battery Dismantling and Installation 1. If the bike is provided with a battery, pull the insulation strip out of the gap of the battery cover before using this product; 2. Battery replacement: Remove ST4×13 cross head tapping screws of the battery cover via the L-type cross head hex wrench (A), open the battery cover, take out the old battery, and insert a new battery into the battery slot, with its positive pole outward ( “+”...
- Page 12 Installation Guide (for reference only, subject to the actual product) Safety tip: Adjust the bike and tighten the body tightening knob as needed before using it. Resistance knob (Adjust the resistance as needed; press it to brake in an emergency.) Front column tightening knob (Adjust the head height) Saddle tightening knob...
-
Page 13: First Use
Before using this product, make sure that other users are not connected to the bike. ・The bike will be disconnected 10 min after riding. ・In addition to connection with YESOUL APP, the Bluetooth can also be connected with kinomap and zwift software. Due to software upgrades, the actual product will prevail. -
Page 14: Handlebar Height Adjustment
How to Adjust Bike 1 、 Handlebar height adjustment: Loosen and pull out the front column knob with one hand, hold the middle part of the handlebar with the other hand, and lift the handlebar to the desired position. Then release the knob, and gently pull the column up and down until the spring is automatically reset (when a “click”... - Page 15 How to Adjust Bike 3. Horizontal adjustment of saddle: Loosen the knob under the saddle, slide the saddle back and forth to the desired position, and tighten the knob as much as possible. Horizontal adjustment of saddle Loose Tight 4. Body level adjustment: There are four adjustment pads at the bottom of the front and rear pedal tubes.
- Page 16 How to Determine Correct Riding Posture 1、 Setup of correct saddle position Saddle height Put the feet together, stand on one side of the saddle and adjust the saddle to the hip height (Fig. 1). Then site on the saddle, and step on the pedals forcibly until they are stopped at 6 o’ clock and the leg can be fully stretched (Fig.
- Page 17 How to Determine Correct Riding Posture 2. Setup of appropriate handlebar height Each user can set up the appropriate handlebar height based on his or her body height and riding experience. Recommendation: The handlebar should be slightly higher than the saddle for new users (Fig. 1) and flush with or slightly lower than the saddle for experienced users (Fig.
-
Page 18: Routine Maintenance
Routine Maintenance Daily use: Keep the spinning bike on a dry, ventilated and flat floor. If not used in a long time, the bike should be covered to keep its body clean and tidy. Frame maintenance: Wipe off sweat on the frame with cloth after exercise. Do not wipe the bike with wet cloth, in order to avoid rusting. - Page 20 Prolinx GmbH Brehmstr.56,40239 Duesseldorf Germany...
- Page 21 此页为备注页, 不用印刷 骑马钉 148*210mm 双面印刷 双胶纸 80g 20 页...
Need help?
Do you have a question about the M1 and is the answer not in the manual?
Questions and answers