Table of Contents
Advertisement
Available languages
Available languages
Quick Links
Advertisement
Chapters
Table of Contents

Subscribe to Our Youtube Channel
Related Manuals for MODSTER HOBBY ARROWS F-86


Summary of Contents for MODSTER HOBBY ARROWS F-86
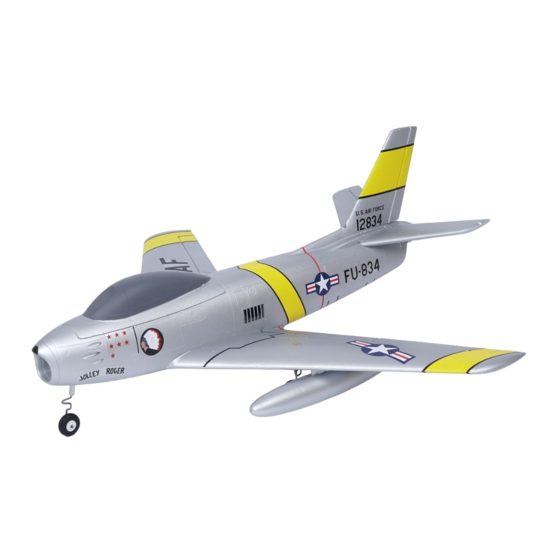
- Page 1 64mm F-86 BETRIEBSANLEITUNG/ MANUAL...
-
Page 2: Table Of Contents
Betriebsanleitung - F-86 Inhaltsverzeichnis Warnung........................................3 Sicherheitsvorkehrungen................................3 Einleitung........................................4 Spezifikationen.......................................4 Inhalt des Kits......................................5 Montage.........................................5-7 Installation der Batterie..................................7 Empfänger-Diagramm..................................7 Check vor dem Flug....................................8 Einstellungen von Steuerhorn und Servoarm........................9 Schwerpunkt finden...................................9 Bevor Sie das Modell fliegen................................10 Flug Kurs........................................11 Fehlerbehebung....................................12 Gewährleistungsauschluss................................13 Konformitätserklärung...................................27 www.modster.at... -
Page 3: Warnung
Lecken Sie niemals an Teilen des Modells oder nehmen Sie diese in den Mund, da dies zu schweren Verletzungen oder sogar zum Tod führen kann. • Bewahren Sie alle Chemikalien, Kleinteile und alle elektrischen Geräte außerhalb der Reich- weite von Kindern auf. www.modster.at... -
Page 4: Einleitung
Vorinstallierte kugelgelagerte Anlenkungen für präzise Bodenbewegungen • Kohlefaserverstärkte Zelle • Fantastische Langsamflugleistungen und Kunstflugfähigkeiten Spezifikationen Flügelspannweite 860mm (33.8in) Flügelfläche 15.2dm²(235sq.in) Gesamtlänge 820mm (32.3in) Gewicht ~ 1050g Servo 9g servo x 8 Motor 2840-KV3150 Empfohlener Akku 4S 2200-2600mAh 35C Belastung 69g/dm² (0.15oz/in²) www.modster.at... -
Page 5: Inhalt Des Kits
Schrauben am Rumpf und schlie- ßen Sie dann die Y-Kabelbäume von CH1 und CH6 an. Einbau des Höhenleitwerks 1. Verbinden Sie die Höhenruder-Servoanschlüsse mit den Servoverlängerungen im Rumpf und setzen Sie das Höhenleitwerk in den Schlitz im Rumpf ein. www.modster.at... - Page 6 Unterseite des Rumpfes ein und befestigen Sie es mit der mitgelieferten Schraube wie abgebildet. 2. Setzen Sie das Hauptfahrwerk in den Fahrwerksschlitz der Tragfläche ein und schwenken Sie es um 90 Grad, um das Fahrwerk zu verriegeln. Hinweis: Hauptfahrwerk unterscheidet sich links und rechts. www.modster.at...
-
Page 7: Installation Der Batterie
Die Kabel von der Servoanschlussplatine sollten in der in der gezeigten Reihenfolge an den Empfänger angeschlossen werden. Beachten Sie, dass die LEDs von jedem freien Kanal des Empfängers gespeist werden können. Stecken Sie die Kabel in die Vertiefung auf der Rück- seite der Akkuklappe. www.modster.at... -
Page 8: Check Vor Dem Flug
Höhe und angemessenen Seitenr. 10mm links / rechts 8mm links / rechts Geschwindigkeit fliegt, bevor Sie hohe Ra- ten verwenden, da das Flugzeug durch die Querr. 14mm auf / ab 12mm auf / ab größeren Ruderbewegungen empfindlich auf Steuereingaben reagiert. www.modster.at... -
Page 9: Einstellungen Von Steuerhorn Und Servoarm
Verschieben des Akkus an eine geeigne- te Stelle nicht erreichen, können Sie auch ein Gegengewicht einbauen, um den korrekten Schwerpunkt zu erreichen. Bei der empfohle- nen Akkugröße ist ein Gegengewicht jedoch nicht erforderlich. Wir empfehlen, ohne unnöti- ges Gegengewicht zu fliegen. www.modster.at... -
Page 10: Bevor Sie Das Modell Fliegen
Gasknüppel ein paar Sekunden lang ganz unten gehalten wird. Um eine unerwartete „‘‘dead stick‘‘-Landung“ bei Ihrem ersten Flug zu vermeiden, stellen Sie Ihren Timer auf konservative 4 Minuten ein. Wenn Ihr Alarm ertönt, sollten Sie sofort landen. www.modster.at... -
Page 11: Flug Kurs
CA und 5-Min-Epoxid durchgeführt werden. Wenn Teile nicht repariert werden können, sehen Sie in der Ersatzteilliste nach, um sie nach Artikelnummern zu bestel- len.Überprüfen Sie immer, ob alle Schrauben am Flugzeug fest angezogen sind. Achten Sie besonders darauf, dass der Spinner vor jedem Flug fest sitzt. www.modster.at... -
Page 12: Fehlerbehebung
Empfänger, Regler, Mo- • ESC verwendet standardmäßig tor & Verkabelung auf Schä- Motorleistung pul- eine weiche Niederspannungs- den (bei Bedarf ersetzen). siert, dann verliert abschaltung (LVC). • Das Flugzeug sofort landen Motor die Leistung. und den Flugakku aufladen. www.modster.at... -
Page 13: Gewährleistungsauschluss
7. Trennen Sie nach dem Flug immer den Akku vom Modell und entnehmen diesen. 8. Laden und lagern Sie den Akku immer außerhalb des Modells und auf unbrennbarem Untergrund. Niemals im Modell laden! Niemals den Akku unbeaufsichtigt laden! Informieren Sie sich über die in Ihrem Land gültigen, gesetzlichen Bestimmungen. www.modster.at... - Page 14 Betriebsanleitung - F-86 www.modster.at...
- Page 15 Introduction......................................16 Specification......................................16 Kit Contents......................................17 Model assembly....................................18-20 Battery Installation....................................20 Receiver Diagram....................................20 Preflight Check.....................................21 Control horn and servo arm settings............................22 Finding the center of gravity..............................22 Before flying the model.................................23 Flying course......................................24 Troubleshooting Guide...................................25 Spare Parts......................................25 Disclaimer of Warranty...................................26 Declaration of Conformity................................27 www.modster.at...
-
Page 16: Warnings
Avoid cleaning this product with chemicals. • Never lick or place any part of your model in your mouth as it could cause serious injury or even death. • Keep all chemicals, small parts and anything electrical out of the reach of children. www.modster.at... -
Page 17: Introduction
• Fantastic low-speed performance and aerobatic capabilities Specifications Wingspan 860mm (33.8in) Wing area 15.2dm²(235sq.in) Overall length 820mm (32.3in) Flying weight ~ 1050g Servo 9g servo x 8 Motor size 2840-KV3150 Recommended battery 4S 2200-2600mAh 35C Wing load 69g/dm² (0.15oz/in²) www.modster.at... -
Page 18: Kit Contents
Y-harness wires of CH1 and CH6. Horizontal stabilizer installation 1. Connect the elevator servo connectors to the servo extensions in the fuselage.Install the horizontal stabilizer into the slot in the fuselage. www.modster.at... - Page 19 2. Insert the main landing gear assembly into the wing landing gear slot and pivot 90 degrees to lock the landing gear in place. Note: Main landing gear differs left & right. www.modster.at...
-
Page 20: Battery Installation
The cables from the servo connector board should be connected to your receiver in the order shown. Note that the LEDs can be powered by any spare channel on the receiver. Tuck the wire leads into the recessed cavity towards the rear of the battery hatch. www.modster.at... -
Page 21: Preflight Check
Rudder 10mm left / right 8mm left / right to using high rates, as the aircraft will be sensitive to control inputs with the larger Aileron 14mm up / down 12mm up / down control surface movements. www.modster.at... -
Page 22: Control Horn And Servo Arm Settings
If you cannot obtain the recommended CG by moving the battery to a suitable location, you can also install a counterweight to achieve correct CG. However, with the recommended battery size, a counterweight is not required. We recommend flying without unnecessary counterweight. www.modster.at... -
Page 23: Before Flying The Model
Often (but not always) power can be briefly restored after the motor cuts off by holding the throttle stick all the way down for a few seconds.To avoid an unexpected dead- stick landing on your first flight,set your timer to a conservative 4 minutes. When your alarm sounds you should land right away. www.modster.at... -
Page 24: Flying Course
5min epoxy. When parts are not repairable, see the spare parts lst for ordering by item number.Always check to make sure all screws on the aircraft are tightened. Pay special atten- tion to make sure the spinner is firmly in place before every flight. www.modster.at... -
Page 25: Troubleshooting Guide
Loss of power to aircraft. transmitter, receiver, ESC, Motor power • ESC uses default soft Low motor and wiring for damage pulses then motor Voltage Cutoff(LVC). (replace as needed). loses power. • Land aircraft immediately and recharge flight battery. www.modster.at... -
Page 26: Disclaimer Of Warranty
7. Always disconnect and remove the flight battery from the model after the flight. 8. Always charge and store the battery outside of the model, charge on a non-flammable surface, never store the battery in the model. Never charge batteries unobserved! Check about the legal provisions applicable in your country www.modster.at... -
Page 27: Konformitätserklärung
Manual - F-86 www.modster.at... - Page 28 64mm F-86 BETRIEBSANLEITUNG/ MANUAL...
Need help?
Do you have a question about the HOBBY ARROWS F-86 and is the answer not in the manual?
Questions and answers