Table of Contents
Advertisement
Quick Links
Advertisement
Table of Contents

Related Manuals for Akaso Brave 8


Summary of Contents for Akaso Brave 8
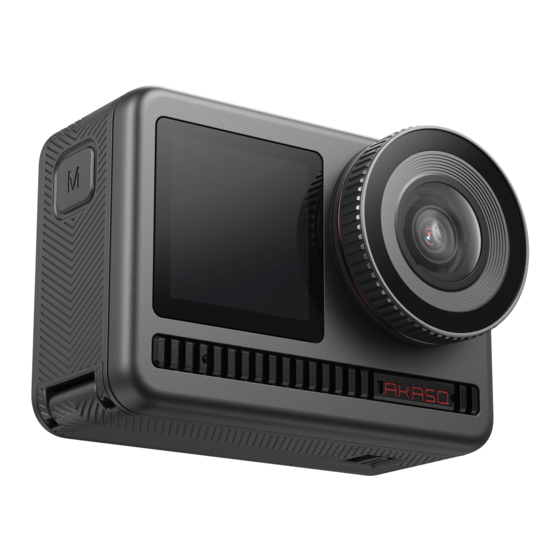
- Page 1 USER MANUAL AKASO Brave 8 Action Camera V2.3...
-
Page 2: Table Of Contents
CONTENTS What's In The Box Your Brave 8 Getting Started Overview Of Modes Comprehensive Functions Instructions Camera Settings Resolution Setting Personalized Setting Connecting To App Playing Back Your Content Connecting To Usb Maintaining Your Camera Maintaining Your Battery Remote Button Operation Instructions... -
Page 3: What's In The Box
Helmet Mounts Remote Control Battery Charger Battery Handle Bar/ Mount Pole Mount x 1 Lens Cloth Tethers Bandages USB Cable Quick Start Guide AKASO Brave 8 Action Camera Remote Control Double Sided Tape Quick Start Guide Strap x 1 V2.0... -
Page 4: Your Brave 8
YOUR BRAVE 8... - Page 5 Shutter/Confirm Button USB-C Port Front Screen Charging/Wifi Indicator Lens Screen Power Button Mode Button Speaker Battery Cover Memory Card Slot Note on Buttons Function • Power Button: Press to wake the device from sleep. Press and hold to power on/off. •...
- Page 6 133:48 00:21 4K30 4:3 1. Memory Card Icon: displays remaining recording time/number of photos. 2. Battery Level: display the percentage of battery. 3. Audio switch: Turn on or off the sound when recording a video. 4. Photo Mode: switch modes or display the current mode. 5.
-
Page 7: Getting Started
GETTING STARTED Welcome to your AKASO Brave 8. To capture videos and photos, you need a memory card (not included). You need to activate in APP for first use (please activate within 3 times; otherwise, the camera will be locked). - Page 8 Function Specifications Swipe up – specification settings Swipe down – general settings Swipe left – quick switch to Photo Mode Swipe right - playback 14:54 Preferences 133:48 00:00/00:52 Record video 4K30 4:3 Video Setting Resolution Metering Image Stabilization 4K 30 Turn off...
-
Page 9: Overview Of Modes
OVERVIEW OF MODES Swipe right to choose the following modes: Video Mode • Video Mode Default mode: Video Mode In Video Mode, press the Shutter button, the camera starts recording video. Press the Shutter button again to stop. • Time-Lapse Video Mode Extract video frames according to the time-lapse interval, and convert long activities into short videos that can be shared. -
Page 10: Comprehensive Functions
COMPREHENSIVE FUNCTIONS Image Stabilization Function Click . Two modes: Image Stabilization and SuperSmooth. They can record 4K30 16:9 stable videos in severe shake. Image Stabilization can be used directly on the device while SuperSmooth improve video stabilization. Videos downloaded from the phone will have the correct SuperSmooth function only when SuperSmooth is enabled in the APP. -
Page 11: Camera Settings
You can set the camera by swiping down the settings, as follows: Functions Specifications Note Voice Control Power on /Power off (default) AKASO Video start AKASO Stop video AKASO Take photo AKASO Power off Language Support 9 languages English/Deutsch/Français/ Español/ Italiano/日本語/简体中文/繁體中文... - Page 12 One Key Fast On (default)/Off Swipe down to general settings, press . Press and hold Shutter Shooting button when the camera is off, it will automatically turn on and start recording. (The recording parameters are the state saved in the last recording.) Press the Shutter button again, the camera will stop recording and shut down.
-
Page 13: Resolution Setting
RESOLUTION SETTING Set the resolution and image stabilization. Tap the resolution icon to enter the home screen. You can adjust the resolution, image stabilization characteristics and time interval of the camera. 133:48 Video Resolution 2.7K30 4:3 2.7K60 4:3 2.7K120 16:9 2.7K30 4:3 •... -
Page 14: Personalized Setting
• Photo Functions Specifications Photo Mode 48M/12M Time Lapse 48M/12M Photo Mode Time interval: 0.5s/1s/2s/5s/10s/30s/1min/2min/5min/10min/30min/1h PERSONALIZED SETTING Swipe up to enter the personalized setting of videos and photos, specifications as follows: 133:48 Video Setting Resolution Metering Image Stabilization 4K 30 Turn off... - Page 15 Resolution ratio: 2.7K/1440P/ Slow Motion Video Mode 1080P/720P Multiple speed: 2x/4x/8x/16x Image Turn off/Normal/SuperSmooth Image Stabilization: Stabilization Basic video stabilization feature will cut the visual area. SuperSmooth: Enhanced Image Stabilization will cut the visual area. After this function is enabled on the camera, the video needs to be exported from the APP to experience Metering...
- Page 16 Bit Rate High/Medium/Low Related to file size and image quality. The lower the bit rate, the smaller the file size and the lower the image quality. The higher the bit rate, the larger the file size and the better the image quality.
- Page 17 Metering CAM/AM/CM/SM/AFM 3.0EV/2.5EV/2.0EV/1.5EV/1.0EV/ Set the shooting brightness 0.5EV/0EV/-0.5EV/-1.0EV/-1.5EV/ of photos and videos, the -2.0EV/-2.5EV/-3.0EV higher values result in brighter shooting effect. Auto/100/200/400/800/1600 Set ISO values of photos and videos. Shutter Auto,5S,2S,1/125S,1/250S,1/500S, Select the opening time of the shutter. 1/1000S,1/2000S White Auto/2300K/2800K/3200K/4000K Select the color of photos and videos.
-
Page 18: Connecting To App
CONNECTING TO APP Wifi is enabled by default only during the activation process when the user starts up, and will be turned off by default in other processes. If there is no connection within 5 minutes, it will be automatically turned off. If you do not connect within 5 minutes, the APP will be automatically disconnected. - Page 19 ② Swipe down to general settings and click . Select “Add device” in AKASO GO APP, find Brave8 and click on it. Select C...ct - Join, and then click Connect. 14:54 Preferences Wifi connected: Wifi indicator light ON Screen display: Connected to Brave 8_xxxx...
- Page 20 3. Control camera by APP. You can record, shoot, playback, load, delete and edit. 4. After connecting the app, press the Mode button to turn off the camera Wifi, exit the Connecting interface, and the connection with the app will also be disconnected.
- Page 21 ② Click , choose the video with , click ... and select Download - Supersmooth, then the video downloaded on the phone will be the one with the correct supersmooth effect. 00:00:52 00:00:52 Supersmooth...
- Page 22 6. Firmware Upgrade Instructions ① After connecting to the camera, click Upgrade firmware on the pop-up window. Then click Download. Note: Please insert the memory card before upgrading the firmware.You can also choose Do not upgrade now. Click Connect and then click , Select Firmware update on the setting menu, and click Download.
- Page 23 ② Click SWITCH NETWORK and select a Wifi that works well, and click Done when it displays connected. ③ Tap on the Connect camera option once the download success page appeared. Then choose Connect and wait for the system to upgrade.
- Page 24 ④ Now just click Try it now and the camera firmware has been upgraded to the latest version.
-
Page 25: Playing Back Your Content
PLAYING BACK YOUR CONTENT Swipe right to enter the playback interface. Tap grid view to change thumbnail browse mode. Swipe the screen to browse the file. Click the file to preview, click the “Delete” icon to delete files and click the “Select” icon to settle files. Video Photo 00:00/00:52... -
Page 26: Maintaining Your Camera
MAINTAINING YOUR CAMERA Please follow these guidelines to get the best performance of your camera: 1. For best audio performance, shake the camera or blow the mic to remove debris from the microphone holes. 2. To clean the lens, wipe it with a soft and lint-free cloth. 3. -
Page 27: Remote Button Operation Instructions
REMOTE BUTTON OPERATION INSTRUCTIONS Record button Power button Set button 1. Remote Power on/off Function Operation Detail Power on Press the Power button Press the Power button, the red and blue light flashes, waiting to be connected with the camera. Pair Press both Set and Record Press Set and Record button at the... - Page 28 2. Photos/Videos Function Operation Detail Record videos Press Record button Press Record button to start recording, press again to stop recording. Take photos Press Record button Press Record button to start taking photos. 3. Switch Mode Function Operation Detail Switch mode Press Set button Press Set button to switch video or photo mode.
-
Page 29: Accessories
ACCESSORIES... -
Page 30: Contact Us
CONTACT US For any inquiries about AKASO products, please feel free to contact us. We will respond within 24 hours. Tel: (888) 466-9222 (US) Email: cs@akasotech.com Web: www.akasotech.com The microSD, microSDHC, microSDXC and SD marks and logos are trademarks of...
Need help?
Do you have a question about the Brave 8 and is the answer not in the manual?
Questions and answers