Table of Contents

Related Manuals for Zass YL1844S


Summary of Contents for Zass YL1844S
- Page 1 The diagram above is just for reference. Please take the appearance of the actual product as the standard. WATER DISPENSER Instruction Manual Model: YL1844S Please read the manual carefully before operating your water dispenser. Retain it for future reference...
-
Page 2: Table Of Contents
DIRECTORY A: SAFETY INSTRUCTION......................2 B: GETTING STARTED........................3 C: PART NAME..........................4 D: DISPENSING WATER........................5 E: TROUBLE SHOOTING.......................6 F: CLEANING..........................6 G: MACHINE INSTALLATION......................7... -
Page 3: A: Safety Instruction
A: SAFETY INSTRUCTION WARNING To reduce risk of injury and property damage, user must read this entire guide before assembling, installing & operating dispenser. Failure to execute the instructions in this manual can cause personal injury or property damage.This product dispenses water at very high temperatures. Failure to use properly can cause personal injury. -
Page 4: B:getting Started
•This appliance should work under environment of temp from 10°C~43°C. •This appliance is not suitable for installation in an area where a water jet could be used. •Never turn the machine upside down or lean it more than 45°. •When the machine is under the ice point and blocked by ice, the cooling switch must be closed for 4 hours before turning it on again to continue its operation. -
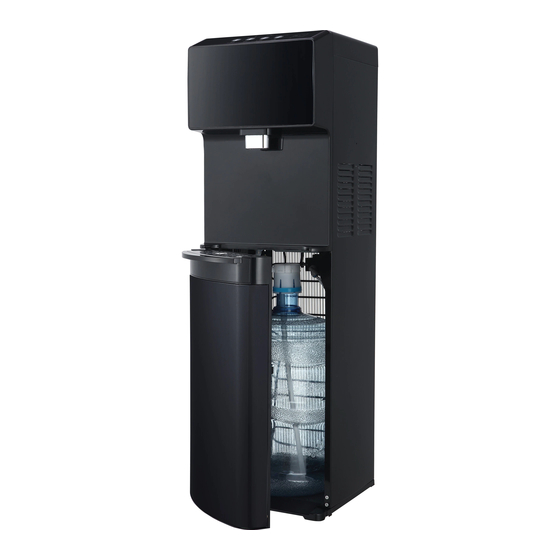
Page 5: C: Part Name
C: PARTS NAME 1 2 3 4 (FRONT) (REAR) Child lock button Night light switch Hot water button Heating switch Warm water button Cooling switch Cold water button Touchless icon Water faucet Power cord Water collector Hot water outlet Door Condenser NOTE: This machine is suitable for bottle of 3 or 5 gallons. -
Page 6: D: Dispensing Water
D: DISPENSING WATER This unit has been tested and sanitized prior to packing and shipping. During transit dust and odors can accumulate in the tank and lines. Dispense and dispose at least one quart of water prior to drinking any water. Dispensing Warm or Cold Water 1.Water will take approximately 1 hour after initial set up to become completely chilled. -
Page 7: E: Trouble Shooting
E: TROUBLE SHOOTING Water is leaking. •Unplug dispenser, remove bottle and replace it. No Water is coming from the spout. •Make sure the bottle is not empty. If empty, replace it. •Make sure to completely depress the pushbutton controls. Cold water is not cold. •It takes up to one hour after setup to dispense cold water. -
Page 8: G: Machine Installation
3.Sanitizing The machine should be disinfected with the disinfectant separately bought from drugstore or marketplace according to the instruction manual of the disinfectant and then clean it with water (see cleaning and draining instruction). Generally this should be done every three months. 4.To remove mineral deposits: Mix 4 liters water with 200g citric acid crystals, inject into the machine and make sure the water can flow out of the hot water tap. - Page 9 The product is subject to change without notice. Please keep this manual properly.
Need help?
Do you have a question about the YL1844S and is the answer not in the manual?
Questions and answers