Advertisement
Available languages
Available languages
Table of Contents
1. Introduction & Characteristics
Dispose of this product in accordance with local and national disposal regulations.
Thank you for buying the KNS1! Read this manual carefully before bringing the KNS1 into use.
• Easy to build, no glue or soldering required.
• Dislodge pre-cut pieces when you need them ; not before! Sand any jagged edges before use (sandpaper included)
• The kit is powered by 2 AA-batteries (not included).
The kits of the KNS-series are supplied with prepunched boards, a gearbox, gears, shafts, a switch, a motor, a
battery holder and all necessary parts.
2. Parts List
Part n°
Quant.
1
1
2
1
3
1
4
1
5
1
6
1
7
1
8
1
9
1
10
2
11
2
12
4
13
6
14
1
15
1
KNS1
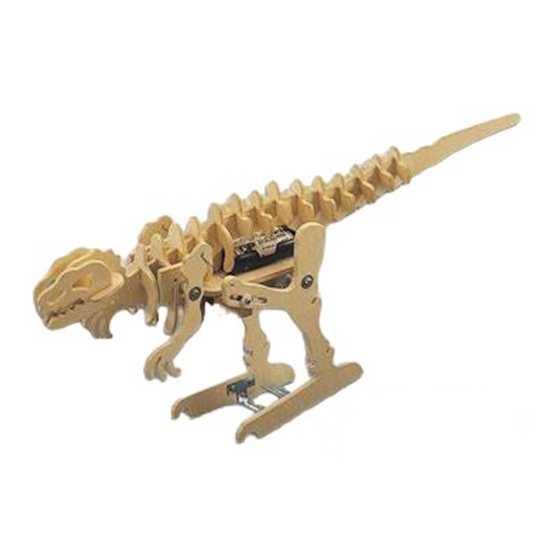
KNS1 – TYRANNOMECH
Description
gearbox
motor 3Vdc
pinion gear 8T
gear 40T/0T (white)
gear 40T/10T (red)
gear 40T/10T (green)
face gear 36T/10T (white)
metal shaft (3 x 52mm)
metal shaft (2 x 40mm)
nylon post (small)
nylon pad
nylon post (large)
nylon pad (Ø8mm)
wire with terminal (yellow)
wire with terminal (green)
Part n°
Quant.
16
1
17
1
18
2
19
2
20
28
21
4
22
2
23
6
24
2
25
3
26
2
27
6
28
2
29
2
- 1 -
Description
battery holder
slide switch with wire
wire (7cm)
nut M2
self-tapping screw (2 x 4mm)
self-tapping screw
screw
washer
spring
PVC tube (15mm)
metal foot (U-shaped)
fixing plate (large)
fixing plate (small)
nylon connector
Fig.1
VELLEMAN
Advertisement
Table of Contents

Summary of Contents for Velleman KNS1
- Page 1 1. Introduction & Characteristics Dispose of this product in accordance with local and national disposal regulations. Thank you for buying the KNS1! Read this manual carefully before bringing the KNS1 into use. • Easy to build, no glue or soldering required.
- Page 2 Screw 2 fixing plates (P27/28) to board edges A1 & A2 and screw them to board X BEFORE fitting the gearbox. Fig.5 Mount the left (V) and right (W) legs to the side boards and install the battery holder (P16) as in the drawing. KNS1 - 2 - VELLEMAN...
- Page 3 Make sure the wiring is correct !!! 1. green 2. red 3. yellow 4. red 5. black Fig.9 Screw a fixing plate P27 to boards Y and Z first and then attach them to boards B and C. KNS1 - 3 - VELLEMAN...
- Page 4 1. Inleiding en Kenmerken Ontdoe u van dit product volgens de plaatselijke en nationale regelgeving inzake verwijdering. Dank u voor uw aankoop! Lees deze handleiding aandachtig voor u de KNS1 in gebruik neemt. • Makkelijk te bouwen, zonder lijm of solderen.
-
Page 5: Lijst Van Onderdelen
Fig. 11: Bevestig de armen op plaat S en verbind de armen en de poten van de Tyrannomech met draad P18. Fig. 12: Breng de overige platen aan op de aangegeven plaats. De inhoud van deze handleiding kan worden gewijzigd zonder voorafgaande kennisgeving. KNS1 - 5 - VELLEMAN... -
Page 6: Liste Des Pièces
1. Introduction et Caractéristiques Débarrassez-vous de ce produit en respectant la législation d'élimination locale et nationale. Nous vous remercions de votre achat ! Lisez la notice présente attentivement avant la mise en service du KNS1. • Facile à assembler, sans colle ou soudage. -
Page 7: Lista De Piezas
Tire el aparato defectuoso en los correspondientes depósitos de eliminación de residuos según las leyes locales y nacionales. ¡Gracias por haber comprado el KNS1! Lea cuidadosamente las instrucciones del manual antes de montarlo. • Fácil construcción, sin cola ni soldadura. - Page 8 1. Einführung und Eigenschaften Entsorgen Sie dieses Produkt gemäß der örtlichen und nationalen Gesetzgebung bezüglich Entsorgung. Danke für Ihren Ankauf ! Lesen Sie vor der Inbetriebnahme des KNS1 diese Bedienungsanleitung sorgfältig durch ! • Einfach zusammenzubauen, ohne Leimen oder Löten.
- Page 9 Abb. 11: Befestigen Sie die Arme an Platte S und verbinden Sie die Arme und Beine des Tyrannomechs mit dem Draht Nr. 18. Abb. 12: Bringen Sie die übrigen Platten an der angegebenen Stelle an. Alle Änderungen vorbehalten. KNS1 - 9 - VELLEMAN...


Need help?
Do you have a question about the KNS1 and is the answer not in the manual?
Questions and answers