
Related Manuals for Velleman KSR13


Summary of Contents for Velleman KSR13
-
Page 1: Table Of Contents
anua Assembly & Instruction CONTENTS Product Introduction Tool You May Need Mechanical Parts List Plastic Parts Sticker A Sticker B & Zipper bag Module Assembly Body Module Assembly Head Module Assembly Testing Wheel Module Assembly Sticker A Boat Module Assembly P.10 Tips P.12... -
Page 2: Product Introduction
Product Introduction Alternative energy is the future, so now is the perfect time to start children on the path of learning basic concepts behind these technologies. Fortunately, this product is powered by the sun, there are no batteries required. The robot moves in direct sunlight and allows children to create while using their infinite imagination. -
Page 3: Plastic Parts
Plastic Parts Sticker Make sure to cut the plastic parts correctly . -
Page 4: Sticker B Zipper Bag
Sticker B Zipper bag For easy identification of each plastic part, suggest to sort out plastic parts and put them into zipper bags as per instruction. ( P.S. Each zipper bag to be placed an illustrated sticker B (as below) first.) -
Page 5: Body Module Assembly
Body Module Assembly Finished Product P3(Yellow) P5(Red) P5(Red) P6(Green) - Page 6 P6(Green) P5(Red) BACK...
-
Page 7: Head Module Assembly
Head Module Assembly Finished Product... -
Page 9: Testing
Testing : You need to test the gear box first. Prepare the below parts first before you test the “Gear box” and “Solar panel”. Body Head (Gear Box) (Solar Panel) 01 Assembly 03 Testing Head Body 50W & UP FRONT HALOGEN 02 Wiring BLACK... -
Page 10: Wheel Module Assembly
Module Wheel Assembly Sticker A (or B2) (or B1) Cut off the two burrs before assembly. -
Page 11: Boat Module Assembly
Module Assembly Boat form the boat Valley fold Mountain fold... -
Page 13: Tips
Tips ( When your part’s stuck. Example 1 Press! Example 2 Push in! Example 3 Gear box Pull out! -
Page 14: Robot Modes
14 Robot Modes LEVEL 1 LEVEL 2 P.46 P.14 Auto-bot Turtle-bot P.19 P.50 Walker-bot Crab-bot P.55 P.22 Slither-bot Quadru-bot P.60 P.27 Roly poly-bot Wheel-bot P.32 P.66 Boat-bot Boxer-bot P.71 P.37 Surf-bot Beetle-bot P.76 P.42 Row-bot Dog-bot... -
Page 15: Level
01 Turtle-bot Assembly Level 1 Prepare the below parts first before you assemble the “Turtle-bot”. Body Head... - Page 16 Ensure all shafts between panels 03 & 03 are properly installed and set in the right position. FRONT Check the gear box engagement by rotating it with a finger, and make sure it is running smoothly. Body FRONT FRONT...
- Page 17 FRONT FRONT...
- Page 18 FRONT FRONT...
- Page 19 HEAD BODY BLACK Black Black Neck Angle Head...
- Page 20 Level 1 02 Walker - bot Assembly Prepare the below parts first before you assemble the “Walker-bot”. Body Head Ensure all shafts between panels B4 & B4 are properly installed and set in the right position.
- Page 21 Body FRONT FRONT Check the gear box engagement by rotating it with a finger, and make sure it is running smoothly. FRONT FRONT...
- Page 22 FRONT FRONT...
- Page 23 Black HEAD BODY BLACK Head Neck Angle Black Red 03 Quadru-bot Assembly Level 1 Prepare the below parts first before you assemble the “Quadru-bot”. Body Head...
- Page 25 Ensure all shafts between panels 05 & 06 are properly installed and set in the right position. FRONT Check the gear box engagement by rotating it with a finger, and make sure it is running smoothly. FRONT Body FRONT...
- Page 26 FRONT RIGHT FRONT...
- Page 27 FRONT LEFT Black HEAD BODY BLACK Black Head Neck Angle...
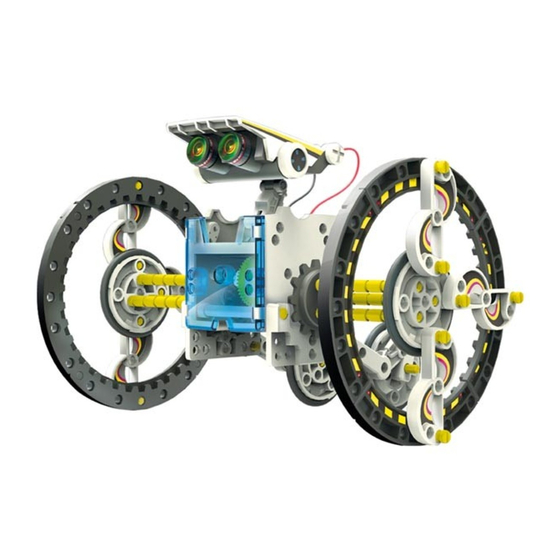
- Page 28 04 Wheel-bot Assembly Level 1 Prepare the below parts first before you assemble the “Wheel-bot”. Body Head Wheel...
- Page 29 Wheel (or B2...
- Page 30 Wheel (or B1...
- Page 31 Body FRONT BACK BACK Wheel...
- Page 32 Black Head Neck Angle HEAD BODY BLACK Black...
- Page 33 05 Boat-bot Assembly Level 1 Prepare the below parts first before you assemble the “Boat-bot”. Body Head Wheel Boat...
- Page 34 Wheel (or B2...
- Page 35 Wheel (or B1...
- Page 36 Body Body FRONT BACK FRONT FRONT Boat...
- Page 37 FRONT Black Head Neck Angle HEAD BODY BLACK Black...
- Page 38 06 Beetle-bot Assembly Level 1 Level 1 Prepare the below parts first before you assemble the “Beetle-bot”. Body Head...
- Page 39 Ensure all shafts between panels 01 & 01 are properly installed and set in the right position.
- Page 40 FRONT Check the gear box engagement by rotating it with a finger, and make sure it is running smoothly. FRONT Body FRONT FRONT...
- Page 41 (or B1) (or B2) (or B1) FRONT (or B2) (or B1) (or B2) FRONT RIGHT LEFT...
- Page 42 HEAD BODY BLACK Black Black Neck Angle Head...
- Page 43 07 Dog-bot Assembly Level 1 Prepare the below parts first before you assemble the “Dog-bot”. Body Head 5 E14 3 E10 2 E11...
- Page 44 Ensure all shafts between panels 06 & 04 are properly installed and set in the right position.
- Page 45 Check the gear box engagement by rotating it with a finger, and make sure it is running smoothly. FRONT FRONT Body FRONT...
- Page 46 movement 1 : shaking & wagging tail! (or B1) movement 2 : jumping & wagging tail! (or B2) Black Head HEAD BODY BLACK Black Neck Angle...
- Page 47 08 Auto-bot Assembly Level 2 Prepare the below parts first before you assemble the “Auto-bot”. Wheel Body Head 2 E4...
- Page 48 Ensure all shafts between panels 05 & 06 are properly installed and set in the right position.
- Page 49 FRONT Check the gear box engagement by rotating it with a finger, and make sure it is running smoothly. Body Wheels Wheels...
- Page 50 Black Head Neck Angle HEAD BODY BLACK Black...
- Page 51 09 Crab-bot Assembly Level 2 Prepare the below parts first before you assemble the “Crab-bot”. Body Head 4 E5 10 E7 Ensure all shafts between panels B4 & B4 are properly installed and set in the right position.
- Page 52 Check the gear box engagement by rotating it with a finger, and make sure it is running smoothly. Body...
- Page 53 FRONT BACK LEFT RIGHT BACK...
- Page 54 (or B2) (or B1) (or B2) (or B1)
- Page 55 Black Head Neck Angle HEAD BODY BLACK Black...
- Page 56 10 Slither-bot Assembly Level 2 Prepare the below parts first before you assemble the “Slither-bot”. Body Head Wheel...
- Page 59 Body...
- Page 60 Wheel Wheel...
- Page 61 Black Neck Angle Head HEAD BODY BLACK Black 11 Roly poly-bot Assembly Level 2 Prepare the below parts first before you assemble the “Roly poly-bot”. Body Head Wheel...
- Page 62 (or B2) Body BACK (or B1)
- Page 63 Wheel...
- Page 64 (or B2) (or B1)
- Page 65 Wheel...
- Page 66 Black Head HEAD BODY BLACK Black Neck Angle...
- Page 67 12 Boxer-bot Assembly Level 2 Prepare the below parts first before you assemble the “Boxer-bot”. Body Head 2 E5 2 E4...
- Page 68 Ensure all shafts between panels 05 & 05 are properly installed and set in the right position. Check the gear box engagement by rotating it with a finger, and make sure it is running smoothly.
- Page 69 Body...
- Page 71 (or B2) (or B1) (or B1) (or B2) Black Head Neck Angle HEAD BODY BLACK Black...
- Page 72 13 Surf-bot Assembly Level 2 Prepare the below parts first before you assemble the “Surf-bot”. Body Head 3 B2 Boat 4 E4 10 E9 4 E8 Body Body BACK FRONT...
- Page 73 RIGHT LEFT BACK BACK Boat...
- Page 74 FRONT BACK LEFT RIGHT LEFT RIGHT...
- Page 75 BACK (or B1) (or B2) FRONT...
- Page 76 (or B1) (or B2) FRONT FRONT HEAD BODY Black Neck Angle BLACK Black Head...
- Page 77 14 Row-bot Assembly Level 2 Prepare the below parts first before you assemble the “Row-bot”. Body Head Boat Body Body BACK FRONT...
- Page 78 RIGHT LEFT FRONT Boat...
- Page 79 FRONT...
- Page 80 FRONT RIGHT LEFT RIGHT LEFT...
- Page 81 Black Head HEAD BODY BLACK Neck Angle Black It’s time to have some FUN ! 1.Take outside under direct sunlight. Best results are obtained when operated on a sunny day. 2.For indoor fun, use a 50 watt halogen light. The product will not run on a cloudy day, shaded locations, indirect sunlight, or under a Fluorescent light.
- Page 84 Copyright © 2013 CIC. All rights reserved 4350006151...
Need help?
Do you have a question about the KSR13 and is the answer not in the manual?
Questions and answers