
Related Manuals for Inalto ESL60D2S


Summary of Contents for Inalto ESL60D2S
- Page 1 U S E R M A N U A L I N A L T O . H O U S E 60cm Slideout Rangehood MODEL CODE/S E S L 6 0 D 2 S F O R A L L A U S T R A L I A N H O M E S V 2 .
-
Page 2: Welcome
Again, thank you for choosing an InAlto appliance and we look forward to being of service to you. Scan to Register your InAlto Appliance or go to: →... -
Page 3: Table Of Contents
24 Warranty Information Customer Care InAlto recommends the use of original spare parts. When contacting our customer service team on 1300 11 4357, please ensure that you have the following information at hand (which can be found on your appliances’ rating plate). -
Page 4: Safety Information
The following statements you will see in this This manual explains the proper use of your booklet have these meanings: new InAlto rangehood. Please read this manual carefully before using the product. WARNING: Indicating information concerning This manual should be kept in a safe place your personal safety. - Page 5 • Ensure the rangehood is switched off before carrying out maintenance, to avoid any possibility of electric shock. • Never carry out flambé cooking under the rangehood. • This rangehood is not suitable for use over barbecues. • This rangehood cannot be installed for external use —only to be installed indoors.
- Page 6 Safety Information (Continued) ELECTRICAL CONNECTION SAFETY WARNINGS – FOR THE INSTALLER Check that the mains voltage matches with When installing the rangehood, make sure you the voltage on the data plate inside the adhere to the minimum and maximum distances rangehood.
- Page 7 UNPACKING DISPOSAL OF THE APPLIANCE During transportation, protective packaging Old appliances should not simply be disposed was used to protect the appliance against any of with normal household waste and should damage. After unpacking, please dispose of be delivered to a collection and recycling all elements of packaging in a way that will not centre for electric and electronic equipment.
-
Page 8: Your Inalto Rangehood
Your InAlto Rangehood YOUR RANGEHOOD Figure 3A Your Slideout Rangehood features switch controls with 2 speed levels of extraction. Figure 3B 1. Rangehood housing 2. Slide-out Front Fascia Rail 3. Inner Aluminium Grease Filter 4. Outer Aluminium Grease Filter 5. On/Off Switch 6. - Page 9 RANGEHOOD COMPONENTS Your InAlto Undermount Rangehood is supplied with: • 1 × Rangehood • 1 × Rear-underside support mounting bracket • 6 × Screws (ST4 × 30mm) • 2 × Screws (ST4 × 8mm) • 6 × Wall Plugs (8mm) •...
- Page 10 THIS PAGE IS INTENTIONALLY LEFT BL ANK...
-
Page 11: Operation Instructions
Operation Instructions • The rangehood will only operate once the slide-out rail is pulled outwards towards the kitchen. O P E R AT I N G YO U R R A N G E H O O D O P E R AT I N G YO U R R A N G E H O O D •... -
Page 12: Installation Instructions
Installation Instructions WARNING: Before starting the installation, POSITIONING THE RANGEHOOD please refer to the Safety Information section. • The typical installation method for your slideout rangehood is into a purpose built • Always switch the power off prior to overhead/wall cabinet. beginning the installation. - Page 13 Unpacking Rangehood standard confi guration • This product has been packaged to protect This product has been supplied with it against transportation damage. Unpack “recirculation mode” as the default setting. the appliance and remove all packaging The rangehood is suitable for both recirculation materials from around the rangehood.
- Page 14 Installation Instructions (Continued) White Plastic Cover Charcoal fi • When choosing the outdoor exhausting mode, • If you inte • Keep your total length of ducting to the 3. Clip in the plastic Front Vent Cover over the you can cover the front outlet (part ID 9) with air recircu shortest length possible.
- Page 15 Rear-mounting to the wall • Using a spirit level, mark a horizontal line on the wall where the rangehood base will be, observing all necessary clearances (Fig. ). Check the required clearances in your cooktop/stove manual and, should they be greater than those specifi ed in Fig. , make sure to observe them. Rangehood base Fig.
- Page 16 Installation Instructions (Continued) op-mounting in a cabinet Determine where in the top cabinet you want to install the rangehood, then drill 4 holes of Ø4mm at Top-mounting in a cabinet TOP-MOUNTING IN A CABINET • Determine where in the top cabinet you want to install the rangehood, then drill 4 holes of Ø4mm at the bottom of the hanging board of your cabinet (Fig.
- Page 17 THIS PAGE IS INTENTIONALLY LEFT BL ANK...
-
Page 18: Maintenance & Cleaning
Our spare parts department offer a wide range of • Keep the motor and other spare parts free spare parts for the ESL60D2S Rangehood. To from water, as this will cause damage to purchase a part, call us on 1300 11 43 57 or email the appliance. - Page 19 eration and page 11. filters which were supplied with the rangehood If the light bulb needs replacing, proceed as position and would have already been installed. from the power follows: Replacing a light bulb A charcoal filter absorbs cooking odours and regularly as oil must be changed regularly.
-
Page 20: Troubleshooting
Troubleshooting OPERATION IN CASE OF EMERGENCY In the event of an emergency you should: • Switch off all rangehood controls. • Switch the rangehood off at the power outlet and immediately unplug. • Call After Sales Support. Some minor faults can be fixed by referring to the instructions given in the table below. IMPORTANT: If your appliance appears to be operating incorrectly, then you should disconnect it from your electrical supply and then contact After Sales Support. -
Page 21: Technical Data
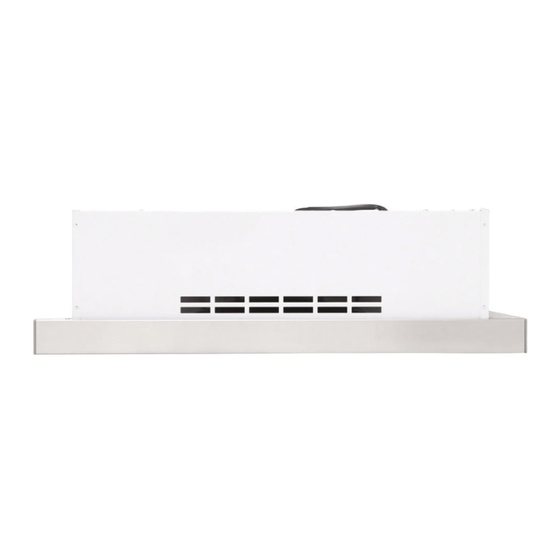
Technical Data SPECIFICATIONS MODEL ESL60D2S Dimensions 599mm × 278mm × 176mm (W × D × H) Extended Depth 278–472mm Height of Front Panel 40mm Weight 7.6kg Speed Settings Motor Power 2 × 100W Total Input Power 202W Lighting LED, 1 × 2W... -
Page 22: Your Receipt
Attach your receipt to this page... -
Page 23: Purchase Details
Purchase Details For future reference, please record the following information in the form below. The product details can be found on the rating plate (located within the rangehood, behind the aluminium grease filter), installation details and purchase details which can be found on your sales invoice. STORE DETAILS STORE NAME ADDRESS... -
Page 24: Warranty Information
Warranty Information AUSTRALIAN WARRANTY TERMS & CONDITIONS (h) ‘you’ means the purchaser of the Appliance not RANGEHOOD APPLIANCES having purchased the Appliance for re-sale, and ‘your’ has a corresponding meaning. This document sets out the terms and conditions This warranty only applies to Appliances of the product warranties for Residentia Group purchased and used in Australia and is in Appliances. - Page 25 (a) the Appliance is damaged by: failure. The benefits to you given by this warranty accident are in addition to your other rights and remedies (ii) misuse or abuse, including failure to properly under a law in relation to the Appliances or services maintain or service to which the warranty relates.
- Page 26 THIS PAGE IS INTENTIONALLY LEFT BL ANK...
- Page 27 Simply visit the below website, or ask your retailer 24 months on the microwave magnetron; Waste for help: www.inalto.co.nz/register disposers have a 12 month warranty. The provision of service under this warranty is...
- Page 28 D E S I G N E D I N M E L B O U R N E F O R A L L A U S T R A L I A N H O M E S —...
Need help?
Do you have a question about the ESL60D2S and is the answer not in the manual?
Questions and answers