
Subscribe to Our Youtube Channel
Related Manuals for Bridgeport Hardinge 1 Series


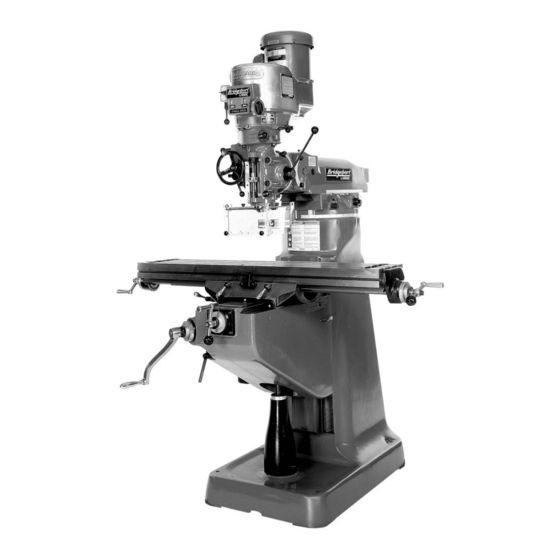
Summary of Contents for Bridgeport Hardinge 1 Series
- Page 1 INSTALLATION, OPERATION, MAINTENANCE, AND PARTS LIST SERIES I MILLING MACHINES TP5260 Revised: August 29, 2005 Manual No. M-450 Litho in U.S.A. Part No. M -0009500-0450 June, 2003...
-
Page 2: Chapter 3 - Maintenance
CHAPTER 3 - MAINTENANCE 2J-HEAD MAINTENANCE PROCEDURES Motor Removal 1. Run head to adjust to lowest speed. 2. Disconnect power. 3. Remove three screws “A” and cover “B”, Fig- ure 3.1. 4. Using the two screws “A”, compress spring “C”. 5. - Page 3 Drive Belt Replacement 1. Remove the motor as described on Page 3-1. 2. Remove the three screws “F”, Figure 3.3, insert into the adjacent tapped holes and withdraw bearing housing “G”. 3. Remove the two screws and the bushings “H”. 4.
- Page 4 Brake Shoe Replacement 1. Remove the top section. 2. Remove the two screws “P”, Figure 3.5. 3. Remove the clutch hub assembly “Q”. 4. Replace the brake shoes “R”. 5. Remove the bearing, drive discs and circlips from the hub assembly “Q”. 6.
- Page 5 HEAD MAINTENANCE PROCEDURES Micro Feed Trip Assembly and Quill Re- moval 1. Remove screw “A” and ball reverse lever “B”, Figure 3.6. 2. Remove retaining ring “C”, screw “D” and arm “E”. 3. Thread shaft “F” through micro nuts and re- move.
- Page 6 Balance Spring Replacement 1. With quill in maximum up position apply quill lock. 2. Remove screw “I”, hub “J”, and key “K”, Fig- ure 3.7. 3. Remove screws “L”, allowing housing to ro- tate slowly releasing spring tension. 4. Lift end of spring from pin on the pinion shaft.
- Page 7 Collet Aligning Screw Replacement 1. Use felt pen, mark reference line on quill and nose cap “S”, Figure 3.9. 2. Remove set screw “R”. 3. Unscrew nose cap “S”. 4. Remove lock screw “T” and collet aligning screw “U”. 5. Replace “U”; insert collet and check that the dog on the end of the screw does not interfere with the bottom of the guide slot.
-
Page 8: Gib Strip Adjustment
GIB STRIP ADJUSTMENT MAINTENANCE PROCEDURES Adjustment of Table Gib Table Gib The table is provided with a full length tapered gib Screw in the saddle, and an adjusting screw on the left side (see Figure 3.10). To take up gib, tighten gib adjusting screw slightly and repeat until a slight drag is felt when moving the table by hand. - Page 9 Adjustment of Knee Gib Remove chip wiper and adjust screw until smooth movement is attained (see Figure 3.12). Chip Wiper - NOTE - Guard Loose gibs will cause loss of machine accuracy. Saddle Gib Adjusting Screw Backing Felt TP5331 Figure 3.12 - Knee Gib Adjustment M-450...
- Page 10 TABLE SCREW MAINTENANCE PROCEDURES Backlash Adjustment 1. Crank the table to the lift. 2. Withdraw “W”, Figure 3.13, half a turn. 3. Tighten screw “X” while slowly turning handle “Y” until minimum backlash is obtained over entire travel. 4. Finally, lock screw “W” on to “X”. 5.
-
Page 11: Cross Screw Assembly
CROSS SCREW ASSEMBLY MAINTENANCE PROCEDURES Backlash Adjustment 1. Crank the saddle to mid position 2. Remove four socket head cap screws securing bracket “D”, Figure 3.14, to knee. 3. Pull the saddle forward to expose screws “A” and “B” through hole in front of knee. 4. - Page 12 E-HEAD MAINTENANCE PROCEDURES - NOTE - Add a few drops of Waylube #1180 oil or equivalent into oil cup “E”, Figure 3.15, before operating unit Changing the Gear Case Oil Drain and refill the gear case with ½ pint of Mobil 600W oil or equivalent after first two months of normal service and twice yearly thereafter.
- Page 13 Removing Motor 1. Loosen the two hex nuts “H”, Figure 3.17, on either side of belt housing. 2. Remove motor. TP5336 Figure 3.17 - E-Head Motor Removal Changing Speed 1. To change speed loosen the two hex nuts “I”, Figure 3.18, and move motor forward. 2.
- Page 14 Removing Reduction Drive Unit or Ram 1. Loosen hex nuts “I”, and remove motor. 2. Remove vee belt pulley “K”, Figure 3.19. 3. Remove two screws “L”, Figure 3.19, from air vent cover “M” and bring the top end of the connecting rod into view. 4.
- Page 15 - NOTES - 3-14 M-450...
Need help?
Do you have a question about the Hardinge 1 Series and is the answer not in the manual?
Questions and answers